
Knowing how do you know if roast chicken is cooked perfectly is essential for both safety and taste. This guide covers temperature checks, visual cues, and expert tips to ensure your roast chicken is safe to eat, tender, and full of flavor—every single time.
Roasting a chicken seems simple—toss it in the oven, wait, and enjoy. But if you’ve ever cut into a roast only to find pink meat or dry, rubbery flesh, you know it’s not always that easy. The truth is, knowing how do you know if roast chicken is cooked perfectly takes more than just guessing or relying on the clock. It’s a mix of science, observation, and a little kitchen intuition.
Whether you’re cooking your first Sunday roast or you’re a seasoned home chef, getting that golden-brown bird just right is a rewarding experience. A perfectly cooked roast chicken is juicy, tender, and safe to eat—no dry breast meat, no undercooked thighs. But achieving that balance requires more than just setting a timer and walking away. You need to understand what’s happening inside that oven, how heat moves through the meat, and how to read the subtle signs that your chicken is done.
In this guide, we’ll walk you through every method to check if your roast chicken is cooked, from the most reliable (a meat thermometer) to visual and tactile cues you can use in a pinch. We’ll also cover common mistakes, how to avoid dry meat, and why resting your chicken matters. By the end, you’ll feel confident every time you pull that bird out of the oven—knowing it’s not just cooked, but cooked perfectly.
Key Takeaways
- Use a meat thermometer: The most reliable way to check if roast chicken is cooked is by measuring the internal temperature—165°F (74°C) in the thickest part of the thigh, avoiding bone.
- Check the juices: When pierced, the juices should run clear, not pink or bloody, especially near the joints.
- Look for visual signs: The skin should be golden brown and crispy, and the meat should pull away easily from the bones.
- Rest the chicken: Letting the roast rest for 15–20 minutes after cooking helps retain juices and ensures even doneness.
- Avoid overcooking: Overcooked chicken becomes dry and tough—use timing as a guide, but always confirm with a thermometer.
- Understand carryover cooking: The internal temperature rises 5–10°F after removal from the oven, so remove it at 160°F for perfect results.
- Practice makes perfect: Each roast is different—size, oven, and stuffing affect cooking time, so stay attentive and use multiple checks.
Quick Answers to Common Questions
What is the safest internal temperature for roast chicken?
The USDA recommends cooking roast chicken to an internal temperature of 165°F (74°C) in the thickest part of the thigh, avoiding the bone.
Can I rely on cooking time alone to know if my chicken is done?
No, cooking time varies based on oven, chicken size, and pan type. Always use a thermometer to confirm doneness.
Why does my chicken breast dry out even when the thighs are done?
Breast meat cooks faster than thighs. Use a thermometer, consider spatchcocking, or try reverse searing to keep it moist.
Is it safe to eat chicken if the juices are slightly pink?
Pink juices can sometimes appear even when chicken is fully cooked due to myoglobin. Always check the internal temperature to be sure.
How long should I let my roast chicken rest?
Let it rest for 15–20 minutes, uncovered, to allow juices to redistribute and carryover cooking to complete.
📑 Table of Contents
The Science Behind Cooking Chicken Safely
Chicken, like all poultry, can carry harmful bacteria such as Salmonella and Campylobacter. These bacteria are killed when the meat reaches a safe internal temperature, which is why knowing how do you know if roast chicken is cooked isn’t just about taste—it’s about health.
The U.S. Department of Agriculture (USDA) recommends cooking all poultry to a minimum internal temperature of 165°F (74°C). This temperature ensures that harmful bacteria are destroyed, making the chicken safe to eat. But here’s the catch: that temperature must be measured in the right place. The thickest part of the thigh, near the breast but not touching the bone, is the best spot. Why? Because the thigh takes longer to cook than the breast, and if the thigh is done, the rest of the bird is almost certainly safe.
It’s also important to understand that chicken doesn’t cook evenly. The breast, which is leaner, cooks faster and can dry out if overcooked. The thighs and legs, with more fat and connective tissue, stay juicy longer but need more time to become tender. This is why many chefs recommend trussing the chicken—tying the legs together with kitchen twine—to help it cook more evenly.
Another factor is carryover cooking. When you remove the chicken from the oven, the internal temperature continues to rise by 5–10°F as heat redistributes. This means if you pull the chicken out at 160°F, it will reach 165°F during resting. Timing this correctly prevents overcooking and keeps the meat moist.
Why Timing Alone Isn’t Enough
Many recipe books suggest cooking a roast chicken for a certain amount of time per pound—say, 20 minutes per pound at 375°F. While this is a helpful starting point, it’s not foolproof. Oven temperatures vary, chickens differ in size and shape, and even the type of roasting pan can affect cooking time.
For example, a chicken roasted in a dark, non-stick pan will brown faster than one in a light-colored pan. A chicken stuffed with vegetables or herbs will take longer to cook because the stuffing acts as an insulator. And if your oven runs hot or cold—something many home ovens do—you could end up with undercooked or overcooked meat, even if you follow the recipe exactly.
That’s why relying solely on time is risky. The only way to be certain your chicken is cooked is to check it. And the best way to do that? A meat thermometer.
Using a Meat Thermometer: The Gold Standard
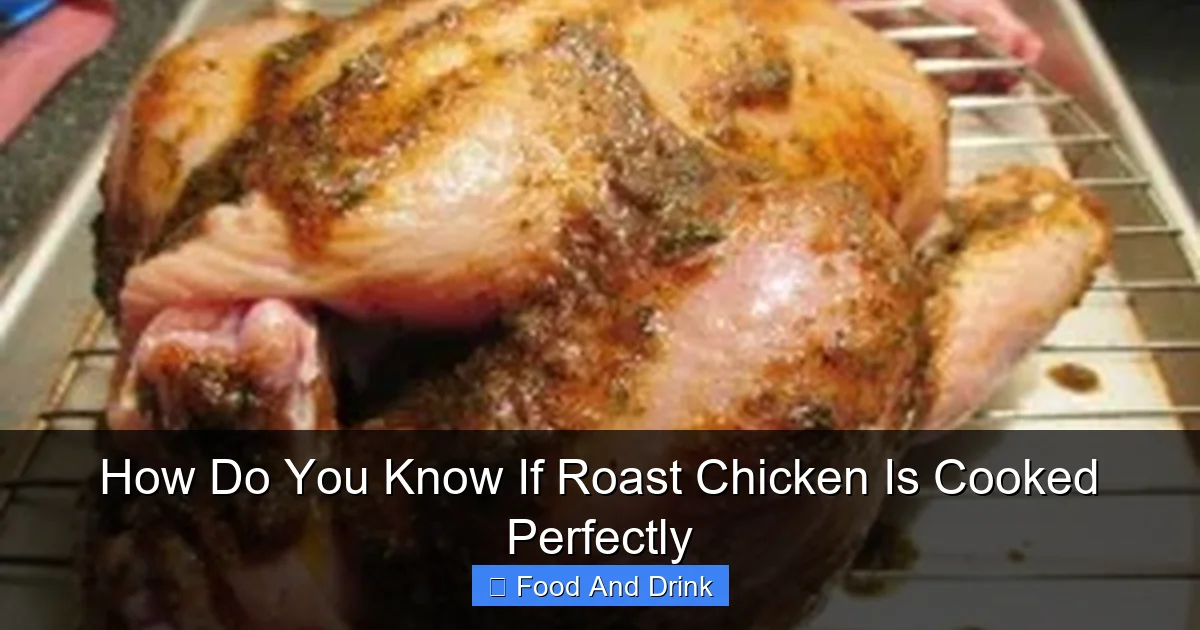
Visual guide about How Do You Know If Roast Chicken Is Cooked Perfectly
Image source: goodfoodgourmet.com
If you’re serious about knowing how do you know if roast chicken is cooked, a meat thermometer is your best friend. It’s the most accurate, reliable method and takes the guesswork out of roasting.
There are two main types of thermometers used in home kitchens: instant-read and leave-in (or probe) thermometers. Instant-read thermometers give a quick reading when inserted into the meat and are ideal for checking doneness at the end of cooking. Leave-in thermometers stay in the chicken during roasting and alert you when the target temperature is reached.
For roast chicken, an instant-read thermometer is usually sufficient. Here’s how to use it correctly:
Insert the probe into the thickest part of the thigh, making sure it doesn’t touch the bone. Bone conducts heat differently than meat and can give a false reading. You’re aiming for 165°F (74°C). If the temperature is lower, return the chicken to the oven and check again in 5–10 minutes.
Some chefs prefer to remove the chicken from the oven at 160°F, knowing that carryover cooking will bring it to 165°F during resting. This is a great technique for preventing dryness, especially in the breast meat.
Where to Insert the Thermometer
The thigh is the safest bet because it’s the last part to cook. The breast can reach 165°F before the thigh, especially in larger birds. If you check the breast and it’s done, the thighs might still be undercooked.
Avoid inserting the thermometer into the cavity or near the wing joints. These areas can give misleading readings. The goal is to measure the temperature of the meat, not the air inside the cavity or the joint itself.
If you’re stuffing the chicken, check the temperature of the stuffing as well. The stuffing must also reach 165°F to be safe to eat. Some cooks prefer to cook stuffing separately to avoid this issue.
Digital vs. Analog Thermometers
Digital instant-read thermometers are faster and more accurate than analog dial thermometers. They typically give a reading in 2–5 seconds and are easy to clean. Look for one with a thin probe for precise insertion.
Leave-in probe thermometers are great for hands-off cooking. You set the target temperature, and the thermometer beeps when it’s reached. Some models even connect to your phone via Bluetooth, so you can monitor the temperature from another room.
No matter which type you use, make sure it’s calibrated correctly. You can test it by placing the probe in ice water—it should read 32°F (0°C)—or in boiling water, which should read 212°F (100°C) at sea level.
Visual and Physical Cues: What to Look and Feel For
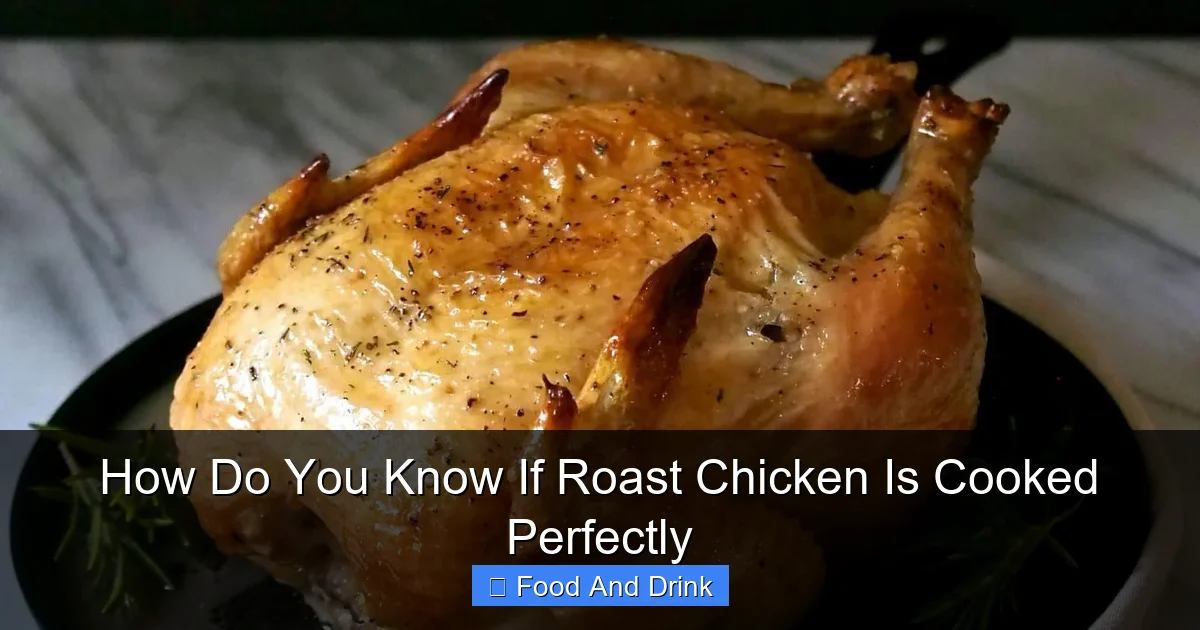
Visual guide about How Do You Know If Roast Chicken Is Cooked Perfectly
Image source: simplysated.com
While a thermometer is the most accurate tool, there are other ways to tell if your roast chicken is cooked. These methods are helpful if you don’t have a thermometer or want to double-check your results.
Juices Run Clear
One classic test is to pierce the chicken near the thigh or wing joint with a knife or fork. If the juices that run out are clear—not pink or bloody—the chicken is likely done. Pink juices can indicate undercooked meat, especially near the bone.
However, this method isn’t foolproof. Sometimes, even when chicken is fully cooked, juices can appear slightly pink due to myoglobin, a protein in the meat. This is more common in younger birds or certain breeds. So while clear juices are a good sign, they shouldn’t be your only indicator.
Meat Pulls Away from the Bone
As chicken cooks, the connective tissue breaks down, and the meat shrinks. When the chicken is done, the legs and wings should move easily when wiggled. The meat should also pull away from the bones, especially around the thigh and drumstick.
You can test this by gently tugging on a leg. If it comes away with little resistance, the chicken is likely cooked through. If it’s still tight or the meat clings to the bone, it needs more time.
Skin Is Golden and Crispy
A well-roasted chicken should have golden-brown, crispy skin. This doesn’t just look appetizing—it’s a sign that the chicken has been cooked at a high enough temperature to render fat and crisp the skin.
If the skin is pale or soggy, the chicken may not have been roasted long enough or at a high enough temperature. Crispy skin also indicates that the surface has dried out, which helps seal in moisture inside the meat.
Internal Temperature Is Rising
Even without a thermometer, you can get a sense of doneness by how the chicken feels. As it cooks, the meat firms up. When you press the thickest part of the breast or thigh, it should feel springy, not soft or squishy.
This tactile test takes practice, but experienced cooks often use it alongside other methods. Just be careful not to press too hard—you don’t want to squeeze out the juices.
Common Mistakes and How to Avoid Them
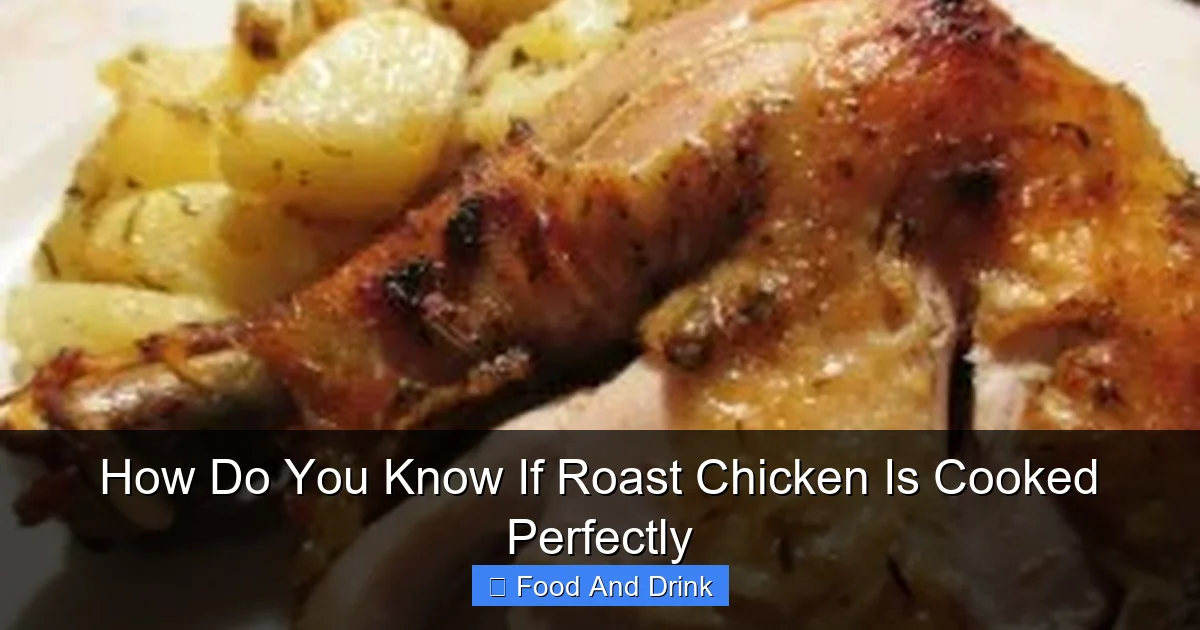
Visual guide about How Do You Know If Roast Chicken Is Cooked Perfectly
Image source: goodfoodgourmet.com
Even with the best intentions, it’s easy to make mistakes when roasting chicken. Here are some common pitfalls and how to avoid them.
Overcooking the Breast
The breast meat is the most delicate part of the chicken and dries out quickly. Many home cooks pull the chicken out too late, thinking they need to ensure the thighs are done. But by the time the thighs reach 165°F, the breast can be overcooked.
To prevent this, consider spatchcocking (butterflying) the chicken. This involves removing the backbone and flattening the bird, which allows it to cook more evenly. Spatchcocked chickens roast faster and more uniformly, reducing the risk of dry breast meat.
Another option is to use the “reverse sear” method: roast the chicken at a low temperature (275°F) until it reaches 150°F internally, then finish it under a hot broiler to crisp the skin. This keeps the meat juicy while ensuring it’s fully cooked.
Not Letting the Chicken Rest
Resting is one of the most important—and often overlooked—steps in roasting chicken. When you remove the chicken from the oven, the juices are concentrated in the center. If you carve it immediately, those juices will spill out, leaving the meat dry.
Let the chicken rest, uncovered, for 15–20 minutes. During this time, the juices redistribute, and the internal temperature stabilizes. The result? Moist, tender meat that holds its flavor.
Ignoring Carryover Cooking
As mentioned earlier, carryover cooking can raise the internal temperature by 5–10°F. If you pull the chicken out at 165°F, it could reach 175°F by the time you carve it—way too high for juicy meat.
To avoid this, remove the chicken from the oven when the thermometer reads 160°F. It will continue to cook to 165°F during resting. This small adjustment makes a big difference in texture.
Using the Wrong Pan or Rack
The type of roasting pan and rack you use affects how evenly the chicken cooks. A heavy, dark pan retains heat and promotes browning, while a light-colored pan reflects heat and can result in paler skin.
A roasting rack elevates the chicken, allowing hot air to circulate underneath. This prevents the bottom from steaming and helps the skin crisp evenly. If you don’t have a rack, you can use chopped vegetables (like onions, carrots, and celery) as a bed—they’ll absorb drippings and add flavor to your gravy.
Tips for Juicy, Flavorful Roast Chicken
Knowing how do you know if roast chicken is cooked is only half the battle. The other half is making sure it’s delicious. Here are some tips to elevate your roast chicken game.
Brining for Moisture
Brining—soaking the chicken in a saltwater solution—helps it retain moisture during cooking. The salt changes the protein structure, allowing the meat to hold onto more water. Even a quick 30-minute brine can make a difference.
For a basic brine, dissolve 1/2 cup of salt in 4 cups of water. Add herbs, spices, or citrus for extra flavor. Submerge the chicken and refrigerate for 1–2 hours (or up to 12 hours for a whole bird).
Seasoning Under the Skin
For maximum flavor, lift the skin over the breast and thighs and rub seasoning directly onto the meat. This allows the salt, pepper, garlic, or herbs to penetrate deeper than surface seasoning alone.
You can also add butter or olive oil under the skin for extra richness. The fat will melt during roasting and baste the meat from within.
Roasting at the Right Temperature
Most roast chickens are cooked at 375°F to 425°F. Higher temperatures (425°F) give crispier skin but require closer monitoring to prevent drying. Lower temperatures (325°F to 350°F) cook more slowly and evenly, reducing the risk of overcooking the breast.
A popular method is to start at a high temperature (450°F) for 15–20 minutes to crisp the skin, then reduce to 350°F for the remainder of the cooking time.
Basting (Optional)
Basting—spooning pan juices over the chicken—can add flavor and help keep the skin moist. However, it’s not necessary and can actually lower the oven temperature each time you open the door.
If you do baste, do it sparingly and only during the last half of cooking. Many chefs now skip basting altogether, relying on brining and proper seasoning instead.
Conclusion: Confidence in the Kitchen
Roasting a chicken doesn’t have to be stressful. With the right tools and techniques, you can serve a perfectly cooked, juicy bird every time. The key is understanding how do you know if roast chicken is cooked—not just by the clock, but by temperature, appearance, and feel.
Start with a meat thermometer. It’s the most reliable way to ensure safety and doneness. Combine that with visual cues—clear juices, golden skin, meat pulling from the bone—and you’ll have multiple ways to confirm your chicken is ready.
Don’t forget to rest your chicken. Those 15–20 minutes are crucial for juicy meat. And remember carryover cooking—pull the chicken out a few degrees early to avoid overcooking.
Finally, practice makes perfect. Every chicken is different, and every oven has its quirks. The more you roast, the more confident you’ll become. Soon, you’ll be pulling golden, fragrant birds out of the oven with ease, knowing they’re not just cooked—but cooked perfectly.
🎥 Related Video: No thermometer? No problem – here is how to tell your chicken is cooked through #chickenhack #short
📺 ShiftPixy Labs
No thermometer? No problem – here is how to tell your chicken is cooked through Chef JP shares an easy tip for when you are …
Frequently Asked Questions
Can I cook a stuffed roast chicken safely?
Yes, but the stuffing must also reach 165°F (74°C) to be safe. Many cooks prefer to bake stuffing separately to avoid undercooking.
What’s the best way to check temperature without a thermometer?
Look for clear juices, meat pulling from bones, and golden skin. However, a thermometer is still the most reliable method.
Why is my roast chicken skin soggy?
Soggy skin usually means the chicken wasn’t roasted at a high enough temperature or wasn’t patted dry before cooking. Start with high heat to crisp the skin.
Can I roast a frozen chicken?
It’s not recommended. Frozen chickens cook unevenly and may have unsafe internal temperatures. Always thaw in the refrigerator before roasting.
How do I prevent dry breast meat?
Brining, spatchcocking, and using the reverse sear method can help keep breast meat moist. Also, avoid overcooking by monitoring temperature closely.
Is it okay to eat chicken that’s a little pink near the bone?
Pink near the bone can be normal, especially in younger birds. As long as the internal temperature is 165°F, the chicken is safe to eat.