
Roasting chicken breast up or down makes a real difference in texture and flavor. While breast-up is traditional, roasting breast-down can yield juicier meat and more even browning—especially when combined with smart techniques like flipping or basting.
Key Takeaways
- Breast-down roasting helps keep the white meat moist by shielding it from direct heat, reducing dryness.
- Breast-up roasting promotes crispy skin on the most visible part of the bird, ideal for presentation.
- Flipping halfway through cooking combines the benefits of both methods for balanced crispness and juiciness.
- Trussing matters—properly tied chicken cooks more evenly regardless of position.
- Basting enhances flavor and moisture, especially when roasting breast-up.
- Use a rack to allow air circulation and prevent soggy skin, no matter which way you roast.
- Resting is essential—let the chicken rest 15–20 minutes after roasting to lock in juices.
Quick Answers to Common Questions
Should I roast chicken breast up or down for crispy skin?
Roast breast-up for the crispiest skin, as direct heat promotes browning and rendering of fat.
Does roasting breast-down make the meat juicier?
Yes, roasting breast-down shields the lean breast meat from direct heat, helping retain moisture.
Can I flip the chicken halfway through roasting?
Absolutely! Flipping from breast-down to breast-up combines juicy meat with crispy skin.
Do I need to use a rack when roasting chicken?
Yes, a rack allows air circulation and prevents soggy skin, no matter which way you roast.
How long should I let the chicken rest after roasting?
Let it rest for 15–20 minutes to allow juices to redistribute and keep the meat moist.
📑 Table of Contents
- Do You Roast Chicken with Breast Up or Down for Crispy Juicy Results?
- The Science Behind Roasting Chicken
- Breast-Up Roasting: The Classic Method
- Breast-Down Roasting: The Moisture-Saving Technique
- The Hybrid Approach: Flip for the Best of Both Worlds
- Tips for Perfect Roast Chicken Every Time
- Common Mistakes to Avoid
- Conclusion
Do You Roast Chicken with Breast Up or Down for Crispy Juicy Results?
Roasting a whole chicken seems simple—toss it in the oven, wait, and enjoy. But if you’ve ever ended up with dry breast meat or soggy skin, you know it’s not always that easy. One of the most debated questions in home cooking is: Do you roast chicken with breast up or down? The answer isn’t just about tradition—it’s about science, texture, and flavor.
The way you position your chicken in the roasting pan affects everything from moisture retention to skin crispness. Some swear by breast-up for golden, crispy skin. Others insist breast-down keeps the leaner white meat from drying out. And then there are the hybrid methods—flipping, rotating, or even starting one way and finishing another. With so many opinions, it’s easy to feel overwhelmed.
But here’s the good news: you don’t have to choose just one method. By understanding how heat moves through a chicken and how different cuts respond, you can tailor your approach to get the best of both worlds—crispy skin and juicy meat. Whether you’re cooking for a weeknight dinner or a holiday feast, knowing whether to roast breast up or down can elevate your chicken from good to unforgettable.
The Science Behind Roasting Chicken

Visual guide about Do You Roast Chicken with Breast Up or Down for Crispy Juicy Results
Image source: thumbs.dreamstime.com
To understand why breast position matters, let’s break down what happens inside the oven. Roasting is a dry-heat cooking method that relies on hot air to cook food evenly. But chickens aren’t symmetrical—the breast is lean and cooks faster, while the dark meat (thighs and legs) is richer in fat and collagen, needing more time to become tender.
When you roast a chicken breast-up, the direct heat hits the breast first. This can lead to overcooking before the thighs are done, especially if you’re aiming for that golden, crispy skin. The breast meat, low in fat, loses moisture quickly under high heat. That’s why so many home cooks end up with dry, stringy breast meat—even if the rest of the bird is perfect.
On the other hand, roasting breast-down shields the breast from direct heat. The thighs and legs absorb more of the oven’s energy, allowing them to cook through while the breast slowly warms from the inside. This method helps preserve moisture in the white meat, but it comes at a cost: the skin on the breast doesn’t crisp up as well. Instead, it can become soft or rubbery.
Heat also circulates differently depending on your oven and pan setup. Convection ovens move air more efficiently, reducing hot spots. But even in a standard oven, the position of the chicken affects how heat reaches each part. The breast, being the largest and flattest section, is most vulnerable to drying out if exposed too long.
Understanding this balance is key. It’s not just about flipping a bird—it’s about managing heat distribution, moisture retention, and timing. That’s why many chefs and food scientists recommend a hybrid approach: start breast-down to protect the meat, then flip or rotate to crisp the skin.
Breast-Up Roasting: The Classic Method
Visual guide about Do You Roast Chicken with Breast Up or Down for Crispy Juicy Results
Image source: thestayathomechef.com
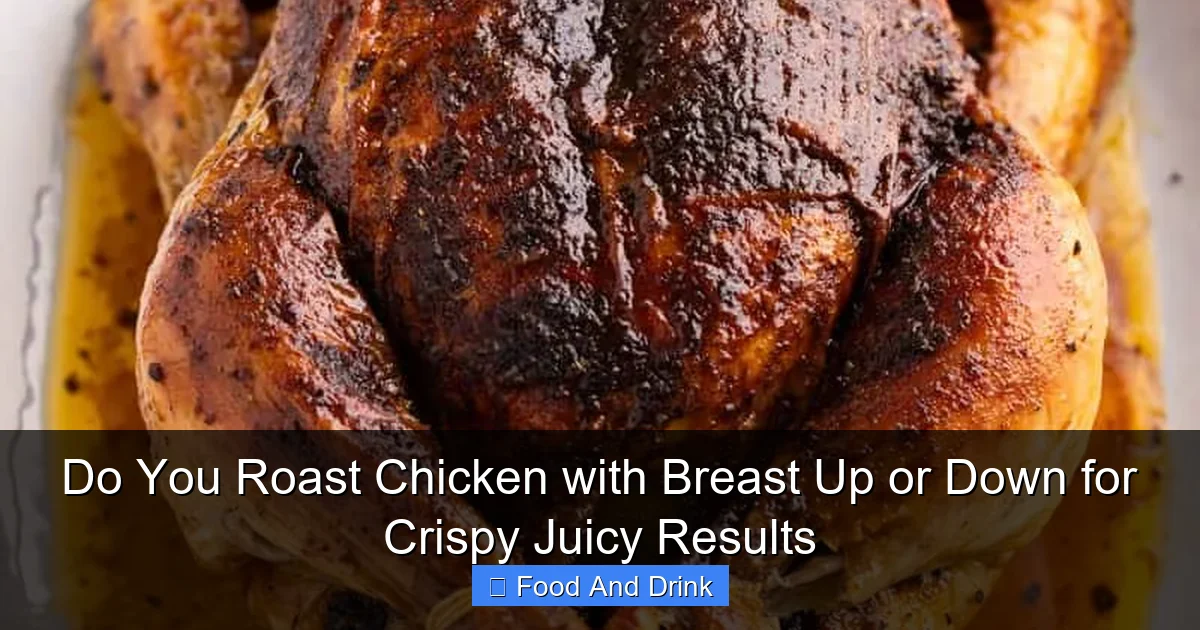
Roasting chicken breast-up is the traditional method you’ll find in most cookbooks and family recipes. It’s simple: place the chicken on a rack in a roasting pan, breast side up, and let it cook. This method prioritizes presentation and skin crispness—two things that matter when you’re serving a whole bird at the dinner table.
The biggest advantage of breast-up roasting is the skin. When the breast faces the heat source, the skin renders fat more effectively and browns evenly. The result? A golden, crackly crust that’s both visually appealing and delicious. For many, that crispy skin is the highlight of the meal.
But there’s a catch: the breast meat is exposed to the hottest part of the oven for the entire cook time. Since white meat has less fat and connective tissue, it dries out faster than dark meat. If you’re not careful, you’ll end up with a beautiful bird that tastes like cardboard on the inside.
To make breast-up roasting work, timing and temperature are crucial. Many chefs recommend starting at a high temperature (425°F to 450°F) to jumpstart browning, then reducing to 350°F to finish cooking gently. This two-stage method helps crisp the skin without overcooking the meat.
Basting is another helpful technique. Every 20–30 minutes, use a spoon or baster to drizzle pan juices over the breast. This adds moisture and helps distribute heat more evenly. Some cooks even add aromatics like garlic, herbs, or lemon slices under the skin to infuse flavor and keep the meat juicy.
Trussing the chicken also improves results. Tying the legs together and tucking the wings under the body helps the bird cook more uniformly. It prevents the thinner parts from drying out and ensures the heat reaches the center more efficiently.
One practical tip: use a meat thermometer. Insert it into the thickest part of the breast (without touching bone). When it reads 165°F, the chicken is safe to eat. But remember, the temperature will rise a few degrees during resting, so pulling it at 160°F is often ideal.
Breast-Down Roasting: The Moisture-Saving Technique

Visual guide about Do You Roast Chicken with Breast Up or Down for Crispy Juicy Results
Image source: thedailymeal.com
If you’ve ever pulled a chicken from the oven only to find the breast meat dry and the thighs undercooked, breast-down roasting might be your new best friend. This method flips the script—literally—by placing the chicken breast side down in the pan. The idea is simple: protect the lean breast meat from direct heat while allowing the darker, fattier thighs to absorb more energy.
The main benefit of roasting breast-down is moisture retention. By shielding the breast, you reduce the risk of overcooking. The heat focuses on the thighs and legs, which need more time to become tender. As the chicken cooks, juices from the dark meat naturally baste the breast from below, keeping it moist and flavorful.
This method is especially useful for larger birds or when cooking at lower temperatures. Since the breast isn’t exposed to intense heat, it cooks more gently. Many cooks find that breast-down roasting results in a more evenly cooked bird—no more guessing whether the thighs are done while the breast is already dry.
But there’s a trade-off: the skin on the breast doesn’t crisp up as well. Instead of golden and crackly, it can turn soft or even soggy. That’s because the skin is in contact with the pan or rack, trapping steam and preventing proper browning.
To fix this, some chefs recommend finishing the chicken breast-up for the last 10–15 minutes of cooking. This gives the skin a chance to crisp without overcooking the meat. Others suggest removing the chicken from the pan, flipping it, and returning it to the oven on a wire rack.
Another tip: elevate the chicken. Use a V-rack or place chopped vegetables (like onions, carrots, or celery) in the pan to lift the bird off the bottom. This improves air circulation and helps the skin dry out, even when roasting breast-down.
Breast-down roasting also works well with brining or dry-brining. A salt-based brine draws moisture into the meat, creating a buffer against dryness. Dry-brining (salting the chicken and letting it sit uncovered in the fridge) does the same while also drying out the skin—perfect for later crisping.
The Hybrid Approach: Flip for the Best of Both Worlds
Why choose one method when you can have both? The hybrid approach—starting breast-down and flipping to breast-up—combines the moisture-saving benefits of breast-down roasting with the crispy skin of breast-up. It’s a favorite among experienced cooks who want juicy meat and golden skin without compromise.
Here’s how it works: place the chicken breast-down in the roasting pan and cook for about half the total time. Then, carefully flip it over (use tongs or a spatula to avoid burning yourself) and continue roasting breast-up until done. This allows the thighs to cook through while protecting the breast, then gives the skin a chance to crisp.
The key is timing. Flip too early, and the breast won’t benefit from the protection. Flip too late, and the skin won’t have enough time to brown. A good rule of thumb is to flip when the internal temperature reaches about 140°F to 145°F. At this point, the chicken is partially cooked but still has time to finish safely.
Flipping can be tricky—chickens are heavy and unwieldy, and hot pans are dangerous. To make it easier, use a roasting pan with handles and a sturdy rack. Some cooks even use silicone oven gloves or a turkey lifter to grip the bird securely.
Another option is to rotate instead of flipping. If your oven has even heat distribution, you can simply turn the pan 180 degrees halfway through cooking. This exposes different parts of the chicken to the heat source, promoting more even browning without the hassle of flipping.
The hybrid method works especially well with spatchcocking—removing the backbone and flattening the chicken. Spatchcocked birds cook faster and more evenly, and flipping is much easier since the bird lies flat. Plus, both sides get direct heat, so skin crisps beautifully no matter which way you start.
For extra insurance, baste the chicken after flipping. The pan juices will have rendered fat and flavor, perfect for coating the now-exposed breast. A final blast of high heat (450°F for 5–10 minutes) can also help achieve that perfect golden crust.
Tips for Perfect Roast Chicken Every Time
No matter which method you choose—breast-up, breast-down, or hybrid—these tips will help you roast a chicken that’s juicy, flavorful, and beautifully browned.
Use a Rack
Always roast your chicken on a rack placed inside a roasting pan. This elevates the bird, allowing hot air to circulate underneath. Without a rack, the bottom of the chicken sits in its own juices, leading to soggy skin. A V-rack or flat wire rack works well, but even a bed of chopped vegetables can do the trick.
Season Generously and Ahead of Time
Salt is your best friend. Season the chicken inside and out at least 30 minutes before roasting—better yet, do it the night before and let it dry-brine in the fridge. This not only seasons the meat deeply but also dries out the skin, which is essential for crispiness. Add herbs, garlic, lemon, or spices under the skin for extra flavor.
Let It Rest
This is non-negotiable. After roasting, let the chicken rest for 15–20 minutes before carving. During this time, the juices redistribute throughout the meat, ensuring every bite is moist. Cover loosely with foil to keep it warm, but don’t wrap tightly—that can steam the skin and make it soft.
Use a Meat Thermometer
Guessing when chicken is done is a recipe for disappointment. Insert a digital thermometer into the thickest part of the breast (avoiding bone). It’s safe to eat at 165°F, but pulling it at 160°F allows for carryover cooking. For thighs, aim for 175°F to 180°F for tender, fall-off-the-bone meat.
Don’t Overcrowd the Pan
If you’re roasting vegetables alongside the chicken, don’t pile them too high. Overcrowding traps steam and prevents proper browning. Spread them in a single layer around the chicken, or roast them separately.
Finish with High Heat (Optional)
For extra-crispy skin, increase the oven temperature to 450°F for the last 5–10 minutes of cooking. This gives the skin a final blast of heat to crisp up without overcooking the meat.
Common Mistakes to Avoid
Even with the best intentions, it’s easy to make mistakes when roasting chicken. Here are a few to watch out for:
Skipping the Resting Period
Cutting into the chicken immediately after roasting lets all the juices spill out. The result? Dry, disappointing meat. Always rest your bird—it’s the secret to juiciness.
Using Cold Chicken
Roasting a chicken straight from the fridge can lead to uneven cooking. Let it sit at room temperature for 30–60 minutes before cooking. This helps the bird cook more uniformly.
Overcooking
Chicken continues to cook after it’s removed from the oven. Pull it when the breast reaches 160°F—it will hit 165°F during resting. Overcooking, even by a few minutes, can dry out the meat.
Ignoring the Pan Juices
Those golden drippings in the pan are liquid gold. Use them to make a quick pan sauce—deglaze with broth or wine, add butter, and season to taste. It’s the perfect finishing touch.
Not Trussing
While not essential, trussing helps the chicken cook evenly and keeps the wings and legs from burning. Use kitchen twine to tie the legs together and tuck the wings under.
Conclusion
So, do you roast chicken with breast up or down? The answer depends on your priorities. If you want crispy skin and don’t mind a little extra attention to prevent dryness, go breast-up. If juicy meat is your goal and you’re okay with softer breast skin, try breast-down. But for the best of both worlds, the hybrid method—starting breast-down and flipping to breast-up—is hard to beat.
Ultimately, roasting a perfect chicken is about balance. It’s about managing heat, moisture, and time. It’s about understanding your ingredients and your tools. And it’s about being willing to experiment.
Don’t be afraid to try different methods. Keep notes on what works and what doesn’t. Over time, you’ll develop a technique that suits your taste and your kitchen. Whether you’re cooking for two or twenty, a well-roasted chicken is a centerpiece worth mastering.
So next time you’re standing in the kitchen with a whole bird and a roasting pan, remember: it’s not just about which way it faces. It’s about how you cook it. With the right approach, you can have crispy skin, juicy meat, and a dinner that everyone will remember.
🎥 Related Video: 7 Tricks for Juicy Chicken Every Time (No More Dry Chicken!) | Allrecipes
📺 Allrecipes
Tired of dry, overcooked chicken? Nicole’s got you covered! In this video, she shares 7 juicy chicken tricks that will upgrade your …
Frequently Asked Questions
Is it better to roast chicken breast up or down?
It depends on your goal. Breast-up gives crispier skin, while breast-down keeps the meat juicier. Many cooks prefer a hybrid method for the best of both.
Can I roast chicken without flipping it?
Yes, you can roast it entirely breast-up or breast-down. Just adjust your technique—baste if breast-up, or finish breast-up briefly if starting down.
Why is my roast chicken skin soggy?
Soggy skin often results from lack of airflow or not drying the skin before roasting. Use a rack, dry-brine, and avoid covering tightly while resting.
How do I keep the breast meat from drying out?
Roast breast-down, use a meat thermometer, brine or dry-brine, and avoid overcooking. Basting also helps retain moisture.
Should I truss my chicken before roasting?
Trussing helps the chicken cook evenly and prevents wings and legs from burning. It’s recommended but not mandatory.
What temperature should I roast chicken at?
Start at 425°F to 450°F for browning, then reduce to 350°F to finish. Use a thermometer to ensure the breast reaches 165°F internally.