

Discover foolproof roasting instructions for juicy chicken that delivers crispy skin and tender meat every single time. Whether you’re a beginner or a seasoned cook, these step-by-step tips will elevate your dinner game with minimal effort and maximum flavor.
Key Takeaways
- Use a meat thermometer: The safest and most accurate way to ensure your chicken is fully cooked without overcooking.
- Let the chicken rest before carving: Resting allows juices to redistribute, keeping the meat moist and flavorful.
- Season generously and in advance: Salting the chicken 12–24 hours ahead enhances flavor and texture.
- Roast at high heat for crispy skin: Start at 425°F (220°C) for golden, crispy skin, then reduce to finish cooking.
- Truss the chicken for even cooking: Tying the legs and wings close to the body helps it cook uniformly.
- Use a roasting rack: Elevating the chicken promotes airflow and prevents soggy skin.
- Choose the right pan and add aromatics: A heavy roasting pan with vegetables underneath adds flavor and catches drippings.
Quick Answers to Common Questions
How long should I roast a 4-pound chicken?
Roast a 4-pound chicken at 425°F for 30 minutes, then reduce to 375°F and cook for another 50–60 minutes, or until the internal temperature reaches 165°F in the thigh.
Can I roast a chicken without a rack?
Yes, you can place chopped vegetables like onions, carrots, and celery in the pan to elevate the chicken and prevent soggy skin.
Should I cover the chicken while roasting?
No, covering the chicken traps steam and prevents the skin from crisping. Roast it uncovered for the best results.
How do I know when the chicken is done?
Use a meat thermometer. Insert it into the thickest part of the thigh without touching the bone. It’s done at 165°F (74°C).
Can I use a roasting bag?
Yes, but it will result in softer skin. For crispy skin, roast the chicken uncovered in a pan with a rack.
📑 Table of Contents
- Introduction: Why Roasting Chicken Should Be Your Go-To Dinner
- Choosing the Right Chicken for Roasting
- Preparing Your Chicken: The Secret to Juicy Meat
- Seasoning Like a Pro: Flavor That Packs a Punch
- Roasting Techniques: Temperature, Timing, and Tools
- Resting and Carving: The Final Steps to Perfection
- Common Mistakes and How to Avoid Them
- Conclusion: Master the Art of Roasting Chicken
Introduction: Why Roasting Chicken Should Be Your Go-To Dinner
Roasting a whole chicken might sound like a task reserved for Sunday dinners or special occasions, but it’s actually one of the simplest, most rewarding meals you can make. With the right roasting instructions for juicy chicken, you can turn a humble bird into a golden, aromatic centerpiece that satisfies the whole family. It’s economical, versatile, and leaves you with leftovers perfect for sandwiches, salads, or soups.
But here’s the thing: not all roasted chicken is created equal. Too often, home cooks end up with dry meat or undercooked skin. That’s because roasting is both an art and a science—timing, temperature, and technique all play crucial roles. The good news? Once you master the basics, you’ll never look back. This guide will walk you through every step, from prep to plating, so you can achieve perfectly juicy, flavorful chicken every time.
Choosing the Right Chicken for Roasting
Not all chickens are created equal when it comes to roasting. The quality and type of bird you choose can make a big difference in flavor, texture, and overall success.
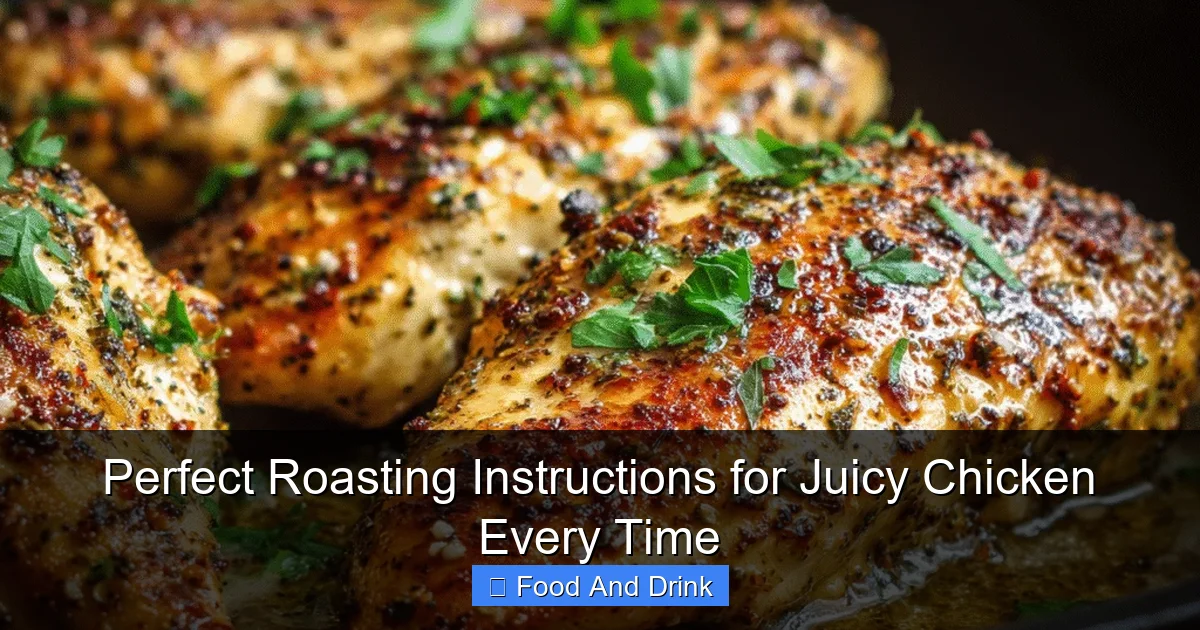
Visual guide about Perfect Roasting Instructions for Juicy Chicken Every Time
Image source: olyviarecipes.com
Whole Chicken vs. Cut-Up Pieces
For this guide, we’re focusing on whole chickens because they offer the best balance of crispy skin and juicy meat when roasted properly. A whole bird also gives you more control over doneness—you can check the internal temperature in multiple spots to ensure even cooking. That said, if you prefer dark meat or want faster cooking, chicken thighs or drumsticks roasted on a sheet pan are also excellent options.
Organic, Free-Range, or Conventional?
If budget allows, opt for organic or free-range chickens. These birds are typically raised with better living conditions and diets, which can result in more flavorful meat. They also tend to have a better fat distribution, which helps keep the meat moist during roasting. However, conventional chickens work perfectly fine too—just make sure to follow proper brining or seasoning techniques to boost flavor.
Weight Matters: How Big Should Your Chicken Be?
A good rule of thumb is to plan for about 1 pound (450g) of chicken per person. Most whole chickens at the grocery store range from 3 to 5 pounds (1.4 to 2.3 kg). A 4-pound bird usually feeds 4 people comfortably, with leftovers. Larger birds take longer to cook, but they also have more surface area for crispy skin—just be sure to adjust your roasting time accordingly.
Preparing Your Chicken: The Secret to Juicy Meat
Great roasting starts long before the oven heats up. Proper preparation is the foundation of juicy, flavorful chicken. Skipping this step is one of the biggest mistakes home cooks make.
Thawing Safely
If you’re using a frozen chicken, thaw it in the refrigerator—not on the counter. This takes time (allow 24 hours for every 5 pounds), but it’s the only safe method. Never thaw at room temperature, as it can encourage bacterial growth. For faster thawing, you can use the cold water method: submerge the chicken in its packaging in cold water, changing the water every 30 minutes. A 4-pound chicken takes about 2 hours this way.
Brining: The Juice-Boosting Hack
Brining is a game-changer. Soaking the chicken in a saltwater solution (with optional sugar and aromatics) for 12–24 hours before roasting helps the meat retain moisture. The salt alters the protein structure, allowing the chicken to hold onto more water during cooking. Even a quick 1-hour brine makes a noticeable difference.
To make a basic brine: dissolve 1/2 cup of kosher salt and 1/4 cup of sugar in 1 quart (1 liter) of water. Add herbs like rosemary, thyme, or bay leaves if you like. Submerge the chicken fully, cover, and refrigerate. Rinse and pat dry before roasting.
Dry Brining: The Easier Alternative
If you’re short on time or fridge space, dry brining is a fantastic option. Simply rub the chicken generously with salt (about 1 teaspoon per pound) and let it sit uncovered in the fridge for 12–24 hours. The salt draws out moisture, which then gets reabsorbed, seasoning the meat deeply and helping the skin dry out for better crispiness. This method requires no rinsing—just pat dry and roast.
Pat It Dry: The Crispy Skin Trick
No matter which prep method you use, always pat the chicken dry with paper towels before seasoning. Moisture on the skin is the enemy of crispiness. The drier the skin, the better it will brown and crisp up in the oven. Take your time with this step—it’s worth it.
Seasoning Like a Pro: Flavor That Packs a Punch
Seasoning isn’t just about salt and pepper. It’s about building layers of flavor that penetrate the meat and enhance the natural taste of the chicken.
Inside and Out: Season the Cavity
Don’t forget the inside of the chicken! Sprinkle salt and pepper into the cavity, and consider stuffing it with aromatics. A halved lemon, a few garlic cloves, fresh herbs like thyme or rosemary, and a halved onion add incredible fragrance and subtle flavor. The steam from these ingredients helps keep the meat moist.
Butter Under the Skin: The Luxury Touch
For extra richness and flavor, gently loosen the skin over the breast and thighs with your fingers. Slide small pats of softened butter (or herb butter) underneath. This bastes the meat from above as it melts, keeping it incredibly juicy. You can also mix in minced garlic, lemon zest, or chopped herbs for a gourmet touch.
Oil and Spice Rubs
After butter (or instead of it), rub the outside of the chicken with olive oil or melted butter. This helps the seasoning stick and promotes even browning. Then apply your spice rub. A simple mix of salt, pepper, garlic powder, onion powder, and paprika works wonders. For a Mediterranean twist, add oregano and lemon zest. For heat, include cayenne or chili powder.
Trussing: Why It Matters
Trussing—tying the legs together with kitchen twine and tucking the wings under the body—might seem old-fashioned, but it serves a real purpose. It helps the chicken cook evenly by keeping the thinner parts (wings and legs) from drying out before the thicker breast is done. It also gives the bird a neat, professional appearance.
Roasting Techniques: Temperature, Timing, and Tools
Now for the main event: the actual roasting. This is where many cooks go wrong—either undercooking or overcooking. But with the right technique, you’ll get golden skin and juicy meat every time.
The High-Heat Start Method
The best roasting instructions for juicy chicken start with high heat. Preheat your oven to 425°F (220°C). This initial blast of heat crisps the skin quickly, sealing in juices. After 30 minutes, reduce the temperature to 375°F (190°C) to finish cooking gently. This two-stage method is the secret to perfect texture.
Use a Roasting Rack
Always roast your chicken on a rack placed inside a roasting pan. This elevates the bird, allowing hot air to circulate underneath and preventing the bottom from steaming in its own juices. If you don’t have a rack, you can improvise by placing chopped vegetables (like carrots, onions, and celery) in the pan—they’ll act as a natural stand and add flavor to the drippings.
Timing Is Everything
Roasting time depends on the size of your chicken. As a general rule, plan for 20 minutes per pound at 375°F (190°C) after the initial high-heat phase. So a 4-pound chicken will take about 80 minutes total (30 minutes at 425°F + 50 minutes at 375°F). But don’t rely solely on time—use a meat thermometer.
The Thermometer Rule
Insert an instant-read thermometer into the thickest part of the thigh, avoiding the bone. The chicken is done when it reaches 165°F (74°C). The breast should be around 160°F (71°C)—it will continue to rise a few degrees as it rests. Overcooking is the #1 cause of dry chicken, so trust the thermometer, not the clock.
Basting: To Do or Not to Do?
Basting—spooning pan juices over the chicken—was once considered essential. But modern ovens are so efficient that frequent opening causes heat loss and uneven cooking. Instead of basting, rely on the butter under the skin and the natural drippings. If you really want to baste, do it sparingly during the last 20 minutes.
Resting and Carving: The Final Steps to Perfection
You’re almost done! But don’t slice into that chicken the second it comes out of the oven. Resting is a crucial step that many people skip—and it’s the difference between juicy and dry.
Let It Rest
Transfer the chicken to a cutting board and tent it loosely with foil. Let it rest for 15–20 minutes. During this time, the juices redistribute throughout the meat, ensuring every bite is moist. The internal temperature will also rise by 5–10°F, so keep that in mind when checking doneness.
Carving Like a Pro
Use a sharp knife and a steady hand. Start by removing the legs: pull one leg away from the body and cut through the joint. Repeat on the other side. Then slice the breast meat against the grain into even portions. Save the carcass for making homemade stock—it’s packed with flavor.
Serving Suggestions
Serve your roasted chicken with simple sides that complement its rich flavor. Roasted potatoes, steamed green beans, or a fresh garden salad all work beautifully. Drizzle with pan juices or a simple gravy made from the drippings for extra indulgence.
Common Mistakes and How to Avoid Them
Even with the best intentions, things can go wrong. Here are the most common roasting pitfalls and how to fix them.
Dry Meat
Cause: Overcooking or skipping brining. Solution: Use a thermometer and brine or dry brine the chicken beforehand. If you do overcook it slightly, slice it thin and serve with a sauce or gravy to add moisture.
Soggy Skin
Cause: Not patting the skin dry or roasting without a rack. Solution: Always dry the skin thoroughly and use a roasting rack. If the skin is still soft after roasting, pop the chicken under the broiler for 2–3 minutes to crisp it up.
Uneven Cooking
Cause: Not trussing or using an uneven heat source. Solution: Truss the chicken and rotate the pan halfway through cooking if your oven has hot spots.
Underseasoned Chicken
Cause: Skipping the cavity seasoning or using too little salt. Solution: Season generously inside and out, and consider dry brining for deeper flavor penetration.
Conclusion: Master the Art of Roasting Chicken
Roasting a perfect chicken doesn’t require fancy equipment or professional skills—just attention to detail and a few key techniques. By following these roasting instructions for juicy chicken, you’ll transform a simple bird into a show-stopping meal that’s both comforting and impressive. From choosing the right chicken to mastering temperature and timing, every step matters.
Remember: brining or dry brining, high-heat start, proper seasoning, and resting are your best friends. With practice, you’ll develop your own signature style—whether that’s herb butter under the skin, a spicy rub, or a citrus-stuffed cavity. So fire up that oven, grab a thermometer, and get ready to enjoy golden, juicy, flavorful chicken that’s perfect every single time.
Frequently Asked Questions
What temperature should I roast chicken at?
Start at 425°F (220°C) for 30 minutes to crisp the skin, then reduce to 375°F (190°C) to finish cooking. This two-stage method ensures juicy meat and golden skin.
How do I keep chicken moist when roasting?
Brining or dry brining before roasting helps retain moisture. Also, avoid overcooking by using a meat thermometer and letting the chicken rest before carving.
Can I roast a frozen chicken?
It’s not recommended. Always thaw the chicken fully in the refrigerator or using the cold water method to ensure even cooking and food safety.
What herbs go well with roasted chicken?
Thyme, rosemary, sage, and oregano are classic choices. You can also use lemon zest, garlic, and onion for added aroma and flavor.
How long does roasted chicken last in the fridge?
Store leftover roasted chicken in an airtight container for up to 4 days. Reheat gently to avoid drying out the meat.
Can I use the drippings to make gravy?
Absolutely! Skim off excess fat, then whisk in flour and broth to create a rich, flavorful gravy. Season to taste and serve warm.


