
Roasting a chicken to golden perfection doesn’t require guesswork. Whether you cover your roast chicken depends on your goal—crispy skin or extra moisture. Learn when to tent, when to leave it uncovered, and how timing impacts flavor and texture.
Key Takeaways
- Covering slows browning: Tenting with foil prevents the skin from crisping too quickly, ideal for longer roasts.
- Uncovered = crispy skin: Leaving the chicken uncovered allows moisture to evaporate, creating that coveted golden, crackling skin.
- Use a meat thermometer: The safest way to know when your chicken is done is by checking internal temperature (165°F at the thigh).
- Rest before carving: Letting the chicken rest for 15–20 minutes locks in juices and improves texture.
- Season under the skin: Rubbing herbs and butter beneath the skin enhances flavor and keeps meat moist.
- Start high, finish low: Begin roasting at 425°F for crispiness, then reduce to 350°F to cook through evenly.
- Cover only if needed: Use foil to tent the breast if it’s browning too fast, but remove it later to crisp the skin.
Quick Answers to Common Questions
Should I cover roast chicken with foil?
Only if the breast is browning too quickly. Use a loose foil tent over the breast, but remove it during the last 20–30 minutes to crisp the skin.
Can I roast chicken in a covered dish?
Yes, but it will steam instead of roast, resulting in softer skin. Use a covered dish only for long, slow roasts where moisture retention is key.
How long do you roast a chicken uncovered?
Most chickens roast uncovered for 1 to 1.5 hours at 350°F–425°F, depending on size. Always check internal temperature to confirm doneness.
Does covering chicken make it juicier?
It can help retain moisture, especially in lean birds, but may sacrifice crispiness. For juicy meat with crispy skin, roast uncovered and use a meat thermometer.
What temperature should roast chicken be?
The safe internal temperature is 165°F (74°C) measured in the thickest part of the thigh, without touching the bone.
📑 Table of Contents
Do You Cover Roast Chicken While Cooking?
Roast chicken is one of those classic comfort foods that feels both simple and deeply satisfying. The aroma of herbs, garlic, and golden skin filling your kitchen is enough to make anyone hungry. But when it comes to the actual cooking process, one question keeps popping up: *Do you cover roast chicken while cooking?* The answer isn’t a simple yes or no—it depends on what you’re trying to achieve.
If you want crispy, crackling skin that shatters with every bite, you’ll likely leave the chicken uncovered for most of the roast. But if you’re worried about drying out the breast meat or your oven runs hot, covering it—even partially—can help. The key is understanding how heat, moisture, and time interact during roasting. Covering affects browning, moisture retention, and overall texture, so knowing when and how to use a lid or foil tent makes all the difference.
In this guide, we’ll break down the science and strategy behind covering (or not covering) your roast chicken. Whether you’re a beginner or a seasoned home cook, these tips will help you roast a juicy, flavorful bird with confidence. From timing and temperature to seasoning and resting, we’ve got you covered—literally and figuratively.
Why the Cover Question Matters
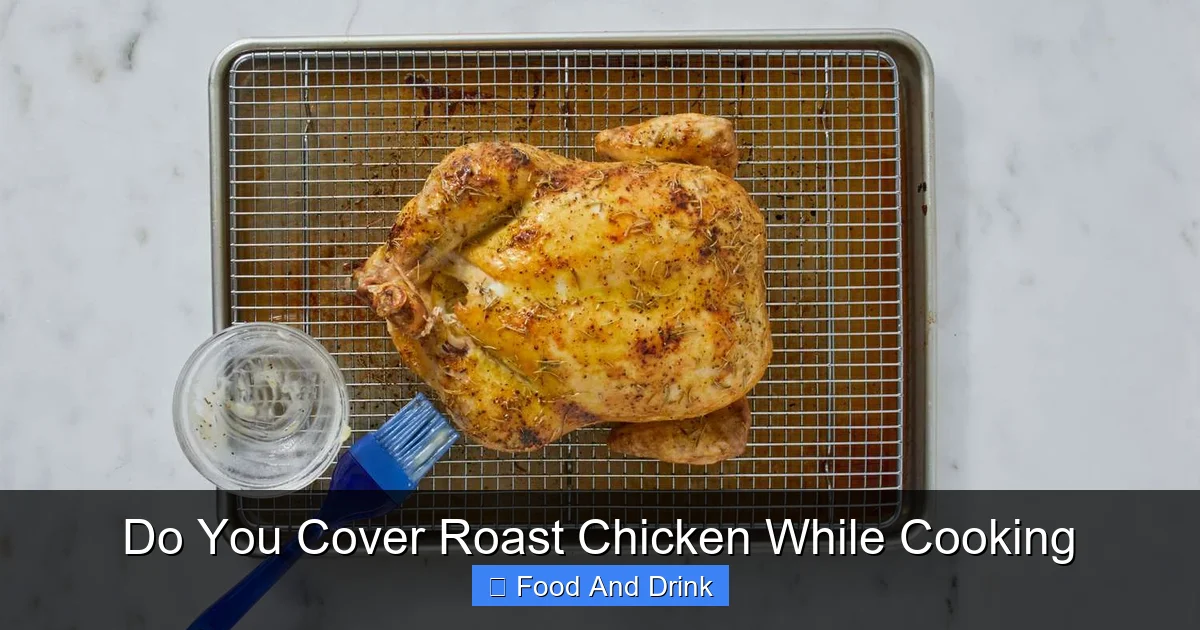
Visual guide about Do You Cover Roast Chicken While Cooking
Image source: southernliving.com
At first glance, covering a roast chicken might seem like a small detail. But it actually plays a major role in the final outcome. Think of it like this: roasting is a balancing act between drying out the skin to make it crispy and keeping the meat moist and tender. Covering the chicken changes the environment inside the roasting pan, which directly impacts both.
When you cover the chicken—whether with a lid, foil, or even a roasting bag—you trap steam. That steam keeps the surface moist, which slows down browning and crisping. This can be helpful if you’re roasting at a lower temperature or if your chicken is on the smaller side and prone to drying out. But it also means you’ll lose that beautiful golden crust that makes roast chicken so irresistible.
On the flip side, leaving the chicken uncovered allows moisture to escape. The skin dries out, the fat renders, and the Maillard reaction kicks in—that’s the chemical process that gives browned food its rich, complex flavor. This is why most professional chefs and recipe developers recommend roasting uncovered for at least part of the cooking time.
So, do you cover roast chicken? It really depends on your priorities. If you’re after maximum crispiness, go uncovered. If you’re more concerned about juiciness—especially in the breast—then a brief cover or tent might be your best friend.
When to Cover Your Roast Chicken
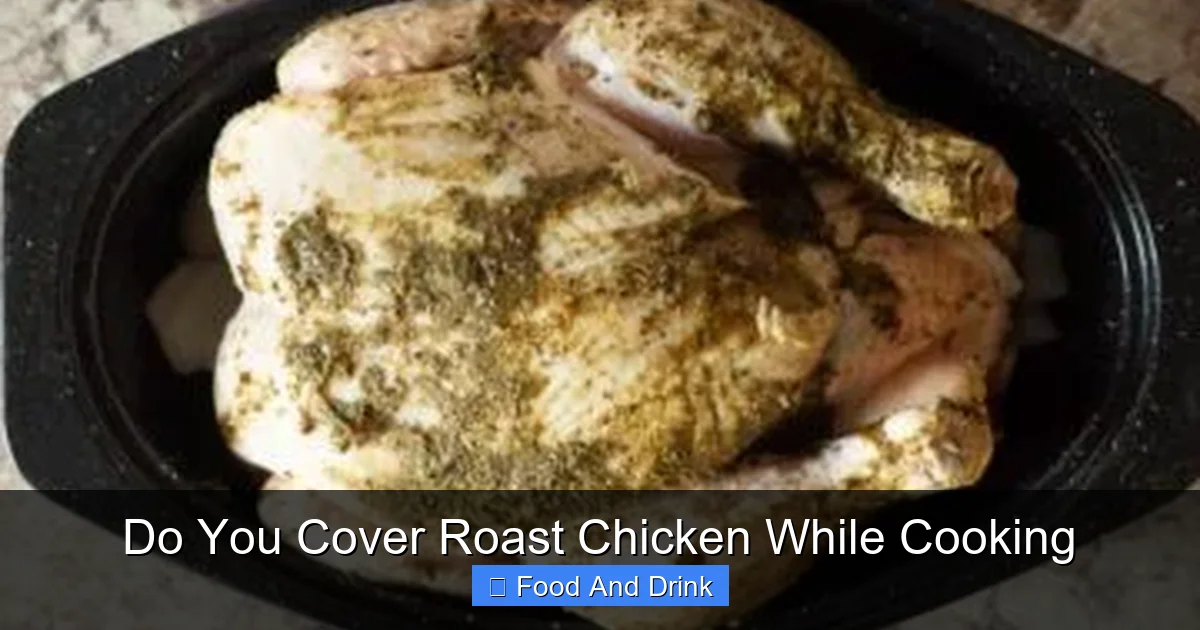
Visual guide about Do You Cover Roast Chicken While Cooking
Image source: thenessykitchen.com
There are specific situations where covering your roast chicken makes perfect sense. It’s not about avoiding crispiness altogether, but about managing the cooking process to get the best of both worlds: moist meat and golden skin.
Covering to Prevent Over-Browning
One of the most common reasons to cover roast chicken is to prevent the breast from browning too quickly. Chicken breasts cook faster than thighs and legs, and they’re also leaner, which means they dry out more easily. If you’re roasting at a high temperature—say, 425°F (220°C)—the skin on the breast can turn dark brown or even black before the thighs are fully cooked.
In this case, you can loosely tent the breast with a piece of aluminum foil after the first 20–30 minutes of roasting. This shields the breast from direct heat, slowing down the browning process while allowing the rest of the bird to continue cooking. Just make sure the foil doesn’t touch the skin too tightly, or it will trap steam and soften the skin.
Using a Roasting Bag for Moisture
Another option is to use a roasting bag. These heat-safe plastic bags are designed to seal in moisture while still allowing the chicken to brown slightly. They’re especially useful for beginners or anyone worried about dry chicken. Simply place the seasoned chicken inside the bag, add a tablespoon of water or broth, seal it according to the package instructions, and roast as directed.
The result is a very juicy bird with tender meat. The downside? The skin won’t be as crispy as when roasted uncovered. Some people don’t mind this trade-off, especially if they’re serving the chicken in a casserole or shredding it for tacos. But if you’re aiming for that classic roast chicken experience with crackling skin, a roasting bag might not be the best choice.
Covering for Long, Slow Roasts
If you’re roasting a large chicken (over 5 pounds) or using a low-and-slow method (like 300°F for several hours), covering can help keep the meat from drying out. In these cases, the extended cooking time increases the risk of moisture loss, especially in the breast. Covering the chicken for the first half of the roast can help retain juices, then you can remove the cover for the final hour to crisp the skin.
This method works well for heritage breeds or free-range chickens, which can be leaner and benefit from extra moisture. It’s also a good strategy if you’re roasting in a convection oven, which tends to dry out food faster than a conventional oven.
When to Leave Your Roast Chicken Uncovered
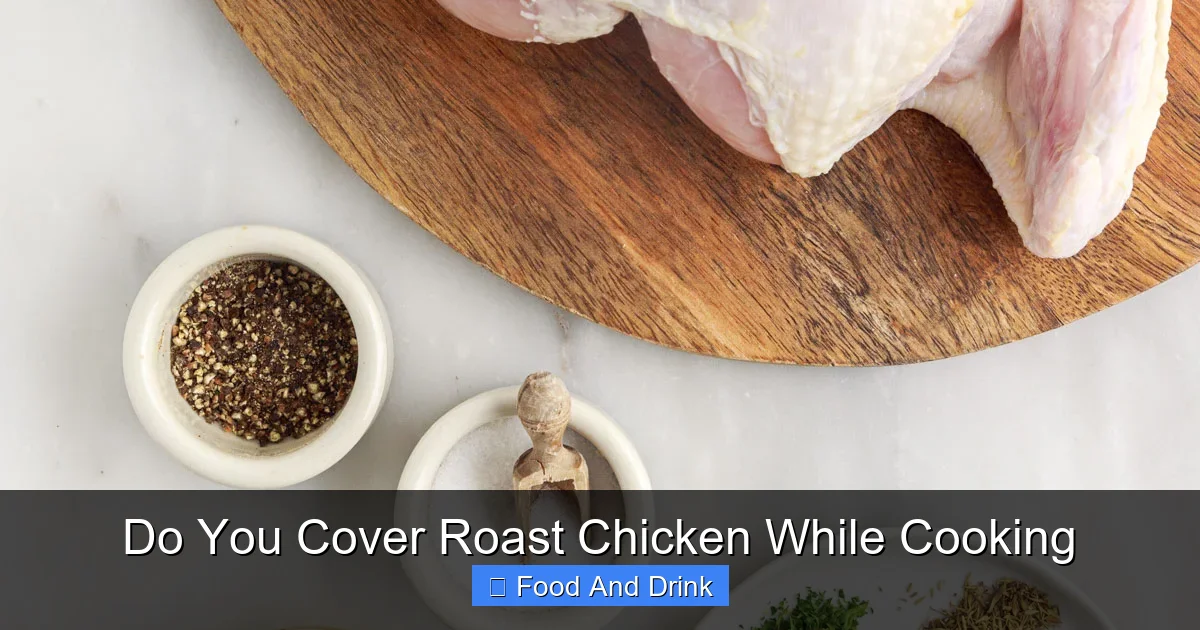
Visual guide about Do You Cover Roast Chicken While Cooking
Image source: familydinners.com
For most home cooks, the best approach is to roast chicken uncovered—at least for the majority of the cooking time. This method delivers the crispiest skin and most flavorful results, and it’s the technique used by top chefs and food magazines alike.
The Case for Crispy Skin
Let’s be honest: the best part of roast chicken is the skin. When it’s perfectly golden, slightly blistered, and shatteringly crisp, it’s pure magic. And that only happens when the skin is exposed to dry, direct heat. Covering the chicken traps moisture, which turns the skin soft and rubbery—no one wants that.
By leaving the chicken uncovered, you allow the surface to dry out gradually. The fat beneath the skin renders, the proteins brown, and the result is a texture that’s both crunchy and rich. This is especially true if you pat the chicken dry with paper towels before seasoning and let it air-dry in the fridge for a few hours (or overnight). The drier the skin, the crispier it gets.
High-Heat Roasting for Flavor
Another reason to roast uncovered is to take advantage of high heat. Starting your roast chicken at 425°F (220°C) for the first 20–30 minutes creates a burst of browning and flavor. This initial blast of heat jumpstarts the Maillard reaction, giving the skin a deep, savory taste that you just can’t get with lower temperatures.
After the high-heat start, you can reduce the oven to 350°F (175°C) to finish cooking the chicken gently. This two-stage method ensures crispy skin and evenly cooked meat without drying out the breast. And because the chicken is uncovered the whole time, there’s no risk of soggy skin.
Even Cooking Without a Lid
Some people worry that leaving the chicken uncovered will cause the breast to dry out before the thighs are done. But with proper timing and temperature control, this doesn’t have to be an issue. The key is to use a meat thermometer and check the internal temperature in the thickest part of the thigh (without touching the bone). Once it reaches 165°F (74°C), the chicken is safe to eat.
You can also truss the chicken—tying the legs together with kitchen twine—to help it cook more evenly. This brings the legs closer to the body, reducing the surface area exposed to heat and slowing down cooking in the darker meat. It’s a simple step that makes a big difference.
Best Practices for Juicy, Crispy Roast Chicken
Now that we’ve covered when to cover (and when not to), let’s talk about how to roast a chicken that’s both juicy and crispy—no compromises. These best practices will help you get restaurant-quality results at home, every time.
Season Generously and Strategically
Flavor starts with seasoning. Don’t just sprinkle salt and pepper on the outside—get under the skin. Gently loosen the skin over the breast and thighs with your fingers, then rub a mixture of softened butter, minced garlic, fresh herbs (like thyme, rosemary, or sage), and salt directly onto the meat. This infuses flavor deep into the chicken and helps keep it moist during roasting.
Don’t forget the cavity! Stuff it with aromatics like lemon halves, garlic cloves, onion wedges, and fresh herbs. These won’t add much flavor to the meat directly, but they’ll release fragrant steam during cooking, enhancing the overall aroma and taste.
Use the Right Pan and Rack
A roasting pan with a rack is ideal because it allows hot air to circulate around the chicken, promoting even browning. If you don’t have a rack, you can place the chicken on a bed of chopped vegetables (like carrots, celery, and onions) to lift it off the bottom of the pan. Just avoid overcrowding—too many veggies can trap steam and soften the skin.
Make sure your pan is oven-safe and large enough to hold the chicken with some space around it. A crowded pan leads to steaming instead of roasting.
Let the Chicken Come to Room Temperature
Cold chicken straight from the fridge takes longer to cook and can lead to uneven results. Take your chicken out of the refrigerator 30–60 minutes before roasting to let it come to room temperature. This ensures more even cooking and better browning.
Roast Breast-Side Up
Always roast your chicken breast-side up. This allows the fat to render and drip down over the breast, basting it naturally and keeping it moist. If you roast it upside down, the breast will dry out while the skin on the back crisps up—definitely not the goal.
Rest Before Carving
This might be the most important step of all. Once your chicken reaches 165°F (74°C) in the thigh, remove it from the oven and let it rest for 15–20 minutes before carving. During this time, the juices redistribute throughout the meat, resulting in a moister, more flavorful bite.
Cover the chicken loosely with foil during resting—this keeps it warm without steaming the skin. Just don’t wrap it tightly, or you’ll lose that crispiness you worked so hard to achieve.
Common Mistakes to Avoid
Even with the best intentions, it’s easy to make mistakes when roasting chicken. Here are a few common pitfalls and how to avoid them.
Overcooking the Breast
The breast is the most delicate part of the chicken and dries out quickly. To prevent this, use a meat thermometer and check the temperature early. Start checking around the 45-minute mark for a 4-pound chicken. Remember, the temperature will continue to rise a few degrees after you take it out of the oven (carryover cooking), so pull it out when the thigh hits 160°F (71°C).
Skipping the Pat-Dry Step
Moisture is the enemy of crispy skin. Always pat the chicken dry with paper towels before seasoning. For even better results, let it air-dry in the fridge, uncovered, for a few hours or overnight. This extra step makes a huge difference in skin texture.
Using Too Much Foil
If you do decide to tent the chicken with foil, use it sparingly. A loose tent over the breast is fine, but covering the entire bird will trap too much steam and ruin the skin. And never press the foil directly onto the skin—it will stick and tear.
Not Trussing the Chicken
Trussing helps the chicken cook evenly and keeps the legs from drying out. It’s a simple technique: tie the legs together with kitchen twine and tuck the wings under the body. If you don’t have twine, you can use a silicone band or even a clean rubber band (just make sure it’s food-safe).
Final Thoughts: To Cover or Not to Cover?
So, do you cover roast chicken while cooking? The short answer is: usually not—unless you have a specific reason to do so. For most home cooks, roasting uncovered delivers the best combination of crispy skin and juicy meat. But if you’re dealing with a lean bird, a hot oven, or a long cooking time, a brief cover or tent can help protect the meat.
The real secret to great roast chicken isn’t just about covering—it’s about understanding your ingredients, your oven, and your goals. Use a thermometer, season well, and don’t rush the resting period. With these tips, you’ll be roasting perfect chickens like a pro.
And remember: every chicken is a little different. Don’t be afraid to experiment. Try roasting uncovered one time, then tent the breast the next. Take notes on what works best for your oven and your taste. Over time, you’ll develop your own signature method—and that’s when roast chicken truly becomes magic.
Frequently Asked Questions
Do you cover roast chicken while cooking for crispy skin?
No, you should not cover roast chicken if you want crispy skin. Leaving it uncovered allows moisture to escape and the skin to brown and crisp up.
Can I cover my roast chicken with aluminum foil?
Yes, but only to tent the breast if it’s browning too fast. Remove the foil during the final 20–30 minutes to allow the skin to crisp.
Is it better to roast chicken covered or uncovered?
Uncovered is generally better for crispy skin and even browning. Covering is only recommended in specific cases, like preventing over-browning or slow roasting.
How do I keep my roast chicken from drying out?
Use a meat thermometer, don’t overcook, season under the skin, and let the chicken rest before carving. Trussing also helps retain moisture.
Should I baste my roast chicken?
Basting is optional. It can add flavor, but opening the oven door frequently lowers the temperature and may slow cooking. Self-basting (via rendered fat) is often enough.
Can I roast a chicken in a Dutch oven?
Yes, but if you cover it, the chicken will steam. For crispy skin, roast uncovered or remove the lid during the last 30 minutes of cooking.


