

Knowing how to tell if roast chicken is done is essential for both safety and flavor. This guide covers reliable methods like internal temperature testing, visual signs, and timing tips to ensure your chicken is cooked perfectly—never dry, never undercooked.
Roasting a chicken seems simple—toss it in the oven, wait, and enjoy. But if you’ve ever cut into a bird only to find pink meat or dry, stringy flesh, you know it’s not always that easy. The secret to a perfect roast chicken lies in knowing exactly how to tell if roast chicken is done. It’s not just about timing or color—it’s about combining science, observation, and a little kitchen intuition.
Whether you’re a weekend cook or a seasoned home chef, mastering this skill transforms your meals. A properly cooked roast chicken is juicy, flavorful, and safe to eat. Undercooked chicken can harbor harmful bacteria like Salmonella, while overcooked chicken turns dry and unappetizing. That’s why understanding the signs of doneness is so important. In this guide, we’ll walk you through every method—from thermometers to touch tests—so you can roast with confidence every single time.
You’ll learn not only the technical steps but also practical tips to avoid common mistakes. We’ll cover how to position the chicken, when to check it, and why resting matters. By the end, you’ll be able to pull a golden, crispy-skinned bird from the oven knowing it’s cooked to perfection—safe, succulent, and ready to impress.
Key Takeaways
- Use a meat thermometer: The most accurate way to check doneness is by measuring the internal temperature—165°F (74°C) in the thickest part of the thigh, away from bone.
- Check the juices: When pierced, the juices should run clear, not pink or bloody.
- Observe the color: The meat should be white or light beige, with no traces of pink, especially near the bone.
- Wiggle the legs: If the leg moves freely and easily, the chicken is likely done.
- Rest before carving: Let the chicken rest for 10–15 minutes after roasting to retain juices and ensure even doneness.
- Avoid overcooking: Overdone chicken becomes dry and tough—use timing as a guide, but always confirm with a thermometer.
- Account for carryover cooking: The internal temperature rises 5–10°F after removal from the oven, so remove it at 160°F (71°C) for perfect results.
Quick Answers to Common Questions
Can I tell if roast chicken is done by looking at the color?
Color can be a helpful indicator, but it’s not always reliable. The meat should be white or light beige with no pink, especially near the bone. However, some brines or marinades can cause pink hues even when fully cooked, so always confirm with a thermometer.
Is it safe to eat chicken if the juices are pink?
No. Pink or bloody juices indicate that the chicken is undercooked and may contain harmful bacteria. The juices should run clear when the meat is pierced. If in doubt, check the internal temperature with a thermometer.
How long should I let roast chicken rest?
Let roast chicken rest for 10–15 minutes after removing it from the oven. This allows the juices to redistribute and the internal temperature to stabilize, resulting in more tender and flavorful meat.
Can I use a meat thermometer on a stuffed chicken?
Yes, but you must check both the chicken and the stuffing. The chicken should reach 165°F (74°C) in the thigh, and the stuffing should also reach 165°F (74°C) when measured in the center of the cavity.
What if my chicken is done but the skin isn’t crispy?
If the skin isn’t crispy, increase the oven temperature for the last 10–15 minutes of cooking, or broil it briefly (watch closely to avoid burning). You can also pat the skin dry before roasting to help it crisp up.
📑 Table of Contents
The Science Behind Safe Roast Chicken
Cooking chicken safely isn’t just about taste—it’s about health. Poultry can carry bacteria such as Salmonella and Campylobacter, which are destroyed only when the meat reaches a high enough internal temperature. According to the USDA, all parts of chicken must reach a minimum internal temperature of 165°F (74°C) to be considered safe for consumption. This temperature ensures that harmful pathogens are eliminated, reducing the risk of foodborne illness.
But safety isn’t the only concern. Texture and moisture matter just as much. Chicken breast meat, for example, dries out quickly if overcooked, while dark meat (like thighs and drumsticks) can remain tough if not cooked long enough. That’s why it’s crucial to understand the different parts of the bird and how they respond to heat. The breast cooks faster than the thighs, so relying solely on time or appearance can lead to uneven results.
The ideal roast chicken is one where every part is cooked just right—juicy breast meat, tender thighs, and crispy skin. Achieving this balance requires more than just setting a timer. It means paying attention to how heat penetrates the meat, how juices redistribute, and how the bird changes as it roasts. Understanding these principles helps you make better decisions in the kitchen, whether you’re adjusting oven temperature or choosing the right roasting pan.
Why Temperature Matters Most
When it comes to how to tell if roast chicken is done, temperature is the gold standard. Visual cues like color and juice clarity can be misleading, especially with certain brines or marinades that affect appearance. A meat thermometer removes guesswork and gives you a precise, scientific answer.
The key is knowing where to insert the thermometer. The thickest part of the thigh, where the leg meets the body, is the best spot. This area takes the longest to cook and is farthest from the heat source. Avoid touching the bone, as it conducts heat and can give a false reading. The breast should also be checked, but it usually reaches 165°F (74°C) before the thighs—so focus on the thigh for overall doneness.
Digital instant-read thermometers are the most reliable tools for this job. They provide a reading in seconds and are easy to use. Leave-in probes are also helpful, especially for larger birds, because they allow you to monitor temperature without opening the oven door. Whichever you choose, make sure it’s calibrated and clean before use.
Carryover Cooking: The Hidden Factor
One of the most overlooked aspects of roasting chicken is carryover cooking. This is the phenomenon where the internal temperature of the meat continues to rise after it’s removed from the oven. Heat trapped inside the bird redistributes, causing the temperature to increase by 5–10°F (3–6°C) during the resting period.
Because of this, many chefs recommend removing the chicken from the oven when the internal temperature reaches 160°F (71°C). By the time it rests, it will climb to the safe 165°F (74°C) threshold. This technique helps prevent overcooking, especially in the breast, which can dry out quickly. It’s a small adjustment that makes a big difference in texture and juiciness.
To take advantage of carryover cooking, use a reliable thermometer and check the temperature toward the end of the estimated roasting time. Once it hits 160°F (71°C), turn off the oven and let the chicken rest. This not only ensures safety but also allows the juices to settle, resulting in a more flavorful and tender bird.
Using a Meat Thermometer: The Most Reliable Method
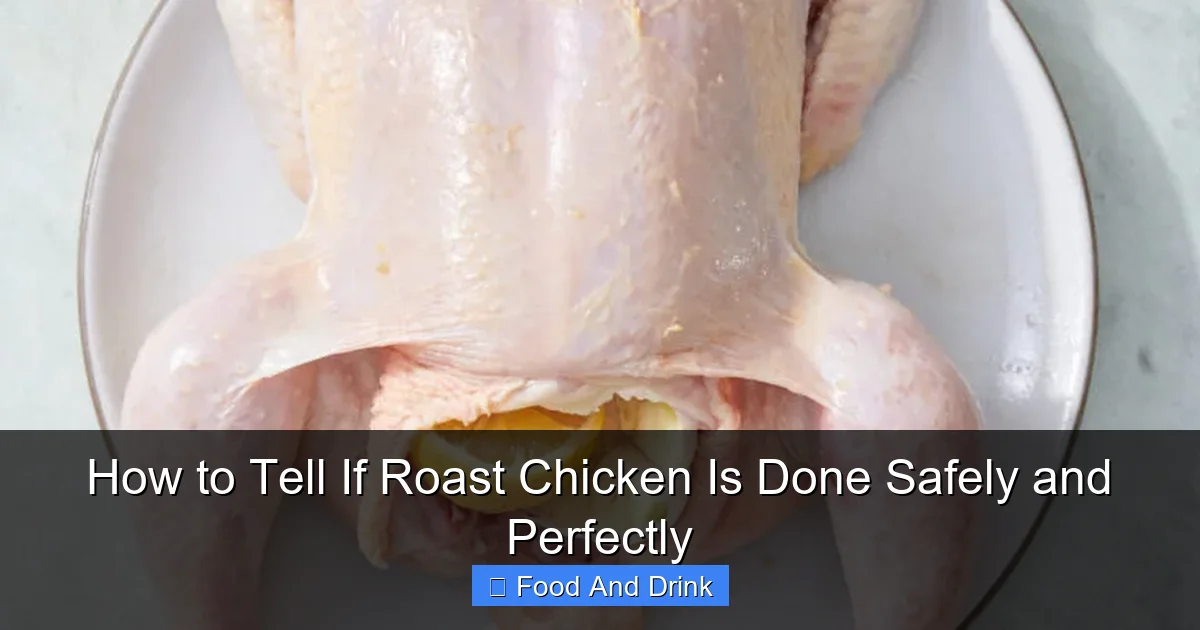
Visual guide about How to Tell If Roast Chicken Is Done Safely and Perfectly
Image source: weelicious.com
If you want to know how to tell if roast chicken is done with certainty, a meat thermometer is your best friend. It’s the only method that provides an exact measurement, eliminating the risk of undercooking or overcooking. While visual and tactile cues can be helpful, they’re not always accurate—especially for beginners.
There are two main types of thermometers to consider: instant-read and leave-in probes. Instant-read thermometers are inserted into the meat just before serving and give a quick reading. They’re ideal for checking multiple spots without leaving the probe in the oven. Leave-in probes, on the other hand, stay in the chicken throughout the cooking process and connect to a monitor outside the oven. These are great for monitoring temperature in real time, especially for large birds or when using a smoker.
Where to Insert the Thermometer
Proper placement is crucial for an accurate reading. The thickest part of the thigh, near where the leg attaches to the body, is the best location. This area is the last to cook and is less likely to be affected by bone conduction. Insert the probe horizontally, making sure it doesn’t touch the bone, as this can give a falsely high reading.
You should also check the breast, but only as a secondary measure. The breast typically reaches 165°F (74°C) earlier than the thighs, so if the thigh is done, the breast is almost certainly safe. However, if you’re concerned about dryness, you can use a dual-probe thermometer to monitor both areas simultaneously.
Avoid inserting the thermometer into fatty areas or near the skin, as these can also skew results. The goal is to measure the temperature of the muscle meat, where bacteria are most likely to survive if undercooked.
Choosing the Right Thermometer
Not all thermometers are created equal. For roasting chicken, look for a digital model with a fast response time (under 10 seconds) and a wide temperature range. Instant-read thermometers like the ThermoPop or Thermapen are popular among home cooks for their accuracy and ease of use.
Leave-in probes, such as those from brands like Meater or Inkbird, are excellent for long roasts. They allow you to monitor temperature without opening the oven, which helps maintain consistent heat. Some models even connect to your smartphone, sending alerts when the chicken reaches the desired temperature.
Whichever type you choose, make sure it’s calibrated. You can test it by placing the probe in ice water (should read 32°F/0°C) or boiling water (should read 212°F/100°C at sea level). Regular calibration ensures accuracy and gives you confidence in your readings.
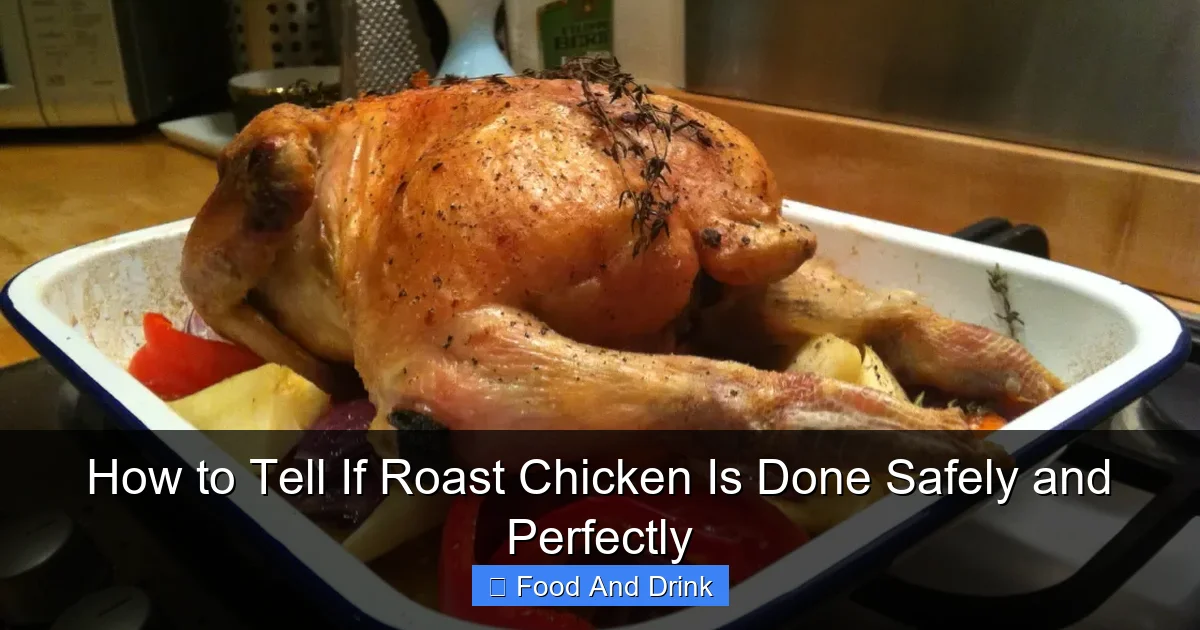
Visual and Tactile Cues: What to Look For

Visual guide about How to Tell If Roast Chicken Is Done Safely and Perfectly
Image source: i0.wp.com
While a thermometer is the most reliable tool, visual and tactile cues can also help you determine how to tell if roast chicken is done. These methods are especially useful if you don’t have a thermometer on hand or want to double-check your results.
One of the most common signs is juice clarity. When you pierce the thickest part of the thigh with a knife or skewer, the juices should run clear, not pink or bloody. Pink juices indicate that the meat is still undercooked and may contain harmful bacteria. However, be cautious—some brines or marinades can cause juices to appear pink even when the chicken is fully cooked. In these cases, rely more on temperature than color.
Color and Texture Changes
As chicken cooks, its color changes from pink or gray to white or light beige. The meat should look opaque, not translucent. Pay special attention to areas near the bone, as these can retain a pinkish hue even when the rest of the meat is done. This is normal, especially in younger birds, but if the meat itself is pink, it’s not safe to eat.
The skin should be golden brown and crispy, another sign that the chicken has roasted properly. If the skin is pale or rubbery, the chicken may not have cooked long enough or at a high enough temperature. A well-roasted bird will have a rich, appetizing color and a satisfying crunch when you cut into it.
The Wiggle Test
A simple but effective method is the wiggle test. Gently grasp the leg and try to move it. If it moves freely and easily, the connective tissues have broken down, and the chicken is likely done. If it’s stiff or resists movement, it needs more time in the oven.
This test works because collagen in the joints and tendons breaks down into gelatin as the chicken cooks, making the legs loose and flexible. While it’s not as precise as a thermometer, it’s a good secondary check, especially for whole birds.
Touch and Feel
Experienced cooks often use touch to assess doneness. Press gently on the breast and thigh with your finger or a spoon. The meat should feel firm but springy, not soft or squishy. If it feels mushy, it’s undercooked. If it feels hard or rubbery, it’s overcooked.
This method takes practice, but it can be a useful backup when a thermometer isn’t available. Just be careful not to press too hard, as this can release juices and dry out the meat.
Timing and Oven Considerations
Visual guide about How to Tell If Roast Chicken Is Done Safely and Perfectly
Image source: ambernouveau.files.wordpress.com
While timing isn’t the most accurate way to tell if roast chicken is done, it’s a helpful starting point. Most whole chickens take about 20 minutes per pound at 375°F (190°C). So a 4-pound bird would take roughly 80 minutes. However, this can vary based on oven type, chicken size, and whether it’s stuffed.
Convection ovens cook faster and more evenly than conventional ones, so reduce the temperature by 25°F (about 15°C) or shorten the cooking time by 15–20%. Roasting at a higher temperature (425°F/220°C) for the first 30 minutes can help crisp the skin, then lowering it to 350°F (175°C) ensures even cooking without burning.
Factors That Affect Cooking Time
Several factors can influence how long your chicken takes to roast. A cold chicken straight from the fridge will take longer than one that’s been brought to room temperature. Letting it sit for 30–60 minutes before roasting helps it cook more evenly.
The size and shape of the bird also matter. A plump, round chicken may cook faster than a long, narrow one. Trussing the legs can help the breast and thighs cook at a similar rate, preventing the breast from drying out.
Stuffing the cavity adds moisture but also increases cooking time, as the stuffing must reach 165°F (74°C) as well. If you stuff your chicken, add 15–20 minutes to the roasting time and check the stuffing temperature separately.
Using a Roasting Pan and Rack
The type of pan you use can affect cooking time and results. A roasting pan with a rack allows hot air to circulate around the chicken, promoting even browning and preventing the bottom from steaming. If you don’t have a rack, you can use vegetables like onions, carrots, and celery to elevate the bird.
Avoid using nonstick pans at high temperatures, as they can release harmful fumes. Stainless steel, enameled cast iron, or heavy-duty aluminum pans are better choices for roasting.
Resting: The Final Step to Perfection
Once you’ve determined how to tell if roast chicken is done, the process isn’t over. Resting is a critical step that many cooks skip, but it makes a huge difference in flavor and texture. When you remove the chicken from the oven, the juices are concentrated in the center. If you carve it immediately, those juices will spill out, leaving the meat dry.
Letting the chicken rest for 10–15 minutes allows the juices to redistribute throughout the meat. Cover it loosely with foil to keep it warm, but don’t wrap it tightly—this can trap steam and soften the crispy skin.
How Resting Affects Doneness
Resting also allows carryover cooking to complete. As mentioned earlier, the internal temperature can rise 5–10°F during this time. This means that even if you removed the chicken at 160°F (71°C), it will reach the safe 165°F (74°C) threshold while resting.
This extra time also gives the muscle fibers a chance to relax, making the meat more tender and easier to carve. A well-rested chicken will slice cleanly, with moist, flavorful meat in every bite.
Carving After Resting
After resting, transfer the chicken to a cutting board and carve it while it’s still warm. Start by removing the legs and wings, then slice the breast meat against the grain. Serve immediately for the best texture and flavor.
If you’re not serving right away, keep the carved chicken covered in a warm oven (around 170°F/77°C) for up to 30 minutes. Avoid leaving it at room temperature for more than 2 hours to prevent bacterial growth.
Common Mistakes and How to Avoid Them
Even experienced cooks make mistakes when roasting chicken. One of the most common is relying solely on time or appearance. Ovens vary, chickens differ in size, and visual cues can be deceptive. Always use a thermometer to confirm doneness.
Another mistake is not trussing the chicken. Trussing keeps the legs and wings close to the body, promoting even cooking and preventing the breast from drying out. Use kitchen twine to tie the legs together and tuck the wings under the body.
Overcrowding the pan can also lead to uneven cooking. Make sure there’s enough space around the chicken for air to circulate. If you’re roasting vegetables, place them around the edges, not directly under the bird.
Finally, don’t skip the resting period. It’s tempting to carve the chicken right away, especially when it smells amazing, but patience pays off. A few extra minutes of resting can mean the difference between a dry bird and a juicy, restaurant-quality roast.
Conclusion
Knowing how to tell if roast chicken is done is a skill that combines science, observation, and practice. The most reliable method is using a meat thermometer to check that the internal temperature reaches 165°F (74°C) in the thickest part of the thigh. Visual cues like clear juices, white meat, and a wiggly leg can support your判断, but they shouldn’t replace temperature testing.
Timing, oven type, and resting all play important roles in achieving a perfectly cooked bird. By understanding these factors and avoiding common mistakes, you can roast chicken that’s safe, juicy, and full of flavor every time. Whether you’re cooking for a holiday dinner or a weeknight meal, these tips will help you serve a roast chicken that’s nothing short of perfect.
🎥 Related Video: How To Check A Roasted Chicken's Temperature
📺 Prevention Magazine
Is your bird cooked? Find out the right way to check. SUBSCRIBE to our YouTube channel! http://bit.ly/1AFl66L Connect with …
Frequently Asked Questions
What is the safest way to check if roast chicken is done?
The safest way is to use a meat thermometer. Insert it into the thickest part of the thigh, avoiding the bone, and ensure the temperature reaches 165°F (74°C). This eliminates guesswork and ensures the chicken is safe to eat.
Can I rely on cooking time alone to determine doneness?
No, cooking time is only a guideline. Ovens vary, and chicken sizes differ, so always confirm doneness with a thermometer. Relying solely on time can lead to undercooked or overcooked chicken.
Is it normal for chicken near the bone to look pink?
A slight pink hue near the bone can be normal, especially in younger birds, as bones can retain heat and affect color. However, the meat itself should not be pink. Always check the temperature to be sure.
How do I prevent my roast chicken from drying out?
To prevent dryness, avoid overcooking by using a thermometer and removing the chicken at 160°F (71°C) to account for carryover cooking. Brining or basting can also help retain moisture.
Should I truss my roast chicken?
Yes, trussing helps the chicken cook evenly by keeping the legs and wings close to the body. It prevents the breast from drying out and promotes uniform browning.
Can I roast a chicken from frozen?
It’s not recommended to roast a chicken from frozen, as it can lead to uneven cooking and food safety risks. Always thaw the chicken in the refrigerator before roasting.


