
Perfectly baked chicken wings are crispy outside and juicy inside—but only if you bake them the right way. The key is balancing oven temperature, timing, and preparation to avoid dry or soggy results. Whether you’re using fresh or frozen wings, this guide covers everything you need to nail it every time.
Key Takeaways
- Bake chicken wings at 400°F (200°C) for 45–50 minutes for optimal crispiness and doneness. This temperature renders fat effectively while keeping the meat tender.
- Pat wings completely dry before baking to ensure maximum crispiness. Moisture is the enemy of crunch—dry skin crisps up faster and better.
- Use a wire rack on a baking sheet to allow air circulation. Elevating the wings prevents steaming and promotes even browning on all sides.
- Flip wings halfway through baking for uniform crispiness. This simple step ensures both sides get equally crispy without burning.
- Let wings rest for 3–5 minutes after baking before saucing. Resting helps redistribute juices and prevents sogginess when tossed in sauce.
- For extra crispiness, broil for 2–3 minutes at the end. A quick broil adds a golden finish and extra crunch without overcooking.
- Frozen wings need extra time—add 10–15 minutes to baking time. Always thaw in the fridge overnight when possible for best results.
Quick Answers to Common Questions
How long should you bake chicken wings at 400°F?
Bake chicken wings at 400°F (200°C) for 45–50 minutes, flipping them halfway through, until golden and crispy with an internal temperature of 165°F (74°C).
Can you bake frozen chicken wings?
Yes, you can bake frozen wings, but add 10–15 minutes to the baking time. For best results, thaw them in the fridge overnight first.
Do you need to flip chicken wings when baking?
Yes, flipping wings halfway through baking ensures even crispiness on both sides and prevents burning.
What temperature should chicken wings reach?
Chicken wings should reach an internal temperature of 165°F (74°C) to be safe to eat. Use a meat thermometer to check.
How do you keep baked wings crispy?
Use a wire rack, don’t overcrowd the pan, let them rest before saucing, and serve immediately. Avoid microwaving leftovers.
📑 Table of Contents
- How Long Should You Bake Chicken Wings for Perfect Crispiness?
- Why Baking Beats Frying for Crispy Wings
- The Science Behind Crispy Baked Wings
- Step-by-Step Guide to Baking Perfect Wings
- Baking Times for Different Wing Types
- Pro Tips for Extra Crispiness
- Common Mistakes to Avoid
- Saucing and Serving Your Baked Wings
- Conclusion
How Long Should You Bake Chicken Wings for Perfect Crispiness?
There’s nothing quite like biting into a perfectly baked chicken wing—golden, crispy skin giving way to tender, juicy meat. But achieving that ideal texture isn’t just about tossing wings on a pan and hoping for the best. It’s a science, and the secret lies in knowing exactly how long you should bake chicken wings to get that restaurant-quality crunch at home.
Whether you’re hosting game day, prepping for a family dinner, or just craving a flavorful snack, baking wings is one of the easiest and healthiest ways to enjoy them. No deep fryer needed—just your oven, a little prep, and the right timing. But here’s the catch: bake them too long, and they’ll dry out. Too short, and they’ll be rubbery or undercooked. So how do you hit that sweet spot?
In this guide, we’ll walk you through everything you need to know about baking chicken wings for perfect crispiness. From ideal oven temperatures and baking times to pro tips for extra crunch, you’ll learn how to make wings that are crispy on the outside, juicy on the inside, and absolutely irresistible. Let’s get started.
Why Baking Beats Frying for Crispy Wings
Many people assume that frying is the only way to get truly crispy chicken wings. While deep-fried wings are undeniably delicious, baking can actually produce equally crispy results—without the mess, oil, and extra calories. The key is understanding how heat and airflow work together in the oven to create that coveted crunch.

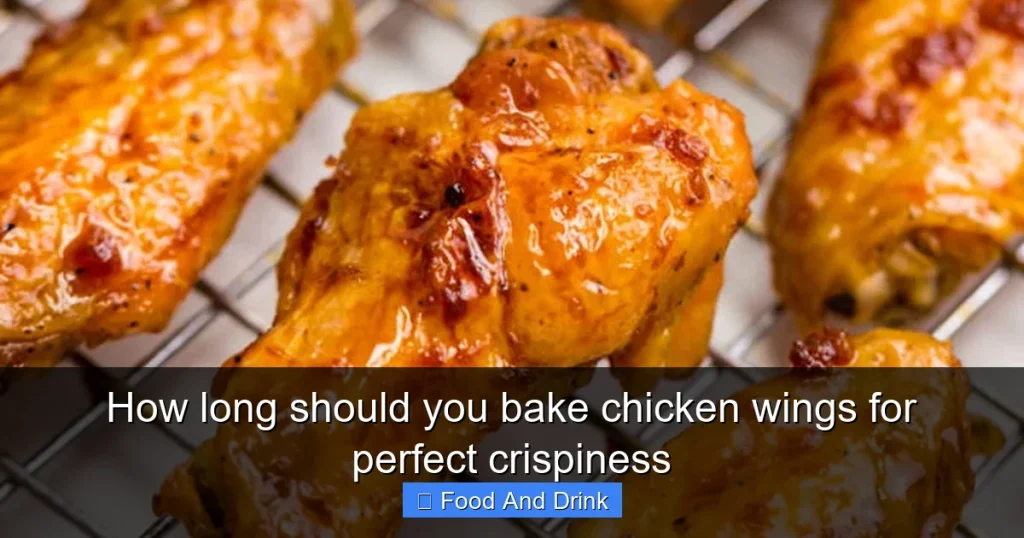
Visual guide about How long should you bake chicken wings for perfect crispiness
Image source: kitchenseer.com
How Baking Creates Crispiness
When you bake chicken wings, the dry heat of the oven slowly renders the fat beneath the skin. As the fat melts away, the skin tightens and begins to crisp up. At the same time, the moisture inside the meat evaporates, allowing the exterior to dry out and turn golden brown. This process is similar to roasting a chicken, but faster because wings are smaller and have more surface area relative to their size.
Advantages of Baking Over Frying
Baking offers several benefits over frying. First, it’s healthier—no submerging in oil means fewer calories and less saturated fat. Second, it’s safer and cleaner. No hot oil splatters, no smoke alarms, and no greasy stovetop to clean. Third, baking is more hands-off. Once the wings go in the oven, you can focus on making sauce, setting the table, or just relaxing.
But the real advantage? Consistency. With frying, it’s easy to overcook or undercook wings, especially if you’re not experienced. Baking, when done correctly, gives you predictable, even results every time. And with a few simple techniques, you can make baked wings that rival—or even surpass—fried ones in crispiness.
The Science Behind Crispy Baked Wings
To understand how long you should bake chicken wings, it helps to know what’s happening at a molecular level. Crispiness isn’t just about heat—it’s about moisture, fat, and airflow. Let’s break it down.

Visual guide about How long should you bake chicken wings for perfect crispiness
Image source: shungrill.com
Moisture: The Enemy of Crispiness
Water is the biggest obstacle to crispy skin. When wings are wet, the oven steams them instead of crisping them. That’s why drying the wings thoroughly before baking is so important. Even a little moisture on the skin can prevent browning and leave you with rubbery, soggy results.
To maximize crispiness, pat the wings dry with paper towels right out of the package. For even better results, let them air-dry in the fridge for an hour or two (or overnight). This draws out surface moisture and firms up the skin, setting the stage for a golden, crunchy finish.
Fat Rendering: The Secret to Golden Skin
Chicken wings have a high fat content, especially under the skin. When heated, this fat melts and drips away, leaving behind crispy, flavorful skin. The key is giving the oven enough time and the right temperature to render that fat slowly and evenly.
If you bake wings at too low a temperature, the fat won’t render properly, and the skin will stay soft. Too high, and the outside burns before the inside is done. That’s why 400°F (200°C) is the sweet spot—it’s hot enough to crisp the skin but gentle enough to cook the meat through without drying it out.
Airflow: Why Elevation Matters
Heat needs to circulate around the wings to crisp them evenly. If wings sit directly on a baking sheet, the bottom can steam in its own juices, leading to uneven browning. That’s where a wire rack comes in.
Placing wings on a wire rack set over a baking sheet allows hot air to flow underneath, crisping the bottom just like the top. It also lets rendered fat drip away, preventing sogginess. Think of it like a mini rotisserie—every angle gets exposed to heat, resulting in uniform crispiness.
Step-by-Step Guide to Baking Perfect Wings
Now that you know the science, let’s put it into practice. Follow these steps to bake chicken wings that are crispy, juicy, and full of flavor.

Visual guide about How long should you bake chicken wings for perfect crispiness
Image source: tipbuzz.com
Step 1: Prep the Wings
Start by separating the wings into drumettes and flats if they aren’t already. Remove the wing tips (you can save them for stock) and pat everything dry with paper towels. For extra crispiness, let the wings air-dry uncovered in the fridge for 1–2 hours, or ideally overnight.
Step 2: Season Simply
You don’t need a complicated marinade for great wings. A light coating of oil (like olive or avocado oil) helps the seasoning stick and promotes browning. Then, sprinkle with salt, pepper, and any other dry spices you like—garlic powder, paprika, or cayenne work well. Toss to coat evenly.
Step 3: Arrange on a Rack
Place a wire rack on a rimmed baking sheet. Arrange the wings in a single layer, skin-side up, with a little space between each. This ensures even cooking and prevents sticking.
Step 4: Bake at 400°F (200°C)
Pop the wings into a preheated oven at 400°F (200°C). Bake for 45–50 minutes, flipping them halfway through. This flip is crucial—it ensures both sides crisp up evenly.
Step 5: Broil for Extra Crisp (Optional)
In the last 2–3 minutes, switch the oven to broil and move the wings to the top rack. Watch closely—broiling adds a beautiful golden finish and extra crunch. Just don’t walk away, or they’ll burn.
Step 6: Rest Before Saucing
Once the wings are done, let them rest for 3–5 minutes. This allows the juices to redistribute, keeping the meat moist. If you sauce them right away, the hot wings can make the sauce slide off or turn soggy.
Baking Times for Different Wing Types
Not all wings are created equal. The size, thickness, and preparation method can all affect how long you should bake chicken wings. Here’s a quick reference guide.
Fresh Chicken Wings
Fresh wings are the easiest to work with. They’re already thawed and ready to go. Bake at 400°F (200°C) for 45–50 minutes, flipping halfway. They should reach an internal temperature of 165°F (74°C) and have golden, crispy skin.
Frozen Chicken Wings
Frozen wings need extra time. You can bake them from frozen, but add 10–15 minutes to the total time. Start checking at 55 minutes. For best results, thaw them in the fridge overnight first. This ensures even cooking and better crispiness.
Party Wings vs. Whole Wings
Party wings (already cut into drumettes and flats) cook faster than whole wings. If you’re using whole wings, you may need an extra 5–10 minutes. Always check the internal temperature to be sure.
Thick vs. Thin Wings
Some wings are plumper than others. Thicker drumettes may need a few extra minutes, while smaller flats cook faster. Rotate the pan halfway through and keep an eye on the color—golden brown is your goal.
Pro Tips for Extra Crispiness
Want to take your baked wings to the next level? These expert tips will help you achieve that perfect crunch every time.
Use Baking Powder (Yes, Really!)
Here’s a little-known trick: toss wings with a teaspoon of baking powder (not baking soda!) before seasoning. Baking powder draws out moisture and raises the skin’s pH, which helps it brown and crisp up faster. Just be sure to rinse off any residue if you’re sensitive to the taste.
Flip Them Halfway
Don’t skip the flip! Turning the wings at the 20–25 minute mark ensures both sides get equally crispy. Use tongs to avoid piercing the skin, which can let juices escape and dry out the meat.
Don’t Overcrowd the Pan
Give each wing space to breathe. Overcrowding traps steam and leads to uneven cooking. If you have too many wings, bake them in batches or use two pans.
Let Them Rest
Resting isn’t just for steaks. Letting wings sit for a few minutes after baking helps the skin stay crispy and the meat stay juicy. It also makes saucing easier—the wings won’t fall apart when tossed.
Serve Immediately
Crispy wings are best eaten hot and fresh. If you need to hold them, place them on a wire rack (not a plate) to prevent sogginess. A low oven (200°F/95°C) can keep them warm without drying them out.
Common Mistakes to Avoid
Even with the best intentions, it’s easy to make mistakes that ruin your wings. Here are the most common pitfalls and how to avoid them.
Baking at the Wrong Temperature
Too low, and the wings steam instead of crisp. Too high, and they burn. Stick to 400°F (200°C) for the best balance of crispiness and doneness.
Not Drying the Wings
Wet wings = soggy wings. Always pat them dry, and consider air-drying in the fridge for an hour or more.
Skipping the Wire Rack
Baking directly on a sheet pan traps moisture underneath. A wire rack is essential for even crisping.
Over-saucing
Too much sauce can make wings soggy. Toss them lightly just before serving, or serve sauce on the side for dipping.
Cutting Corners on Time
Rushing the process leads to undercooked or unevenly cooked wings. Use a meat thermometer to check for 165°F (74°C) in the thickest part.
Saucing and Serving Your Baked Wings
The final step in making perfect wings is saucing and serving them right. Here’s how to do it without sacrificing crispiness.
When to Sauce
Always sauce wings after they’ve rested for 3–5 minutes. Hot wings can make sauce slide off or turn greasy. Toss them gently in a bowl with your favorite sauce—buffalo, honey garlic, BBQ, or teriyaki.
Keep It Light
A light coating is all you need. Over-saucing weighs down the wings and makes them soggy. Use about ½ to ¾ cup of sauce per pound of wings.
Serve with Sides
Pair your wings with classic sides like celery sticks, carrot sticks, and blue cheese or ranch dressing. A cold beer or lemonade makes the perfect accompaniment.
Store and Reheat Properly
Store leftover wings in an airtight container in the fridge for up to 3 days. To reheat, place them on a wire rack in a 375°F (190°C) oven for 10–15 minutes until crispy and hot. Avoid the microwave—it makes them rubbery.
Conclusion
Knowing how long you should bake chicken wings is the foundation of making them crispy, juicy, and delicious. With the right temperature (400°F), proper prep (dry skin, wire rack), and timing (45–50 minutes), you can achieve restaurant-quality results at home—no fryer required.
Remember, crispiness comes from dry heat, airflow, and patience. Don’t rush the process, and always let your wings rest before saucing. Whether you’re making them for a party or a quiet night in, these tips will help you bake wings that are golden, crunchy, and impossible to resist.
So preheat that oven, grab your wings, and get baking. Your taste buds will thank you.
Frequently Asked Questions
Should I boil chicken wings before baking?
No, boiling is not necessary and can make wings soggy. Baking from raw (or thawed) is the best way to achieve crispiness.
Can I use baking soda instead of baking powder?
No, baking soda is too strong and can leave a metallic taste. Use baking powder in small amounts (1 tsp per pound) for extra crispiness.
How do I know when my wings are done?
The wings are done when they reach 165°F (74°C) internally and the skin is golden brown and crispy. Use a meat thermometer for accuracy.
Can I bake wings without a wire rack?
You can, but the bottom may not crisp as well. A wire rack is highly recommended for even browning and airflow.
Why are my baked wings soggy?
Sogginess is usually caused by excess moisture. Make sure to pat wings dry, use a wire rack, and avoid overcrowding the pan.
How long do baked wings last in the fridge?
Baked wings last up to 3 days in an airtight container in the fridge. Reheat in the oven to restore crispiness.


