Grilling chicken on the stove is a fast, convenient way to achieve delicious, restaurant-quality results without firing up the outdoor grill. With the right technique and timing, you can cook juicy, evenly browned chicken in under 20 minutes—perfect for busy weeknights or last-minute meals.
Grilling chicken on the stove might sound like a contradiction—after all, grilling usually brings to mind smoky flames, charcoal, and summer barbecues. But the truth is, you can absolutely “grill” chicken indoors using your stovetop, and it’s one of the most efficient ways to cook this versatile protein. Whether you’re dealing with a sudden rainstorm, living in an apartment without a backyard, or simply want a quick dinner without the hassle of outdoor setup, stovetop grilling delivers impressive results.
The secret lies in mimicking the high-heat, direct-contact cooking method of an outdoor grill. Instead of flames, you use a heavy-bottomed skillet—preferably cast iron—to create those beautiful grill marks and a crispy, caramelized exterior. And while it’s not technically “grilling” in the traditional sense, the effect is remarkably similar: juicy, flavorful chicken with a satisfying char. Plus, you can do it year-round, regardless of the weather.
But here’s the catch: timing is everything. Overcook chicken on the stove, and you end up with dry, rubbery meat. Undercook it, and you risk foodborne illness. So, how long do you grill chicken on the stove? The answer depends on the cut, thickness, heat level, and whether you’re using bone-in or boneless pieces. In this guide, we’ll walk you through everything you need to know to master stovetop chicken grilling—from prep to plating—so you can serve up perfect, restaurant-worthy chicken every single time.
Key Takeaways
- Prep is key: Pat chicken dry, season well, and bring to room temperature for even cooking.
- Use a heavy skillet: Cast iron or stainless steel retains heat and creates a perfect sear.
- Medium-high heat works best: Too hot burns the outside; too low steams the chicken.
- Cook bone-in thighs 6–8 minutes per side: They’re forgiving and stay juicy longer.
- Boneless breasts need 5–7 minutes per side: Use a meat thermometer to avoid overcooking.
- Rest before slicing: Let chicken rest 5 minutes to lock in juices.
- Internal temperature matters most: Safe to eat at 165°F (74°C), but 160°F (71°C) with resting is ideal.
Quick Answers to Common Questions
How long do you grill boneless chicken breasts on the stove?
Boneless, skinless chicken breasts typically take 5–7 minutes per side on medium-high heat. Use a meat thermometer to ensure they reach 160°F (71°C) internally before resting.
Can you grill chicken on a non-stick pan?
Yes, but non-stick pans don’t sear as well as cast iron or stainless steel. Use medium heat and avoid metal utensils to protect the coating.
Should I cover the chicken while grilling on the stove?
Only if you want to speed up cooking or keep the chicken moist. Covering prevents browning, so use it sparingly.
How do I prevent chicken from sticking to the skillet?
Preheat the skillet properly, use enough oil, and don’t move the chicken until it releases naturally from the pan.
Can I use a grill pan on the stove?
Absolutely! A stovetop grill pan with ridges mimics outdoor grilling and creates attractive grill marks. Preheat it well and follow the same timing guidelines.
📑 Table of Contents
Why Grill Chicken on the Stove?
You might be wondering: why bother grilling chicken on the stove when you could just bake, pan-fry, or air-fry it? The answer is simple: flavor and texture. Stovetop grilling gives you that signature sear—the Maillard reaction—that transforms plain chicken into something deeply savory and aromatic. It’s the same chemical process that happens on an outdoor grill, creating complex flavors through browning and caramelization.
Another major advantage? Speed. While baking chicken in the oven can take 30–40 minutes, stovetop grilling often takes half that time. You get fast, high-heat cooking that locks in moisture while developing a crispy exterior. And because you’re using direct heat, you don’t need to preheat an entire oven—just your skillet. That means less energy use and faster cleanup.
Stovetop grilling is also incredibly versatile. You can use it for everything from chicken breasts and thighs to drumsticks, wings, and even skewers (with a little creativity). It’s perfect for small kitchens, dorm rooms, or anyone who wants to cook like a pro without fancy equipment. Plus, it’s a great skill to have when outdoor grilling isn’t an option—like during winter, in urban apartments, or when you’re short on time.
Indoor Grilling vs. Outdoor Grilling
While both methods aim to cook food over high heat, there are some key differences between indoor stovetop grilling and traditional outdoor grilling. Outdoor grills use open flames or hot coals, which impart a distinct smoky flavor that’s hard to replicate indoors. They also allow for higher temperatures and better airflow, which can lead to more pronounced grill marks and char.
Indoor stovetop grilling, on the other hand, relies on conduction—direct contact between the chicken and a hot pan. This method gives you excellent control over heat and cooking time, making it easier to avoid overcooking. You also don’t have to worry about flare-ups or uneven heat zones. However, you’ll miss out on that smoky aroma unless you use a smoker box or liquid smoke.
That said, stovetop grilling has its own advantages. It’s more consistent, especially in colder months when outdoor grills can struggle to maintain temperature. It’s also safer and more convenient—no need to monitor flames or deal with wind. And with the right technique, you can still achieve a beautiful crust and juicy interior that rivals outdoor results.
Equipment You’ll Need
To grill chicken on the stove effectively, you don’t need a lot of fancy gear. But having the right tools makes a big difference in the outcome. Here’s what you’ll want to have on hand:
– **Heavy-bottomed skillet:** Cast iron is the gold standard for stovetop grilling. It retains heat evenly and develops a great sear. Stainless steel skillets also work well, especially if they have a thick base.
– **Tongs:** Use long-handled tongs to flip the chicken without piercing the meat, which can cause juices to escape.
– **Meat thermometer:** This is non-negotiable. Relying on time alone can lead to overcooked or undercooked chicken. A digital instant-read thermometer gives you accurate readings in seconds.
– **Paper towels:** For patting the chicken dry before cooking—this is crucial for browning.
– **Oil with a high smoke point:** Use avocado oil, canola oil, or grapeseed oil. Avoid olive oil for high-heat cooking, as it can burn.
Optional but helpful: a splatter screen to reduce mess, and a meat mallet if you’re pounding chicken breasts to even thickness.
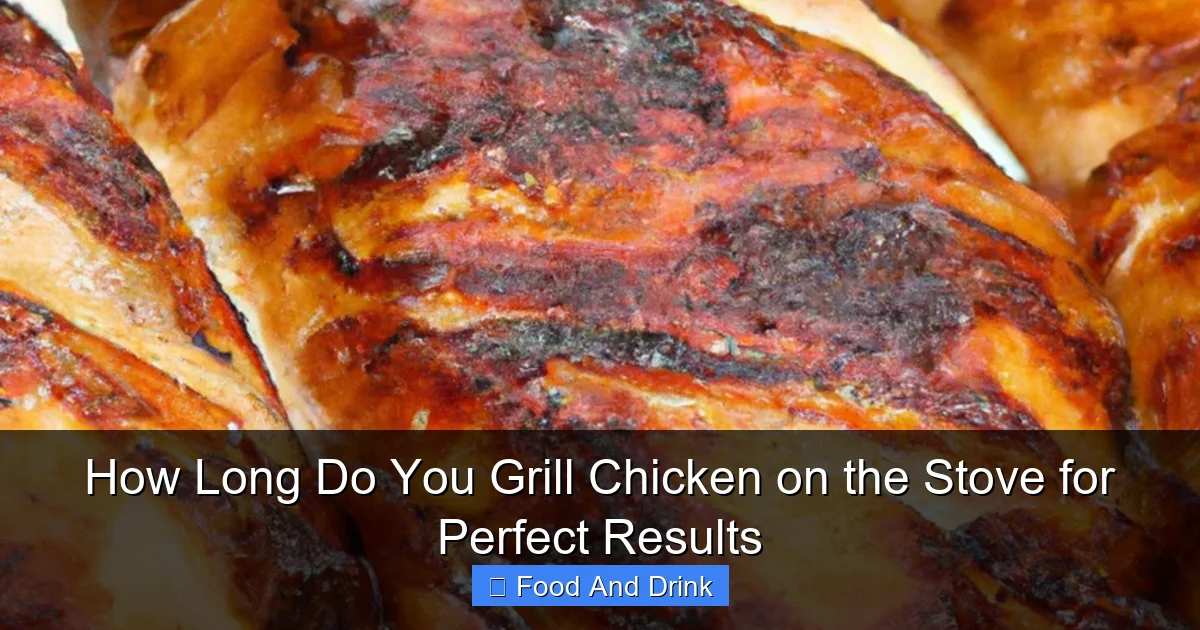
Choosing the Right Chicken Cut
Visual guide about How Long Do You Grill Chicken on the Stove for Perfect Results
Image source: grillmasterhq.com
Not all chicken is created equal when it comes to stovetop grilling. The cut you choose affects cooking time, juiciness, and overall flavor. Here’s a breakdown of the most popular options and how they perform on the stove.
Boneless, Skinless Chicken Breasts
These are the most common cut for quick meals, but they’re also the trickiest to grill without drying out. Because they have no fat or skin to keep them moist, they require careful timing and temperature control. Boneless breasts are lean and cook quickly, which means they can go from perfectly juicy to tough and rubbery in just a few minutes.
To get the best results, look for breasts that are uniform in thickness. If they’re uneven, place them between two sheets of plastic wrap and gently pound the thicker end with a meat mallet until they’re even. This ensures even cooking and prevents the thinner parts from drying out while the thicker parts finish cooking.
When grilling boneless breasts on the stove, aim for medium-high heat. Cook them for 5–7 minutes per side, depending on thickness. A 1-inch thick breast will take about 6 minutes per side. Always use a meat thermometer to check doneness—remove the chicken from the heat when it reaches 160°F (71°C), as it will continue to cook while resting and reach the safe 165°F (74°C) internally.
Bone-In, Skin-On Chicken Thighs
If you want juicy, flavorful chicken with minimal effort, bone-in, skin-on thighs are your best bet. The bone conducts heat slowly, helping the meat cook evenly, while the skin crisps up beautifully and adds richness. Thighs also have more fat, which keeps them moist even if you slightly overcook them.
These cuts are more forgiving than breasts and are ideal for beginners. They take longer to cook—about 6–8 minutes per side on medium-high heat—but the results are consistently tender and delicious. The skin should be golden brown and crispy, and the meat should pull away easily from the bone.
For extra flavor, score the skin lightly with a knife before cooking. This helps the fat render out and allows seasonings to penetrate deeper. You can also start them skin-side down to crisp the skin first, then flip to finish cooking.
Chicken Drumsticks and Wings
Drumsticks and wings are excellent for stovetop grilling, especially if you’re aiming for a crispy exterior. Drumsticks are similar to thighs in texture and cooking time—about 7–9 minutes per side. Wings cook faster, usually 4–6 minutes per side, but they can burn easily due to their small size and high skin-to-meat ratio.
Because wings have so much skin, they benefit from a two-step cooking method: start them skin-side down over medium heat to render the fat, then increase the heat to crisp them up. You can also finish them under the broiler for extra crunch.
These cuts are great for marinades and dry rubs, as the skin holds onto flavors well. Just be sure to pat them dry before cooking to avoid splattering oil.
Ground Chicken Patties
Yes, you can even grill ground chicken on the stove! Form the meat into patties, season well, and cook them like burgers. Use medium heat to prevent burning, and cook for about 4–5 minutes per side. Ground chicken is lean, so avoid pressing down on the patties with your spatula—this squeezes out juices and leads to dryness.
These patties are perfect for sandwiches, salads, or tacos. Just make sure they reach 165°F (74°C) internally before serving.
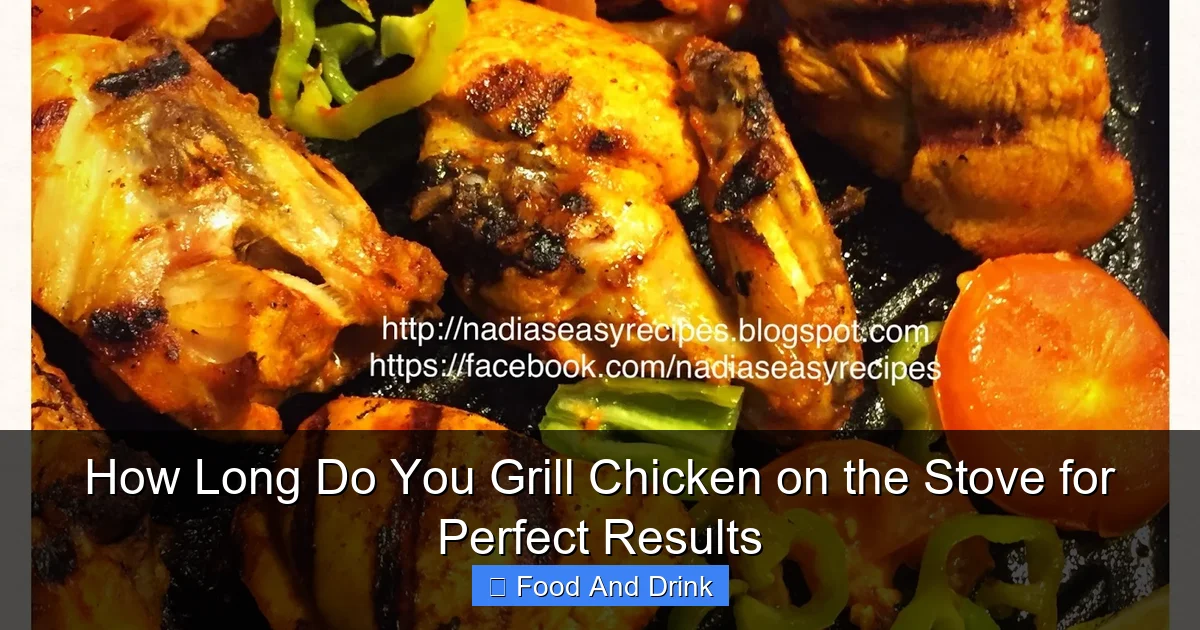
Step-by-Step Guide to Grilling Chicken on the Stove

Visual guide about How Long Do You Grill Chicken on the Stove for Perfect Results
Image source: c8.alamy.com
Now that you know which cuts work best, let’s walk through the process of grilling chicken on the stove from start to finish. Follow these steps for consistently great results.
Step 1: Prep the Chicken
Start by removing the chicken from the refrigerator about 20–30 minutes before cooking. This allows it to come to room temperature, which promotes even cooking. Cold chicken straight from the fridge can cause the exterior to overcook before the interior is done.
While the chicken rests, pat it dry with paper towels. Moisture is the enemy of browning—water on the surface turns to steam, which prevents the Maillard reaction from occurring. Dry chicken = better sear.
Season generously with salt, pepper, and any other spices or herbs you like. For extra flavor, marinate the chicken for at least 30 minutes (or up to 24 hours) in the fridge. Just be sure to pat it dry again before cooking.
Step 2: Preheat the Skillet
Place your skillet on the stove over medium-high heat. Let it heat up for 3–5 minutes before adding oil. You want the pan to be hot—hot enough that a drop of water sizzles and evaporates immediately.
Add 1–2 tablespoons of oil and swirl to coat the bottom. The oil should shimmer but not smoke. If it starts smoking, reduce the heat slightly—you don’t want to burn the oil, as it will impart a bitter taste.
Step 3: Cook the Chicken
Place the chicken in the skillet in a single layer, leaving space between pieces so they don’t steam. Don’t overcrowd the pan—cook in batches if necessary.
For boneless breasts: Cook for 5–7 minutes on the first side without moving them. This allows a crust to form. Flip and cook for another 5–7 minutes, or until the internal temperature reaches 160°F (71°C).
For bone-in thighs: Start skin-side down and cook for 6–8 minutes until the skin is golden and crispy. Flip and cook for another 6–8 minutes, or until the meat reaches 165°F (74°C).
Avoid flipping too often—this prevents browning. Let the chicken develop a nice crust before turning.
Step 4: Check for Doneness
Use a meat thermometer to check the internal temperature. Insert it into the thickest part of the meat, avoiding bone or fat. The safe internal temperature for chicken is 165°F (74°C), but many chefs prefer to pull it off the heat at 160°F (71°C) and let it rest. The residual heat will carry it to 165°F while resting, and the chicken will stay juicier.
If you don’t have a thermometer, you can check doneness by cutting into the thickest part. The meat should be white with no pink, and the juices should run clear.
Step 5: Rest the Chicken
Once cooked, transfer the chicken to a plate or cutting board and let it rest for 5 minutes. This allows the juices to redistribute throughout the meat, resulting in a more flavorful and tender bite. Cover loosely with foil to keep it warm.
Step 6: Serve and Enjoy
Slice, shred, or serve whole—your grilled chicken is ready to enjoy! Pair it with roasted vegetables, a fresh salad, or your favorite grain. Leftovers make excellent additions to soups, wraps, or grain bowls.
Timing Guide: How Long to Grill Chicken on the Stove
Visual guide about How Long Do You Grill Chicken on the Stove for Perfect Results
Image source: 4.bp.blogspot.com
One of the most common questions home cooks have is: “How long do you grill chicken on the stove?” The answer varies depending on the cut, thickness, and heat level. Here’s a quick reference guide to help you nail the timing every time.
Boneless, Skinless Chicken Breasts
– **1-inch thick:** 5–7 minutes per side
– **1.5-inch thick:** 7–9 minutes per side
– **Pounded to ½-inch:** 3–4 minutes per side
Always check internal temperature: remove at 160°F (71°C), rest to 165°F (74°C).
Bone-In, Skin-On Chicken Thighs**
– **Medium thighs:** 6–8 minutes per side
– **Large thighs:** 8–10 minutes per side
Cook skin-side down first for crispy skin. Internal temp should reach 165°F (74°C).
Chicken Drumsticks**
– **Standard size:** 7–9 minutes per side
– **Extra large:** 9–11 minutes per side
Rotate once for even browning. Check for doneness by piercing near the bone—juices should run clear.
Chicken Wings**
– **Whole wings:** 4–6 minutes per side
– **Drumettes or flats:** 3–5 minutes per side
Start skin-side down over medium heat, then increase to medium-high to crisp.
Ground Chicken Patties**
– **½-inch thick:** 4–5 minutes per side
– **¾-inch thick:** 5–6 minutes per side
Avoid pressing down. Cook until internal temp reaches 165°F (74°C).
Tips for Adjusting Cooking Time
– **Thicker cuts need lower heat and longer time:** If your chicken is thicker than average, reduce the heat to medium and extend cooking time to prevent burning.
– **Cold chicken takes longer:** If you forget to bring it to room temperature, add 1–2 minutes per side.
– **Crowded pans lower temperature:** Cook in batches if needed to maintain heat.
– **Use a lid to speed up cooking:** Covering the skillet traps heat and can reduce cooking time by 1–2 minutes per side, but avoid it if you want a crispy exterior.
Common Mistakes to Avoid
Even experienced cooks can make mistakes when grilling chicken on the stove. Here are some common pitfalls and how to avoid them.
Overcooking the Chicken
This is the #1 mistake. Overcooked chicken is dry, tough, and unappetizing. The solution? Use a meat thermometer and pull the chicken off the heat at 160°F (71°C). It will continue to cook while resting.
Not Preheating the Skillet
A cold pan leads to steaming instead of searing. Always preheat your skillet for at least 3–5 minutes before adding oil and chicken.
Using the Wrong Oil
Oils with low smoke points, like extra virgin olive oil, can burn and create a bitter taste. Stick to high-smoke-point oils like avocado, canola, or grapeseed.
Flipping Too Early or Too Often
Let the chicken develop a crust before flipping. Constant flipping prevents browning and can tear the skin.
Skipping the Resting Step
Resting allows juices to redistribute. Skipping this step means you’ll lose flavor and moisture when you cut into the chicken.
Not Seasoning Properly
Chicken needs salt—and plenty of it. Season at least 15 minutes before cooking, or use a dry brine for deeper flavor.
Flavor-Boosting Tips
Want to take your stovetop grilled chicken to the next level? Try these flavor-enhancing techniques.
Marinate for Depth
Marinating adds moisture and flavor. Use acidic ingredients like lemon juice, vinegar, or yogurt to tenderize, and add herbs, garlic, and spices for aroma. Marinate for at least 30 minutes, or up to 24 hours.
Use a Dry Rub
Dry rubs are quick and effective. Mix salt, pepper, paprika, garlic powder, onion powder, and brown sugar for a sweet-smoky crust. Apply 15–30 minutes before cooking.
Add Herbs and Aromatics
Toss whole sprigs of rosemary, thyme, or bay leaves into the skillet while cooking. They’ll infuse the chicken with subtle fragrance.
Finish with Butter and Herbs
In the last minute of cooking, add a tablespoon of butter and a few sprigs of fresh herbs to the skillet. Baste the chicken for a rich, aromatic finish.
Deglaze the Pan
After removing the chicken, add a splash of broth, wine, or lemon juice to the hot pan. Scrape up the browned bits (fond) and reduce into a quick pan sauce.
Conclusion
Grilling chicken on the stove is a fast, flavorful, and convenient cooking method that delivers juicy, restaurant-quality results. Whether you’re working with boneless breasts, bone-in thighs, or drumsticks, the key is proper prep, the right heat, and precise timing. By following the guidelines in this guide—especially using a meat thermometer and letting the chicken rest—you’ll avoid common pitfalls and serve up perfect chicken every time.
Remember, the question isn’t just “how long do you grill chicken on the stove?”—it’s also about how you cook it. With the right technique, your stovetop can become your go-to grill, no backyard required. So fire up that skillet, season your chicken, and enjoy the sizzle of success.
🎥 Related Video: How to Cook Chicken on the Stovetop #shorts
📺 Jessica Gavin
Learn how to cook chicken breasts on the stovetop with juicy and tender results! This is my go-to method for a quick and healthy …
Frequently Asked Questions
What’s the best pan for grilling chicken on the stove?
Cast iron skillets are ideal because they retain heat evenly and create a great sear. Stainless steel with a thick base also works well.
How do I know when chicken is done on the stove?
Use a meat thermometer to check the internal temperature. Chicken is safe to eat at 165°F (74°C), but many chefs pull it at 160°F (71°C) and let it rest.
Can I grill frozen chicken on the stove?
It’s not recommended. Frozen chicken cooks unevenly and can lead to food safety issues. Always thaw chicken in the fridge before cooking.
Why is my chicken dry after stovetop grilling?
Overcooking is the most common cause. Use a thermometer, avoid high heat, and let the chicken rest before slicing to retain moisture.
Do I need to oil the chicken before grilling?
No—oil the pan, not the chicken. Adding oil directly to the meat can cause splattering and uneven browning.
Can I add BBQ sauce while grilling chicken on the stove?
Yes, but add it in the last 1–2 minutes of cooking. BBQ sauce contains sugar, which can burn at high heat.