Grilling chicken breast on the stove is a fast, foolproof method for tender, juicy meat without firing up the outdoor grill. With the right pan, heat control, and seasoning, you can achieve restaurant-quality results in under 20 minutes—ideal for busy weeknights or last-minute meals.
Key Takeaways
- Use a heavy-bottomed skillet: Cast iron or stainless steel retains heat evenly, creating a perfect sear that locks in moisture.
- Pat chicken dry before cooking: Removing surface moisture ensures better browning and prevents steaming.
- Season generously and let rest: Salt and spices work best when applied 15–30 minutes before cooking to enhance flavor and texture.
- Cook over medium-high heat: High heat sears the outside; medium heat finishes cooking without drying out the interior.
- Use a meat thermometer: Chicken is safe and juicy at 165°F (74°C)—overcooking leads to dryness.
- Rest before slicing: Letting chicken rest for 5 minutes redistributes juices, keeping every bite moist.
- Add flavor with butter and herbs: Basting with melted butter and fresh herbs during the last minute adds richness and aroma.
Quick Answers to Common Questions
Can I use frozen chicken breast?
It’s best to thaw chicken completely before cooking. Frozen chicken lowers the pan’s temperature and leads to uneven cooking. If you must cook from frozen, use lower heat and extend cooking time, but results won’t be as good.
Do I need to pound the chicken?
Pounding ensures even thickness, which promotes uniform cooking. If your chicken is already even or you’re using thin-cut breasts, you can skip this step.
Can I use olive oil?
Yes, but use high-quality extra virgin olive oil sparingly and at medium heat. For high-heat searing, avocado or canola oil is better due to their higher smoke points.
How do I know when the pan is hot enough?
Sprinkle a few drops of water into the pan. If they sizzle and evaporate immediately, the pan is ready. If they just sit there, wait a bit longer.
Can I make a sauce in the same pan?
Absolutely! After removing the chicken, deglaze the pan with broth, wine, or lemon juice, scrape up the browned bits, and simmer with herbs or butter for a quick pan sauce.
📑 Table of Contents
- Why Stovetop Grilling Is the Secret to Perfect Chicken Breast
- Choosing the Right Pan for Stovetop Grilling
- Prepping the Chicken: The Foundation of Juicy Results
- Mastering the Cooking Process: Heat, Time, and Technique
- Resting and Serving: The Final Touch
- Common Mistakes and How to Avoid Them
- Flavor Variations and Marinades
- Conclusion
Why Stovetop Grilling Is the Secret to Perfect Chicken Breast
If you’ve ever ended up with dry, rubbery chicken breast, you’re not alone. It’s one of the most common kitchen frustrations—especially when you’re trying to eat healthy and lean proteins. But here’s the good news: you don’t need a backyard grill or fancy equipment to cook chicken breast that’s juicy, flavorful, and full of texture. The best way to grill chicken breast on stove is simpler than you think, and it delivers consistent results every single time.
Stovetop grilling—often called pan-searing—mimics the high-heat environment of an outdoor grill but gives you far more control. You can adjust the temperature instantly, monitor doneness with precision, and infuse flavor through basting and aromatics. Plus, it’s fast. In under 20 minutes, you can have perfectly cooked chicken ready to serve over salads, rice, pasta, or veggies. No waiting for the grill to heat up, no flare-ups, and no mess outside.
What makes stovetop grilling so effective is the direct contact between the chicken and the hot surface. This creates a beautiful golden-brown crust—known as the Maillard reaction—that adds depth of flavor and locks in moisture. When done right, the outside is crispy and caramelized, while the inside stays tender and succulent. And the best part? You can do it with tools you already have in your kitchen: a good skillet, a little oil, and a meat thermometer.
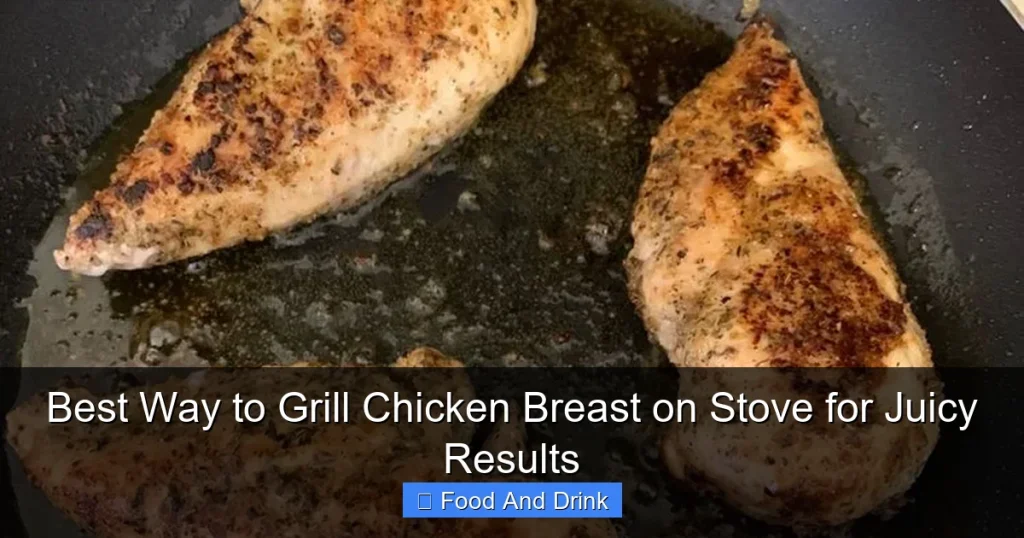
Choosing the Right Pan for Stovetop Grilling
Visual guide about Best Way to Grill Chicken Breast on Stove for Juicy Results
Image source: stellanspice.com
Not all pans are created equal when it comes to grilling chicken breast on the stove. The type of skillet you use can make or break your results. For the best sear and even cooking, you’ll want a pan that heats evenly, retains heat well, and can handle high temperatures.
Cast Iron Skillet: The Gold Standard
Cast iron is the undisputed champion of stovetop grilling. Its thick, heavy base distributes heat uniformly across the surface, preventing hot spots that can lead to uneven cooking. Once heated, cast iron holds that heat steady—even when you add cold chicken—so you get a consistent sear from edge to edge.
Another advantage? Cast iron develops a natural non-stick surface over time, especially when properly seasoned. This means you can use less oil and still achieve that beautiful golden crust. Plus, it’s oven-safe, so if your chicken needs a little extra time to cook through, you can finish it in the oven without switching pans.
Stainless Steel: A Close Second
If you don’t have cast iron, a high-quality stainless steel skillet is an excellent alternative. Like cast iron, it heats evenly and can withstand high temperatures. However, it doesn’t retain heat quite as well, so you’ll need to preheat it thoroughly and avoid overcrowding the pan.
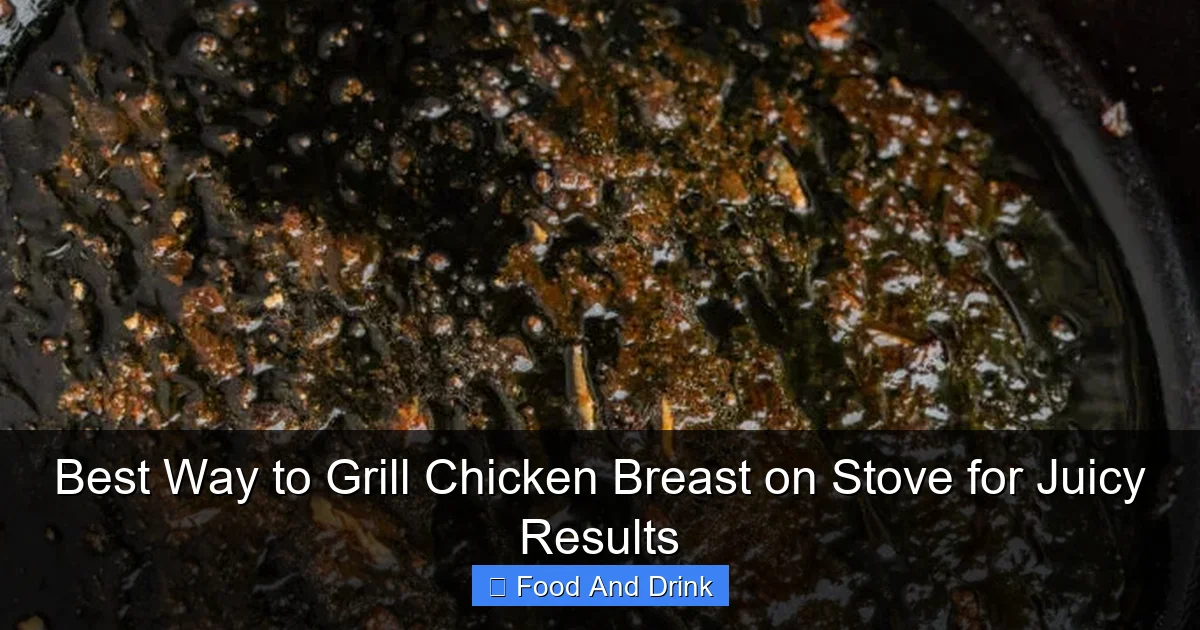
Stainless steel also allows you to deglaze the pan easily after cooking. That browned, sticky residue left behind—called fond—is packed with flavor. Add a splash of broth, wine, or lemon juice, and you’ve got the base for a quick pan sauce to drizzle over your chicken.
Avoid Non-Stick and Thin Pans
Non-stick pans are great for delicate foods like eggs or fish, but they’re not ideal for searing chicken. Most non-stick coatings can’t handle the high heat needed for a proper crust, and they often prevent browning altogether. Thin aluminum or non-stick pans also heat unevenly, leading to patchy cooking and steamed—not seared—chicken.
Size Matters
Choose a skillet that’s large enough to fit your chicken breasts without overlapping. Overcrowding lowers the pan’s temperature and causes the chicken to steam instead of sear. If you’re cooking multiple pieces, work in batches or use two skillets. A 10- or 12-inch pan is usually perfect for 2–3 chicken breasts.
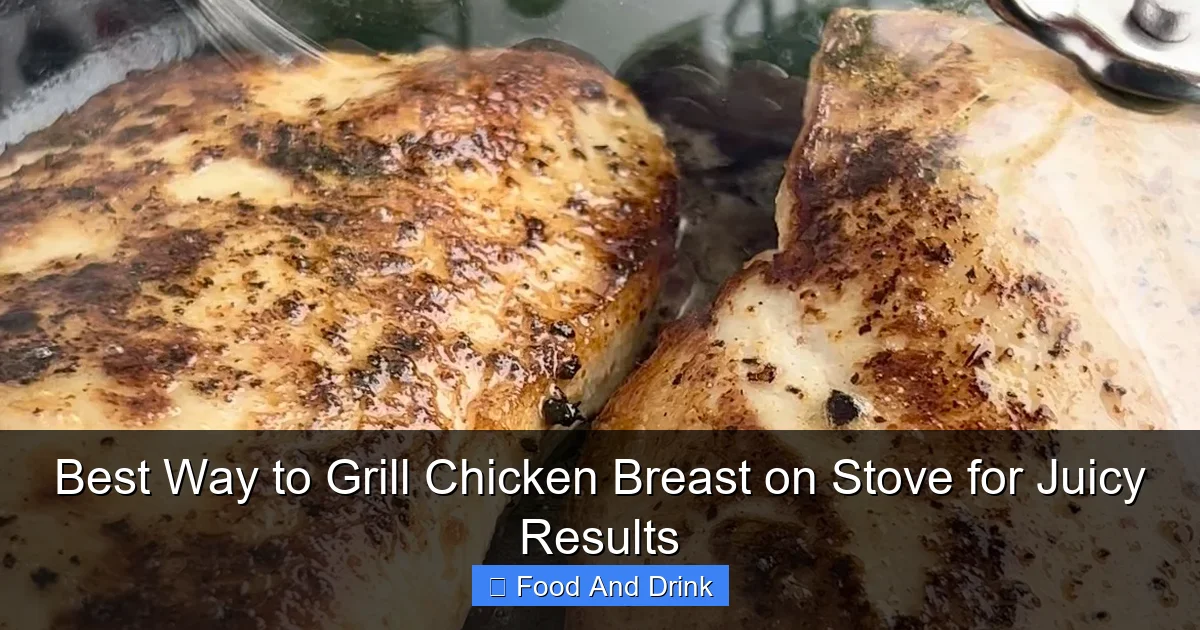
Prepping the Chicken: The Foundation of Juicy Results
Visual guide about Best Way to Grill Chicken Breast on Stove for Juicy Results
Image source: stellanspice.com
Great cooking starts with great prep. Even the best pan and technique won’t save under-seasoned or poorly prepared chicken. Taking a few extra minutes to prep your chicken breast properly can make the difference between a good meal and a great one.
Trim and Pound for Even Thickness
Chicken breasts often have a tapered shape—thick at one end and thin at the other. This unevenness leads to overcooked edges and undercooked centers. To fix this, place the chicken between two sheets of plastic wrap or parchment paper and gently pound the thicker end with a meat mallet, rolling pin, or even a heavy can.
Aim for an even thickness of about ¾ to 1 inch. This ensures the chicken cooks uniformly, so every bite is tender and juicy. If you’re short on time, you can also buy “thin-cut” or “butterflied” chicken breasts from the store—they’re already prepped for quick cooking.
Pat Dry Thoroughly
Moisture is the enemy of a good sear. Any water on the surface of the chicken will turn to steam when it hits the hot pan, preventing browning and leaving the skin soggy. Before seasoning, pat the chicken dry with paper towels—front and back. Be thorough. The drier the surface, the better the crust.
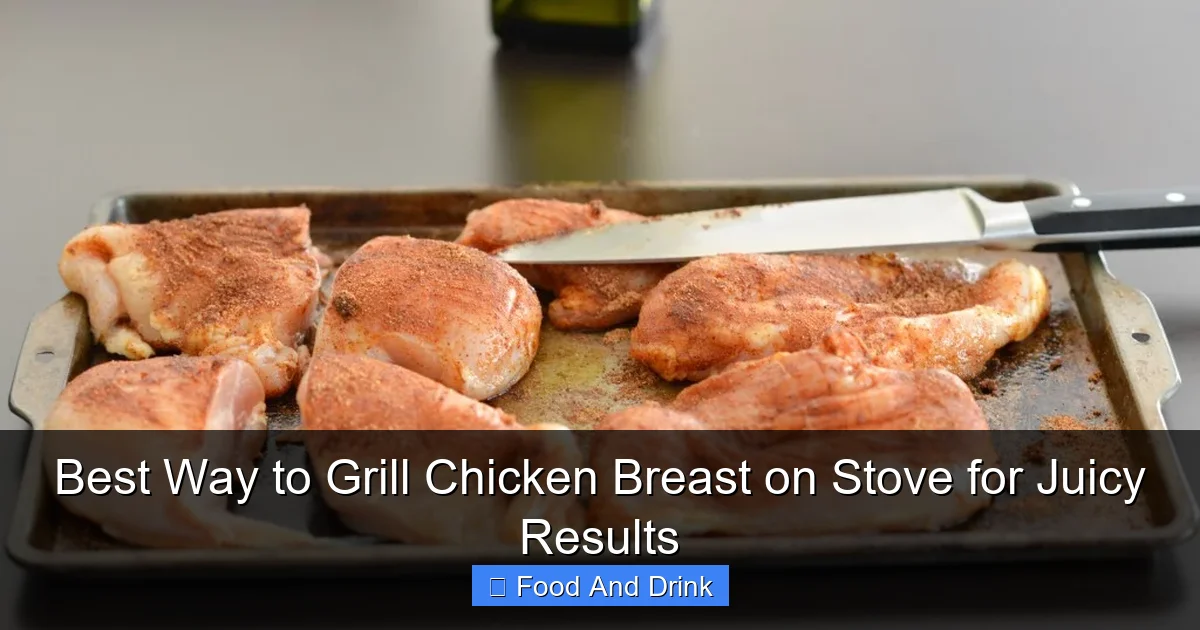
Season Generously—and Early
Salt is your best friend when it comes to flavor and texture. But don’t just sprinkle it on right before cooking. For the best results, season your chicken with salt (and any other dry spices) at least 15 minutes before cooking—up to 30 minutes if you have time.
This gives the salt a chance to penetrate the meat, enhancing flavor and helping the chicken retain moisture during cooking. It also draws out a bit of moisture, which then gets reabsorbed, seasoning the chicken from the inside out. Add pepper, garlic powder, paprika, or your favorite herbs at this stage too.
Bring to Room Temperature
Cold chicken straight from the fridge takes longer to cook and can lead to uneven results. Let your seasoned chicken sit at room temperature for 15–20 minutes before cooking. This small step helps the meat cook more evenly and reduces the risk of overcooking the outside while the center catches up.
Mastering the Cooking Process: Heat, Time, and Technique
Visual guide about Best Way to Grill Chicken Breast on Stove for Juicy Results
Image source: culinarymamas.com
Now for the main event: actually grilling the chicken breast on the stove. This is where precision pays off. With the right heat, timing, and technique, you’ll get that perfect balance of crispy exterior and juicy interior every time.
Preheat the Pan Properly
A hot pan is essential for a good sear. Preheat your skillet over medium-high heat for 3–5 minutes before adding oil. You’ll know it’s ready when a few drops of water sizzle and evaporate instantly. Don’t rush this step—adding chicken to a cold pan will result in steaming, not searing.
Use the Right Oil
Choose an oil with a high smoke point, like avocado oil, canola oil, or grapeseed oil. These can handle the high heat without burning. Olive oil is tasty but has a lower smoke point, so it’s better saved for finishing or lower-heat cooking.
Add just enough oil to coat the bottom of the pan—about 1–2 tablespoons. Swirl it around to create an even layer. You want a thin, shimmering coat, not a pool of oil.
Sear, Then Finish
Place the chicken breast in the pan, smooth side down. Don’t move it for the first 3–4 minutes. This allows a crust to form. If you peek too soon, you’ll tear the surface and lose that beautiful browning.
After 3–4 minutes, flip the chicken using tongs. Reduce the heat to medium and cook for another 4–6 minutes, depending on thickness. The goal is to reach an internal temperature of 165°F (74°C). Use a meat thermometer inserted into the thickest part—avoid touching the bone or pan.
Baste for Extra Flavor
In the last minute of cooking, add a tablespoon of butter, a crushed garlic clove, and a few sprigs of fresh thyme or rosemary to the pan. Tilt the pan slightly and use a spoon to continuously baste the chicken with the melted butter and herbs. This adds richness, aroma, and a glossy finish.
Check Doneness with a Thermometer
Guessing when chicken is done is a recipe for dryness. The only reliable way to know is with a meat thermometer. Insert it into the center of the thickest part—it should read 165°F (74°C). If it’s a few degrees under, the residual heat will finish the job during resting.
Avoid cutting into the chicken to check—this lets precious juices escape. Trust the thermometer.
Resting and Serving: The Final Touch
You’re almost done—but don’t skip this step. Resting is just as important as cooking when it comes to juicy chicken.
Let It Rest
Once the chicken reaches 165°F, transfer it to a cutting board or plate and let it rest for 5–10 minutes. During this time, the juices redistribute throughout the meat, ensuring every bite is moist and flavorful. If you slice it too soon, those juices will spill out, leaving the chicken dry.
Cover loosely with foil to keep it warm, but don’t wrap it tightly—this can steam the crust and make it soggy.
Slice Against the Grain
When you’re ready to serve, slice the chicken breast against the grain. This means cutting perpendicular to the muscle fibers, which shortens them and makes the meat more tender. Look for the direction of the fibers—they usually run lengthwise—and slice across them.
Serve with Style
Grilled chicken breast is incredibly versatile. Serve it over a bed of quinoa with roasted vegetables, slice it into strips for a Caesar salad, or layer it on a sandwich with avocado and sprouts. Drizzle with pan sauce, a squeeze of lemon, or a dollop of herb butter for extra flair.
Common Mistakes and How to Avoid Them
Even with the best intentions, things can go wrong. Here are the most common mistakes people make when grilling chicken breast on the stove—and how to fix them.
Overcooking
This is the #1 cause of dry chicken. Chicken breast is lean, with little fat to keep it moist. Once it hits 165°F, it’s done—any longer and it starts to dry out. Use a thermometer and remove the chicken as soon as it reaches the target temperature.
Underseasoning
Bland chicken is a disappointment. Don’t be shy with salt and spices. Season at least 15 minutes before cooking to let the flavors penetrate. Taste your seasoning mix—if it doesn’t taste good on its own, it won’t taste good on the chicken.
Using the Wrong Pan
As discussed earlier, thin or non-stick pans won’t give you the sear you need. Invest in a good cast iron or stainless steel skillet—it’s worth it.
Flipping Too Early or Too Often
Let the chicken form a crust before flipping. Moving it too soon tears the surface and prevents browning. Flip only once during cooking—unless you’re basting, in which case gentle movement is fine.
Not Resting
Skipping the rest is a surefire way to lose moisture. Always let the chicken rest before slicing.
Flavor Variations and Marinades
Plain grilled chicken is delicious, but a little creativity can take it to the next level. Try these easy flavor boosts.
Simple Herb Marinade
Mix 2 tablespoons olive oil, 1 minced garlic clove, 1 teaspoon lemon zest, 1 tablespoon chopped parsley, and a pinch of salt. Marinate chicken for 30 minutes to 2 hours before cooking.
Spicy Cajun Rub
Combine 1 teaspoon each of paprika, garlic powder, onion powder, oregano, thyme, cayenne, salt, and black pepper. Rub onto chicken and let sit for 15 minutes.
Asian-Inspired Glaze
Whisk together 2 tablespoons soy sauce, 1 tablespoon honey, 1 teaspoon grated ginger, and 1 minced garlic clove. Brush onto chicken during the last 2 minutes of cooking.
Lemon-Garlic Butter Baste
Melt 2 tablespoons butter with 1 minced garlic clove, 1 teaspoon lemon juice, and a pinch of red pepper flakes. Baste during the final minute.
Conclusion
Grilling chicken breast on the stove doesn’t have to be intimidating. With the right pan, proper prep, and a few key techniques, you can consistently produce juicy, flavorful chicken that rivals any restaurant dish. The best way to grill chicken breast on stove focuses on even heat, proper seasoning, and precise timing—all within the comfort of your own kitchen.
Remember: dry chicken is often the result of overcooking or poor prep, not the method itself. By patting the chicken dry, seasoning in advance, using a hot skillet, and checking temperature with a thermometer, you’ll avoid the pitfalls that lead to disappointment. And don’t forget to let it rest—those few minutes make all the difference.
Whether you’re cooking for one or feeding a family, stovetop grilling is a reliable, efficient, and delicious way to enjoy chicken breast. So next time you’re craving grilled flavors but don’t want to fire up the outdoor grill, reach for your skillet instead. Your taste buds—and your schedule—will thank you.
Frequently Asked Questions
What’s the best internal temperature for chicken breast?
Chicken breast is safe and juicy at 165°F (74°C). Use a meat thermometer to check the thickest part. Removing it at 160°F and letting it rest will also reach 165°F safely.
Can I cook chicken breast without oil?
You can, but a small amount of oil helps prevent sticking and promotes browning. If avoiding oil, use a well-seasoned cast iron skillet and monitor closely.
How long does it take to cook chicken breast on the stove?
Typically 8–12 minutes total, depending on thickness. Sear 3–4 minutes per side over medium-high heat, then finish on medium until done.
Why is my chicken sticking to the pan?
This usually happens if the pan isn’t hot enough or the chicken isn’t dry. Preheat the pan thoroughly and pat the chicken dry before cooking.
Can I use boneless, skinless chicken thighs instead?
Yes! Thighs are more forgiving and stay juicier. Cook them the same way, but they may take 1–2 minutes longer due to higher fat content.
How do I store leftover grilled chicken?
Let it cool, then store in an airtight container in the fridge for up to 3–4 days. Reheat gently in a skillet or microwave to retain moisture.