
Roasting a chicken at home doesn’t have to be intimidating. With the right techniques, seasonings, and oven know-how, you can achieve restaurant-quality results that are juicy, golden, and packed with flavor—no professional kitchen required.
Key Takeaways
- Start with a quality bird: Choose a fresh or properly thawed chicken, ideally organic or free-range, for the best flavor and texture.
- Patience pays off: Let the chicken come to room temperature before roasting and allow it to rest after cooking for juicier meat.
- Season generously and creatively: Use salt, pepper, herbs, and aromatics like garlic, lemon, and onion to build deep, complex flavors.
- Trussing improves even cooking: Tying the legs together helps the chicken cook evenly and maintains its shape.
- Use a meat thermometer: The safest and most accurate way to ensure your chicken is fully cooked is by checking the internal temperature (165°F in the thickest part).
- High heat for crispy skin: Roast at 425°F (220°C) for the first 20 minutes, then reduce to 375°F (190°C) for tender, evenly cooked meat.
- Save the drippings: Use the pan juices to make a quick pan sauce or gravy that elevates your meal.
Quick Answers to Common Questions
How long does it take to roast a 4-pound chicken?
It takes about 80–100 minutes to roast a 4-pound chicken at 425°F for the first 20 minutes, then 375°F until the internal temperature reaches 165°F.
Can I roast a chicken without a roasting pan?
Yes! You can use a sheet pan, cast-iron skillet, or even a baking dish. Just make sure the chicken is elevated on a rack or vegetables for even cooking.
Should I rinse my chicken before roasting?
No. Rinsing can spread bacteria in your sink. Instead, pat the chicken dry with paper towels and proceed with seasoning.
How do I keep the breast meat from drying out?
Butter under the skin, proper seasoning, and not overcooking are key. Use a meat thermometer to ensure you stop cooking at the right time.
Can I roast a frozen chicken?
It’s not recommended. Always thaw the chicken safely in the refrigerator, cold water, or microwave before roasting for even cooking.
📑 Table of Contents
Why Roasting Chicken at Home Is Worth the Effort
There’s something deeply satisfying about pulling a golden, perfectly roasted chicken out of the oven. The aroma fills the kitchen, the skin crackles under the fork, and the meat is so tender it practically falls off the bone. Yet, for many home cooks, roasting a whole chicken can feel like a daunting task—something reserved for holidays or fancy dinners. But here’s the truth: roasting chicken like a pro at home is not only achievable, it’s one of the most rewarding culinary skills you can master.
Unlike store-bought rotisserie chickens that often lean toward dryness or over-seasoning, a homemade roasted chicken gives you full control over flavor, texture, and ingredients. You decide how much salt to use, which herbs to include, and whether to go classic or adventurous with your seasoning. Plus, a single roasted chicken can feed a family for multiple meals—think leftovers for sandwiches, salads, soups, or tacos. It’s economical, versatile, and surprisingly simple once you know the basics.
In this guide, we’ll walk you through everything you need to know to roast chicken like a pro at home. From selecting the right bird to mastering the perfect roast, you’ll learn techniques used by chefs and home cooks alike. Whether you’re a beginner or looking to refine your skills, these tips will help you achieve juicy, flavorful, and beautifully golden results every time.
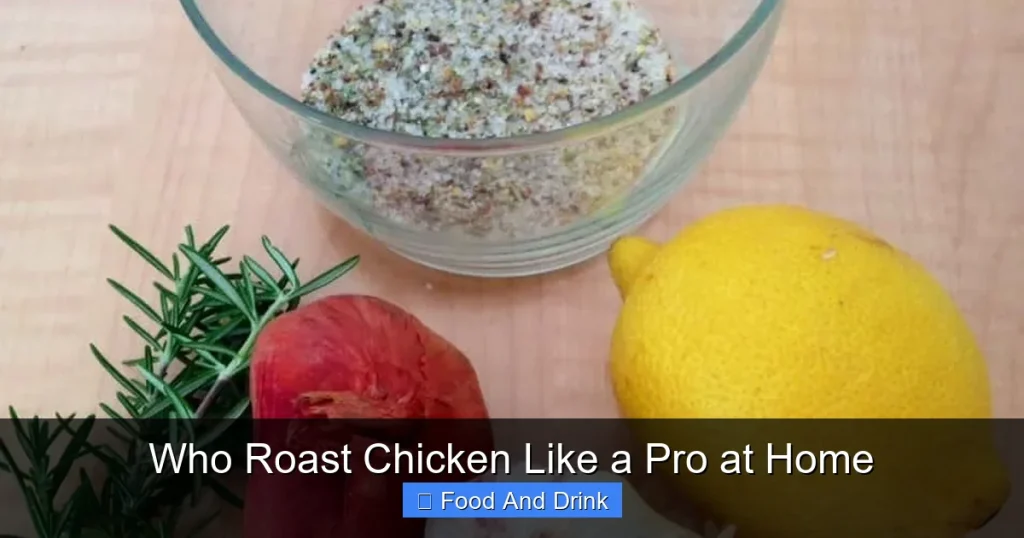
Choosing the Right Chicken

Visual guide about Who Roast Chicken Like a Pro at Home
Image source: amprince.com
The foundation of a great roasted chicken starts with the bird itself. Not all chickens are created equal, and the quality of your ingredients directly impacts the final dish. When shopping, you’ll likely encounter several options: conventional, organic, free-range, and pasture-raised. Each has its own benefits and considerations.
Conventional vs. Organic vs. Free-Range
Conventional chickens are typically raised in large-scale facilities and may be treated with antibiotics or hormones (though hormones are banned in poultry in the U.S.). They’re usually the most affordable option, but their flavor and texture can be less pronounced. Organic chickens, on the other hand, are raised without antibiotics, synthetic pesticides, or GMO feed. They often have a richer, more natural taste and tend to have better texture due to more humane living conditions.
Free-range chickens have access to the outdoors, which can lead to more active birds and potentially more flavorful meat. Pasture-raised chickens take this a step further, spending most of their lives outdoors on grass, eating insects and plants in addition to feed. These birds often have the most robust flavor and firmer texture, making them ideal for roasting.
While pasture-raised and organic chickens are generally more expensive, many home cooks find the investment worthwhile for the superior taste and ethical considerations. If budget is a concern, look for sales or consider buying a whole chicken and using every part—this maximizes value and minimizes waste.
Fresh vs. Frozen
Fresh chickens are convenient, but frozen can be just as good—if handled properly. The key is to thaw the chicken safely. Never thaw at room temperature, as this can encourage bacterial growth. Instead, use one of these methods:
– **Refrigerator thawing:** Place the chicken in its packaging on a plate in the fridge. Allow 24 hours for every 4–5 pounds of weight.
– **Cold water thawing:** Submerge the chicken in cold water, changing the water every 30 minutes. This takes about 30 minutes per pound.
– **Microwave thawing:** Use the defrost setting, but cook immediately after, as some parts may begin to cook.
Once thawed, use the chicken within 1–2 days. Fresh chickens should have a mild smell, smooth skin, and no slimy texture. Avoid birds with strong odors or discolored skin.
Size Matters
Chickens typically range from 3 to 6 pounds. A 3–4 pound bird is ideal for most home ovens and serves 4–6 people. Larger chickens can be harder to cook evenly, especially if your oven runs hot or cold. Smaller birds roast faster and more uniformly, making them a great choice for beginners.
When selecting your chicken, look for one that feels heavy for its size—this indicates good meat-to-bone ratio. Avoid birds with loose skin or excessive fat deposits, as these can lead to greasy results.
Preparation: The Secret to Juicy, Flavorful Meat
Visual guide about Who Roast Chicken Like a Pro at Home
Image source: ice.edu
Great roasted chicken starts long before it hits the oven. Proper preparation ensures even cooking, maximum flavor, and that coveted crispy skin. Skipping these steps might still yield an edible bird, but taking the time to prep like a pro makes all the difference.
Bringing the Chicken to Room Temperature
Cold chicken straight from the fridge will cook unevenly. The outside may dry out before the inside reaches a safe temperature. To avoid this, take the chicken out of the refrigerator 30–60 minutes before roasting. This allows the meat to warm slightly, promoting more uniform cooking.
Place the chicken on a plate or tray to catch any drips, and cover loosely with plastic wrap if you’re concerned about contamination. Letting it sit at room temperature also helps the seasoning penetrate the meat more effectively.
Drying the Skin
Crispy skin is one of the hallmarks of a perfectly roasted chicken. Moisture is the enemy of crispiness, so drying the skin thoroughly is essential. After removing the chicken from its packaging, pat it dry inside and out with paper towels. Be thorough—get into the crevices around the legs and wings.
For an even crisper result, some chefs recommend air-drying the chicken uncovered in the fridge for several hours or overnight. This extended drying time removes surface moisture and tightens the skin, leading to a shatteringly crisp finish. If you’re short on time, a quick pat-down will still yield good results, but the extra step makes a noticeable difference.
Seasoning Like a Pro
Seasoning is where you can get creative. A well-seasoned chicken doesn’t just taste good—it sings. Start with a generous amount of salt and pepper. Kosher salt is ideal because it adheres well to the skin and seasons evenly. Use about 1 teaspoon of salt per pound of chicken, plus freshly ground black pepper to taste.
But don’t stop there. Herbs and aromatics add depth and complexity. Classic combinations include:
– **Herb butter:** Mix softened butter with chopped rosemary, thyme, garlic, and lemon zest. Gently loosen the skin over the breast and thighs and spread the butter directly on the meat. This keeps the breast moist and infuses flavor throughout.
– **Dry rubs:** Combine salt, pepper, paprika, garlic powder, onion powder, and dried herbs like oregano or sage. Rub generously over the entire surface.
– **Citrus and aromatics:** Stuff the cavity with halved lemons, garlic cloves, onion quarters, and fresh herbs like thyme or rosemary. These release fragrance and moisture during roasting, enhancing the flavor from the inside out.
For a bold twist, try a spice blend like za’atar, jerk seasoning, or harissa. Just be mindful of heat levels—some blends can overpower if used too liberally.
Trussing the Chicken
Trussing—tying the legs together with kitchen twine—might seem like an old-fashioned step, but it serves an important purpose. It helps the chicken cook evenly by keeping the legs and wings close to the body. This prevents the thinner parts from drying out while the thicker breast meat cooks through.
To truss, cut a piece of kitchen twine about 3 feet long. Place the chicken breast-side up and tuck the wing tips behind the shoulders. Cross the legs and tie them together securely. You can also loop the string around the drumsticks and pull tight. Don’t worry about perfection—just make sure the legs are held in place.
Some cooks skip trussing, especially if using a roasting pan with a rack. While it’s not strictly necessary, it does improve presentation and can lead to more even cooking.
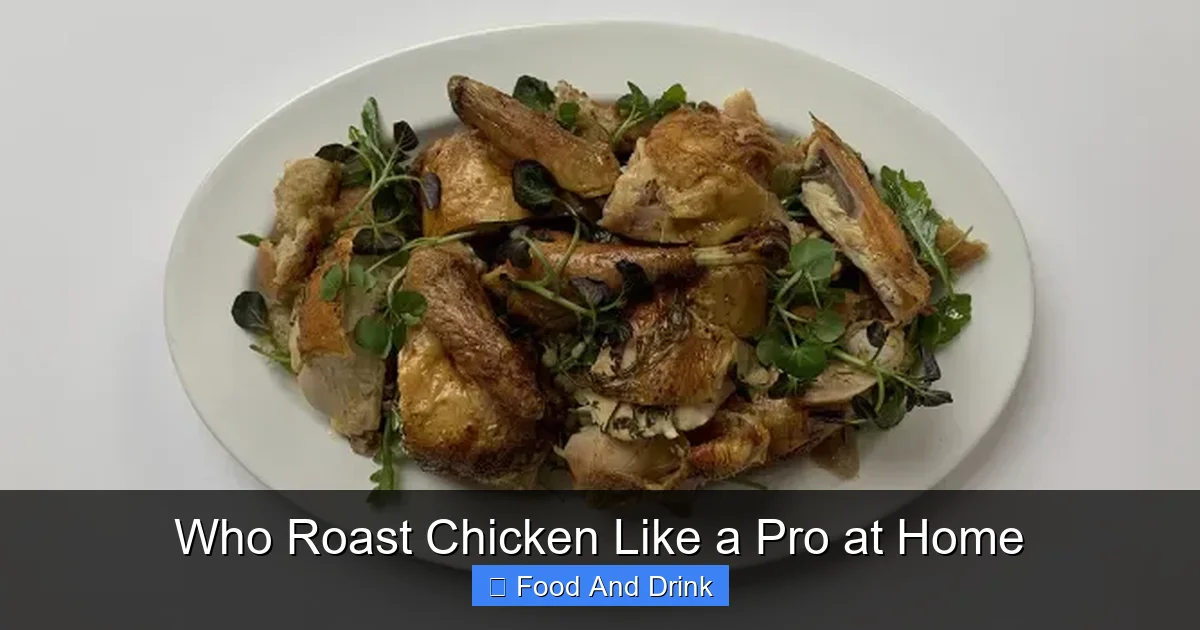
Roasting Techniques for Perfect Results
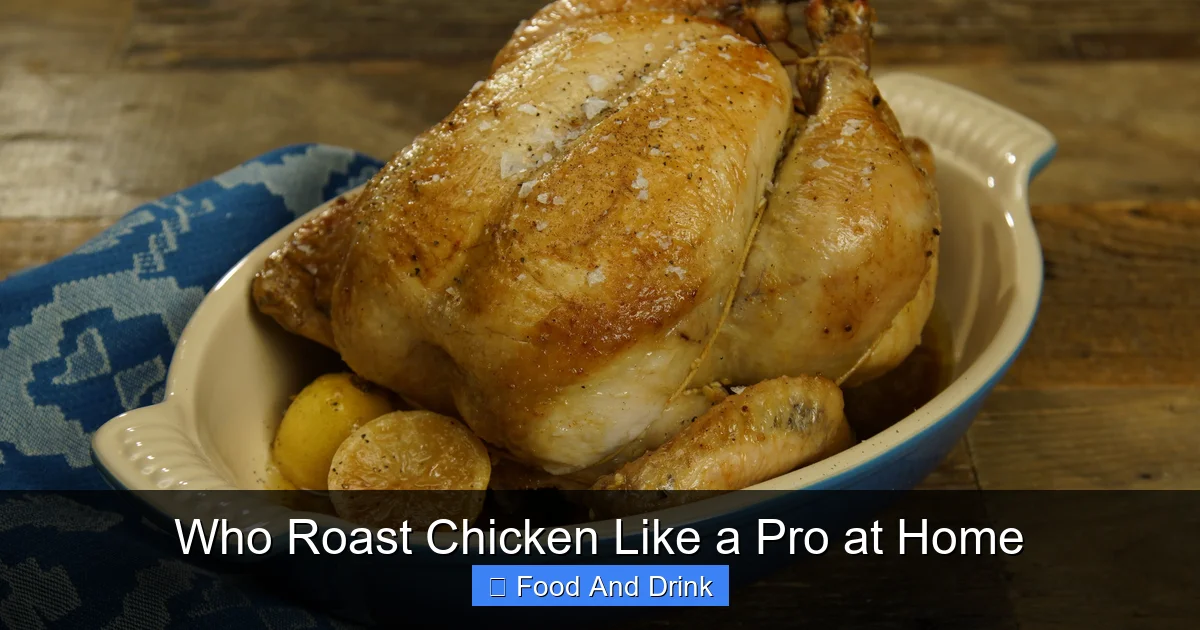
Visual guide about Who Roast Chicken Like a Pro at Home
Image source: assets.tastemadecdn.net
Now that your chicken is prepped and seasoned, it’s time to roast. The method you choose can dramatically affect the outcome. Whether you’re using a roasting pan, a sheet pan, or a cast-iron skillet, the principles remain the same: high heat for crispy skin, moderate heat for tender meat, and consistent temperature monitoring.
Oven Temperature and Timing
The most reliable method for roasting chicken like a pro at home is the two-temperature approach:
1. **Start high:** Preheat your oven to 425°F (220°C). Roast the chicken at this temperature for the first 20 minutes. The high heat jump-starts the Maillard reaction—the chemical process that creates browning and deep flavor—and crisps the skin.
2. **Reduce heat:** After 20 minutes, lower the oven to 375°F (190°C). Continue roasting until the internal temperature reaches 165°F (74°C) in the thickest part of the thigh, avoiding the bone.
This method ensures a golden, crispy exterior while keeping the meat juicy and tender. Total roasting time will vary depending on the size of the chicken, but plan on about 20 minutes per pound. For a 4-pound chicken, expect a total time of 80–100 minutes.
Using a Roasting Rack
A roasting rack elevates the chicken above the pan, allowing hot air to circulate evenly around the bird. This promotes uniform browning and prevents the bottom from steaming in its own juices. If you don’t have a rack, you can improvise by placing chopped vegetables (like carrots, celery, and onion) in the bottom of the pan. They’ll act as a natural rack and add flavor to your drippings.
Avoid placing the chicken directly on the pan bottom, as this can lead to soggy skin and uneven cooking.
Basting: Yes or No?
Basting—spooning pan juices over the chicken during roasting—is a traditional technique, but modern chefs are divided on its effectiveness. While it can add moisture and flavor, opening the oven door repeatedly causes temperature fluctuations, which can lead to uneven cooking.
A better approach is to rely on proper seasoning and butter under the skin to keep the meat moist. If you do want to baste, do it sparingly—once or twice during the second half of roasting—and close the oven quickly to retain heat.
Checking for Doneness
The only way to know for sure that your chicken is fully cooked is by using a meat thermometer. Insert the probe into the thickest part of the thigh, making sure it doesn’t touch the bone. The safe internal temperature is 165°F (74°C). At this point, the juices should run clear, and the meat should feel firm but still yield slightly to pressure.
If you don’t have a thermometer, you can check by wiggling the leg—if it moves freely, the chicken is likely done. However, this method is less reliable and can lead to overcooking.
Resting and Carving Like a Pro
Once your chicken is out of the oven, resist the urge to carve immediately. Resting is a crucial step that allows the juices to redistribute throughout the meat. If you cut into the chicken too soon, those precious juices will spill out, leaving the meat dry.
How Long to Rest
Let the chicken rest for at least 15–20 minutes, loosely covered with aluminum foil. This keeps it warm while allowing the internal temperature to stabilize. During this time, the meat firms up slightly, making it easier to carve.
For even better results, transfer the chicken to a cutting board and tent it with foil. This prevents the skin from steaming and losing its crispness.
Carving Techniques
Carving a whole chicken can seem intimidating, but it’s simpler than it looks. Here’s a step-by-step method:
1. **Remove the legs:** Hold one leg and gently pull it away from the body. Use a sharp knife to cut through the joint where the thigh meets the breast.
2. **Separate the thigh and drumstick:** Cut through the joint between the two pieces.
3. **Remove the wings:** Pull each wing away from the body and cut through the joint.
4. **Slice the breast:** Make a horizontal cut just above the wing joint to remove the entire breast. Slice it into even portions.
5. **Optional:** Remove the backbone with kitchen shears for stock or discard.
Serve the pieces on a platter, arranging them neatly for presentation. Save the carcass for making homemade chicken stock—it’s a flavorful base for soups and sauces.
Creative Serving Ideas and Leftovers
A perfectly roasted chicken doesn’t have to be a one-and-done meal. With a little creativity, you can stretch it into multiple delicious dishes throughout the week.
Pan Sauce or Gravy
Don’t let those golden drippings go to waste! After removing the chicken, place the roasting pan on the stovetop over medium heat. Add a splash of chicken broth, wine, or water to deglaze the pan, scraping up the browned bits. Simmer for a few minutes, then whisk in a tablespoon of butter or a slurry of cornstarch and water to thicken. Season with salt, pepper, and fresh herbs for a rich, restaurant-quality sauce.
Using Leftovers
Leftover roasted chicken is incredibly versatile. Shred the meat and use it in:
– **Sandwiches:** Add mayo, celery, and herbs for a classic chicken salad.
– **Tacos:** Warm the meat with spices and serve with salsa and avocado.
– **Soups:** Add to chicken noodle, tortilla, or creamy broccoli soup.
– **Salads:** Toss with mixed greens, nuts, and a vinaigrette.
– **Casseroles:** Combine with rice, vegetables, and cheese for a hearty bake.
Store leftovers in an airtight container in the refrigerator for up to 4 days, or freeze for up to 3 months.
Common Mistakes to Avoid
Even experienced cooks can fall into traps that lead to dry, bland, or undercooked chicken. Here are some common pitfalls and how to avoid them:
– **Overcooking:** The most frequent cause of dry chicken. Always use a thermometer and remove the chicken from the oven when it reaches 160°F—it will continue cooking as it rests.
– **Underseasoning:** Salt is essential for flavor. Don’t be shy—season generously inside and out.
– **Skipping the rest:** Cutting too soon leads to juice loss. Always let the chicken rest.
– **Using a cold pan:** Preheat your oven and use a room-temperature roasting pan for even cooking.
– **Crowding the oven:** Avoid opening the door frequently, as this drops the temperature and extends cooking time.
By following these guidelines, you’ll roast chicken like a pro at home—consistently delicious, juicy, and impressive.
Conclusion
Roasting a chicken at home is one of the most rewarding skills a cook can develop. It’s simple, economical, and deeply satisfying. With the right techniques—choosing a quality bird, proper seasoning, high-heat roasting, and careful resting—you can achieve results that rival any restaurant.
The next time you’re planning a family dinner or hosting guests, skip the takeout and try roasting a chicken. You’ll be amazed at how easy it is to create a meal that’s not only delicious but also full of homemade love and flavor. So preheat that oven, grab your favorite herbs, and get ready to roast chicken like a pro at home.
Frequently Asked Questions
What’s the best way to season a roasted chicken?
Use a generous amount of salt and pepper, plus herbs like rosemary and thyme. For extra flavor, rub herb butter under the skin or stuff the cavity with lemon and garlic.
How do I get crispy skin on my roasted chicken?
Pat the skin dry thoroughly, roast at high heat initially, and avoid covering the chicken while it cooks. Air-drying in the fridge overnight also helps.
Is it safe to eat chicken if the juices aren’t clear?
Clear juices are a good sign, but the safest indicator is internal temperature. Use a thermometer to ensure the thickest part of the thigh reaches 165°F.
Can I use a slow cooker to roast chicken?
Slow cookers aren’t ideal for roasting because they don’t brown the skin. For crispy results, use an oven. However, you can cook chicken in a slow cooker for tender, shredded meat.
How do I store leftover roasted chicken?
Store in an airtight container in the refrigerator for up to 4 days. You can also freeze it for up to 3 months. Reheat gently to preserve moisture.
What should I do with the chicken carcass?
Save it to make homemade chicken stock. Simmer with vegetables, herbs, and water for 2–4 hours, then strain and use in soups, sauces, or risottos.


