
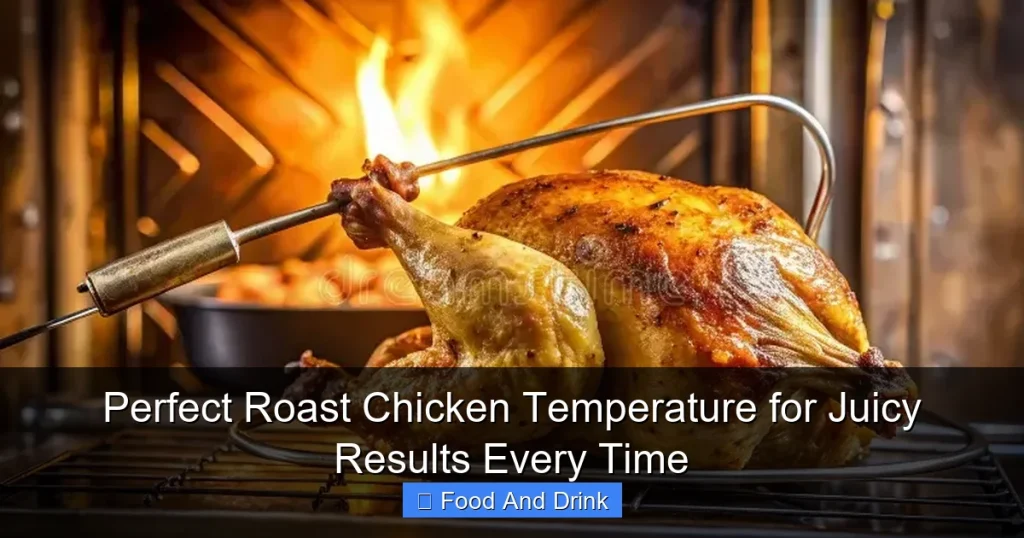
Roasting the perfect chicken starts with one key factor: temperature. Whether you’re aiming for crispy skin or fall-off-the-bone tenderness, knowing the right roast chicken temperature ensures juicy meat and food safety. This guide breaks down everything you need to know—from internal temps to oven settings—so your bird turns out flawless every single time.
There’s something deeply satisfying about pulling a golden-brown roast chicken out of the oven—its skin crackling, aroma filling the kitchen, and the promise of tender, juicy meat with every bite. But behind that perfect bird lies a crucial detail many home cooks overlook: temperature. Not just the oven temperature, but the internal temperature of the chicken itself. Getting this right transforms a good meal into a great one, ensuring safety, flavor, and texture that keeps everyone asking for seconds.
Roasting chicken seems simple—toss it in the oven, wait, and serve. But without understanding how heat affects the meat, you risk dry, overcooked breasts or worse, undercooked thighs that could make you sick. The secret? It’s all about precision. Whether you’re using a whole bird, bone-in pieces, or a spatchcocked chicken, knowing the correct roast chicken temperature is your golden ticket to success. In this guide, we’ll walk you through everything from safe internal temps to oven strategies, so you can roast with confidence and deliver juicy results every single time.
Key Takeaways
- Use a meat thermometer: The most reliable way to ensure doneness is by checking the internal temperature, not timing alone.
- Target 165°F (74°C) in the thickest part: This is the USDA-recommended safe internal temperature for poultry to kill harmful bacteria.
- Rest the chicken after roasting: Letting it rest for 15–20 minutes allows juices to redistribute, keeping the meat moist.
- Higher oven temps (425–450°F) yield crispy skin: Start hot for browning, then reduce heat if needed to prevent drying.
- Lower and slower (325–350°F) = tender, even cooking: Ideal for larger birds or when you want ultra-juicy results without constant monitoring.
- Don’t stuff the cavity with raw ingredients: Stuffing should be cooked separately or added near the end to avoid undercooking.
- Trussing helps with even cooking: Tying the legs together promotes uniform heat distribution and better presentation.
Quick Answers to Common Questions
What is the safest internal temperature for roast chicken?
The USDA recommends cooking poultry to an internal temperature of 165°F (74°C) to ensure food safety. However, you can remove the chicken at 160°F (71°C) and let it rest, as carryover cooking will bring it to 165°F.
Should I roast chicken at high or low temperature?
It depends on your goal. High heat (425–450°F) gives crispy skin and faster cooking, while low heat (325–350°F) yields more tender, juicy meat. A hybrid method—starting high, then reducing heat—offers the best of both.
How long should I let roast chicken rest?
Let the chicken rest for 15–20 minutes after roasting. This allows juices to redistribute, resulting in moister, more flavorful meat.
Can I stuff the chicken cavity while roasting?
It’s safer to cook stuffing separately. If you do stuff the cavity, add it during the last 30 minutes of roasting to ensure it reaches a safe temperature.
Is brining necessary for juicy roast chicken?
Brining isn’t required, but it significantly improves moisture and flavor. Dry brining (salting ahead of time) is an easy alternative that works just as well.
📑 Table of Contents
Why Temperature Matters More Than Time
When it comes to roasting chicken, many recipes rely heavily on cooking time—“roast for 1 hour and 15 minutes” or “cook until golden.” But here’s the truth: time is a rough estimate at best. Factors like oven accuracy, chicken size, starting temperature (room temp vs. straight from the fridge), and even altitude can drastically affect how long it takes to cook. That’s why relying solely on a timer is a recipe for disappointment.
Temperature, on the other hand, is objective. It doesn’t lie. Using a reliable meat thermometer takes the guesswork out of roasting and ensures your chicken is both safe to eat and perfectly cooked. The USDA recommends cooking poultry to an internal temperature of 165°F (74°C) to destroy harmful bacteria like salmonella. But that doesn’t mean you should stop the moment you hit 165°F—especially if you want juicy meat.
Here’s why: chicken continues to cook even after it’s removed from the oven. This is called carryover cooking. As the bird rests, the internal temperature can rise by 5–10°F. So if you pull it out at exactly 165°F, it might climb to 170–175°F, which can dry out the white meat. Instead, aim to remove the chicken when the thickest part of the breast reads 160°F (71°C). It will safely reach 165°F during the resting period, while staying moist and tender.
The Science of Juicy Meat
Chicken meat, especially the breast, is prone to drying out because it’s lean and has little fat. When heated, muscle fibers contract and squeeze out moisture. The higher the temperature and the longer the cooking time, the more moisture is lost. That’s why overcooked chicken often feels like rubber—it’s literally been squeezed dry.
But here’s the good news: by controlling the roast chicken temperature, you can minimize this effect. Cooking to the right internal temp and allowing the bird to rest gives the proteins time to relax and reabsorb some of the juices. This is why resting is non-negotiable—it’s not just a suggestion, it’s a crucial step in the process.
Additionally, brining or dry-brining your chicken ahead of time can help retain moisture. A brine (saltwater solution) or even just salting the bird 12–24 hours in advance allows the meat to hold onto more water during cooking. This means even if you slightly overcook it, it’ll still be juicier than an unbrined bird.
Common Mistakes with Temperature
One of the biggest mistakes home cooks make is not using a thermometer at all. They rely on visual cues—like clear juices or browning—but these aren’t reliable indicators of doneness. Juices can run clear even when the chicken is undercooked, and skin can brown long before the inside is safe to eat.
Another mistake is checking the temperature in the wrong spot. You should always insert the thermometer into the thickest part of the breast, avoiding the bone. Bone conducts heat differently and can give a false reading. Similarly, checking the thigh? Great—but make sure you’re not hitting the joint. The thigh is naturally darker and can safely go a bit higher (175°F is fine), but the breast is the limiting factor.
Finally, many people pull the chicken out too early, thinking it’s done when it “looks ready.” But without a thermometer, you’re just guessing. And guessing with poultry isn’t worth the risk.
Safe Internal Temperatures for Roast Chicken
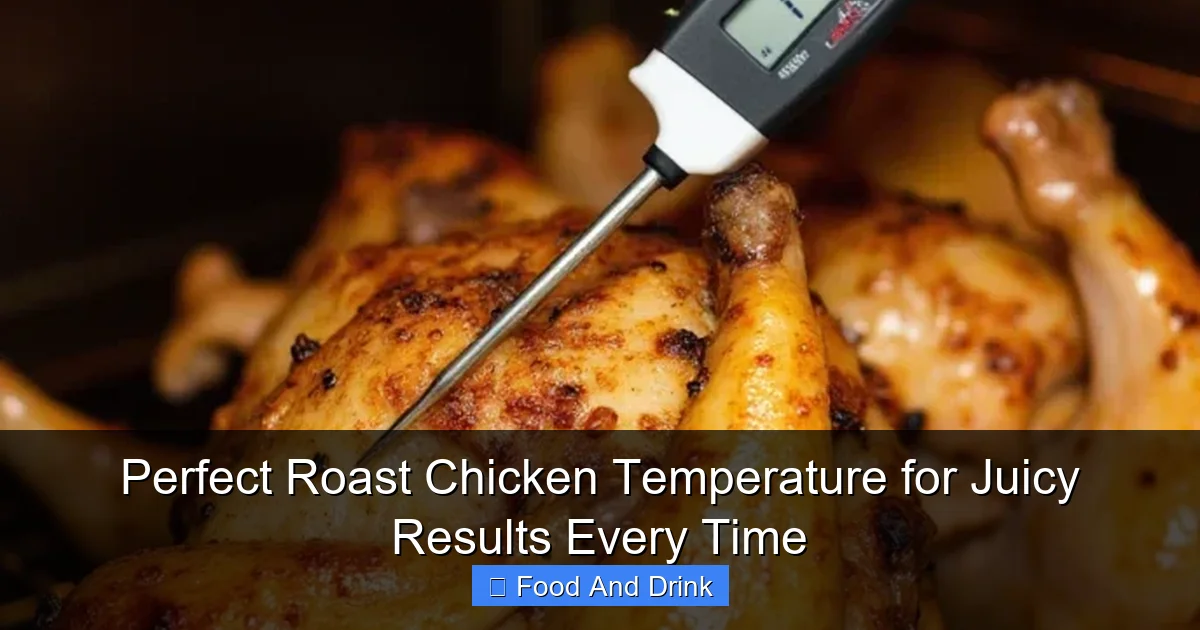
Visual guide about Perfect Roast Chicken Temperature for Juicy Results Every Time
Image source: surgerecipes.com
When it comes to food safety, the USDA is clear: poultry must reach an internal temperature of 165°F (74°C) to be safe to eat. This temperature ensures that harmful bacteria like salmonella and campylobacter are destroyed. But that doesn’t mean every part of the chicken needs to hit 165°F at the same time—or that you should cook it to that temp and stop.
Different parts of the chicken cook at different rates. The breast, being lean, cooks faster and dries out more easily. The thighs and drumsticks, with more fat and connective tissue, can handle higher temperatures and benefit from a bit more cooking to become tender.
Here’s a breakdown of ideal internal temperatures for different parts:
– Breast (white meat): 160–165°F (71–74°C)
Remove at 160°F to account for carryover cooking. The final temp will reach 165°F during resting.
– Thighs and drumsticks (dark meat): 170–175°F (77–80°C)
Dark meat is more forgiving and benefits from a slightly higher temp to break down collagen and become tender.
– Wings: 165°F (74°C)
These cook quickly and can dry out if overdone.
The key is to check multiple spots, especially if you’re roasting a whole bird. Insert the thermometer into the breast and one of the thighs to ensure both are properly cooked. If the breast is done but the thigh needs more time, you can tent the breast with foil to slow down cooking while the rest finishes.
Using a Meat Thermometer Correctly
Not all thermometers are created equal. For roasting chicken, you’ll want an instant-read thermometer or a leave-in probe thermometer. Instant-read models are great for spot-checking, while leave-in thermometers let you monitor the temperature in real time without opening the oven.
To use an instant-read thermometer:
1. Insert the probe into the thickest part of the breast, avoiding bone.
2. Wait a few seconds for the reading to stabilize.
3. Check the thigh as well, especially if it’s still undercooked.
For leave-in thermometers:
– Place the probe in the breast before roasting.
– Set an alarm for 160°F so you’re alerted when it’s time to check.
– Monitor the thigh separately if needed.
Avoid thermometers with long cords that can melt in the oven. Digital models are more accurate than analog ones, and models with a thin probe cause less damage to the meat.
What If the Chicken Is Undercooked?
If you check the temperature and it’s below 160°F, don’t panic. Simply return the chicken to the oven and continue roasting, checking every 5–10 minutes. If only one part is undercooked (like the thigh), you can tent the rest with foil to prevent overcooking.
Never serve undercooked chicken. Even if it looks done, bacteria can still be present. When in doubt, cook it a little longer. It’s better to have slightly overcooked chicken than risk foodborne illness.
Oven Temperature Strategies for Perfect Roasting
Now that we’ve covered internal temperature, let’s talk about oven temperature. This is where many cooks get creative—and sometimes confused. Should you roast high and fast? Low and slow? The answer depends on what you’re trying to achieve.
High Heat (425–450°F / 218–232°C): Crispy Skin, Fast Cooking
Roasting at high heat is ideal if you want crispy, golden-brown skin and don’t mind a shorter cooking time. The intense heat quickly renders fat and crisps the skin, while the inside cooks through relatively fast. This method works well for smaller chickens (3–4 pounds) or when you’re short on time.
To use this method:
– Preheat your oven to 425–450°F.
– Pat the chicken dry and season generously.
– Roast breast-side up for 45–60 minutes, depending on size.
– Check the internal temperature starting at 45 minutes.
Tip: For extra crispiness, place the chicken on a wire rack set inside a baking sheet. This allows hot air to circulate underneath, crisping the bottom as well.
One downside? High heat can dry out the breast if not monitored carefully. To prevent this, consider basting with butter or oil halfway through, or spritzing with broth to keep the skin from burning.
Low and Slow (325–350°F / 163–177°C): Tender, Juicy Results
If you have more time and want ultra-tender, fall-off-the-bone meat, low and slow is the way to go. Roasting at 325–350°F allows the heat to penetrate evenly, cooking the dark and white meat at a similar rate. This method is especially great for larger birds (5+ pounds) or when you want to minimize the risk of overcooking.
Benefits of low and slow roasting:
– More even cooking
– Less risk of dry breast meat
– Easier to monitor and adjust
To use this method:
– Preheat oven to 325–350°F.
– Season the chicken and place it breast-side up in a roasting pan.
– Roast for 20 minutes per pound (e.g., a 4-pound chicken = 80 minutes).
– Check internal temperature starting at 70 minutes.
You can still get crispy skin with this method—just crank the heat to 450°F for the last 10–15 minutes to brown the skin. This gives you the best of both worlds: juicy meat and crispy skin.
The Hybrid Approach: Start High, Finish Low
Many professional chefs use a hybrid method: start at a high temperature to crisp the skin, then reduce the heat to finish cooking gently. This combines the benefits of both techniques.
How it works:
1. Preheat oven to 450°F.
2. Roast chicken for 20–30 minutes to brown the skin.
3. Reduce heat to 325°F and continue roasting until done.
4. Check internal temperature as usual.
This method is especially useful if you’re roasting a chicken with the skin on and want that restaurant-quality crispness without drying out the meat.
Spatchcocking: Even Cooking, Faster Results
Spatchcocking—removing the backbone and flattening the chicken—is a game-changer for even roasting. It allows the bird to lie flat in the pan, exposing more surface area to heat. This means the breast and thighs cook at the same rate, reducing the risk of dry white meat.
To spatchcock:
– Place the chicken breast-side down.
– Use kitchen shears to cut along both sides of the backbone and remove it.
– Flip the chicken over and press down firmly to flatten.
Roast spatchcocked chicken at 425°F for 40–50 minutes. Because it’s flattened, it cooks faster and more evenly. Plus, the skin gets crispy all over.
Tips for Juicier, More Flavorful Roast Chicken
Temperature is key, but it’s not the only factor in a great roast chicken. Here are some pro tips to take your bird to the next level.
Brining: The Secret to Moisture
Brining—soaking the chicken in salted water—is one of the best ways to ensure juicy meat. The salt helps the proteins retain moisture during cooking, so even if you slightly overcook it, it won’t dry out.
There are two types of brining:
– Wet brine: Submerge the chicken in a solution of water, salt, sugar, and aromatics (like herbs, garlic, or citrus) for 4–12 hours.
– Dry brine: Rub salt (and optional sugar/spices) all over the chicken and let it sit uncovered in the fridge for 12–24 hours.
Dry brining is easier and doesn’t require a large container. It also helps dry out the skin, which leads to better browning.
Seasoning and Aromatics
Don’t just salt and pepper—get creative! Rub the chicken with a mix of herbs (thyme, rosemary, sage), garlic, lemon zest, and olive oil. Stuff the cavity with aromatics like onion, garlic, lemon halves, and fresh herbs. These won’t flavor the meat directly, but they’ll infuse the steam and enhance the overall aroma.
For extra flavor, try a compound butter: mix softened butter with herbs, garlic, and lemon juice, then slide it under the skin of the breast. As it melts, it bastes the meat from within.
Trussing: For Even Cooking and Presentation
Trussing—tying the legs together with kitchen twine—helps the chicken cook evenly and look more polished. It also prevents the legs from burning and keeps the wings close to the body.
To truss:
– Tuck the wings under the body.
– Cross the legs and tie them together with twine.
– Optional: tie the twine around the body to secure.
If you don’t have twine, you can use a roasting rack or simply tuck the wings and legs close to the body.
Resting: The Final Step for Juicy Meat
After roasting, let the chicken rest for 15–20 minutes before carving. This allows the juices to redistribute throughout the meat. If you carve it too soon, those precious juices will spill out onto the cutting board, leaving the meat dry.
To rest:
– Transfer the chicken to a cutting board or platter.
– Tent loosely with foil (don’t wrap tightly—this can steam the skin and make it soggy).
– Let it sit while you make gravy or finish side dishes.
During this time, the internal temperature will rise slightly (carryover cooking), and the meat will become more tender and juicy.
Troubleshooting Common Roasting Problems
Even with the best intentions, things can go wrong. Here’s how to fix common issues.
Dry Breast Meat
Cause: Overcooking or high heat without moisture.
Solution: Use a lower oven temperature, brine the chicken, or baste during roasting. Remove the breast at 160°F and let it rest.
Soggy Skin
Cause: Not drying the skin before roasting or covering too tightly while resting.
Solution: Pat the skin very dry before seasoning. Roast on a rack. Tent loosely with foil when resting.
Uneven Cooking
Cause: Chicken not trussed or oven hot spots.
Solution: Truss the bird and rotate the pan halfway through roasting. Use a reliable oven thermometer to check accuracy.
Burnt Skin
Cause: Too high heat or not monitoring.
Solution: Reduce oven temperature or tent the breast with foil if it’s browning too fast.
Undercooked Thighs
Cause: Dark meat takes longer to cook.
Solution: Check both breast and thigh. If the breast is done first, tent it with foil and continue roasting until the thigh reaches 170–175°F.
Conclusion
Roasting the perfect chicken doesn’t require fancy equipment or professional skills—just a solid understanding of temperature. Whether you’re aiming for crispy skin or melt-in-your-mouth tenderness, the key is knowing the right roast chicken temperature and using a thermometer to guide you. From safe internal temps to oven strategies, brining, and resting, every step plays a role in creating a juicy, flavorful bird that impresses every time.
So the next time you’re planning a family dinner or hosting guests, remember: it’s not about how long you cook it—it’s about how well you cook it. With these tips, you’ll roast with confidence, serve with pride, and enjoy every last bite.
Frequently Asked Questions
Can I roast a frozen chicken?
It’s not recommended to roast a frozen chicken directly, as it can lead to uneven cooking and food safety risks. Thaw it in the refrigerator for 24–48 hours before roasting.
How do I know if my oven temperature is accurate?
Use an oven thermometer to check. Place it inside while preheating and compare the reading to your oven’s display. Adjust accordingly or recalibrate if needed.
Why is my chicken skin not crispy?
Soggy skin often results from not drying the chicken thoroughly before roasting or covering it too tightly while resting. Pat the skin dry and roast on a rack for best results.
Can I use a roasting bag?
Yes, roasting bags can help retain moisture and reduce splatter. Follow the package instructions and adjust cooking time—usually reduce by 25%.
What’s the best way to carve roast chicken?
Let the chicken rest, then remove the legs and wings first. Slice the breast meat against the grain for tender pieces. Use a sharp knife and a steady hand.
Can I reuse the drippings for gravy?
Absolutely! Skim off excess fat, then deglaze the pan with broth or wine. Add a slurry of flour and water to thicken into a rich, flavorful gravy.


