

Knowing where to bake chicken at is key to achieving juicy, flavorful, and evenly cooked results. Whether you’re using a conventional oven, convection oven, or even a toaster oven, the right temperature, rack position, and timing make all the difference.
If you’ve ever pulled a chicken out of the oven only to find it dry, undercooked, or unevenly browned, you’re not alone. Baking chicken seems simple—just toss it in the oven, right? But the truth is, where you bake chicken at matters more than you might think. It’s not just about tossing it on a pan and hoping for the best. The rack position, oven type, temperature, and even the pan you use all play a role in how your chicken turns out.
Think of your oven like a stage, and your chicken is the star performer. If it’s placed too close to the heating element, it might burn on the outside while staying raw inside. Too far down, and it could end up steaming instead of roasting. Getting the placement right ensures that heat surrounds the chicken evenly, cooking it through without drying it out. And when you combine that with the right temperature and timing, you get golden, juicy, perfectly cooked chicken every single time.
Whether you’re baking chicken breasts, thighs, wings, or a whole bird, understanding the basics of oven setup can transform your meals. This guide will walk you through everything you need to know—from choosing the right rack to mastering temperature control—so you can bake chicken with confidence. No more guesswork, no more dry meat. Just delicious, restaurant-quality results from your own kitchen.
Key Takeaways
- Use the center rack for even heat distribution: Placing your chicken on the middle oven rack ensures consistent cooking and prevents burning or undercooking.
- Bake at 375°F to 425°F depending on the cut: Whole chickens and bone-in pieces do well at 375°F, while boneless breasts benefit from higher heat like 400°F–425°F.
- Preheat your oven for reliable results: Always preheat to the target temperature before adding chicken to avoid uneven cooking.
- Use a baking dish or sheet pan with a rack: Elevating the chicken allows air circulation and prevents soggy bottoms.
- Check internal temperature with a meat thermometer: Chicken is safe to eat at 165°F, but removing it at 160°F lets carryover heat finish the job.
- Let chicken rest before slicing: Resting for 5–10 minutes helps retain juices and improves texture.
- Adjust time and temperature for convection ovens: Reduce temperature by 25°F or shorten cooking time by 25% when using convection settings.
Quick Answers to Common Questions
What is the best rack to bake chicken on?
The middle rack is ideal for baking chicken because it provides even heat distribution and prevents burning or undercooking.
What temperature should I bake chicken at?
Boneless chicken breasts bake best at 400°F–425°F, while bone-in cuts and whole chickens do well at 375°F.
How long does it take to bake chicken?
Boneless breasts take 20–25 minutes at 400°F, while a whole chicken takes 1 to 1.5 hours at 375°F.
Should I use a wire rack when baking chicken?
Yes, a wire rack helps air circulate under the chicken, resulting in crispier skin and even cooking.
How do I know when chicken is done baking?
Use a meat thermometer to check that the internal temperature reaches 165°F, or remove at 160°F and let it rest.
📑 Table of Contents
Understanding Oven Rack Positions
One of the most overlooked aspects of baking chicken is where you place it in the oven. Most home cooks just slide the pan in wherever it fits, but that can lead to uneven cooking, burnt edges, or undercooked centers. The oven has three main rack positions: top, middle, and bottom. Each one affects how heat reaches your food.
The middle rack is the sweet spot for baking chicken. It’s far enough from the heating elements to avoid burning, but close enough to receive consistent, even heat from both the top and bottom. This balanced exposure helps the chicken cook uniformly, developing a nice golden-brown crust without drying out the interior.
Placing chicken on the top rack exposes it to more direct heat from the upper element. This can be useful for browning the top of a whole chicken or crisping skin, but it increases the risk of burning, especially if your oven runs hot. If you do use the top rack, keep a close eye on the chicken and consider lowering the temperature slightly.
The bottom rack is closest to the lower heating element. While this can help crisp the bottom of a chicken breast or roast, it often leads to overcooked or burnt undersides while the top remains pale. It’s generally not recommended for most chicken recipes unless you’re specifically trying to achieve a crispy skin on the bottom—like with certain roasts or casseroles.
For best results, always use the middle rack unless your recipe specifically calls for another position. And if your oven has multiple middle racks (some larger ovens do), choose the one that gives your chicken plenty of space—about 2–3 inches from the top and bottom elements. This ensures proper air circulation and even cooking.
Why Rack Position Matters
Heat in an oven doesn’t distribute perfectly. The top and bottom elements create hot zones, while the center remains more stable. When chicken is placed too high or too low, it’s exposed to these intense zones, which can cause uneven cooking. For example, a chicken breast on the top rack might brown too quickly on top while the inside stays undercooked. On the bottom rack, the underside could burn before the center reaches a safe temperature.
Using the middle rack minimizes these risks. It allows radiant heat to surround the chicken from all sides, promoting even browning and thorough cooking. This is especially important for bone-in cuts like thighs or drumsticks, which take longer to cook and are more prone to drying out if exposed to too much direct heat.
Another benefit of the middle rack is consistency. Most oven manufacturers design their appliances with the middle rack in mind as the default cooking position. Recipes are typically tested using this setup, so following it increases your chances of success. Whether you’re baking a simple sheet pan dinner or a holiday roast, the middle rack is your best bet for reliable results.
Exceptions to the Rule
While the middle rack is ideal for most chicken dishes, there are a few exceptions. For example, if you’re roasting a whole chicken and want extra crispy skin, you might start it on the middle rack and then move it to the top rack for the last 10–15 minutes to boost browning. This technique gives you the best of both worlds—even cooking and a golden finish.
Similarly, some convection ovens have a “roast” setting that uses the top element more aggressively. In these cases, placing the chicken slightly lower than the middle can help prevent over-browning. Always refer to your oven’s manual for guidance on rack placement with specific settings.
Another exception is when baking multiple trays of chicken wings or tenders. If you’re cooking on two racks at once, place one on the middle rack and the other just above or below it. Rotate the pans halfway through cooking to ensure even browning. This method works well for party appetizers or meal prep, but avoid overcrowding the oven, as it can block airflow and lead to uneven results.
Choosing the Right Oven Temperature
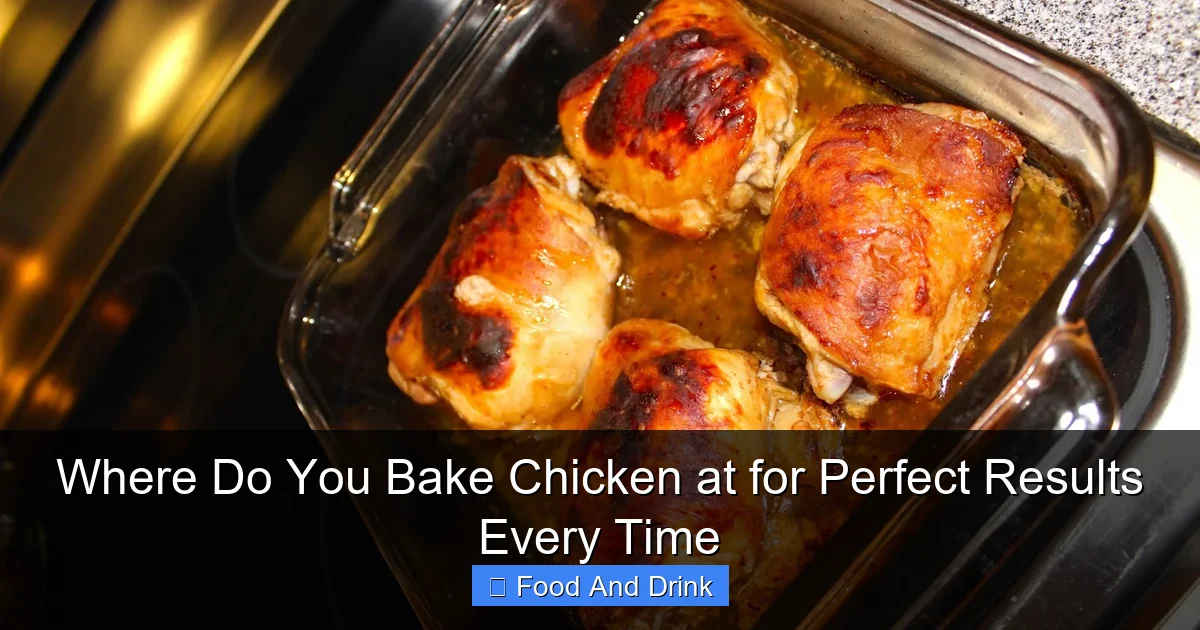
Visual guide about Where Do You Bake Chicken at for Perfect Results Every Time
Image source: blogger.googleusercontent.com
Temperature is just as important as rack position when baking chicken. Too low, and the chicken will take forever to cook, potentially drying out or becoming unsafe to eat. Too high, and the outside burns before the inside is done. The ideal temperature depends on the type of chicken you’re cooking.
For whole chickens and bone-in cuts like thighs, drumsticks, or legs, a moderate temperature of 375°F (190°C) is ideal. This allows the meat to cook through slowly, keeping it juicy while developing a rich, golden skin. Whole chickens typically take 1 to 1.5 hours at this temperature, depending on size.
Boneless chicken breasts, on the other hand, benefit from higher heat. Baking them at 400°F to 425°F (200°C–220°C) helps them cook quickly while staying tender. The higher temperature sears the outside, locking in moisture, and reduces the risk of overcooking. Most boneless breasts take 20–25 minutes at 400°F, but always check the internal temperature.
Chicken wings and tenders are best baked at 425°F (220°C). This high heat crisps the skin without drying out the meat. For extra crispiness, flip the wings halfway through and consider using a wire rack on a baking sheet to allow air to circulate underneath.
Why Temperature Affects Texture and Safety
Chicken is safe to eat when it reaches an internal temperature of 165°F (74°C). However, removing it from the oven at 160°F (71°C) allows carryover heat to finish the job while preventing dryness. Cooking at the right temperature ensures the chicken reaches this point without overcooking.
Low temperatures (below 350°F) can lead to uneven cooking and food safety risks. Bacteria like salmonella thrive between 40°F and 140°F, so slow cooking at low heat can leave chicken in the “danger zone” too long. Higher temperatures (above 425°F) can cause the exterior to burn before the center is safe to eat.
The right temperature also affects texture. Boneless breasts cooked at 375°F can become dry and rubbery because they take too long to reach 165°F. At 400°F, they cook faster, retaining more moisture. Bone-in cuts, with their higher fat content, handle lower temperatures better, staying juicy even with longer cooking times.
Adjusting for Convection Ovens
If you’re using a convection oven, you’ll need to adjust the temperature or time. Convection ovens use a fan to circulate hot air, which cooks food faster and more evenly. This can reduce cooking time by about 25% or allow you to lower the temperature by 25°F.
For example, if a recipe calls for baking chicken at 400°F in a conventional oven, set your convection oven to 375°F and check for doneness a few minutes early. Alternatively, keep the temperature the same but reduce the cooking time by 5–10 minutes.
Convection is especially great for achieving crispy skin on chicken wings or roasts. The circulating air helps remove moisture from the surface, leading to better browning. Just be sure to use a pan with low sides or a wire rack to maximize airflow.
Selecting the Best Baking Pan and Setup

Visual guide about Where Do You Bake Chicken at for Perfect Results Every Time
Image source: 3.bp.blogspot.com
The pan you use can make or break your baked chicken. A good setup ensures even cooking, prevents sticking, and helps achieve that perfect golden crust. Here’s what to look for:
Use a rimmed baking sheet or oven-safe dish that’s large enough to hold the chicken without overcrowding. Overcrowding traps steam, which leads to soggy skin and uneven browning. Leave at least 1 inch of space around each piece.
For crispy results, place the chicken on a wire rack set inside the baking sheet. The rack elevates the chicken, allowing hot air to circulate underneath. This is especially helpful for wings, tenders, or bone-in cuts. If you don’t have a rack, you can crumple up aluminum foil into balls and place them under the chicken to lift it slightly.
Avoid using non-stick sprays excessively, as they can cause uneven browning. Instead, lightly oil the chicken or the rack with olive oil or avocado oil. This helps promote browning and prevents sticking.
Pan Materials Matter
Different pan materials conduct heat differently. Dark, non-stick pans absorb more heat and can cause the bottom of the chicken to brown too quickly. They’re fine for boneless breasts but may burn bone-in cuts.
Light-colored aluminum or stainless steel pans distribute heat more evenly and are ideal for most chicken recipes. They’re durable, easy to clean, and work well with wire racks.
Glass or ceramic dishes retain heat well but can cause the bottom to overcook if not monitored. They’re great for casseroles or baked chicken with sauce, but avoid them for crispy-skinned dishes unless you use a rack.
Toaster Ovens and Countertop Convection Ovens
Don’t have a full-sized oven? No problem. You can bake chicken in a toaster oven or countertop convection oven. These smaller appliances heat up quickly and are perfect for single servings or small families.
Place the chicken in the center of the oven, using the middle rack if available. Preheat the oven and use the same temperature guidelines as a conventional oven. Cooking times may be slightly shorter due to the smaller space and faster heat circulation.
Toaster ovens are great for baking chicken breasts, tenders, or small roasts. Just be sure to use oven-safe cookware and avoid overcrowding. A wire rack is especially helpful in these compact spaces to ensure even cooking.
Timing and Doneness: How to Know When Chicken Is Done

Visual guide about Where Do You Bake Chicken at for Perfect Results Every Time
Image source: i.pinimg.com
Timing is crucial, but it’s not the only factor. The size, thickness, and type of chicken all affect how long it takes to cook. A thin chicken breast will cook in 15–20 minutes at 400°F, while a whole chicken can take over an hour at 375°F.
Instead of relying solely on time, use a meat thermometer to check for doneness. Insert the probe into the thickest part of the meat, avoiding bone or fat. Chicken is safe to eat at 165°F (74°C), but removing it at 160°F (71°C) allows carryover heat to finish the cooking process, keeping the meat juicy.
For bone-in cuts, check the temperature near the bone but not touching it. For boneless breasts, insert the thermometer from the side into the center.
Signs of Overcooked Chicken
Overcooked chicken is dry, tough, and stringy. It may pull apart easily and have a chalky texture. To avoid this, use a thermometer and remove the chicken as soon as it reaches 160°F. Let it rest for 5–10 minutes before slicing. During this time, the temperature will rise to 165°F, and the juices will redistribute.
Resting Is Essential
Resting allows the muscle fibers to relax and reabsorb juices. Cutting into chicken immediately after baking causes those juices to spill out, leaving the meat dry. Cover the chicken loosely with foil and let it rest on a cutting board or warm plate. This simple step can make a huge difference in flavor and texture.
Tips for Juicy, Flavorful Baked Chicken
Baking chicken doesn’t have to be boring. With a few simple techniques, you can elevate your dishes from basic to restaurant-quality.
Brining is a game-changer. Soak chicken breasts in a saltwater solution (1/4 cup salt per 4 cups water) for 30 minutes to 2 hours before baking. This helps the meat retain moisture and stay juicy.
Marinating adds flavor and tenderizes the meat. Use acidic ingredients like lemon juice, vinegar, or yogurt, combined with herbs, garlic, and oil. Marinate for at least 30 minutes, or up to 24 hours in the fridge.
Basting with butter, oil, or pan juices during the last 10 minutes of cooking adds richness and helps develop a golden crust. Use a pastry brush or spoon to coat the chicken evenly.
Seasoning generously with salt, pepper, and your favorite spices ensures every bite is flavorful. Don’t be shy—chicken can handle bold seasonings like paprika, garlic powder, or Italian herbs.
Herb and Spice Combinations
Try these flavor-boosting combinations:
– Lemon, garlic, and thyme
– Smoked paprika, cumin, and chili powder
– Rosemary, sage, and black pepper
– Soy sauce, ginger, and sesame oil
Using a Meat Thermometer
Invest in a good instant-read thermometer. It’s the most reliable way to ensure your chicken is cooked perfectly every time. Look for one with a quick readout (under 5 seconds) and a thin probe for accurate readings.
Troubleshooting Common Baking Problems
Even with the best techniques, things can go wrong. Here’s how to fix common issues:
Dry chicken: Caused by overcooking or high heat. Use a thermometer, brine the meat, and avoid cooking boneless breasts at very high temperatures for too long.
Undercooked center: Often due to low oven temperature or thick cuts. Pound chicken breasts to even thickness, or bake at a higher temperature for a shorter time.
Soggy skin: Results from steaming instead of roasting. Use a wire rack, avoid overcrowding, and pat the chicken dry before seasoning.
Burnt edges: Caused by high heat or incorrect rack position. Move the chicken to the middle rack and reduce the temperature if needed.
Oven Calibration
If your chicken is consistently undercooked or burnt, your oven may not be heating accurately. Use an oven thermometer to check the actual temperature. If it’s off by more than 25°F, consider having it calibrated or adjusting your recipes accordingly.
Conclusion
Baking chicken doesn’t have to be a guessing game. By understanding where to bake chicken at—using the middle rack, the right temperature, and the proper setup—you can achieve juicy, flavorful results every time. Whether you’re cooking for one or feeding a crowd, these tips will help you master the art of baked chicken.
Remember to preheat your oven, use a meat thermometer, and let the chicken rest before serving. With a little practice, you’ll be baking perfect chicken like a pro. So next time you’re wondering where to bake chicken at, just head to the center of your oven—and enjoy the delicious results.
Frequently Asked Questions
Can I bake chicken in a toaster oven?
Yes, you can bake chicken in a toaster oven. Use the same temperature guidelines and place the chicken in the center for even cooking.
Should I cover chicken while baking?
Generally, no. Covering traps steam and prevents browning. Only cover if the recipe calls for it, like in a casserole.
Can I bake frozen chicken?
It’s safer to thaw chicken first, but if baking frozen, increase the cooking time by 50% and use a thermometer to check doneness.
Why is my baked chicken dry?
Dry chicken is usually overcooked. Use a thermometer, brine the meat, and avoid high heat for too long.
Do I need to flip chicken while baking?
Flipping is optional but helps with even browning, especially for wings or tenders. Flip halfway through cooking.
Can I use a glass dish to bake chicken?
Yes, but use a wire rack to prevent the bottom from overcooking. Glass retains heat well but can cause uneven browning.


