Roasting chicken uncovered delivers crispy skin and even browning, while covering it traps steam and keeps meat moist—but at the cost of texture. For best results, most chefs recommend starting uncovered, then optionally tenting with foil later if needed.
Key Takeaways
- Uncovered roasting yields crispy skin: Leaving the chicken uncovered allows moisture to evaporate, creating that golden, crackling skin everyone loves.
- Covered roasting retains moisture: Covering with foil or a lid traps steam, preventing dryness—ideal for lean cuts or longer cook times.
- Hybrid method offers balance: Start uncovered for browning, then cover partway through to prevent overcooking without sacrificing too much crispness.
- Bird size and oven temp matter: Larger chickens benefit from covered finishing; high-heat roasting usually stays uncovered.
- Use a meat thermometer: Regardless of method, internal temperature (165°F in the thigh) is the best doneness indicator.
- Resting is non-negotiable: Letting the chicken rest 15–20 minutes after roasting redistributes juices for maximum tenderness.
- Pan choice affects outcome: A roasting pan with low sides promotes airflow; covered Dutch ovens mimic braising and require less monitoring.
Quick Answers to Common Questions
Should I cover chicken when roasting for crispy skin?
No—roast uncovered to allow moisture to evaporate and the skin to crisp up. Covering traps steam and softens the skin.
Can I cover chicken halfway through roasting?
Yes! This hybrid method gives you crispy skin early on, then protects the meat from drying out as it finishes cooking.
What temperature should I roast chicken at?
Start at 425°F–450°F for browning, then reduce to 325°F–375°F to finish. Always cook to an internal temp of 165°F in the thigh.
How long does it take to roast a 4-pound chicken uncovered?
About 1 hour to 1 hour 15 minutes at 375°F, depending on your oven. Use a thermometer to check doneness.
Is it okay to roast chicken in a covered Dutch oven?
Absolutely! A Dutch oven creates a moist environment, keeping the chicken juicy—ideal for slow, even cooking.
📑 Table of Contents
- When You Roast Chicken Do You Cover It for Best Results?
- The Science Behind Roasting: Moisture, Heat, and Skin
- Uncovered Roasting: The Path to Crispy Perfection
- Covered Roasting: Locking in Juiciness
- The Hybrid Approach: Best of Both Worlds
- Factors That Influence Your Decision
- Common Mistakes to Avoid
- Expert Tips for Foolproof Roast Chicken
- Conclusion: Choose Your Method, Own Your Results
When You Roast Chicken Do You Cover It for Best Results?
There’s something deeply satisfying about pulling a perfectly roasted chicken from the oven—golden skin glistening, aroma filling the kitchen, and the promise of juicy, flavorful meat with every bite. But amid all the joy of roasting poultry, one question keeps popping up in home kitchens and online forums alike: *When you roast chicken, do you cover it?*
It’s a deceptively simple question with a surprisingly nuanced answer. The truth is, whether or not to cover your chicken during roasting depends on your goals—crispy skin versus ultra-moist meat, speed versus tenderness, tradition versus innovation. And while there’s no single “right” way, understanding the science and technique behind covering (or not covering) your bird can transform your roast chicken from good to exceptional.
In this guide, we’ll dive deep into the pros and cons of both methods, explore hybrid approaches used by professional chefs, and give you practical, foolproof tips to achieve your ideal roast chicken—every single time. Whether you’re cooking a whole bird for Sunday dinner or just a few thighs for a weeknight meal, you’ll walk away knowing exactly when—and why—to reach for that sheet of foil.
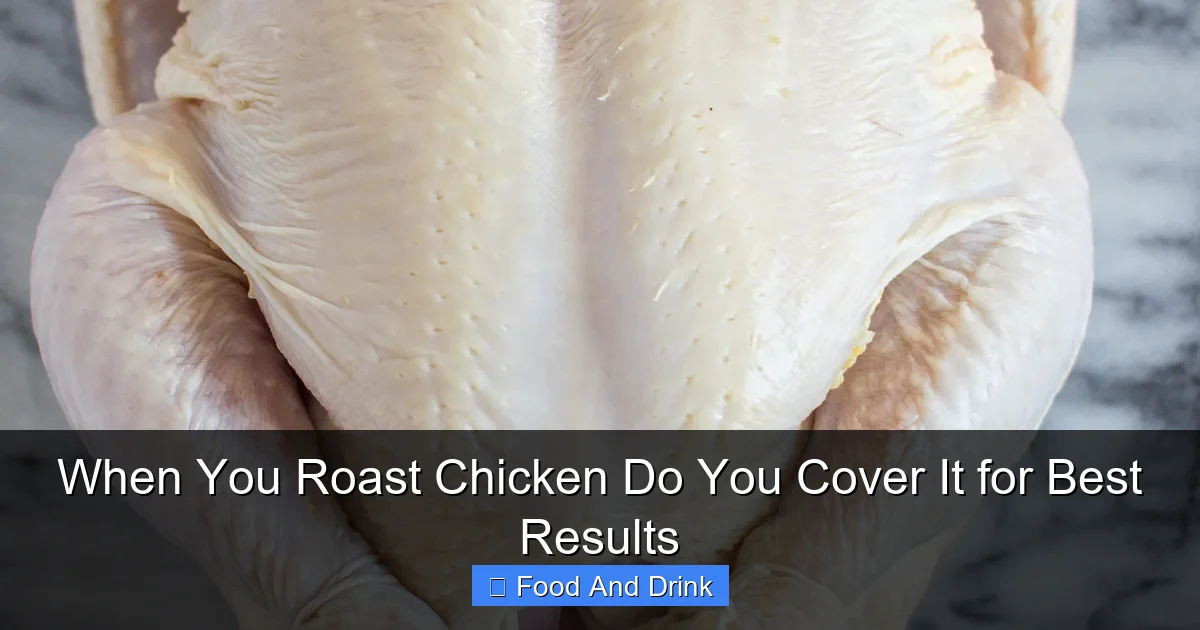
The Science Behind Roasting: Moisture, Heat, and Skin
Visual guide about When You Roast Chicken Do You Cover It for Best Results
Image source: thekittchen.com
To understand whether to cover your chicken, it helps to first grasp what happens inside the oven during roasting. Roasting is a dry-heat cooking method that relies on hot air circulating around the food to cook it evenly while developing flavor through the Maillard reaction—the chemical process that turns proteins and sugars brown and creates complex, savory notes.
When chicken roasts uncovered, moisture on the surface of the skin evaporates quickly. This drying effect is crucial for achieving crispiness. As the skin dehydrates, it becomes more receptive to browning, eventually transforming into that coveted golden-brown crust. At the same time, the fat under the skin renders out, basting the meat from within and adding richness.
However, this same evaporation can be a double-edged sword. While it crisps the skin, it also draws moisture from the meat itself—especially in leaner parts like the breast. If the chicken cooks too long or at too high a temperature without protection, those delicate white meat sections can dry out before the dark meat reaches safe internal temperatures.
Covering the chicken changes the game entirely. When you tent it with foil or place it under a lid (like in a Dutch oven), you create a mini steam environment. Moisture released from the meat gets trapped and recirculates, keeping the surface damp. This slows down browning and crisping but significantly reduces moisture loss from the interior. It’s essentially a gentle braise-in-disguise, ideal for ensuring even doneness across the whole bird—particularly useful for larger chickens or those with uneven thickness.
So, the core trade-off is clear: **uncovered = crisp skin + potential dryness; covered = moist meat + softer skin**. Your choice hinges on which quality matters most to you—and how you plan to manage the cooking process.
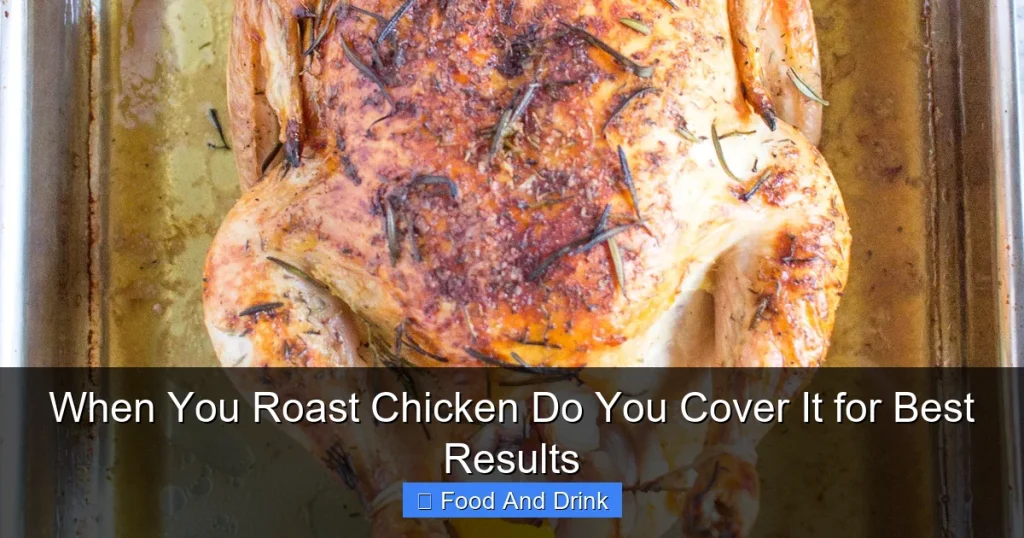
Uncovered Roasting: The Path to Crispy Perfection
Visual guide about When You Roast Chicken Do You Cover It for Best Results
Image source: thekittchen.com
If your ideal roast chicken boasts shatteringly crisp skin that crackles under your fork, then roasting uncovered is your best bet. This method is the gold standard in many professional kitchens and among seasoned home cooks who prize texture and flavor development.
Why Uncovered Works Wonders
Leaving the chicken exposed to dry oven heat allows for maximum evaporation of surface moisture—the key to crisping. As the skin dries, it reaches the optimal conditions for the Maillard reaction and caramelization, resulting in deep golden color and rich, nutty flavors. Additionally, the rendered fat pools in the pan, which you can later use for basting or making gravy.
Uncovered roasting also gives you better visual control. You can watch the chicken brown evenly, rotate it if needed, and assess doneness by appearance alongside temperature checks. It’s especially effective when using high heat (425°F–450°F) for the first 20–30 minutes to jumpstart crisping, then reducing to 350°F–375°F to finish cooking gently.
Best Practices for Uncovered Roasting
– **Dry the skin thoroughly:** Pat the chicken completely dry with paper towels before seasoning. Any residual moisture will steam instead of crisp.
– **Use a rack:** Place the chicken on a roasting rack set inside a rimmed baking sheet or roasting pan. This elevates the bird, allowing hot air to circulate underneath and promoting even browning.
– **Season generously:** Salt not only flavors the meat but also helps draw out surface moisture. For extra insurance, salt the chicken 12–24 hours ahead and refrigerate uncovered—this dry-brining technique dramatically improves crispness.
– **Don’t overcrowd the oven:** Ensure there’s space around the pan for airflow. Convection ovens work especially well here, as the fan circulates hot air efficiently.
– **Baste wisely:** While traditional basting (spooning pan juices over the chicken) adds flavor, it can also reintroduce moisture to the skin, softening it. If crispness is your priority, skip frequent basting or do it only in the last 10–15 minutes.
When Uncovered Roasting Shines
This method excels with smaller birds (under 4 pounds), spatchcocked (butterflied) chickens, or parts like legs and thighs. Spatchcocking flattens the bird, exposing more skin to direct heat and reducing cooking time—perfect for achieving all-over crispness without drying out the breast.
It’s also ideal if you’re serving the chicken immediately after roasting, as the skin stays crispest within the first 30–45 minutes out of the oven.
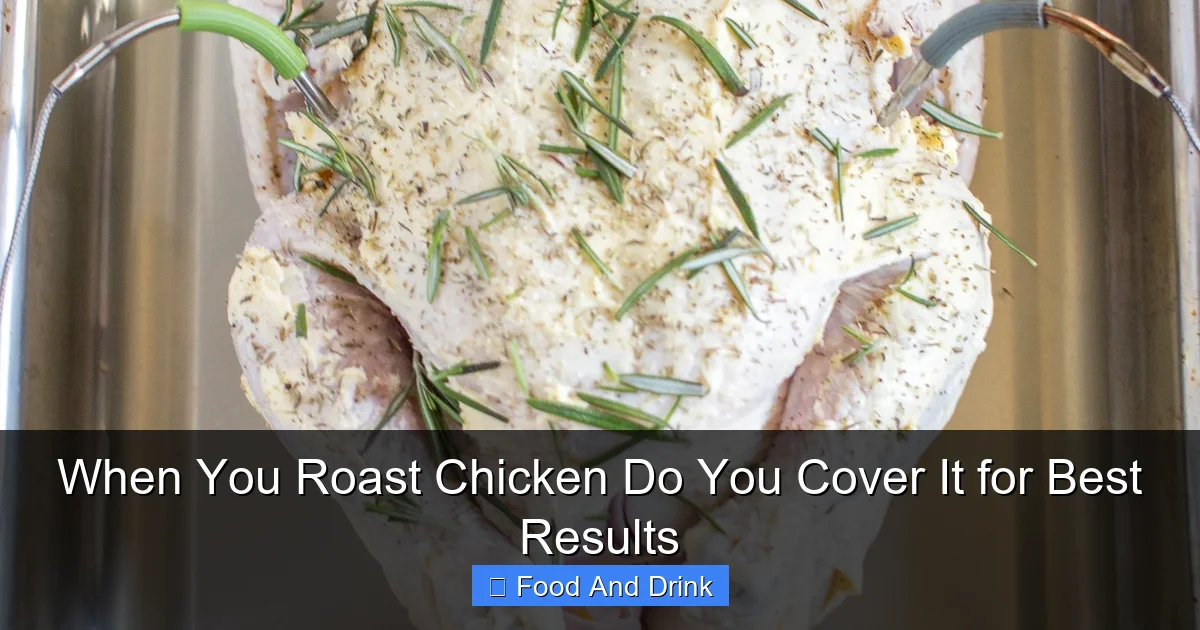
Covered Roasting: Locking in Juiciness

Visual guide about When You Roast Chicken Do You Cover It for Best Results
Image source: ezghx3g57bf.exactdn.com
While uncovered roasting delivers on texture, covered roasting prioritizes moisture retention—making it a smart choice for certain situations and preferences.
The Benefits of Trapping Steam
Covering the chicken with aluminum foil (tented loosely to avoid steaming the skin flat) or cooking it in a covered Dutch oven creates a humid microenvironment. This trapped moisture prevents the meat from drying out, especially during longer roasts or when cooking larger birds where the breast might otherwise overcook before the thighs are done.
This method is particularly useful if:
– You’re roasting a whole chicken that’s on the larger side (5+ pounds)
– Your oven runs hot or unevenly
– You’re new to roasting and want a forgiving approach
– You prefer tender, fall-off-the-bone meat over crispy skin
Covered roasting also reduces splattering in the oven, making cleanup easier—a small but welcome perk!
How to Roast Covered Effectively
– **Tent, don’t seal:** Use foil to loosely cover the chicken, leaving gaps for some steam to escape. A tight seal can lead to soggy skin and uneven cooking.
– **Add liquid (optional):** Some recipes call for adding a splash of broth, wine, or water to the pan before covering. This boosts humidity and creates a flavorful jus, but isn’t strictly necessary—chicken releases plenty of its own juices.
– **Monitor timing:** Covered roasting typically takes longer than uncovered because the effective cooking temperature is lower due to steam. Expect an extra 15–25 minutes for a whole bird.
– **Finish uncovered (optional):** For a compromise, remove the cover during the last 15–20 minutes of cooking to allow the skin to crisp up slightly.
Ideal Candidates for Covered Roasting
This method works beautifully with heritage breeds, organic chickens, or any bird known for leaner meat. It’s also great if you’re planning to shred the chicken for tacos, salads, or casseroles—where ultra-tender, moist meat is more important than presentation.
The Hybrid Approach: Best of Both Worlds
Many top chefs and food scientists advocate for a hybrid method: start uncovered to develop color and crispness, then cover partway through to protect the meat from overcooking. This balanced technique gives you golden skin *and* juicy meat—without compromise.
How the Hybrid Method Works
1. **Sear and brown uncovered:** Roast the chicken at 425°F–450°F for the first 20–30 minutes, uncovered. This jump-starts crisping and deepens flavor.
2. **Check internal temperature:** Use an instant-read thermometer to monitor the breast (target: ~150°F) and thigh (~160°F) at this stage.
3. **Tent with foil:** Once the skin is deeply golden and the breast is nearing doneness, loosely cover the chicken with foil. Reduce the oven temperature to 325°F–350°F.
4. **Finish gently:** Continue roasting until the thickest part of the thigh reaches 165°F. The foil slows down cooking just enough to prevent dryness while preserving most of the skin’s texture.
Why This Method Wins
The hybrid approach acknowledges that different parts of the chicken cook at different rates. The breast, being leaner, benefits from early high heat for flavor but risks drying out if left exposed too long. The thighs and legs, richer in fat and collagen, need more time to become tender. By switching methods mid-roast, you honor both needs.
This technique is especially effective for whole chickens between 3.5 and 5 pounds—the most common size found in supermarkets. It’s also forgiving: even if you’re off by a few minutes on timing, the foil buffer prevents disaster.
Pro Tips for Hybrid Roasting
– **Use a reliable thermometer:** This method relies on precise temperature checks. Don’t guess—measure.
– **Rotate the pan:** Turn the chicken 180 degrees halfway through the uncovered phase for even browning.
– **Let it rest:** After removing from the oven, tent loosely with foil (not tight!) and rest for 15–20 minutes. This allows juices to redistribute, ensuring every bite is succulent.
Factors That Influence Your Decision
While the uncovered vs. covered debate is central, several other variables should guide your choice:
Chicken Size and Cut
– **Whole chickens under 4 lbs:** Often do fine uncovered, especially if spatchcocked.
– **Whole chickens over 5 lbs:** Benefit from covered finishing or hybrid method to prevent breast dryness.
– **Parts (thighs, legs, breasts):** Dark meat can handle longer uncovered roasting; breast meat may need covering or lower heat.
Oven Type and Temperature
– **Convection ovens:** Promote even browning—ideal for uncovered roasting.
– **Conventional ovens:** May have hot spots; covering can help even out cooking.
– **High heat (425°F+):** Best started uncovered.
– **Low heat (300°F–325°F):** Often used for slow-roasting covered methods (e.g., “confit-style”).
Desired Outcome
Ask yourself: Do I want crispy skin? Fall-apart tender meat? Quick cooking? Make-ahead convenience? Your answer will steer you toward uncovered, covered, or hybrid.
For example, if you’re serving guests and presentation matters, go uncovered or hybrid. If you’re meal-prepping shredded chicken for the week, covered roasting ensures consistent moisture.
Time and Convenience
Uncovered roasting is generally faster but requires more attention (basting, rotating). Covered roasting is more hands-off but takes longer. The hybrid method strikes a middle ground—moderate time, moderate effort, maximum reward.
Common Mistakes to Avoid
Even experienced cooks make missteps when roasting chicken. Here are the top pitfalls—and how to dodge them:
– **Not drying the skin:** Wet skin = steamed, not roasted. Always pat dry thoroughly.
– **Crowding the pan:** Chicken should have space around it for air circulation. Use a rack if possible.
– **Overcooking:** The #1 cause of dry chicken. Use a thermometer and pull the bird at 160°F–165°F (it will rise 5°F while resting).
– **Skipping the rest:** Cutting into chicken immediately after roasting lets all the juices run out. Always rest!
– **Using dull knives:** A sharp carving knife makes clean cuts and preserves the skin’s integrity.
– **Ignoring carryover cooking:** Chicken continues to cook after removal from the oven. Account for this in your timing.
Expert Tips for Foolproof Roast Chicken
No matter which method you choose, these pro tips will elevate your roast chicken game:
– **Dry brine ahead of time:** Salt the chicken 12–24 hours before roasting and refrigerate uncovered. This seasons deeply and dries the skin for superior crispness.
– **Truss the legs:** Tying the legs together with kitchen twine helps the chicken cook evenly and keeps the shape compact for better heat distribution.
– **Stuff with aromatics:** Place lemon halves, garlic, onion wedges, or fresh herbs (thyme, rosemary) inside the cavity for subtle fragrance—not moisture.
– **Save the drippings:** Skim the fat from the pan juices and use it for roasting vegetables or making gravy. The jus is liquid gold!
– **Experiment with fats:** Rubbing the skin with butter, olive oil, or rendered duck fat adds richness and aids browning.
– **Try different seasonings:** Beyond salt and pepper, consider smoked paprika, garlic powder, or a herb butter under the skin for extra flavor.
Conclusion: Choose Your Method, Own Your Results
So, when you roast chicken, do you cover it? The answer isn’t black and white—it’s golden brown, juicy, and deeply personal. If crispy skin is your holy grail, roast uncovered. If melt-in-your-mouth tenderness tops your list, go covered. And if you want both? Embrace the hybrid method like a seasoned chef.
Ultimately, the best roast chicken is the one that makes you and your loved ones happy. With the knowledge of how covering affects moisture, texture, and flavor, you’re now equipped to make an informed choice—and adjust as needed based on your chicken, your oven, and your taste.
Remember: great roast chicken isn’t about perfection—it’s about intention. Whether you’re feeding a family, impressing guests, or simply treating yourself, take pride in the process. Dry that skin, trust your thermometer, let it rest, and savor every bite. Your perfect roast chicken is just one oven session away.
🎥 Related Video: Juicy ROAST CHICKEN RECIPE – How To Cook a Whole Chicken
📺 Natashas Kitchen
There’s nothing like homemade roast chicken! This one-pan dinner features juicy chicken breasts with our foolproof tip for perfect …
Frequently Asked Questions
Does covering chicken make it more tender?
Yes, covering traps steam and reduces moisture loss, which helps keep the meat tender and juicy—especially in lean cuts like the breast.
Can I get crispy skin if I cover my chicken?
It’s difficult, as covering introduces moisture that prevents crisping. For best results, finish uncovered for the last 15–20 minutes.
What’s the best way to prevent dry chicken when roasting uncovered?
Dry-brine the chicken ahead of time, use a meat thermometer, and avoid overcooking. Resting the bird afterward also locks in juices.
Should I add liquid to the pan when roasting covered?
It’s optional. Chicken releases its own juices, but adding broth or wine can enhance flavor and ensure ample steam.
How do I know when my roast chicken is done?
Insert an instant-read thermometer into the thickest part of the thigh (without touching bone). It should read 165°F.
Can I roast chicken parts covered or uncovered?
Either works! Dark meat (thighs, legs) handles uncovered roasting well. Breast meat may benefit from partial covering to stay moist.