
Learn how to make the perfect roasted chicken with this simple, step-by-step guide that guarantees juicy meat and crispy skin every time. Whether you’re a beginner or a seasoned cook, this foolproof method uses basic ingredients and smart techniques to deliver restaurant-quality results at home.
There’s something deeply satisfying about pulling a golden, aromatic roasted chicken out of the oven. The skin is crisp and fragrant, the meat is tender and juicy, and the kitchen smells like comfort itself. Yet, for many home cooks, roasting a chicken can feel intimidating—will it be dry? Undercooked? Bland? The good news? With the right method, roasting a perfect chicken is simpler than you think.
This step-by-step roasted chicken recipe is designed to deliver juicy results every single time. No fancy equipment, no complicated steps—just a few smart techniques that make all the difference. Whether you’re cooking for a weeknight dinner or a holiday feast, this method works like a charm. We’ll walk you through everything from prep to plating, including tips for maximizing flavor, ensuring even cooking, and achieving that coveted crispy skin. By the end, you’ll have a recipe you can rely on again and again.
Key Takeaways
- Brining is optional but powerful: A quick brine or dry brine boosts moisture and flavor, especially for larger chickens.
- Room temperature matters: Letting the chicken sit out for 30–60 minutes before roasting ensures even cooking.
- Trussing isn’t just for looks: Tying the legs together helps the chicken cook evenly and stay juicy.
- High heat at the start = crispy skin: Starting at 425°F (220°C) crisps the skin, then lowering to 375°F (190°C) cooks the meat gently.
- Use a meat thermometer: The safest way to know when your chicken is done—165°F (74°C) in the thickest part of the thigh.
- Resting is non-negotiable: Let the chicken rest for 15–20 minutes before carving to lock in juices.
- Save the drippings: Use the pan juices to make a quick, flavorful gravy or sauce.
Quick Answers to Common Questions
How long does it take to roast a 4-pound chicken?
It takes about 75 minutes total: 30 minutes at 425°F (220°C) followed by 45 minutes at 375°F (190°C). Always check with a meat thermometer to ensure it reaches 165°F (74°C) in the thigh.
Can I roast a chicken without trussing?
Yes, trussing is optional. It helps the chicken cook more evenly and look neater, but you can skip it if you don’t have kitchen twine or prefer a more rustic presentation.
What’s the best way to store leftover roasted chicken?
Store in an airtight container in the refrigerator for up to 4 days. You can also freeze it for up to 3 months. Reheat gently in the oven or microwave.
Can I use this recipe for a smaller or larger chicken?
Yes. Adjust cooking time accordingly—smaller chickens (3–4 lbs) may need 60–70 minutes total, while larger ones (5–6 lbs) may need 90–100 minutes. Always use a thermometer.
Do I need to baste the chicken while it roasts?
Basting is optional. It can add flavor, but frequent opening of the oven door lowers the temperature and may prevent crispy skin. One or two light bastes are fine.
📑 Table of Contents
Why This Roasted Chicken Recipe Works
Not all roasted chicken recipes are created equal. Some call for endless basting, others require special pans or gadgets. This recipe strips away the fluff and focuses on what truly matters: moisture, flavor, and texture. The secret lies in a combination of proper seasoning, temperature control, and timing.
First, we use a simple dry brine—salt rubbed directly onto the chicken—to season the meat deeply and help it retain moisture during roasting. This isn’t just about taste; salt changes the protein structure slightly, allowing the chicken to hold onto more water. The result? Juicier meat, even if you slightly overcook it.
Next, we roast the chicken at two different temperatures. We start high—425°F (220°C)—to jumpstart the browning and crisping of the skin. Then, we drop the heat to 375°F (190°C) to gently cook the meat without drying it out. This two-stage method ensures a golden exterior and a tender interior.
Finally, we emphasize resting. Many people skip this step, but it’s crucial. When you cut into a hot chicken, the juices rush out and leave the meat dry. Letting it rest allows the juices to redistribute, so every bite stays moist.
Ingredients You’ll Need
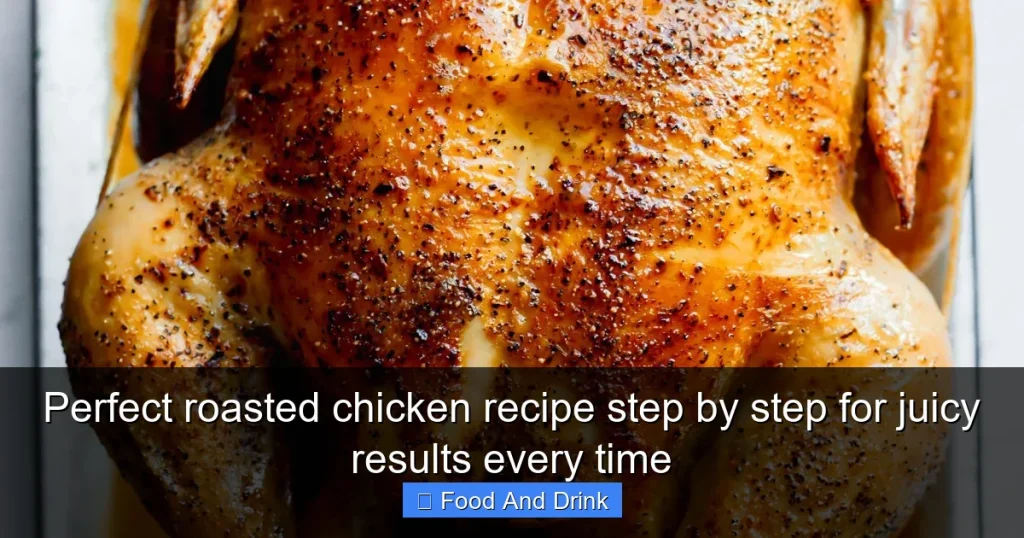
Visual guide about Perfect roasted chicken recipe step by step for juicy results every time
Image source: allrecipes.com
One of the best things about this roasted chicken recipe is how few ingredients it requires. You likely have most of them in your pantry already. Here’s what you’ll need for a standard 4–5 pound (1.8–2.3 kg) whole chicken:
- 1 whole chicken (4–5 pounds / 1.8–2.3 kg), giblets removed
- 2 tablespoons kosher salt (or 1 tablespoon table salt)
- 1 teaspoon freshly ground black pepper
- 1 tablespoon olive oil or melted butter
- 1 lemon, halved
- 1 head of garlic, halved horizontally
- 1 large onion, quartered
- 4–6 sprigs fresh thyme, rosemary, or sage (or a mix)
- 1 cup chicken broth or water (optional, for the roasting pan)
You can customize the aromatics based on what you have. Carrots, celery, or fennel work well too. The key is to use ingredients that release flavor as they roast and create a fragrant base for the chicken.
Optional Add-Ins for Extra Flavor
If you want to take your roasted chicken up a notch, consider these optional additions:
- Butter under the skin: Gently loosen the skin over the breast and thighs and slide in small pats of softened butter mixed with herbs. This adds richness and helps baste the meat from within.
- Herb butter rub: Mix softened butter with minced garlic, lemon zest, and fresh herbs. Rub it all over the chicken for a flavorful crust.
- Spice blend: Add smoked paprika, garlic powder, or onion powder to the salt and pepper for a more complex flavor profile.
- White wine: Replace the broth with a dry white wine for a brighter, more aromatic pan sauce.
These extras aren’t necessary, but they can transform a good chicken into a great one.
Step-by-Step Instructions
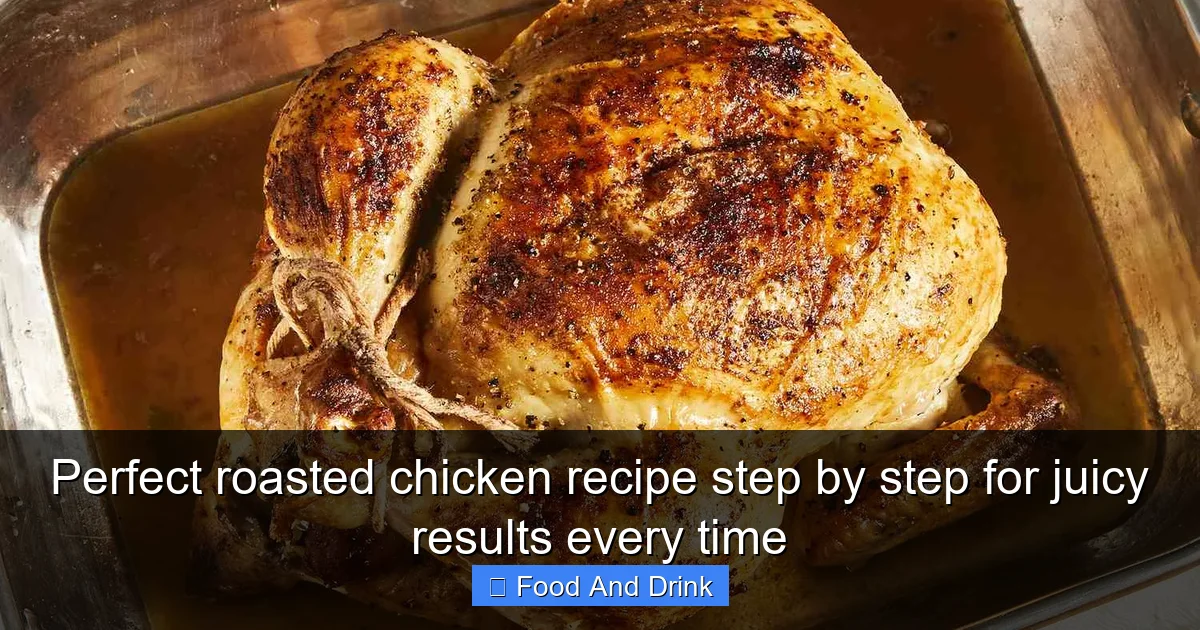
Visual guide about Perfect roasted chicken recipe step by step for juicy results every time
Image source: allrecipes.com
Now, let’s walk through the process of making the perfect roasted chicken, step by step. Follow these instructions carefully, and you’ll end up with a juicy, golden bird every time.
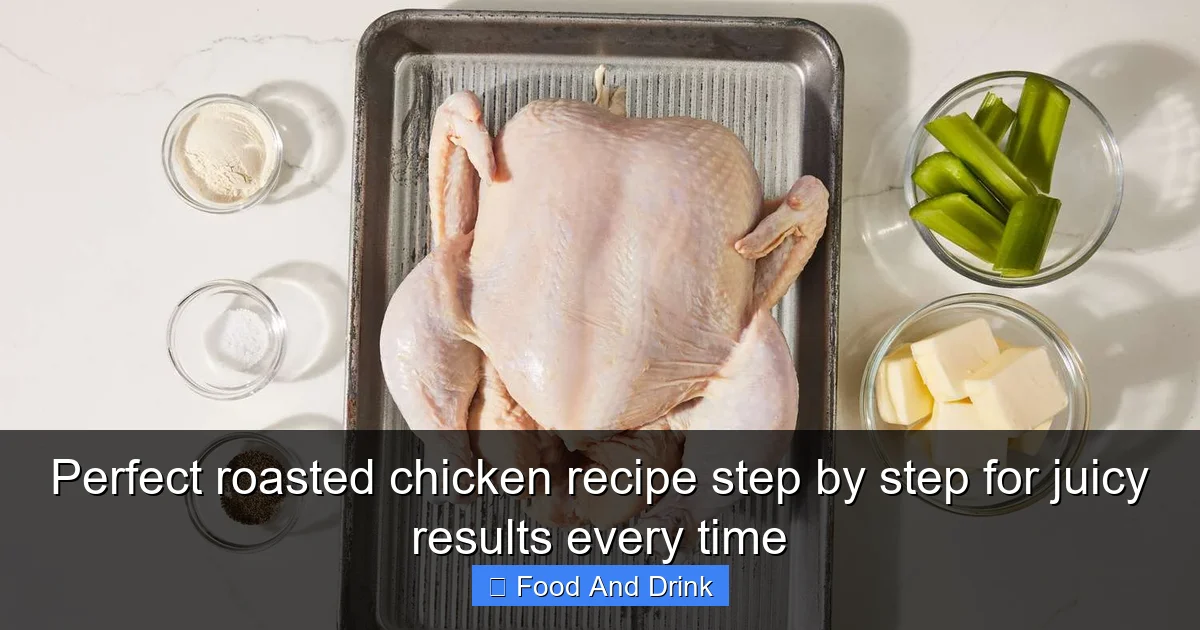
Step 1: Prep the Chicken
Start by removing the chicken from the refrigerator and patting it completely dry with paper towels. Moisture is the enemy of crispy skin, so this step is essential. Check the cavity for the giblets packet—many chickens come with it tucked inside. Remove it and save for gravy or discard.
Next, season the chicken generously with salt and pepper. Use about 1 tablespoon of kosher salt for a 4–5 pound bird. Sprinkle it inside the cavity and all over the outside, including under the wings and legs. Don’t be shy—salt is your friend.
Let the chicken sit, uncovered, in the refrigerator for at least 1 hour, or up to 24 hours. This dry brining process seasons the meat deeply and helps it retain moisture. If you’re short on time, you can skip the fridge time, but the results won’t be as juicy.
Step 2: Bring to Room Temperature
About 30–60 minutes before roasting, take the chicken out of the fridge and let it come to room temperature. Cold chicken going into a hot oven will cook unevenly—the outside may dry out before the inside is done. Letting it warm up slightly ensures more even cooking.
While the chicken sits, preheat your oven to 425°F (220°C). Place a roasting pan or heavy oven-safe skillet on the middle rack to heat up. A hot pan helps sear the skin and jumpstart browning.
Step 3: Add Aromatics and Truss (Optional)
Stuff the cavity with the lemon halves, garlic head, onion quarters, and herb sprigs. These aromatics will infuse the chicken with flavor as it roasts and create a fragrant steam inside the cavity.
If you’d like, truss the chicken. This means tying the legs together with kitchen twine and tucking the wings under the body. Trussing isn’t strictly necessary, but it helps the chicken cook more evenly and gives it a neat, restaurant-style appearance.
Step 4: Roast the Chicken
Once the oven and pan are hot, carefully remove the pan and place the chicken breast-side up in the center. Drizzle the olive oil or melted butter over the top—this helps the skin crisp up and turn golden.
Return the pan to the oven and roast at 425°F (220°C) for 30 minutes. This high heat blast is key for crispy skin.
After 30 minutes, reduce the oven temperature to 375°F (190°C). Continue roasting for another 45–60 minutes, depending on the size of your chicken. A 4-pound chicken will take about 75 minutes total; a 5-pound bird may need closer to 90 minutes.
Step 5: Check for Doneness
The best way to know if your chicken is done is with a meat thermometer. Insert it into the thickest part of the thigh, avoiding the bone. The internal temperature should read 165°F (74°C). If you don’t have a thermometer, pierce the thigh—the juices should run clear, not pink.
If the skin is getting too dark before the chicken is done, tent it loosely with aluminum foil.
Step 6: Rest the Chicken
Once the chicken is cooked, remove it from the oven and transfer it to a cutting board or platter. Tent it loosely with foil and let it rest for 15–20 minutes. This resting period allows the juices to settle back into the meat. If you carve it too soon, those juices will spill out and leave the chicken dry.
Step 7: Carve and Serve
After resting, it’s time to carve. Start by removing the legs: pull one leg away from the body and cut through the joint where it connects. Repeat on the other side. Then, slice the breast meat against the grain into even pieces.
Serve the chicken with the roasted vegetables from the pan, a drizzle of pan juices, and your favorite sides—mashed potatoes, roasted carrots, or a fresh salad all pair beautifully.
Tips for Juicy, Flavorful Results
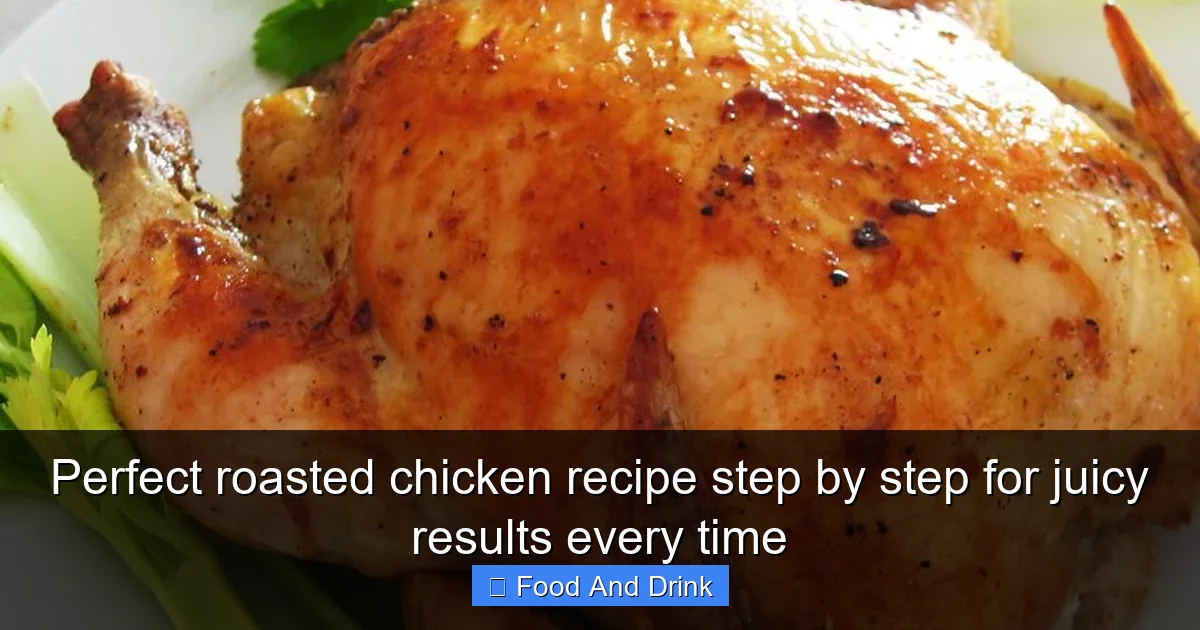
Visual guide about Perfect roasted chicken recipe step by step for juicy results every time
Image source: allrecipes.com
Even with a solid recipe, small tweaks can make a big difference. Here are some pro tips to ensure your roasted chicken is always a success.
Use a Meat Thermometer
This can’t be stressed enough. Visual cues like color and texture are unreliable. A meat thermometer takes the guesswork out of cooking and ensures your chicken is safe to eat without being overdone.
Don’t Overcrowd the Pan
If you’re roasting vegetables alongside the chicken, make sure they’re arranged in a single layer around the bird—not piled on top. Overcrowding leads to steaming instead of roasting, which can make the skin soggy.
Baste Lightly (But Not Too Much)
Some recipes call for frequent basting, but this actually lowers the oven temperature each time you open the door and can prevent the skin from crisping. Instead, baste once or twice during the second stage of roasting, or skip it altogether if you’ve used butter or oil.
Save the Drippings
The browned bits and juices in the pan are liquid gold. Pour off excess fat (leave about 2 tablespoons), then deglaze the pan with broth or wine. Scrape up the browned bits and simmer to make a quick pan sauce or gravy.
Let Leftovers Shine
Roasted chicken is even better the next day. Use leftover meat for sandwiches, salads, tacos, or soups. The bones make an excellent base for homemade chicken stock.
Common Mistakes to Avoid
Even experienced cooks can fall into traps that lead to dry or undercooked chicken. Here are the most common mistakes and how to avoid them.
Skipping the Dry Brine
Salt isn’t just for flavor—it’s a moisture-retaining powerhouse. Skipping the dry brine means you’re more likely to end up with dry meat, especially on the breast.
Roasting Cold Chicken
Putting a cold chicken straight from the fridge into a hot oven causes uneven cooking. Always let it come to room temperature first.
Overcooking
Chicken continues to cook slightly after it’s removed from the oven due to residual heat. Pull it out when the thermometer reads 160°F (71°C)—it will reach 165°F (74°C) during resting.
Not Resting
Cutting into the chicken immediately after roasting lets all the juices escape. Resting is non-negotiable for juicy results.
Using a Dull Knife to Carve
A sharp carving knife makes clean cuts and prevents tearing the skin. Keep your knife sharp for the best presentation.
Serving Suggestions and Pairings
A perfectly roasted chicken deserves equally delicious sides. Here are some classic and creative pairings to complete your meal.
- Classic sides: Mashed potatoes, roasted root vegetables, green beans almondine, or a simple arugula salad with lemon vinaigrette.
- Grain bowls: Serve chicken over quinoa, farro, or wild rice with roasted veggies and a tahini drizzle.
- Sandwiches: Shred leftover chicken for chicken salad sandwiches with celery, grapes, and mayo.
- Soups and stews: Use leftover meat in chicken noodle soup, curry, or pot pie.
- Brunch option: Serve cold roasted chicken with avocado, tomato, and a fried egg on toast.
Don’t forget the pan sauce! A simple gravy made from the drippings, flour, and broth adds richness and ties the whole meal together.
Conclusion
Roasting a chicken doesn’t have to be complicated. With this step-by-step roasted chicken recipe, you’ll get juicy, flavorful results every time—no special skills or equipment required. The key is in the details: dry brining, proper temperature control, and resting. Once you master this method, you’ll wonder why you ever relied on takeout.
This recipe is versatile, reliable, and perfect for any occasion. Whether you’re cooking for two or feeding a crowd, a golden roasted chicken is always a crowd-pleaser. So preheat that oven, grab your chicken, and get ready to impress your family and friends with a dish that’s both simple and spectacular.
Frequently Asked Questions
Can I brine the chicken instead of dry brining?
Yes, you can use a wet brine (soaking in salted water) for 4–12 hours. However, dry brining is simpler and equally effective for moisture and flavor.
What if my chicken skin isn’t crispy?
Make sure the chicken is patted very dry before seasoning. Starting at a high temperature (425°F) and avoiding overcrowding the pan also helps crisp the skin.
Can I roast a chicken in a regular baking dish?
Yes, as long as it’s oven-safe and can handle high heat. A roasting pan, skillet, or casserole dish all work. Just ensure there’s enough room around the chicken.
Is it safe to eat chicken if the internal temperature is 160°F?
Yes, chicken is safe to eat at 160°F (71°C) as long as it holds that temperature for at least 30 seconds. It will continue to rise to 165°F (74°C) during resting.
Can I add vegetables to the roasting pan?
Absolutely! Carrots, potatoes, onions, and Brussels sprouts roast beautifully alongside the chicken. Just cut them into even pieces and arrange around the bird.
What should I do with the chicken giblets?
You can save them to make gravy or stock, or discard them. Some people also cook them separately and serve as a side or add to stuffing.


