

Master the art of roast chicken with this easy step-by-step guide that guarantees juicy meat, crispy skin, and rich flavor. From prep to carving, we’ll walk you through every detail for foolproof results.
There’s something deeply satisfying about pulling a golden, aromatic roast chicken from the oven. The skin is crisp and glistening, the meat is tender and juicy, and the kitchen smells like comfort itself. Whether you’re cooking for a holiday dinner, a weeknight family meal, or just because you deserve a delicious homemade dish, roast chicken is a timeless classic that never fails to impress.
But let’s be honest—roast chicken can be tricky. Too often, it turns out dry, under-seasoned, or unevenly cooked. The breast is overdone while the thighs are still undercooked. Or worse, the skin is soggy instead of crispy. That’s why mastering the perfect roast chicken step by step is so important. With the right techniques, tools, and a little patience, you can turn this simple dish into a showstopper every single time.
In this comprehensive guide, we’ll walk you through every stage of the process—from selecting the best chicken to carving it like a pro. You’ll learn how to season for maximum flavor, cook at the right temperatures, and use simple tricks to keep the meat moist and the skin crispy. Whether you’re a beginner or a seasoned home cook, these tips will help you achieve juicy, restaurant-quality results in your own kitchen. So preheat that oven, grab your favorite roasting pan, and let’s get started on your journey to roast chicken perfection.
Key Takeaways
- Choose the right chicken: Opt for a high-quality, fresh or properly thawed whole chicken (3–4 lbs) for best results.
- Season generously and in advance: Salt the chicken inside and out at least 1 hour (or up to 24 hours) before roasting for deeper flavor and moisture.
- Truss for even cooking: Tying the legs together helps the chicken cook evenly and keeps it juicy.
- Roast at high heat initially: Start at 425°F (220°C) for 15–20 minutes to crisp the skin, then reduce to 375°F (190°C) to finish cooking gently.
- Use a meat thermometer: Insert into the thickest part of the thigh (without touching bone); 165°F (74°C) means it’s safe and perfectly cooked.
- Let it rest before carving: Resting for 15–20 minutes allows juices to redistribute, ensuring moist, tender meat.
- Add aromatics for extra flavor: Stuff the cavity with lemon, garlic, herbs, or onions to infuse the meat from within.
Quick Answers to Common Questions
How long does it take to roast a 4-pound chicken?
A 4-pound chicken typically takes about 1 hour and 15 minutes to 1 hour and 30 minutes to roast at 375°F (190°C) after an initial 15–20 minutes at 425°F (220°C). Always use a meat thermometer to check for doneness.
Can I roast a chicken without trussing?
Yes, but trussing helps the chicken cook evenly and keeps the breast moist. If you skip it, just monitor the breast closely and tent with foil if it browns too quickly.
Should I baste my roast chicken?
Basting is optional and not necessary for juicy results. Opening the oven door frequently can lower the temperature and extend cooking time. Focus on proper seasoning and temperature control instead.
Can I use a roasting bag?
Yes, but the skin won’t get as crispy. For best results, roast the chicken uncovered on a rack in a pan. If using a bag, puncture it for ventilation and expect softer skin.
What’s the best way to store leftover roast chicken?
Store in an airtight container in the refrigerator for up to 4 days. Reheat gently in the oven at 325°F (160°C) for best texture, or use in cold dishes like salads and sandwiches.
📑 Table of Contents
Choosing the Right Chicken
The foundation of a great roast chicken starts with the bird itself. Not all chickens are created equal, and the quality of your ingredients will directly impact the final result. When shopping for a whole chicken, look for one that’s plump, evenly shaped, and free of bruises or discoloration. A good rule of thumb is to choose a chicken that weighs between 3 and 4 pounds (1.4 to 1.8 kg). This size roasts evenly and fits comfortably in most home ovens without overcrowding.
You’ll also want to consider whether to buy fresh or frozen. Fresh chickens are ideal if you’re cooking the same day, but frozen chickens can be just as good—if properly thawed. If you go the frozen route, plan ahead. Thaw your chicken in the refrigerator, allowing 24 hours for every 5 pounds. Never thaw at room temperature, as this can promote bacterial growth. Once thawed, pat the chicken dry with paper towels. Dry skin is essential for achieving that coveted crispy exterior.
Another factor to consider is the type of chicken. Organic, free-range, or pasture-raised chickens often have better flavor and texture due to their diet and living conditions. While they may cost a bit more, the difference in taste is noticeable. If budget is a concern, conventional chickens still work well—just be sure to season them thoroughly to enhance their natural flavor.
Finally, inspect the packaging for any added solutions. Some chickens are injected with saline or broth to increase weight and moisture. While this might sound helpful, it can actually dilute flavor and make the meat less absorbent to your seasoning. Look for chickens labeled “all-natural” or “no added solutions” for the best results.
Preparation and Seasoning

Visual guide about Perfect Roast Chicken Step by Step Guide for Juicy Results
Image source: chefsouschef.com
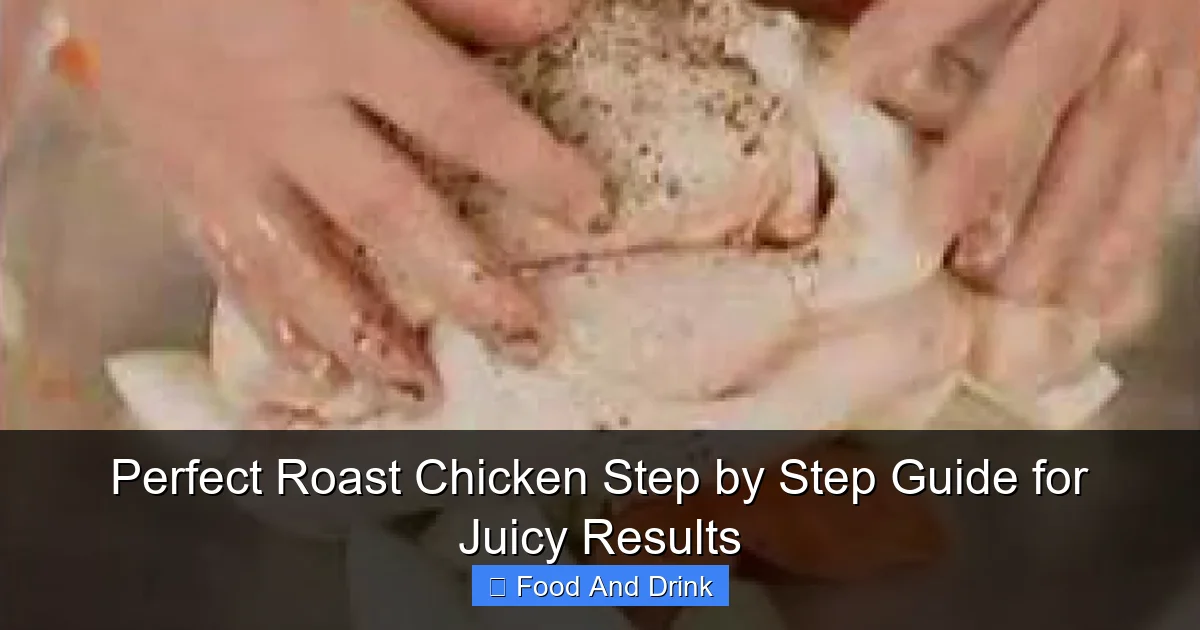
Once you’ve selected your chicken, it’s time to prepare it for roasting. This step is crucial—proper prep ensures even cooking, maximum flavor, and juicy meat. Start by removing the chicken from its packaging and discarding any giblets or neck that may be inside the cavity. Rinse the chicken under cold water if desired (though many food safety experts now recommend skipping this step to avoid cross-contamination), then pat it completely dry with paper towels. Dry skin is non-negotiable for crispy results.
Now comes the most important part: seasoning. Salt is your best friend when it comes to roast chicken. It not only enhances flavor but also helps break down proteins, allowing the meat to retain more moisture during cooking. For the best results, season the chicken generously—both inside and out—with kosher salt or sea salt. Don’t be shy! A good rule is about 1 teaspoon of salt per pound of chicken.
But here’s the secret: season in advance. Salting the chicken at least 1 hour before roasting (or even up to 24 hours in the fridge) allows the salt to penetrate deep into the meat, resulting in a more flavorful and juicy bird. This technique, known as dry brining, is a game-changer. Simply rub the salt all over the chicken, place it on a wire rack set over a baking sheet, and refrigerate uncovered. The air circulation helps dry the skin further, which means even better crispiness.
In addition to salt, add other seasonings to build flavor. Black pepper is a classic choice, but don’t stop there. Garlic powder, onion powder, smoked paprika, thyme, rosemary, or a pinch of cayenne can all elevate your roast chicken. You can also rub the chicken with softened butter or olive oil after salting. This not only adds richness but also helps the skin brown beautifully.
For extra flavor, stuff the cavity with aromatics. A halved lemon, a few garlic cloves, fresh herbs like rosemary or thyme, and a quartered onion work wonders. These ingredients release their essence during roasting, infusing the meat from the inside out. Just remember: the stuffing doesn’t get eaten, so don’t worry about making it perfect—just toss in whatever you have on hand.
Trussing and Stuffing Techniques
Visual guide about Perfect Roast Chicken Step by Step Guide for Juicy Results
Image source: recipeflow.com
Trussing—the act of tying the chicken legs together with kitchen twine—might seem like an old-fashioned step, but it’s actually essential for even cooking. When the legs are tied together, they hold the bird in a compact shape, allowing heat to distribute more evenly. This prevents the breast from drying out while the thighs catch up. It also helps the chicken retain its moisture and makes for a more attractive presentation.
To truss a chicken, place it breast-side up on a clean surface. Tuck the wing tips behind the shoulders—this keeps them from burning. Then, cut a piece of kitchen twine about 3 feet long. Slide the string under the chicken, bringing the ends up between the legs. Cross the ends over the drumsticks, then pull them tight to bring the legs together. Tie a secure knot at the top. If you don’t have twine, you can use a small bunch of fresh herbs (like rosemary or thyme) to tie the legs together—this adds extra flavor too.
Now, about stuffing: while it’s tempting to fill the cavity with a bread-based stuffing, it’s actually safer and more effective to cook stuffing separately. The cavity of a roasting chicken doesn’t get hot enough to cook raw stuffing thoroughly, which can lead to foodborne illness. Instead, use the cavity for aromatics only—lemon, garlic, herbs, and onion are perfect. These won’t be eaten, but they’ll perfume the meat beautifully.
If you’re craving stuffing, make it in a separate dish alongside the chicken. A simple bread stuffing with celery, onion, broth, and herbs bakes wonderfully in a casserole dish. You can even place it in the oven during the last 30 minutes of roasting to warm it up. This way, you get the best of both worlds: juicy chicken and delicious stuffing, safely cooked.
Roasting Temperature and Timing

Visual guide about Perfect Roast Chicken Step by Step Guide for Juicy Results
Image source: shecooksdesign.com
Temperature control is the key to perfectly cooked roast chicken. The goal is to crisp the skin quickly while gently cooking the meat to retain moisture. The best method? Start high, then go low.
Begin by preheating your oven to 425°F (220°C). This high initial temperature is crucial for achieving that golden, crackling skin. Place the chicken breast-side up on a roasting pan or oven-safe skillet. If you have a roasting rack, use it—this allows hot air to circulate underneath the chicken, promoting even browning.
Roast the chicken at 425°F for the first 15–20 minutes. This jump-starts the Maillard reaction, the chemical process that gives roasted foods their rich, complex flavors and beautiful color. You’ll notice the skin beginning to puff up and turn golden brown.
After the initial high-heat blast, reduce the oven temperature to 375°F (190°C). Continue roasting until the internal temperature reaches 165°F (74°C) in the thickest part of the thigh, avoiding the bone. This usually takes about 1 to 1.5 hours total, depending on the size of your chicken. A 3.5-pound chicken typically takes around 75 minutes.
But here’s the most important tip: use a meat thermometer. Relying on time alone is unreliable—ovens vary, and chickens differ in shape and density. Insert the thermometer into the thigh, making sure it doesn’t touch the bone. When it reads 165°F, the chicken is safe to eat and perfectly cooked. The breast may read a few degrees higher, which is fine—it’s better to slightly overcook the breast than undercook the thigh.
If you notice the skin browning too quickly, tent the chicken loosely with aluminum foil. This protects the skin from burning while allowing the interior to continue cooking. Just remove the foil during the last 10–15 minutes to crisp up the skin again.
Resting and Carving
Once your chicken reaches the perfect internal temperature, it’s tempting to slice into it immediately. Resist the urge! Resting is one of the most overlooked—but most important—steps in roasting chicken.
Remove the chicken from the oven and transfer it to a cutting board or platter. Tent it loosely with foil and let it rest for 15–20 minutes. During this time, the juices that have been driven to the center of the meat by the heat begin to redistribute. If you carve too soon, those precious juices will spill out, leaving the meat dry. Resting ensures every bite is moist and flavorful.
While the chicken rests, you can make a quick pan sauce using the drippings in your roasting pan. Simply place the pan on the stove over medium heat, add a splash of broth or wine, and scrape up the browned bits. Simmer for a few minutes, then strain and serve alongside the chicken. It’s a simple way to add richness and depth to your meal.
Now, for carving. Start by removing the twine if you trussed the chicken. Use a sharp carving knife and a sturdy fork or tongs to hold the bird steady. First, remove the legs: pull one leg away from the body and cut through the joint where the thigh meets the backbone. Repeat on the other side. Then, slice the breast meat against the grain into even portions. If you’re serving a crowd, you can also remove the wings and separate the drumsticks from the thighs.
Serve the chicken on a warm platter, garnished with fresh herbs or lemon wedges. The crispy skin, juicy meat, and aromatic aroma will make everyone at the table smile.
Serving Suggestions and Leftovers
Roast chicken is incredibly versatile. Serve it with classic sides like roasted potatoes, steamed green beans, or a fresh garden salad. Mashed potatoes, stuffing, and gravy make it a comforting Sunday dinner. For a lighter option, pair it with a grain bowl or a citrusy arugula salad.
Leftovers? Absolutely! Roast chicken keeps well in the fridge for up to 4 days. Store it in an airtight container, and reheat gently in the oven or microwave. Shred the leftover meat for tacos, sandwiches, or chicken salad. The bones make an excellent base for homemade chicken stock—just simmer them with vegetables and herbs for a few hours.
With a little planning, one roast chicken can turn into multiple meals. It’s a smart, economical, and delicious way to make the most of your cooking efforts.
Frequently Asked Questions
How do I keep roast chicken from drying out?
Season with salt in advance, roast at the right temperature, and use a meat thermometer to avoid overcooking. Letting the chicken rest after roasting also helps retain moisture.
Can I roast a chicken from frozen?
It’s not recommended. Frozen chickens cook unevenly and can lead to food safety issues. Always thaw in the refrigerator before roasting.
What temperature should the oven be for roast chicken?
Start at 425°F (220°C) for 15–20 minutes to crisp the skin, then reduce to 375°F (190°C) to finish cooking gently and evenly.
Do I need to brine my chicken before roasting?
A dry brine (salting in advance) is highly recommended for flavor and moisture. Wet brining works too but is more time-consuming and can dilute flavor if overdone.
Can I stuff the chicken with bread stuffing?
It’s safer to cook stuffing separately. The cavity doesn’t get hot enough to cook raw stuffing thoroughly, which can pose a food safety risk.
How do I know when roast chicken is done?
Use a meat thermometer. Insert it into the thickest part of the thigh without touching the bone. The chicken is done when it reaches 165°F (74°C).


