

If your roast chicken isn’t crispy, you’re not alone—many home cooks struggle with soggy skin. The good news? A few easy adjustments can transform your bird into a golden, crackling masterpiece. From drying techniques to oven tricks, these fixes work fast and deliver restaurant-quality results.
There’s nothing quite like the aroma of a perfectly roasted chicken wafting through your kitchen—golden, fragrant, and promising crispy skin with every bite. But when you pull that bird out of the oven only to find the skin soft, limp, or worse, rubbery, it’s a real letdown. You followed the recipe, preheated the oven, maybe even brined it… yet the crispiness just didn’t happen. Sound familiar?
You’re not alone. Even experienced cooks face this frustrating issue. The truth is, achieving crispy roast chicken skin isn’t just about high heat or long cooking times—it’s a science. Moisture, airflow, timing, and technique all play critical roles. But here’s the silver lining: once you understand what’s going wrong, the fixes are surprisingly simple. No special equipment, no fancy ingredients—just smart adjustments that make all the difference. In this guide, we’ll walk you through the most common reasons your roast chicken isn’t crispy and show you exactly how to fix them, step by step.
Key Takeaways
- Dry the skin thoroughly: Moisture is the enemy of crispiness—pat the chicken dry inside and out before roasting.
- Use a rack: Elevating the chicken allows hot air to circulate underneath, preventing steaming and promoting even browning.
- Start high, then lower: Begin roasting at 425°F (220°C) to kickstart browning, then reduce to 375°F (190°C) to cook through without burning.
- Salt early: Seasoning the chicken 12–24 hours ahead draws out moisture and helps form a crispier crust.
- Don’t overcrowd the pan: Give the chicken space so steam doesn’t build up and soften the skin.
- Finish under the broiler: A 2–3 minute broil at the end adds that final crunch if the skin needs a boost.
- Let it rest properly: Resting on a rack (not in the pan) keeps the skin from getting soggy from residual juices.
Quick Answers to Common Questions
Why is my roast chicken skin soggy?
Moisture is the main cause. If the skin isn’t dried thoroughly before roasting, it steams instead of crisping. Also, poor airflow or cooking at too low a temperature can prevent browning.
Can I fix soggy chicken skin after roasting?
Yes! Place the chicken on a rack and broil it for 2–3 minutes, watching closely. The intense heat can crisp up the skin even after cooking.
Should I cover my roast chicken while cooking?
No—covering traps steam and softens the skin. Only tent with foil if the skin is browning too fast, and remove it for the final 15–20 minutes.
How long should I dry brine a chicken?
For best results, dry brine (salt and refrigerate uncovered) for 12–24 hours. But even 1–2 hours at room temperature helps draw out moisture.
Can I use a baking sheet instead of a roasting pan?
Yes, as long as you use a rack to elevate the chicken. A baking sheet with a wire rack works perfectly for crispy skin.
📑 Table of Contents
Why Is My Roast Chicken Not Crispy? The Root Causes
Before we dive into solutions, let’s talk about why your roast chicken isn’t crispy in the first place. Understanding the problem is half the battle. The main culprit? Moisture. Yes, that’s right—water is the number one enemy of crispy skin. When moisture gets trapped under the skin or in the pan, it turns to steam during roasting. Instead of browning and crisping, the skin steams, becoming soft and unappetizing.
Another common issue is poor airflow. If your chicken is sitting directly in a pool of its own juices or crowded in a small pan, hot air can’t circulate properly. This leads to uneven cooking and soggy spots. And let’s not forget temperature control. Starting too low or cooking at a consistent high heat can either undercook the skin or burn it before the meat is done.
Even your seasoning method matters. Salting too late doesn’t give the salt time to draw out surface moisture, which is essential for crispiness. And if you’re using a marinade or wet brine without proper drying, you’re basically fighting a losing battle against steam.
So, what’s the takeaway? Crispy skin starts long before the chicken hits the oven. It’s about preparation, patience, and precision. But don’t worry—once you know what to look for, these issues are totally fixable.
Moisture: The Silent Killer of Crispy Skin
Let’s get one thing straight: water and crispiness don’t mix. When you roast chicken, the goal is to evaporate the moisture from the skin so it can brown and crisp up. If the skin is wet—whether from rinsing, brining, or just natural juices—it’s going to steam instead of roast.
This is why so many recipes emphasize drying the chicken thoroughly. But “thoroughly” isn’t just a suggestion—it’s a necessity. We’re talking about patting the skin with paper towels until it feels almost like leather. No damp spots. No beads of water. Just dry, taut skin ready to transform in the oven.
And it’s not just the outside. The cavity of the chicken holds moisture too. Be sure to dry the inside as well. Some cooks even leave the chicken uncovered in the fridge overnight to let the skin air-dry further. This step, while it takes extra time, is a game-changer for crispiness.
Airflow and Pan Setup Matter More Than You Think
You might think any roasting pan will do, but the setup can make or break your chicken’s skin. If your chicken is sitting flat in a shallow pan, the bottom half is essentially steaming in its own juices. That’s a recipe for soggy skin on the underside.
The solution? Use a roasting rack. Elevating the chicken allows hot air to circulate all around it—top, bottom, and sides. This even exposure is key to uniform browning and crispiness. If you don’t have a rack, you can improvise with chopped vegetables (like carrots, onions, or celery) to lift the chicken slightly off the pan bottom. Just don’t pack them too tightly—airflow is still essential.
Also, avoid overcrowding. If you’re roasting multiple chickens or adding too many veggies, the pan gets crowded, steam builds up, and the skin suffers. Give your chicken room to breathe.
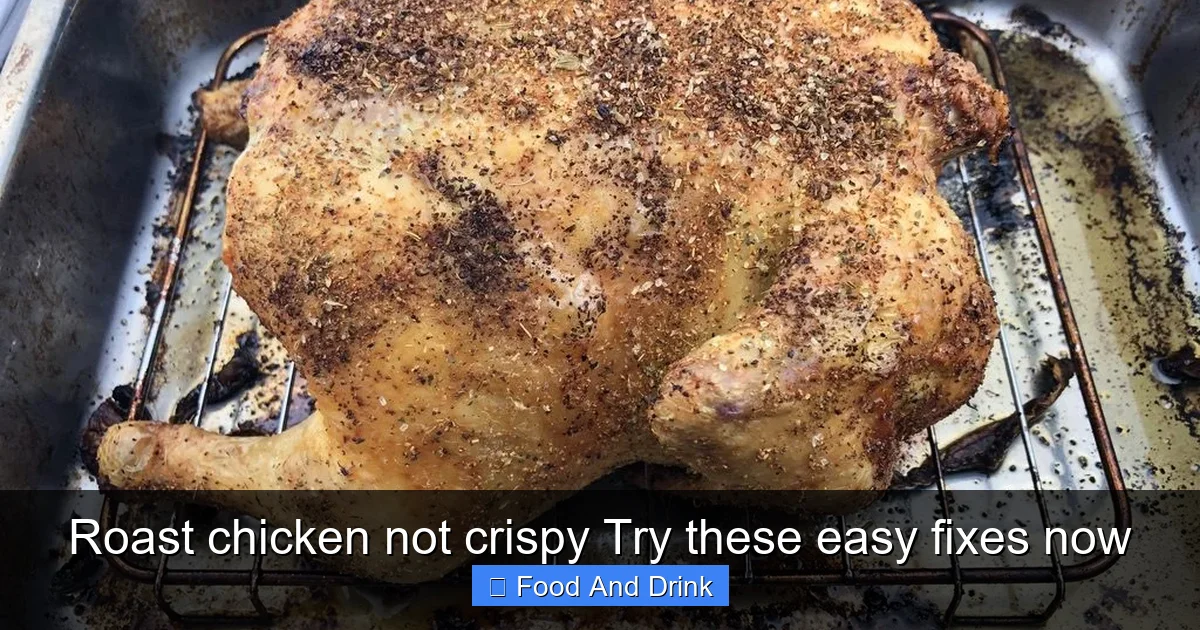
How to Dry Your Chicken for Maximum Crispiness

Visual guide about Roast chicken not crispy Try these easy fixes now
Image source: gfchow.com
Now that we know moisture is the enemy, let’s talk about how to eliminate it. Drying your chicken properly is the single most important step you can take to ensure crispy skin. And it’s easier than you might think.
Start by removing the chicken from its packaging and placing it on a clean plate or tray. Pat the skin dry with paper towels—inside and out. Be thorough. Press firmly to absorb as much moisture as possible. If the skin feels damp after the first round, grab a fresh towel and repeat.
For even better results, let the chicken air-dry in the fridge, uncovered, for at least 1 hour—or ideally, 12 to 24 hours. This extended drying time allows the skin to fully dehydrate, creating the perfect canvas for crisping. Covering the chicken traps moisture, so leave it uncovered. The cold, dry air of the fridge does the work for you.
The Salt Trick: Season Early for Better Results
Here’s a pro tip: salt your chicken at least 1 hour before roasting—or better yet, the night before. Salt draws out moisture through osmosis, which not only seasons the meat deeply but also dries the skin. This dual benefit makes salting ahead a must for crispy results.
Simply sprinkle kosher salt (about 1 teaspoon per pound of chicken) evenly over the skin and inside the cavity. Don’t rinse it off—just let it sit. As the salt works, it pulls moisture to the surface, which you can then pat away before roasting. This process, known as dry brining, is a secret weapon used by chefs for juicy meat and crackling skin.
Should You Rinse Your Chicken?
We need to address the elephant in the room: rinsing raw chicken. Many people still do it, but food safety experts strongly advise against it. Rinsing spreads bacteria like salmonella around your sink and kitchen, increasing the risk of cross-contamination.
More importantly for our topic—rinsing adds moisture. Even if you pat it dry afterward, you’re starting from a wetter state, which makes achieving crispiness harder. Instead, skip the rinse and focus on thorough drying with paper towels. Your chicken—and your kitchen—will be safer and tastier for it.
Oven Temperature and Roasting Techniques That Work
Visual guide about Roast chicken not crispy Try these easy fixes now
Image source: gfchow.com
Once your chicken is dry and seasoned, it’s time to talk heat. Oven temperature plays a huge role in how your chicken turns out. Too low, and the skin won’t crisp. Too high, and it burns before the meat is cooked. The key is a two-stage roasting method.
Start high—around 425°F (220°C)—for the first 20 to 30 minutes. This high heat jumpstarts the Maillard reaction, the chemical process that creates browning and flavor. It also helps render fat and crisp the skin quickly. Then, reduce the temperature to 375°F (190°C) for the remainder of the cooking time. This lower heat allows the meat to cook through gently without overcooking the skin.
Use a meat thermometer to check for doneness. The internal temperature should reach 165°F (74°C) in the thickest part of the thigh, away from the bone. Relying on time alone can lead to undercooked or overcooked chicken—don’t guess, test!
Broiling for the Final Crisp
If your chicken is cooked through but the skin still isn’t as crispy as you’d like, don’t panic. A quick broil can save the day. Switch your oven to broil and move the chicken to the top rack, about 4–6 inches from the heat source. Broil for 2–3 minutes, watching closely to prevent burning. This intense, direct heat crisps up the skin in seconds.
Just be careful—broiling too long or too close can scorch the skin. Keep an eye on it and rotate the pan if needed for even browning. This trick works especially well if you’ve roasted at a lower temperature or if your oven runs cool.
Rotisserie-Style Roasting at Home
Want that perfect, evenly browned skin you see at the deli? Try rotisserie-style roasting. While you probably don’t have a rotisserie oven at home, you can mimic the effect by trussing the chicken and roasting it breast-side up on a rack. The even rotation of heat (thanks to convection, if your oven has it) helps the skin crisp uniformly.
If your oven has a convection setting, use it! Convection circulates hot air around the chicken, promoting faster, more even browning. Just reduce the temperature by 25°F (about 15°C) to prevent over-browning.
Common Mistakes That Ruin Crispy Skin

Visual guide about Roast chicken not crispy Try these easy fixes now
Image source: thedailymeal.com
Even with the best intentions, it’s easy to make mistakes that leave your roast chicken not crispy. Let’s go over the most common pitfalls and how to avoid them.
First: not drying the chicken enough. We’ve said it before, but it’s worth repeating—moisture is public enemy number one. Skimping on the drying step is the fastest way to end up with soft skin.
Second: using a wet marinade or brine without proper drying. If you brine your chicken (which is great for juiciness), you must dry it thoroughly afterward. Wet brines add moisture, so compensate with extra drying time.
Third: covering the chicken while roasting. Some recipes call for tenting with foil, but this traps steam and steams the skin. Only cover if the skin is browning too quickly—and even then, remove the foil for the last 15–20 minutes to crisp up.
Fourth: cutting into the chicken too soon. Resting is crucial. Let the chicken rest for at least 15–20 minutes after roasting. This allows the juices to redistribute, keeping the meat moist. But don’t let it sit in the pan—place it on a rack or plate to prevent the skin from softening from trapped heat and moisture.
Pan Juices and Gravy: Don’t Let Them Sabotage Your Skin
After roasting, many people make gravy from the pan drippings. While delicious, this can be a trap for crispy skin. If you leave the chicken in the pan while making gravy, the residual heat and moisture will soften the skin.
Instead, transfer the chicken to a cutting board or platter to rest. Then, use the pan drippings for gravy. This way, your chicken stays crispy while you enjoy a rich, flavorful sauce on the side.
Easy Fixes You Can Try Tonight
Don’t have time for a 24-hour dry brine? No problem. Here are quick fixes you can use even if your chicken isn’t perfectly prepped.
First, pat it dry—really dry. Use multiple paper towels and press hard. Then, salt it generously and let it sit for at least 30 minutes at room temperature. This quick dry brine helps draw out moisture.
Next, roast it on a rack at 425°F (220°C) for 20 minutes, then reduce to 375°F (190°C) until done. If the skin still isn’t crispy, finish with 2–3 minutes under the broiler.
You can also try rubbing the skin with a little oil or butter. Fat helps conduct heat and promotes browning. Just don’t overdo it—too much fat can cause splattering and uneven cooking.
Improvised Racks and DIY Solutions
No roasting rack? No problem. Use a wire cooling rack placed inside a baking sheet, or build a base with chopped vegetables. Just make sure the chicken isn’t sitting in liquid. You can even use crumpled aluminum foil to create a makeshift rack—just shape it into a dome to lift the chicken.
Conclusion: Crispy Skin Is Within Reach
Roast chicken not crispy? It doesn’t have to be that way. With a few simple adjustments—drying the skin, using a rack, controlling oven temperature, and salting early—you can achieve golden, crackling skin every time. These fixes are easy, affordable, and don’t require special skills or tools.
Remember, great roast chicken is about patience and attention to detail. Take the time to dry the skin, season properly, and roast with care. Your efforts will pay off with a bird that’s not only delicious but visually stunning—crispy on the outside, juicy on the inside.
So the next time you’re planning a roast chicken dinner, don’t settle for soggy skin. Try these easy fixes now and transform your bird into a crispy masterpiece. Your taste buds—and your dinner guests—will thank you.
Frequently Asked Questions
How do I get crispy skin on a whole roast chicken?
Dry the skin thoroughly, salt it ahead of time, roast on a rack at high heat initially, then lower the temperature. Finish with a quick broil if needed.
Why does my chicken skin get rubbery?
Rubbery skin often results from overcooking or steaming. Ensure proper drying, use a rack, and avoid covering the chicken during roasting.
Can I roast chicken at 350°F and still get crispy skin?
It’s harder, but possible. Start at 425°F for 20 minutes to crisp the skin, then reduce to 350°F. Extend cooking time slightly and finish under the broiler.
Does brining make chicken skin less crispy?
Wet brining can add moisture, but if you dry the chicken thoroughly afterward, you can still achieve crispy skin. Dry brining is often better for crispiness.
Should I rinse my chicken before roasting?
No—rinsing adds moisture and spreads bacteria. Pat it dry with paper towels instead for safer, crispier results.
How long should I let roast chicken rest?
Let it rest for 15–20 minutes on a rack or plate. This keeps the skin crispy and allows juices to redistribute for moist meat.


