

Roast chicken doesn’t need to be complicated—just delicious. This guide skips the theatrics of another cooking show and delivers practical, time-tested techniques for golden skin, tender meat, and rich flavor. Whether you’re a beginner or a seasoned home cook, these roast chicken not another cooking show tips will elevate your weeknight dinners.
Key Takeaways
- Brining is a game-changer: Soaking chicken in saltwater (wet brine) or salt rub (dry brine) boosts moisture and flavor deep into the meat.
- Room temperature matters: Letting the chicken sit out for 30–60 minutes before roasting ensures even cooking and crispier skin.
- Patience pays off with crispy skin: Dry the skin thoroughly and avoid moving the chicken too soon in the pan to achieve that perfect golden crust.
- Use a meat thermometer: The safest and most accurate way to know when your roast chicken is done is by checking the internal temperature.
- Resting is non-negotiable: Letting the chicken rest for 15–20 minutes after roasting keeps the juices locked in for maximum tenderness.
- Flavor with aromatics: Stuffing the cavity with lemon, garlic, and herbs infuses the meat with subtle, aromatic flavor from the inside out.
- Don’t waste the drippings: Use the pan juices to make a simple, rich gravy that transforms your roast chicken into a restaurant-quality meal.
Quick Answers to Common Questions
Can I roast a chicken without brining?
Yes, you can roast a chicken without brining, but brining significantly improves moisture and flavor. If skipping it, make sure to season well and avoid overcooking.
How long does it take to roast a 4-pound chicken?
A 4-pound chicken typically takes 1 hour to 1 hour and 15 minutes at 375°F, depending on your oven. Always use a thermometer to check doneness.
Should I cover the chicken while roasting?
No, covering the chicken will trap steam and prevent the skin from crisping. Roast it uncovered for the best results.
Can I use a regular baking sheet instead of a roasting pan?
Yes, a rimmed baking sheet works fine. Just make sure it’s sturdy enough to handle the heat and has enough space around the chicken.
What’s the best way to store leftover roast chicken?
Store leftover chicken in an airtight container in the refrigerator for up to 4 days. Reheat gently in the oven or microwave to preserve moisture.
📑 Table of Contents
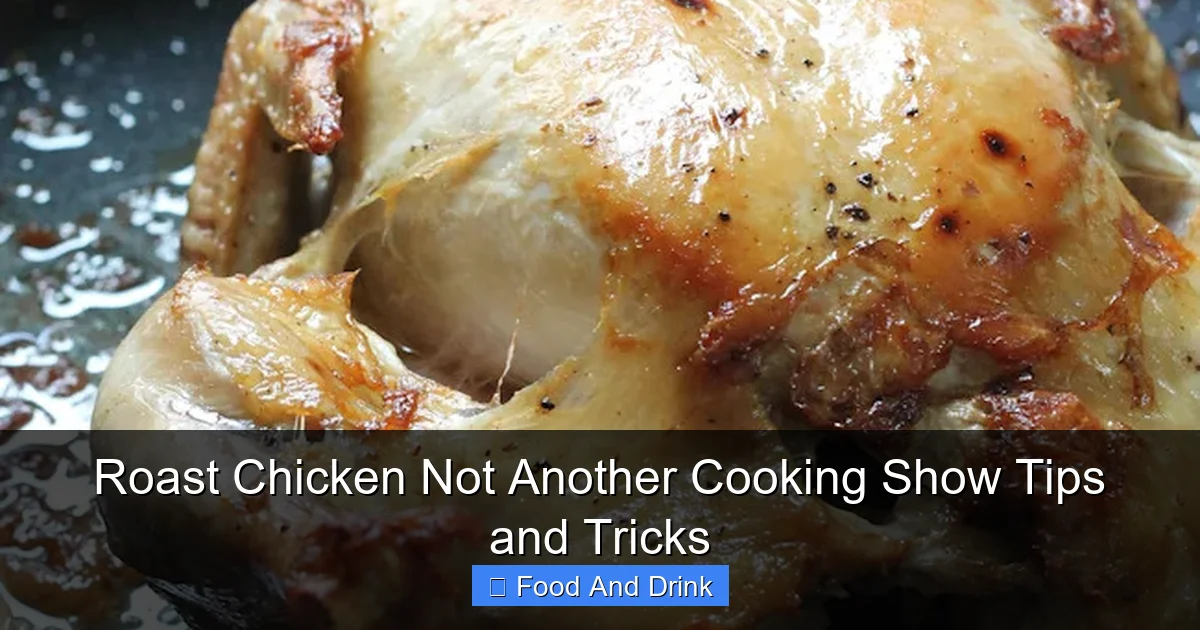
The Simplicity of a Perfect Roast Chicken
There’s something deeply satisfying about pulling a golden-brown roast chicken out of the oven. The aroma fills the kitchen, the skin crackles under the fork, and the meat is so tender it practically falls off the bone. Yet, despite its humble appearance, roast chicken often feels like a dish reserved for holidays or fancy dinners. Why? Because too many recipes overcomplicate it with endless steps, exotic ingredients, or flashy techniques that belong on another cooking show.
But here’s the truth: roast chicken doesn’t need drama. It doesn’t need a 10-step marinade or a sous-vide machine. What it needs is respect for the basics—quality ingredients, proper technique, and a little patience. This guide is all about stripping away the noise and focusing on what really works. No cameras, no judges, no pressure. Just you, your oven, and a chicken that’s about to become your new go-to dinner.
Whether you’re feeding a family, impressing guests, or simply craving comfort food, mastering roast chicken is one of the most valuable skills in the kitchen. It’s versatile, affordable, and endlessly customizable. And once you’ve nailed the fundamentals, you’ll realize that the best roast chicken isn’t the one with the most steps—it’s the one that makes everyone at the table say, “Wow, this is amazing.”
Choosing the Right Chicken

Visual guide about Roast Chicken Not Another Cooking Show Tips and Tricks
Image source: busybutcooking.com
Not all chickens are created equal, and the quality of your bird can make or break your roast. While you might be tempted to grab the cheapest option at the store, investing in a better-quality chicken pays off in flavor, texture, and overall satisfaction.
Organic vs. Conventional
Organic chickens are raised without antibiotics, hormones, and with access to outdoor space. They’re often fed a more natural diet, which can result in richer, more nuanced flavor. While they come with a higher price tag, many home cooks find the difference worth it—especially when roasting, where the natural taste of the meat shines.
Conventional chickens, on the other hand, are widely available and budget-friendly. They’re perfectly fine for roasting, especially if you’re using brining or basting techniques to enhance moisture and flavor. The key is to look for chickens labeled “air-chilled” rather than “water-chilled.” Air-chilled birds retain more of their natural juices and develop crispier skin, which is ideal for roasting.
Size Matters
A 3- to 4-pound chicken is the sweet spot for most home ovens. It’s large enough to feed a family of four with leftovers, but small enough to cook evenly without drying out. Larger birds (5+ pounds) can be trickier—they often cook unevenly, with the breast drying out before the thighs are fully done. If you’re roasting a big bird, consider spatchcocking (butterflying) it to reduce cooking time and promote even browning.
Fresh or Frozen?
Fresh chickens are ideal, but frozen can work just as well if handled properly. If using frozen, make sure to thaw it completely in the refrigerator—never on the counter. A 4-pound chicken typically takes 24 hours to thaw. Once thawed, pat it dry and proceed as usual. Just remember: a frozen chicken won’t brown as well, so extra drying time is essential.
Brining: The Secret to Juicy Meat
Visual guide about Roast Chicken Not Another Cooking Show Tips and Tricks
Image source: momfoodie.com
If there’s one technique that separates good roast chicken from great roast chicken, it’s brining. This simple step—soaking the chicken in a saltwater solution—transforms dry, bland meat into something tender, flavorful, and incredibly juicy. And the best part? It’s not as complicated as it sounds.
Wet Brining: The Classic Method
Wet brining involves submerging the chicken in a solution of water, salt, and optional flavorings like sugar, herbs, or citrus. The salt breaks down muscle proteins, allowing the meat to retain more moisture during cooking. A basic wet brine consists of 1 cup of kosher salt and 1/2 cup of sugar dissolved in 1 gallon of cold water. Add aromatics like bay leaves, peppercorns, garlic, or orange slices for extra depth.
To brine, place the chicken in a large container or brining bag, pour the solution over it, and refrigerate for 4–12 hours. Don’t go longer than 12 hours, or the meat can become too salty. After brining, rinse the chicken thoroughly and pat it dry. The skin may feel slippery—that’s normal. Just dry it well to ensure crispiness.
Dry Brining: The Low-Effort Alternative
If you’re short on time or fridge space, dry brining is a fantastic alternative. Simply rub the chicken generously with kosher salt (about 1 teaspoon per pound) and let it sit uncovered in the refrigerator for 12–24 hours. The salt draws out moisture, which then reabsorbs into the meat along with the salt, seasoning it from the inside out.
Dry brining has two major advantages: it requires no extra containers, and the uncovered chicken dries out in the fridge, resulting in even crispier skin. Plus, you can add other seasonings like black pepper, garlic powder, or smoked paprika to the salt rub for extra flavor.
Does Brining Really Make a Difference?
Absolutely. Brined chicken stays moist even if slightly overcooked, which is a lifesaver for home cooks who worry about timing. It also seasons the meat deeply, so you don’t need to rely on heavy sauces or marinades. In blind taste tests, brined chickens consistently outperform non-brined ones in both juiciness and flavor.
Prepping for the Perfect Roast
Visual guide about Roast Chicken Not Another Cooking Show Tips and Tricks
Image source: cheerfulcook.com
Once your chicken is brined (or not—brining is optional, but highly recommended), it’s time to prep it for the oven. This step is all about setting yourself up for success: ensuring even cooking, maximizing browning, and infusing flavor.
Drying the Skin
Crispy skin starts with dry skin. After brining or rinsing, pat the chicken thoroughly with paper towels. Don’t skip this step—any moisture on the surface will steam instead of brown. For extra insurance, let the chicken sit uncovered in the fridge for a few hours or overnight. This “air-drying” method is a favorite among professional chefs.
Trussing: To Tie or Not to Tie?
Trussing—tying the legs together with kitchen twine—helps the chicken cook evenly and gives it a neat, uniform shape. It’s especially helpful for larger birds or if you want a more polished presentation. However, it’s not strictly necessary. Some cooks prefer to leave the legs untied so they brown more evenly. If you do truss, keep the string loose—tight trussing can cause the legs to pull away from the body.
Seasoning with Intention
Seasoning is where you can get creative. A simple mix of salt, pepper, and olive oil works wonders, but don’t be afraid to experiment. Try rubbing the skin with garlic butter, sprinkling on smoked paprika, or adding fresh herbs like rosemary and thyme under the skin. For a citrusy twist, grate lemon or orange zest over the chicken before roasting.
Stuffing the Cavity
While you shouldn’t stuff the cavity with bread-based stuffing (that’s a food safety risk unless cooked separately), you can add aromatics to infuse flavor. Halved lemons, garlic cloves, onion wedges, and fresh herbs like sage or thyme work beautifully. The steam from these ingredients will gently perfume the meat as it roasts.
Roasting Techniques That Work
Now for the main event: roasting. The goal is simple—golden, crispy skin and perfectly cooked meat. But achieving that balance requires attention to temperature, timing, and technique.
High Heat for Crispy Skin
Start your roast chicken at a high temperature—425°F to 450°F (220°C to 230°C)—for the first 20–30 minutes. This jump-starts the browning process and helps render fat from the skin, creating that coveted crispiness. After the initial blast, reduce the heat to 350°F to 375°F (175°C to 190°C) to finish cooking gently.
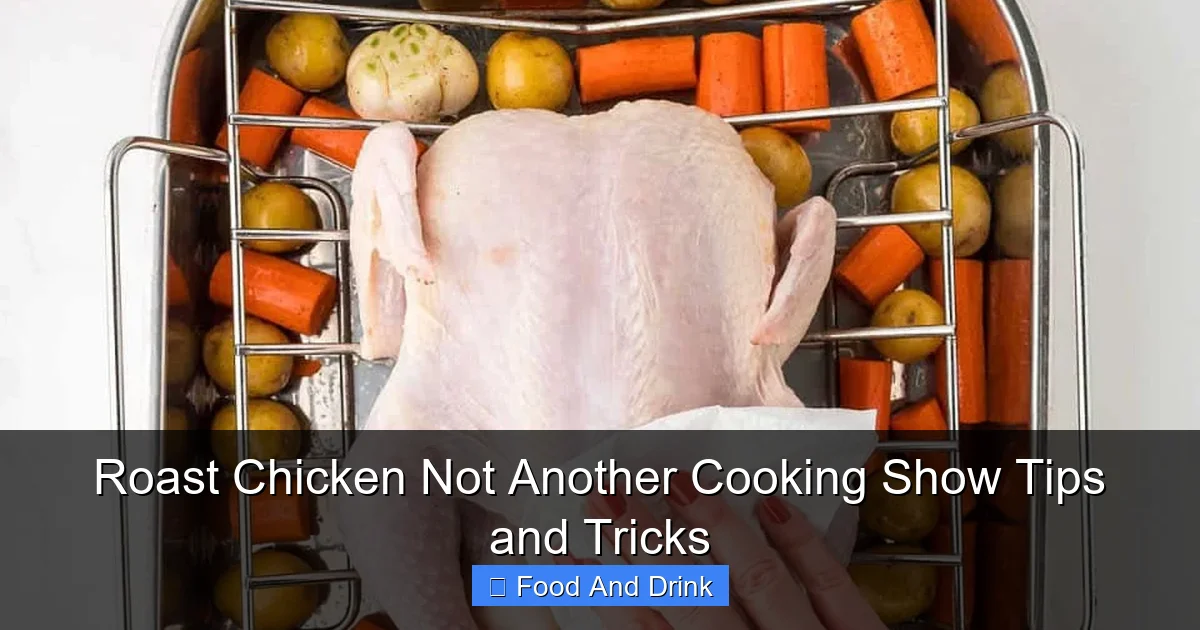
Roasting Methods: Pan, Rack, or Spatchcock?
There are several ways to roast a chicken, each with its own benefits:
– **On a rack in a roasting pan:** This elevates the chicken, allowing hot air to circulate underneath and promoting even browning. Use a V-rack or a flat rack that fits inside a rimmed baking sheet.
– **Directly in a pan:** Placing the chicken directly on the pan bottom is fine, but you’ll need to baste it occasionally to prevent the underside from drying out. It also makes it easier to collect drippings for gravy.
– **Spatchcocking (butterflying):** This involves removing the backbone and flattening the chicken. It reduces cooking time by nearly half and ensures even cooking—especially great for larger birds. Use kitchen shears to cut along both sides of the backbone, then press down on the breast to flatten.
Basting: Helpful or Overrated?
Basting—brushing the chicken with pan juices or butter—can add flavor and moisture, but it’s not essential. Every time you open the oven door, you lose heat, which can affect cooking time. If you do baste, do it quickly and only once or twice. A better alternative is to start with butter or oil under the skin, which melts and bastes the meat from within.
Rotating for Even Browning
Ovens have hot spots, so rotating the pan halfway through cooking ensures even browning. If one side is browning too quickly, turn the pan 180 degrees. For extra insurance, use an oven thermometer to verify your oven’s actual temperature.
Checking for Doneness and Resting
Knowing when your roast chicken is done is crucial. Overcooking leads to dry meat; undercooking is a food safety risk. The best way to check? Use a meat thermometer.
The Magic Number: 165°F
The USDA recommends cooking poultry to an internal temperature of 165°F (74°C). Insert the thermometer into the thickest part of the thigh, avoiding the bone. The breast should read around 160°F, as it will continue to cook slightly while resting.
Visual and Tactile Cues
If you don’t have a thermometer, look for these signs:
– Juices run clear when the thigh is pierced.
– The legs move easily in their joints.
– The skin is golden brown and crispy.
– The internal temperature reaches 165°F.
The Importance of Resting
Once the chicken is done, remove it from the oven and let it rest for 15–20 minutes before carving. This allows the juices to redistribute throughout the meat, ensuring every bite is moist and flavorful. Cover loosely with foil to keep it warm, but don’t wrap it tightly—this can steam the skin and make it soggy.
Making the Most of Your Roast Chicken
A great roast chicken doesn’t end when it comes out of the oven. With a few simple steps, you can turn it into a complete meal and make the most of every part.
Carving Like a Pro
Carving doesn’t have to be intimidating. Start by removing the legs: pull one leg away from the body and cut through the joint. Repeat on the other side. Then, slice the breast meat against the grain into even portions. Save the carcass for stock—simmer it with vegetables and herbs for a rich, homemade broth.
Pan Gravy from Drippings
Don’t toss those golden drippings! They’re the foundation of a rich, flavorful gravy. Pour the pan juices into a measuring cup and let the fat rise to the top. Skim off most of the fat (leave about 2–3 tablespoons), then whisk in 2 tablespoons of flour to make a roux. Cook for 1–2 minutes, then slowly add 2 cups of chicken broth, whisking constantly. Simmer until thickened, then season with salt and pepper.
Serving Suggestions
Roast chicken pairs beautifully with simple sides: roasted potatoes, steamed green beans, or a fresh arugula salad. For a complete meal, serve with crusty bread to soak up the gravy. Leftovers? Shred the meat for tacos, salads, or sandwiches. The possibilities are endless.
Common Mistakes to Avoid
Even experienced cooks can fall into traps that ruin an otherwise perfect roast chicken. Here are the most common mistakes—and how to avoid them.
Not Drying the Skin
Moisture is the enemy of crispy skin. Always pat the chicken dry, and consider air-drying in the fridge for a few hours. Skipping this step leads to steamed, rubbery skin.
Overcrowding the Pan
Roast chicken needs space to breathe. Use a pan large enough to allow air circulation around the bird. Overcrowding traps steam and prevents browning.
Ignoring the Thermometer
Timing alone isn’t reliable. Ovens vary, and chicken sizes differ. Always use a meat thermometer to ensure safe, accurate doneness.
Carving Too Soon
Rushing to carve means losing precious juices. Let the chicken rest—your patience will be rewarded with tender, moist meat.
Using Cold Chicken
Starting with a cold bird leads to uneven cooking. Let the chicken sit at room temperature for 30–60 minutes before roasting.
Conclusion
Roast chicken is more than just a meal—it’s a ritual, a comfort, a celebration of simple, honest cooking. And you don’t need another cooking show to master it. With the right techniques—brining, proper prep, high heat, and patience—you can achieve restaurant-quality results in your own kitchen.
This guide has walked you through every step, from choosing the right bird to carving and serving. But the real magic happens when you make it your own. Experiment with seasonings, try different roasting methods, and don’t be afraid to make mistakes. Every roast chicken you make brings you closer to perfection.
So the next time you’re craving something hearty, flavorful, and deeply satisfying, skip the takeout and roast a chicken. It’s easier than you think, and the results are always worth it. Because sometimes, the best meals aren’t the ones with the most flair—they’re the ones made with care, attention, and a little love.
Frequently Asked Questions
What temperature should I roast chicken at?
Start at 425°F to 450°F for the first 20–30 minutes to crisp the skin, then reduce to 350°F to 375°F to finish cooking. This two-stage method ensures golden skin and tender meat.
How do I keep the breast meat from drying out?
Brining, using a meat thermometer, and not overcooking are key. Also, consider spatchcocking the chicken, which reduces cooking time and promotes even doneness.
Can I roast a chicken from frozen?
It’s not recommended. Frozen chicken won’t brown properly and may cook unevenly. Always thaw it completely in the refrigerator before roasting.
What can I do with the chicken carcass after carving?
Simmer the carcass with onions, carrots, celery, and herbs to make homemade chicken stock. Strain and use it in soups, sauces, or risottos.
How do I make crispy skin without burning it?
Dry the skin thoroughly, start with high heat, and avoid moving the chicken too soon. Let it sear undisturbed for the first 20 minutes to develop a golden crust.
Can I add vegetables to the roasting pan?
Yes, but add them halfway through cooking. Root vegetables like potatoes and carrots take longer, so they’ll burn if added at the start. Toss them in oil and season well.


