

Master the art of a perfect roast chicken dinner with this step-by-step guide. From brining to roasting and pairing with sides, you’ll create a flavorful, restaurant-quality meal at home. Perfect for family dinners or special occasions!
There’s something timeless and deeply satisfying about a perfectly roasted chicken. The golden, crispy skin, the tender, juicy meat, and the rich aroma that fills your kitchen—it’s comfort food at its finest. Whether you’re cooking for a weeknight family dinner or hosting a holiday feast, mastering the roast chicken dinner instructions can elevate your cooking game and impress everyone at the table.
But let’s be honest: not all roast chickens are created equal. Some turn out dry, underseasoned, or unevenly cooked. The good news? With the right techniques, anyone can achieve that golden-brown, succulent bird that’s crispy on the outside and melt-in-your-mouth on the inside. This guide will walk you through every step—from choosing the right chicken to carving it like a pro—so you can serve a roast chicken dinner that’s not just delicious, but truly unforgettable.
Key Takeaways
- Brining ensures juicy meat: Soaking the chicken in saltwater (wet brine) or salt rub (dry brine) locks in moisture and enhances flavor.
- Room temperature roasting matters: Letting the chicken sit out for 30–60 minutes before cooking promotes even browning and cooking.
- Proper seasoning is key: Use a mix of salt, pepper, garlic, herbs, and butter under the skin for maximum flavor penetration.
- Use a meat thermometer: Cook to an internal temperature of 165°F (74°C) in the thickest part of the thigh for safe, tender results.
- Rest before carving: Letting the chicken rest for 15–20 minutes redistributes juices, preventing dry meat.
- Pair with complementary sides: Roasted vegetables, mashed potatoes, and gravy complete the classic roast chicken dinner.
- Carve with confidence: Use a sharp knife and follow natural joints to serve clean, elegant portions.
Quick Answers to Common Questions
How long should I brine a chicken before roasting?
For a wet brine, soak the chicken for 4–12 hours in the refrigerator. For a dry brine, rub salt on the chicken and let it sit uncovered for 12–24 hours. Both methods enhance moisture and flavor.
Can I roast a chicken without a roasting rack?
Yes! Use chopped vegetables like onions, carrots, and celery as a bed in the roasting pan. They’ll elevate the chicken and add flavor to the drippings.
What temperature should the oven be for roasting chicken?
Preheat your oven to 425°F (220°C). This high heat crisps the skin while keeping the meat juicy.
How do I know when the chicken is fully cooked?
Use a meat thermometer. Insert it into the thickest part of the thigh (avoiding the bone). The chicken is done when it reaches 165°F (74°C).
Can I use frozen chicken for roasting?
It’s best to thaw frozen chicken completely in the refrigerator before roasting. Roasting from frozen can lead to uneven cooking and dry meat.
📑 Table of Contents
Why Roast Chicken Is the Ultimate Comfort Meal
Roast chicken is more than just a meal—it’s a tradition. Across cultures and generations, it’s been a centerpiece of family gatherings, holiday celebrations, and simple weeknight dinners. Its universal appeal lies in its simplicity, versatility, and deeply satisfying flavor. Unlike complicated dishes that require hard-to-find ingredients or hours of prep, roast chicken uses basic components: a whole bird, salt, herbs, and a little fat. Yet, when done right, it delivers a dining experience that feels both rustic and refined.
What makes roast chicken so special is its ability to bring people together. The process of roasting fills the house with an irresistible aroma that signals warmth, care, and home. It’s a dish that invites conversation, laughter, and shared moments around the table. Plus, it’s incredibly forgiving—even if you’re not a seasoned chef, you can still pull off a delicious roast chicken dinner with a little guidance.
Another reason roast chicken stands out is its adaptability. You can customize it to suit any taste or occasion. Add lemon and thyme for a bright, Mediterranean flair. Stuff it with garlic and rosemary for a bold, earthy flavor. Or go classic with butter, salt, and pepper for that timeless, comforting taste. And let’s not forget the sides—roasted potatoes, carrots, green beans, or a fresh salad can turn a simple bird into a full, balanced meal.
Choosing the Right Chicken for Roasting

Visual guide about Perfect Roast Chicken Dinner Instructions for a Flavorful Feast
Image source: chefsouschef.com
Not all chickens are created equal when it comes to roasting. The quality and type of bird you choose can make a big difference in the final result. Here’s what to look for:
Whole Chicken vs. Cut-Up Pieces
For a classic roast chicken dinner, a whole bird is your best bet. It allows for even cooking, crispy skin all around, and a dramatic presentation when served. Whole chickens also tend to stay juicier during roasting because the bones and skin help retain moisture.
That said, if you’re short on time or prefer specific cuts, you can roast chicken parts like breasts, thighs, or drumsticks. Just keep in mind that different parts cook at different rates—thighs and drumsticks take longer than breasts. To avoid dryness, consider roasting dark meat and white meat separately or using a two-zone cooking method (placing slower-cooking parts near the center of the pan).
Organic, Free-Range, or Conventional?
The label on your chicken matters. Organic and free-range chickens are typically raised with more space, natural diets, and without antibiotics or hormones. While they may cost a bit more, many people find the flavor and texture superior—especially for roasting. These birds often have more fat under the skin, which helps keep the meat moist and adds richness.
Conventional chickens are perfectly fine for roasting too, especially if you’re on a budget. Just be sure to choose a fresh, high-quality bird from a reputable source. Look for plump, firm flesh and avoid any with a strong odor or slimy texture.
Size Matters: How Big Should Your Chicken Be?
A good rule of thumb is to plan for about 1 to 1.5 pounds (450–700 grams) of chicken per person. A 3.5- to 4.5-pound (1.6–2 kg) bird is ideal for most families—it’s large enough to feed 4–6 people with leftovers, but not so big that it’s difficult to roast evenly.
Smaller chickens (under 3 pounds) cook faster and can dry out more easily, so monitor them closely. Larger birds (over 5 pounds) may need longer roasting times and benefit from being trussed to ensure even cooking.
Preparing the Chicken: Brining and Seasoning
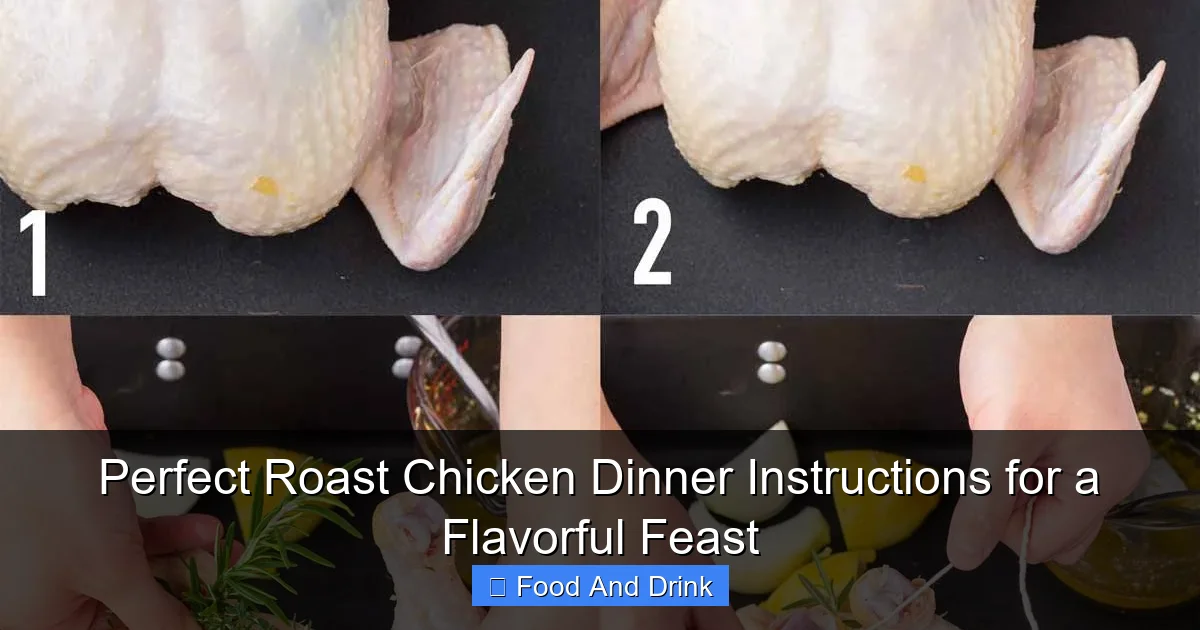
Visual guide about Perfect Roast Chicken Dinner Instructions for a Flavorful Feast
Image source: i.pinimg.com
The secret to a juicy, flavorful roast chicken starts long before it hits the oven. Proper preparation—especially brining and seasoning—can transform an ordinary bird into something extraordinary.
The Power of Brining
Brining is one of the most effective ways to ensure your chicken stays moist and flavorful. It works by allowing salt and water to penetrate the meat, which helps it retain moisture during cooking. There are two main types of brining: wet and dry.
A wet brine involves soaking the chicken in a saltwater solution (usually 1/2 cup salt per quart of water) for 4–12 hours in the refrigerator. You can add sugar, herbs, garlic, or citrus to the brine for extra flavor. This method is great for beginners because it’s hard to over-brine—even if you leave it in too long, the chicken won’t become too salty.
A dry brine, on the other hand, involves rubbing salt (and sometimes other seasonings) directly onto the chicken and letting it sit uncovered in the fridge for 12–24 hours. This method draws moisture out of the meat, which then gets reabsorbed along with the salt, resulting in deeply seasoned, juicy chicken. Dry brining also helps crisp up the skin, making it ideal for roasting.
Seasoning Like a Pro
Once your chicken is brined (or if you’re skipping brining), it’s time to season. The goal is to flavor both the skin and the meat. Start by patting the chicken dry with paper towels—this helps the skin crisp up in the oven.
Next, gently loosen the skin over the breast and thighs by sliding your fingers underneath. This creates a pocket where you can tuck in flavorful ingredients like butter, garlic, or fresh herbs. A simple mixture of softened butter, minced garlic, salt, pepper, and chopped rosemary or thyme works wonders. Rub this under the skin and all over the outside of the bird.
Don’t forget the cavity! Stuff it with aromatics like halved lemons, garlic cloves, onion wedges, and fresh herbs. These won’t be eaten, but they’ll infuse the chicken with incredible flavor as it roasts.
Finally, truss the chicken with kitchen twine. This means tying the legs together and tucking the wings under the body. Trussing helps the chicken cook evenly and keeps the shape compact, which promotes even browning.
Roasting Techniques for Perfect Results
Visual guide about Perfect Roast Chicken Dinner Instructions for a Flavorful Feast
Image source: thisamericanbite.com
Now that your chicken is prepped and seasoned, it’s time to roast. The method you use can make a big difference in texture, flavor, and appearance.
Oven Temperature and Rack Position
Preheat your oven to 425°F (220°C). This high temperature helps crisp the skin quickly while keeping the meat juicy. Place the oven rack in the center position so the chicken cooks evenly.
Roasting Pan Setup
Use a sturdy roasting pan or a heavy oven-safe skillet. Place the chicken breast-side up on a roasting rack set inside the pan. The rack elevates the bird, allowing hot air to circulate underneath and preventing the bottom from steaming instead of browning.
If you don’t have a rack, you can create a “bed” of chopped vegetables (like carrots, onions, and celery) in the bottom of the pan. These will act as a natural rack and also make a flavorful base for gravy later.
Basting and Monitoring
Basting—spooning pan juices over the chicken during roasting—can help keep the skin moist and flavorful. However, it’s not strictly necessary if you’ve properly seasoned and trussed the bird. Opening the oven door too often can cause temperature fluctuations, so baste sparingly (every 20–30 minutes) if at all.
The most important tool for perfect roasting is a meat thermometer. Insert it into the thickest part of the thigh, avoiding the bone. The chicken is done when the internal temperature reaches 165°F (74°C). For extra safety, check both the thigh and the breast—the breast should read at least 160°F (71°C), as it will continue to cook slightly while resting.
Roasting Time Guidelines
As a general rule, roast a 3.5- to 4.5-pound chicken for about 15 minutes per pound, or 50–75 minutes total. Start checking the temperature after 45 minutes. Smaller birds may take less time; larger ones may need up to 90 minutes.
Remember, oven temperatures can vary, so always rely on the thermometer, not the clock.
Resting and Carving the Chicken
Once your chicken reaches the right temperature, remove it from the oven and let it rest. This step is crucial—it allows the juices to redistribute throughout the meat, ensuring every bite is moist and flavorful.
How Long to Rest
Cover the chicken loosely with aluminum foil and let it rest for 15–20 minutes. During this time, the internal temperature will rise slightly (by about 5°F), and the juices will settle. Skipping this step can result in dry, stringy meat when you carve.
Carving Like a Pro
Carving a whole chicken may seem intimidating, but it’s easier than you think. Use a sharp carving knife and a sturdy cutting board. Here’s a simple method:
1. Place the chicken breast-side up. Pull one leg away from the body and cut through the skin and joint to remove the leg and thigh.
2. Repeat on the other side.
3. Slice the breast meat by making horizontal cuts parallel to the breastbone, starting from the top and working down.
4. Remove the wings by cutting through the joint where they meet the body.
5. Serve the pieces on a platter, arranging them neatly for a beautiful presentation.
Save the carcass for making homemade chicken stock—it’s a great way to reduce waste and add flavor to soups and sauces.
Perfect Sides for Your Roast Chicken Dinner
A roast chicken dinner isn’t complete without delicious sides. The best accompaniments are simple, comforting, and complement the rich flavors of the chicken.
Classic Roasted Vegetables
Toss chopped potatoes, carrots, parsnips, and onions with olive oil, salt, pepper, and herbs like rosemary or thyme. Roast them in the same pan as the chicken during the last 30–40 minutes of cooking. The pan drippings will infuse the vegetables with incredible flavor.
Creamy Mashed Potatoes
Nothing pairs better with roast chicken than buttery, fluffy mashed potatoes. Use Yukon Gold potatoes for the best texture, and finish with warm milk, butter, and a pinch of salt. For extra richness, stir in a spoonful of sour cream or cream cheese.
Homemade Gravy
Make gravy from the pan drippings for a rich, savory finish. After removing the chicken, place the roasting pan on the stovetop over medium heat. Add a tablespoon of flour and whisk to create a roux. Gradually pour in chicken broth, whisking constantly until smooth and thickened. Season with salt, pepper, and a splash of white wine if desired.
Fresh Green Salad
Balance the richness of the meal with a crisp green salad. Toss mixed greens with a simple vinaigrette made from olive oil, lemon juice, Dijon mustard, and honey. Add cherry tomatoes, cucumber, and shaved Parmesan for extra flavor.
Tips for Leftovers and Meal Prep
One of the best things about roast chicken is how well it keeps. Leftovers can be transformed into new meals throughout the week.
Store leftover chicken in an airtight container in the refrigerator for up to 4 days. Reheat gently in the oven or microwave to preserve moisture.
Use leftover meat for chicken salad, tacos, sandwiches, or soups. The bones can be simmered into a nourishing broth. And don’t forget the skin—crisp it up in a skillet for a tasty snack or topping.
Conclusion
Mastering the perfect roast chicken dinner instructions doesn’t require fancy equipment or culinary expertise—just patience, attention to detail, and a love for good food. From choosing the right bird to brining, seasoning, roasting, and carving, each step plays a role in creating a meal that’s both comforting and impressive.
Whether you’re cooking for two or twenty, a well-roasted chicken brings warmth, flavor, and joy to the table. So fire up your oven, gather your ingredients, and get ready to serve a feast that everyone will remember. With these tips and techniques, your roast chicken dinner will be nothing short of spectacular.
Frequently Asked Questions
Should I rinse the chicken before roasting?
No, rinsing raw chicken can spread bacteria around your kitchen. Instead, pat it dry with paper towels and proceed with seasoning.
Can I stuff the chicken with bread stuffing?
Yes, but it must reach 165°F (74°C) internally to be safe. For easier cooking, consider baking stuffing separately and serving it alongside the chicken.
Why is my chicken skin not crispy?
Common causes include not drying the skin thoroughly before roasting, brining too long without drying, or roasting at too low a temperature. Pat the skin dry and roast at 425°F for best results.
Can I use a slow cooker for roast chicken?
While possible, slow cookers don’t crisp the skin. For a traditional roast chicken with crispy skin, use an oven.
How do I prevent the breast from drying out?
Brining, trussing, and using a meat thermometer help. Also, avoid overcooking—remove the chicken when the thigh reaches 165°F, even if the breast is slightly under.
What’s the best way to store leftover roast chicken?
Store in an airtight container in the refrigerator for up to 4 days. Reheat gently in the oven or microwave to maintain moisture.


