

Roasting chicken breast doesn’t have to be dry or dull. With the right techniques—like brining, proper seasoning, and precise oven temps—you can achieve tender, juicy meat every time. This guide walks you through simple steps to make restaurant-quality roast chicken breast at home with minimal effort.
There’s something deeply satisfying about pulling a perfectly roasted chicken breast from the oven—golden, fragrant, and impossibly juicy. Whether you’re cooking for one, feeding a family, or prepping meals for the week, roast chicken breast is a kitchen staple that’s both nutritious and versatile. But let’s be honest: too often, it turns out dry, bland, or unevenly cooked. That’s why mastering the art of roasting chicken breast is worth your time.
The good news? You don’t need fancy equipment or chef-level skills. With a few smart techniques and a little attention to detail, you can consistently produce tender, flavorful chicken that rivals anything from a high-end restaurant. This guide will walk you through every step—from prep to plating—so you can confidently roast chicken breast that’s moist, well-seasoned, and full of character. Whether you prefer boneless or bone-in, skin-on or skinless, we’ve got you covered.
Key Takeaways
- Brining is a game-changer: Soaking chicken breasts in saltwater (or a seasoned brine) for 30 minutes to 2 hours locks in moisture and enhances flavor.
- Pat dry before seasoning: Removing surface moisture ensures a better sear and crispier skin, especially if using bone-in, skin-on cuts.
- Use a meat thermometer: Cooking to an internal temperature of 165°F (74°C) guarantees safety without overcooking—remove at 160°F (71°C) for carryover cooking.
- Let it rest: Allowing the chicken to rest for 5–10 minutes after roasting redistributes juices, keeping each bite succulent.
- Roast at high heat: Starting at 425°F (220°C) gives a golden exterior while keeping the inside moist.
- Add aromatics and fat: Placing herbs, garlic, lemon, or butter under the skin or in the pan boosts flavor and prevents dryness.
- Choose the right cut: Bone-in, skin-on breasts stay juicier than boneless, but both can work with proper technique.
Quick Answers to Common Questions
How long do you roast chicken breast at 425°F?
Bone-in, skin-on chicken breasts take about 30–35 minutes at 425°F. Boneless breasts usually need 20–25 minutes. Always check with a thermometer—remove when the internal temperature reaches 160°F (71°C).
Should I cover chicken breast when roasting?
No, do not cover the chicken while roasting. Covering traps steam, which prevents browning and crisping. For juicy results, roast uncovered at high heat.
Can I roast frozen chicken breast?
It’s not recommended. Frozen chicken cooks unevenly and can be unsafe. Always thaw it fully in the refrigerator before roasting.
How do I keep chicken breast from drying out?
Brining, using a meat thermometer, and letting it rest are the best ways. Also, avoid overcooking—pull it out at 160°F (71°C) and let carryover cooking finish the job.
What temperature is safe for roast chicken breast?
The USDA recommends cooking chicken to an internal temperature of 165°F (74°C). For best texture, remove at 160°F (71°C) and let it rest—it will reach 165°F safely.
📑 Table of Contents
Why Roast Chicken Breast?
Chicken breast is a lean, high-protein cut that’s a favorite among health-conscious eaters and busy cooks alike. It’s low in fat, quick to cook, and pairs beautifully with almost any side dish—from roasted vegetables to creamy mashed potatoes. But its leanness is also its biggest challenge: without enough fat or moisture, it can easily become tough and dry.
Roasting is one of the best methods for cooking chicken breast because it uses dry, consistent heat to gently cook the meat while developing rich, caramelized flavors. Unlike frying or grilling, roasting allows you to cook larger portions evenly, making it ideal for meal prep or feeding a crowd. Plus, it’s hands-off once the chicken goes into the oven—perfect for multitasking or entertaining.
But roasting isn’t just about tossing chicken in a pan and hoping for the best. The secret to juicy results lies in understanding how heat affects the meat and using techniques that protect its natural moisture. From brining to temperature control, small adjustments can make a huge difference. In the sections below, we’ll break down each step so you can roast chicken breast like a pro—every single time.
Choosing the Right Chicken Breast
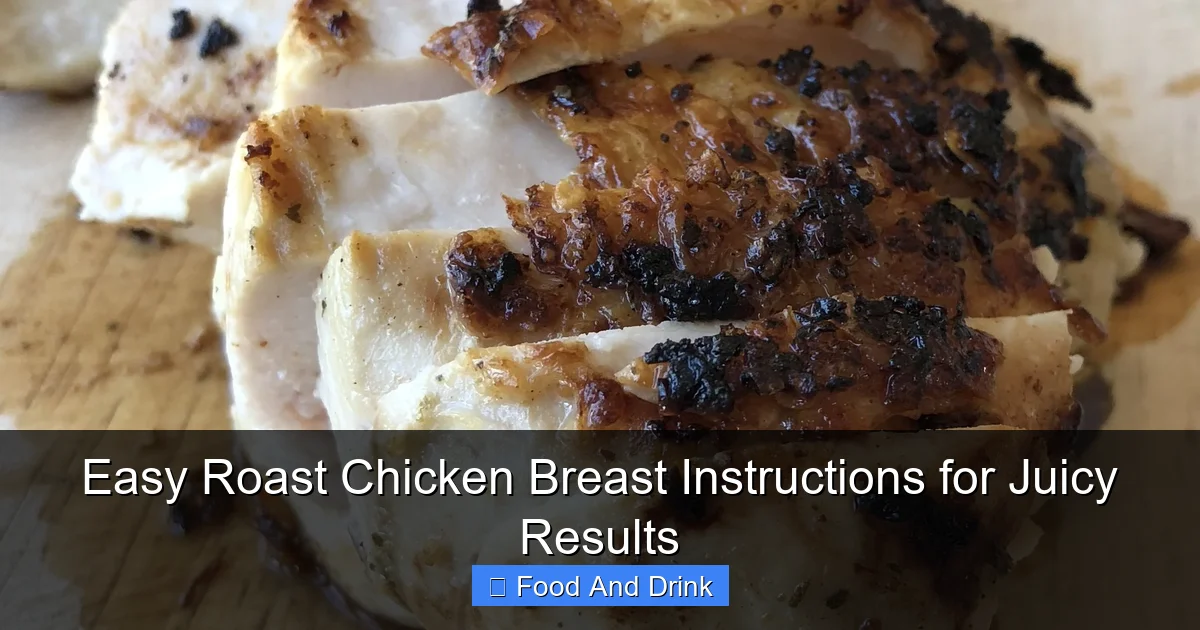
Visual guide about Easy Roast Chicken Breast Instructions for Juicy Results
Image source: data.thefeedfeed.com
Not all chicken breasts are created equal, and your choice of cut can significantly impact the final result. Here’s what to look for when shopping:
Bone-In vs. Boneless
Bone-in, skin-on chicken breasts are the gold standard for roasting. The bone conducts heat slowly, helping the meat cook evenly, while the skin acts as a natural barrier that locks in moisture. Even if you plan to remove the skin before eating, leaving it on during cooking keeps the breast juicy. Plus, crispy, golden skin is a delicious bonus.
Boneless, skinless breasts are more convenient and lower in fat, but they’re also more prone to drying out. If you prefer this cut, you’ll need to take extra care—like brining or using a marinade—to keep it moist.
Size Matters
Chicken breasts can vary widely in size, from small (4–6 ounces) to jumbo (12+ ounces). Larger breasts take longer to cook and are more likely to dry out in the center if not handled properly. For even cooking, choose breasts that are similar in size and thickness. If they’re uneven, you can pound the thicker parts gently with a meat mallet to create a uniform shape.
Fresh vs. Frozen
Fresh chicken is ideal, but frozen can work too—just make sure it’s fully thawed before cooking. Thaw it safely in the refrigerator overnight, never at room temperature. Partially frozen chicken will cook unevenly, leading to dry spots and undercooked areas.
Organic, Free-Range, or Conventional?
While all chicken is safe to eat when cooked properly, higher-welfare options like organic or free-range tend to have better flavor and texture. They’re often raised with more space and natural diets, which can result in more tender meat. If budget allows, consider splurging on quality—it makes a noticeable difference.
Essential Tools for Perfect Roast Chicken Breast

Visual guide about Easy Roast Chicken Breast Instructions for Juicy Results
Image source: moonandmagnolia.com
You don’t need a full kitchen arsenal to roast chicken breast, but a few key tools will make the process easier and more reliable.
Meat Thermometer
This is non-negotiable. Relying on time alone is risky—oven temperatures vary, and chicken sizes differ. A digital instant-read thermometer lets you check the internal temperature accurately, ensuring your chicken is safe to eat without overcooking. Insert it into the thickest part of the breast, avoiding the bone. Aim for 160°F (71°C) before resting—it will rise to 165°F (74°C) as it sits.
Roasting Pan or Baking Dish
A heavy-duty roasting pan with a rack is ideal, as it allows hot air to circulate around the chicken. If you don’t have one, a baking dish or oven-safe skillet works fine. Just make sure it’s large enough so the breasts aren’t crowded—this ensures even browning.
Kitchen Twine (Optional)
If you’re roasting bone-in breasts, tying them with kitchen twine can help them cook more evenly by holding the shape. It’s not essential, but it’s helpful for larger cuts.
Meat Mallet or Rolling Pin
For boneless breasts, a mallet helps even out thickness, preventing the ends from drying out while the center cooks. Place the breast between two sheets of plastic wrap and gently pound to about ¾-inch thickness.
Brining Container
If you’re brining (highly recommended), you’ll need a non-reactive container—glass, plastic, or stainless steel—that’s large enough to hold the chicken submerged in liquid.
Step-by-Step Roast Chicken Breast Instructions
Now for the main event: how to roast chicken breast for juicy, flavorful results every time. Follow these steps, and you’ll never settle for dry chicken again.
Step 1: Brine the Chicken (Optional but Recommended)
Brining is the secret weapon for moist chicken. It works by osmosis: the salt in the brine helps the meat absorb and retain water, resulting in juicier meat even if you slightly overcook it.
To make a basic brine, dissolve ¼ cup of kosher salt (or ⅓ cup table salt) in 4 cups of cold water. Add optional flavorings like sugar, garlic, herbs, or citrus. Submerge the chicken breasts completely and refrigerate for 30 minutes to 2 hours. Don’t go longer than 2 hours, or the meat can become too salty.
After brining, rinse the chicken and pat it dry with paper towels. This step is crucial—moisture on the surface prevents browning.
Step 2: Preheat the Oven
Set your oven to 425°F (220°C). High heat is key for roasting chicken breast. It quickly sears the outside, locking in juices, while the interior cooks through gently. Preheating ensures the chicken starts cooking immediately when it hits the pan.
Step 3: Season Generously
Seasoning is where flavor begins. Use a mix of salt, pepper, and your favorite herbs and spices. A simple blend of garlic powder, onion powder, paprika, thyme, and black pepper works beautifully. For extra richness, rub softened butter or olive oil under the skin (if using skin-on) or directly onto the meat.
Don’t be shy—chicken breast can handle bold seasoning. Let it sit at room temperature for 15–20 minutes after seasoning. This helps it cook more evenly.
Step 4: Prepare the Pan
Place the chicken breasts in a roasting pan or baking dish. If using bone-in, skin-on, place them skin-side up. For boneless, you can lay them flat or slightly elevate them on a rack.
Add aromatics to the pan: chopped onions, garlic cloves, lemon wedges, fresh herbs (like rosemary or thyme), or even apple slices. These infuse the chicken with flavor and create a delicious pan sauce later.
Drizzle lightly with olive oil or dot with butter for extra richness and browning.
Step 5: Roast Until Done
Place the pan in the preheated oven. Roast for 20–30 minutes, depending on size and cut. Bone-in breasts will take longer—closer to 30–35 minutes. Boneless breasts usually need 20–25 minutes.
Halfway through, you can baste the chicken with pan juices or melted butter for extra moisture and color. But don’t open the oven too often—this drops the temperature and slows cooking.
Step 6: Check the Temperature
Use a meat thermometer to check the internal temperature. Insert it into the thickest part of the breast, avoiding bone or fat. The chicken is ready when it reaches 160°F (71°C). It will continue cooking as it rests, rising to the safe minimum of 165°F (74°C).
If the skin isn’t golden enough, you can broil for 1–2 minutes at the end—just watch closely to avoid burning.
Step 7: Let It Rest
This step is critical. Remove the chicken from the oven and let it rest, loosely covered with foil, for 5–10 minutes. Resting allows the juices to redistribute throughout the meat. If you slice it too soon, those precious juices will spill out, leaving the chicken dry.
Step 8: Serve and Enjoy
Slice the chicken against the grain for maximum tenderness. Serve with your favorite sides—roasted vegetables, rice, or a fresh salad. Don’t forget to deglaze the pan with a little broth or wine to make a quick, flavorful sauce.
Tips for Extra Juiciness and Flavor
Even with perfect technique, there are ways to elevate your roast chicken breast even further.
Use a Marinade
If you’re not brining, a marinade can add moisture and flavor. Use acidic ingredients like lemon juice, vinegar, or yogurt, combined with oil and herbs. Marinate for at least 30 minutes, up to 4 hours in the fridge. Avoid over-marinating, as acids can break down the meat and make it mushy.
Add Fat Under the Skin
For bone-in, skin-on breasts, gently loosen the skin and slide small pats of butter, herb butter, or olive oil underneath. This bastes the meat from above as it cooks, keeping it incredibly moist.
Roast on a Bed of Vegetables
Place chopped potatoes, carrots, or fennel in the pan and roast the chicken on top. The vegetables absorb chicken juices and caramelize beautifully, creating a one-pan meal that’s both delicious and convenient.
Use a Meat Thermometer with an Alarm
Some thermometers have timers or alarms that go off when the target temperature is reached. This takes the guesswork out of cooking and prevents overcooking.
Save the Carcass for Stock
If you’re using bone-in breasts, save the bones and scraps to make homemade chicken stock. It’s rich, flavorful, and far superior to store-bought.
Common Mistakes to Avoid
Even experienced cooks make these errors. Avoid them for consistently great results.
Cooking Straight from the Fridge
Cold chicken takes longer to cook and can lead to uneven results. Always let it come to room temperature for 15–20 minutes before roasting.
Overcooking
This is the #1 cause of dry chicken. Remember: 165°F (74°C) is the safe minimum, but pulling it out at 160°F (71°C) and letting it rest is better. Use a thermometer—don’t guess.
Skipping the Rest
Resting is non-negotiable. It’s the difference between juicy and dry. Set a timer if you need to.
Using Too High Heat for Boneless Breasts
While 425°F (220°C) works for bone-in, boneless breasts can dry out at that temperature. Try lowering the oven to 375°F (190°C) and roasting for 25–30 minutes, or use a meat thermometer to monitor doneness closely.
Not Seasoning Enough
Chicken breast is mild, so it needs bold seasoning. Don’t be timid—salt, pepper, and spices are your friends.
Serving Suggestions and Pairings
Roast chicken breast is incredibly versatile. Here are some delicious ways to serve it:
– **Classic Comfort:** With mashed potatoes, gravy, and green beans.
– **Mediterranean Style:** Over a bed of couscous with olives, tomatoes, and feta.
– **Asian-Inspired:** Sliced over rice noodles with a ginger-soy glaze and steamed bok choy.
– **Salad Topper:** Chilled and sliced over a mixed green salad with avocado and vinaigrette.
– **Sandwich Filling:** Shredded or sliced in a wrap with hummus, spinach, and roasted red peppers.
Leftovers? Use them in soups, salads, or casseroles. Roast chicken breast keeps well in the fridge for 3–4 days or can be frozen for up to 3 months.
Conclusion
Roasting chicken breast doesn’t have to be a gamble. With the right approach—brining, proper seasoning, high heat, and a trusty thermometer—you can achieve juicy, flavorful results every time. Whether you’re cooking for a weeknight dinner or prepping meals for the week, this method delivers consistent, delicious chicken that’s anything but boring.
Remember: the key to success is attention to detail. Don’t skip the brine, don’t overcook, and always let it rest. With practice, you’ll develop a feel for the process and be able to adapt it to your tastes and ingredients.
So next time you’re staring at a package of chicken breasts, don’t dread it—embrace it. With these easy roast chicken breast instructions, you’re just 45 minutes away from a meal that’s healthy, satisfying, and truly delicious.
Frequently Asked Questions
Can I use skinless chicken breast for roasting?
Yes, but it’s more prone to drying out. Brining or marinating beforehand helps retain moisture. Roast at a slightly lower temperature (375°F) and use a thermometer to avoid overcooking.
Do I need to baste the chicken while roasting?
Basting is optional but helpful. It adds moisture and enhances browning. Use pan juices or melted butter every 10–15 minutes for best results.
How do I make a pan sauce from roast chicken drippings?
After removing the chicken, place the hot pan on the stove. Add a splash of broth or wine, scrape up the browned bits, and simmer. Stir in butter or cream for richness, then strain and serve.
Can I roast chicken breast with other meats?
It’s best to roast chicken breast separately, as other meats (like thighs or wings) may have different cooking times. However, you can roast vegetables in the same pan.
How long does roast chicken breast last in the fridge?
Store in an airtight container for up to 3–4 days. Reheat gently in the oven or microwave with a damp paper towel to retain moisture.
What’s the best way to reheat roast chicken breast?
Reheat in a 350°F (175°C) oven for 10–15 minutes, covered with foil. Alternatively, microwave with a damp paper towel to prevent drying out.


