
Roasting a juicy, tender chicken doesn’t have to be complicated. With a few smart techniques—like brining, proper temperature control, and resting—you can keep roast chicken moist and delicious every single time.
There’s something deeply comforting about the aroma of a perfectly roasted chicken wafting through the kitchen. The golden, crispy skin, the tender meat that practically falls off the bone—it’s a meal that brings people together. But let’s be honest: nothing ruins that experience faster than dry, stringy chicken. You’ve probably been there—excited to serve a beautiful bird, only to slice into it and find the breast meat tough and flavorless. It’s frustrating, especially after all that prep and anticipation.
The good news? Keeping roast chicken moist isn’t about fancy equipment or secret family recipes passed down through generations. It’s about understanding a few key principles of cooking and applying simple, effective techniques. Whether you’re a beginner or a seasoned home cook, these tips will help you achieve juicy, succulent results every time. From brining to temperature control, resting to basting, we’ll walk you through everything you need to know to roast a chicken that’s as moist on the inside as it is golden on the outside.
Key Takeaways
- Brining is a game-changer: Soaking chicken in a saltwater solution before roasting helps it retain moisture during cooking.
- Don’t overcook: Use a meat thermometer to pull the chicken out at the right internal temperature—165°F (74°C)—to avoid dryness.
- Let it rest: Allowing the chicken to rest for 15–20 minutes after roasting lets juices redistribute, keeping it moist when sliced.
- Trussing matters: Tying the legs together helps the chicken cook evenly, preventing dry breast meat.
- Use a rack: Elevating the chicken on a roasting rack ensures even heat circulation and prevents soggy skin.
- Butter and oil boost juiciness: Rubbing the skin with butter or oil adds flavor and helps lock in moisture.
- Start high, then lower the heat: Begin roasting at a high temperature to crisp the skin, then reduce heat to gently cook the meat without drying it out.
Quick Answers to Common Questions
How long should I brine a whole chicken?
For a whole chicken, brine for 8 to 12 hours in the refrigerator. This gives enough time for the salt to penetrate deeply and retain moisture during roasting.
Can I brine a frozen chicken?
No, always thaw the chicken completely before brining. Brining a frozen bird won’t allow the salt to penetrate evenly, and it could lead to food safety issues.
Is it safe to eat chicken at 160°F?
Yes, as long as it rests. The internal temperature will rise to 165°F during resting, making it safe to eat while staying juicy.
Do I need to truss my chicken?
Trussing helps the chicken cook evenly and keeps the legs from drying out. While not strictly necessary, it’s highly recommended for best results.
Can I roast chicken without a rack?
Yes, but using a rack is better. If you don’t have one, place chopped vegetables in the pan to elevate the chicken and prevent soggy skin.
📑 Table of Contents
- Why Does Roast Chicken Dry Out?
- Brining: The Secret to Juicy Meat
- Mastering Temperature and Cooking Time
- The Power of Resting
- Trussing and Positioning for Even Cooking
- Basting, Butter, and Oil: Flavor and Moisture Boosters
- Using a Meat Thermometer: Your Best Friend in the Kitchen
- Conclusion: Juicy Roast Chicken Is Within Reach
Why Does Roast Chicken Dry Out?
Before we dive into solutions, it helps to understand why roast chicken often turns out dry in the first place. Chicken breast meat, in particular, is lean and low in fat compared to other cuts. When exposed to high heat for too long, the proteins in the meat contract and squeeze out moisture—like wringing a sponge. Once that moisture is gone, it’s nearly impossible to get it back. That’s why overcooking is the number one enemy of juicy roast chicken.
Another factor is uneven cooking. The breast cooks faster than the legs, so if you’re not careful, the breast can be overdone by the time the thighs reach a safe temperature. Add to that the natural tendency of skin to crisp up and protect the meat beneath, and you’ve got a recipe for imbalance. Without proper technique, the breast ends up dry while the legs are still undercooked.
The Role of Muscle Structure
Chicken breast meat is made of fast-twitch muscle fibers, which are designed for short bursts of activity—like flapping wings. These fibers are low in fat and connective tissue, making them prone to drying out. In contrast, dark meat (like thighs and drumsticks) contains more fat and collagen, which break down during cooking to keep the meat tender and juicy.
Heat and Time: The Double-Edged Sword
High heat is essential for creating that beautiful, crispy skin we all love. But too much heat for too long will evaporate moisture and toughen the meat. The key is balancing heat and time—starting hot to sear the skin, then lowering the temperature to cook the meat gently. This method, known as “reverse searing” or “low-and-slow finishing,” helps retain moisture while still achieving that golden exterior.
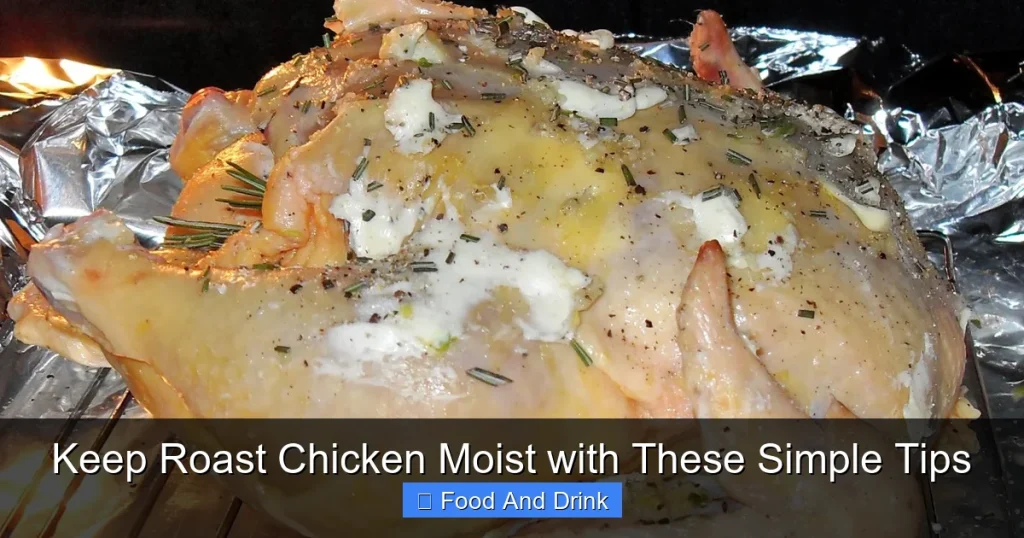
Brining: The Secret to Juicy Meat

Visual guide about Keep Roast Chicken Moist with These Simple Tips
Image source: blogger.googleusercontent.com
If there’s one technique that consistently delivers moist roast chicken, it’s brining. Brining involves soaking the chicken in a saltwater solution—sometimes with sugar, herbs, and spices—before cooking. The salt in the brine changes the protein structure of the meat, allowing it to hold onto more water during cooking. This means even if the chicken cooks a little longer than intended, it won’t dry out as quickly.
Wet Brining: The Classic Method
Wet brining is the most common approach. To make a basic brine, dissolve 1/2 cup of kosher salt and 1/4 cup of sugar in 1 quart (4 cups) of water. You can add aromatics like garlic, bay leaves, peppercorns, or citrus slices for extra flavor. Submerge the chicken in the brine, cover, and refrigerate for 4 to 12 hours. For a whole chicken, 8 hours is ideal—long enough to penetrate deeply but not so long that the meat becomes too salty.
After brining, rinse the chicken thoroughly and pat it dry with paper towels. This step is crucial—drying the skin helps it crisp up during roasting. Some people skip the rinse, but doing so can leave the skin overly salty.
Dry Brining: Simpler and Just as Effective
If you’re short on time or fridge space, dry brining is a fantastic alternative. Also known as salting, this method involves rubbing salt (and optionally herbs and spices) directly onto the chicken and letting it sit uncovered in the refrigerator for several hours or overnight. The salt draws out moisture, which then reabsorbs into the meat along with the seasoning. Because the chicken dries out slightly on the surface, the skin becomes extra crispy when roasted.
Dry brining is especially great for weeknight cooks. Simply season the chicken generously with salt—about 1 teaspoon per pound—and let it rest in the fridge for at least 4 hours, or up to 24 hours. No mixing, no containers, no mess.
Flavorful Brine Variations
Want to take your brine to the next level? Try adding ingredients like:
- Apple cider or apple juice: Adds subtle sweetness and helps tenderize the meat.
- Herbs and spices: Rosemary, thyme, garlic, and black pepper infuse the chicken with flavor from the inside out.
- Soy sauce or fish sauce: Adds umami depth and enhances browning.
- Lemon or orange zest: Brightens the flavor and complements the chicken’s natural taste.
Just remember: the goal of brining is moisture retention, not over-seasoning. Keep the salt ratio consistent, and taste your brine—it should be salty like seawater, not like a salt lick.
Mastering Temperature and Cooking Time

Visual guide about Keep Roast Chicken Moist with These Simple Tips
Image source: 1.bp.blogspot.com
One of the biggest mistakes home cooks make is relying solely on time when roasting chicken. Ovens vary, chicken sizes differ, and even the shape of the bird can affect cooking speed. The only reliable way to know when your chicken is done is by using a meat thermometer.
The Magic Number: 165°F (74°C)
The USDA recommends cooking poultry to an internal temperature of 165°F (74°C) to ensure food safety. But here’s the secret: you don’t have to cook the chicken *to* 165°F and leave it there. In fact, pulling the chicken out at 160°F (71°C) and letting it rest will allow the temperature to rise to 165°F while the meat stays juicy.
Insert the thermometer into the thickest part of the thigh, avoiding the bone. The breast should read around 160°F (71°C) when you remove the chicken from the oven. During the resting period, carryover cooking will bring both the breast and thigh to a safe temperature.
Reverse Searing for Even Cooking
To keep the breast moist while ensuring the legs are fully cooked, try reverse searing. Start by roasting the chicken at a high temperature—425°F (220°C)—for the first 20–30 minutes. This crisps the skin and jump-starts the cooking process. Then, reduce the oven temperature to 325°F (165°C) and continue roasting until the internal temperature reaches 160°F (71°C).
This method gives you the best of both worlds: crispy skin and tender, juicy meat. It also allows the legs to catch up without overcooking the breast.
Using a Roasting Rack
Always roast your chicken on a rack placed inside a roasting pan. This elevates the bird, allowing hot air to circulate evenly around it. Without a rack, the bottom of the chicken sits in its own juices, which can make the skin soggy and slow down cooking. A rack also helps prevent flare-ups if you’re using butter or oil.
If you don’t have a roasting rack, you can improvise by placing chopped vegetables—like onions, carrots, and celery—in the bottom of the pan. They’ll act as a natural rack and add flavor to the drippings for gravy.
The Power of Resting

Visual guide about Keep Roast Chicken Moist with These Simple Tips
Image source: dinnerthendessert.com
You’ve probably heard it before, but it’s worth repeating: always let your roast chicken rest before carving. This step is non-negotiable if you want to keep roast chicken moist. When meat cooks, the juices are pushed toward the center. If you slice into the chicken immediately, those juices spill out onto the cutting board, leaving the meat dry.
How Long to Rest?
Let the chicken rest for at least 15–20 minutes, tented loosely with foil. This allows the juices to redistribute throughout the meat. The longer you rest, the more evenly the juices settle—but don’t wait too long, or the chicken will cool down too much.
For a whole chicken, 20 minutes is ideal. If you’re short on time, even 10 minutes makes a noticeable difference.
Carryover Cooking
During the resting period, the internal temperature of the chicken will continue to rise by 5–10°F. This is called carryover cooking, and it’s why you should remove the chicken from the oven when it’s a few degrees below the target temperature. By the time you carve it, it’ll be perfectly safe and juicy.
Trussing and Positioning for Even Cooking
Trussing—tying the legs together with kitchen twine—might seem like a fussy step, but it serves an important purpose. It helps the chicken cook evenly by keeping the legs close to the body. Without trussing, the legs can flare out and cook faster than the breast, leading to dryness in the white meat.
How to Truss a Chicken
To truss a chicken, place it breast-side up on a cutting board. Tuck the wing tips behind the shoulders. Cut a piece of kitchen twine about 3 feet long. Slide the string under the chicken, bring the ends up between the legs, cross them, and pull tight to bring the legs together. Tie a secure knot at the top.
If you don’t have twine, you can use the chicken’s own skin and bones to hold it together. Simply tuck the legs under the body and press them gently toward the breast.
Roasting Breast-Side Up vs. Down
Most recipes call for roasting chicken breast-side up, which allows the skin to crisp and the breast to cook evenly. However, some chefs recommend starting breast-side down for the first 20–30 minutes to protect the delicate white meat from direct heat. Then, flip the chicken breast-side up for the remainder of the cooking time to crisp the skin.
This method can be effective, but it requires careful handling to avoid splattering hot oil. If you’re not confident flipping a whole chicken, stick with breast-side up and rely on other moisture-preserving techniques.
Basting, Butter, and Oil: Flavor and Moisture Boosters
Basting—spooning pan juices over the chicken during roasting—is a classic technique that adds flavor and helps keep the surface moist. However, it’s not always necessary, especially if you’re using a brine or butter rub. Opening the oven door frequently can cause temperature fluctuations, which may affect cooking time.
Butter Rubs for Richness
One of the best ways to keep roast chicken moist is to rub the skin with softened butter before roasting. The fat in the butter bastes the meat from the outside, adding richness and helping the skin crisp up. For extra flavor, mix the butter with minced garlic, fresh herbs, lemon zest, or a pinch of paprika.
Oil for Even Browning
If you prefer a lighter option, use olive oil or another high-smoke-point oil. Brush it evenly over the skin to promote browning and prevent drying. Oil also helps herbs and spices adhere to the chicken, creating a flavorful crust.
Basting Alternatives
Instead of basting, consider placing a few pats of butter or a drizzle of oil on top of the chicken before roasting. As the butter melts, it will baste the bird naturally. You can also add aromatics like onion wedges, garlic cloves, or herb sprigs to the cavity—they’ll release moisture and flavor as they cook.
Using a Meat Thermometer: Your Best Friend in the Kitchen
We can’t stress this enough: a meat thermometer is essential for keeping roast chicken moist. Guessing based on time or color is unreliable and often leads to overcooking. A digital instant-read thermometer is affordable, easy to use, and takes the guesswork out of roasting.
Where to Insert the Thermometer
Insert the probe into the thickest part of the thigh, making sure it doesn’t touch the bone. The thigh is the best indicator because it takes longer to cook than the breast. Once the thigh reaches 160°F (71°C), the breast should be around 155–160°F (68–71°C)—perfect for juicy results.
Probe Thermometers for Hands-Free Monitoring
If you want to monitor the temperature without opening the oven, invest in an oven-safe probe thermometer. You can set it to beep when the chicken reaches the desired temperature, so you don’t have to keep checking.
Conclusion: Juicy Roast Chicken Is Within Reach
Roasting a moist, flavorful chicken doesn’t require professional skills or expensive tools. It’s about combining a few simple techniques—brining, proper temperature control, resting, and smart seasoning—to create a dish that’s consistently delicious. Whether you’re cooking for a holiday dinner or a weeknight family meal, these tips will help you serve a chicken that’s tender, juicy, and full of flavor.
Start with a good-quality bird, season it well, and don’t rush the process. Let the chicken rest, use a thermometer, and trust the method. With practice, you’ll develop a feel for roasting that goes beyond recipes—and every bite will be worth the wait.
Frequently Asked Questions
What’s the best way to keep roast chicken moist?
The best way to keep roast chicken moist is by brining it before cooking. Brining helps the meat retain moisture, so even if it cooks a little longer, it stays juicy. Dry brining with salt is a simple and effective alternative.
How do I prevent dry breast meat when roasting chicken?
To prevent dry breast meat, avoid overcooking by using a meat thermometer. Pull the chicken from the oven when the breast reaches 160°F (71°C) and let it rest. Trussing the chicken and starting with high heat then lowering the temperature also helps.
Should I baste my roast chicken?
Basting isn’t necessary if you’ve brined or butter-rubbed the chicken. Frequent oven opening can cause temperature drops. Instead, use a butter rub or add aromatics to the cavity for natural basting.
How long should I let roast chicken rest?
Let roast chicken rest for 15–20 minutes after cooking. This allows juices to redistribute, keeping the meat moist when sliced. Tent loosely with foil to retain warmth.
Can I use a roasting bag to keep chicken moist?
Yes, roasting bags can help retain moisture by trapping steam. However, the skin won’t crisp as much. For crispy skin and juicy meat, traditional roasting with a rack is preferred.
What temperature should I roast chicken at?
Start at 425°F (220°C) for 20–30 minutes to crisp the skin, then reduce to 325°F (165°C) until the internal temperature reaches 160°F (71°C). This method ensures even cooking and juicy results.


