Master the OXO can opener with ease using our expert tips and step-by-step instructions. Whether you’re a beginner or looking to refine your technique, this guide ensures clean cuts, safe operation, and long-lasting performance every time.
Key Takeaways
- Proper grip and positioning: Hold the can opener firmly and align the cutting wheel with the can’s rim for smooth operation.
- Use steady, consistent pressure: Avoid forcing the opener—let the sharp blade do the work with gentle, even turns.
- Start at the right spot: Begin cutting just inside the outer rim to prevent jagged edges and ensure a clean lid removal.
- Maintain your tool: Clean after each use and store in a dry place to keep the OXO can opener in top condition.
- Handle lids safely: Use the built-in lid lifter to avoid touching sharp edges and reduce injury risk.
- Choose the right model: OXO offers manual and electric versions—pick one that fits your kitchen needs and comfort level.
- Practice makes perfect: A few test runs on different can sizes will boost your confidence and efficiency.
Quick Answers to Common Questions
How do I know if my OXO can opener is cutting properly?
If the cutting wheel glides smoothly and the lid comes off cleanly without jagged edges, it’s working correctly. If it struggles or leaves sharp pieces, check alignment or clean the blade.
Can I use the OXO can opener on pet food cans?
Yes, the OXO can opener works well on standard pet food cans. Just make sure the rim is smooth and undamaged for best results.
Is the OXO can opener dishwasher safe?
Yes, both the manual and electric models are dishwasher safe. Place them on the top rack to avoid damage.
What should I do if the lid won’t lift off easily?
Use the built-in lid lifter to gently pry the lid up. If it’s stuck, wiggle it slightly—don’t force it with your fingers.
Can I leave the lid partially attached for storage?
Yes, you can stop cutting just short of completing the circle to create a hinge. This lets you fold the lid back to cover the can temporarily.
📑 Table of Contents
- Why the OXO Can Opener Is a Kitchen Must-Have
- Understanding Your OXO Can Opener: Features and Benefits
- Step-by-Step Guide: How to Work an OXO Can Opener
- Tips for Using Your OXO Can Opener Like a Pro
- Manual vs. Electric: Which OXO Can Opener Is Right for You?
- Caring for Your OXO Can Opener: Maintenance Tips
- Common Mistakes to Avoid When Using an OXO Can Opener
- Conclusion: Master the OXO Can Opener for a Better Kitchen Experience
Why the OXO Can Opener Is a Kitchen Must-Have
If you’ve ever struggled with a flimsy, hard-to-turn can opener that leaves jagged metal shards behind, you’re not alone. That’s where the OXO can opener comes in—a reliable, ergonomic tool designed to make opening cans effortless, safe, and mess-free. Known for its thoughtful design and user-friendly features, OXO has become a trusted name in kitchen gadgets, and their can openers are no exception.
Whether you’re using the classic OXO Good Grips Smooth Edge Can Opener or the electric version, this tool is built to reduce hand strain, deliver clean cuts, and keep your fingers safe from sharp edges. Unlike traditional openers that cut through the top of the can, OXO’s smooth-edge models slice along the side of the rim, leaving no sharp lid behind. This small but smart design difference makes a huge impact on safety and convenience, especially if you have kids or elderly family members in the kitchen.
Understanding Your OXO Can Opener: Features and Benefits
Visual guide about How to Work an OXO Can Opener Like a Pro
Image source: i.ytimg.com
Before diving into how to work an OXO can opener, it helps to understand what makes it special. OXO designs its products with real people in mind—people who want tools that are comfortable, durable, and easy to use. Their can openers reflect this philosophy through several standout features.
First, the ergonomic handles are soft, non-slip, and shaped to fit comfortably in your hand. This reduces hand fatigue, even when opening multiple cans in a row. The sharp stainless steel cutting wheel glides smoothly through metal, requiring minimal effort. And because it cuts along the side of the can’s rim—not through the top—the lid comes off cleanly without sharp edges.
Another key feature is the built-in lid lifter, a small metal hook near the cutting mechanism that grabs the lid once it’s fully cut. This allows you to lift the lid off without touching it, which is especially helpful when dealing with messy contents like tomato sauce or tuna. Plus, the opener is dishwasher safe, making cleanup a breeze.
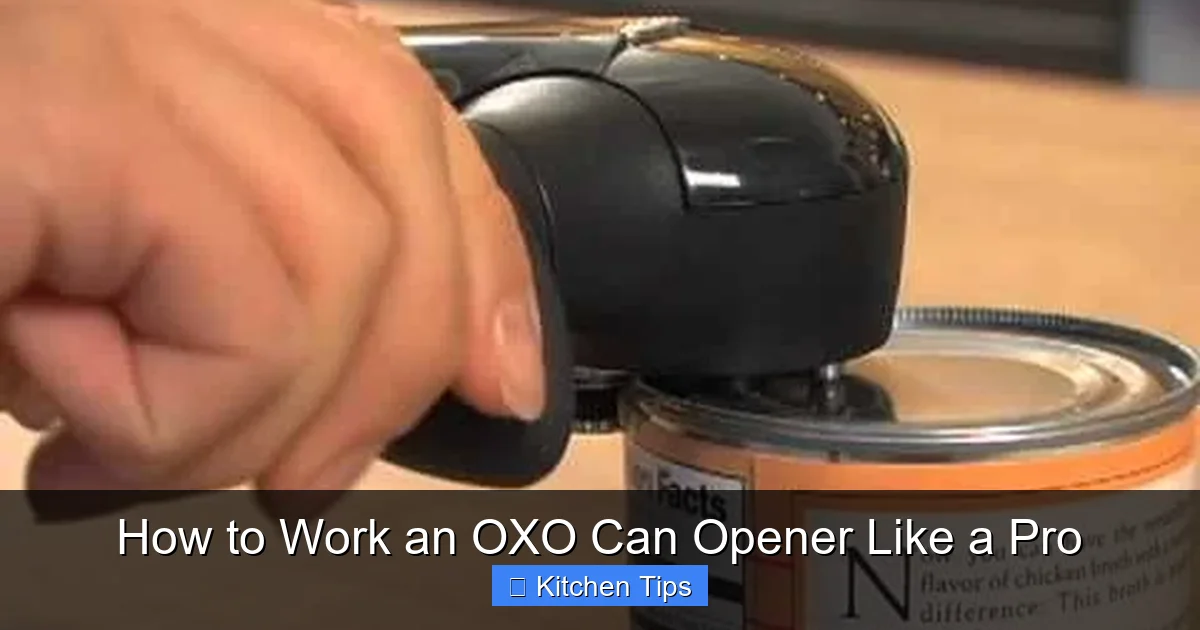
OXO also offers an electric version for those who prefer hands-free operation. It works with the push of a button and automatically stops when the can is fully opened. Both manual and electric models are designed to work on standard-sized cans, including soup, vegetable, and pet food cans.
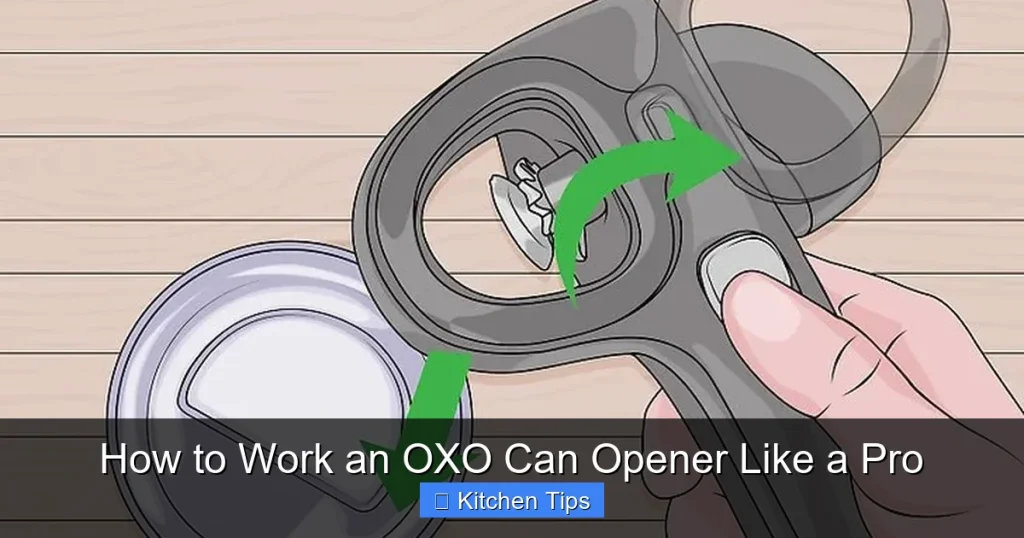
Step-by-Step Guide: How to Work an OXO Can Opener

Visual guide about How to Work an OXO Can Opener Like a Pro
Image source: dymon.ca
Now that you know what makes the OXO can opener great, let’s walk through exactly how to use it like a pro. Whether you’re using the manual or electric model, the process is simple—but following these steps ensures the best results every time.
Step 1: Prepare the Can
Start by placing the can on a flat, stable surface. Make sure the lid is clean and free of debris. If the can has a pull-tab lid, remove it first. For best results, choose cans with smooth, undamaged rims—dented or warped cans can make cutting more difficult.
Step 2: Position the Can Opener
Hold the OXO can opener in your dominant hand. Position the cutting wheel just inside the outer rim of the can, near the edge. The two arms of the opener should grip the top and bottom of the can securely. You’ll feel a slight resistance when it’s in the right spot.
For the manual model, squeeze the handles gently to lock the opener in place. The electric version will automatically grip the can when you press the button.
Step 3: Begin Cutting
With the manual opener, turn the knob clockwise in smooth, steady motions. Don’t rush—let the sharp blade do the work. You’ll hear a soft “zip” sound as it cuts through the metal. Keep turning until you’ve gone all the way around the can.
If you’re using the electric model, simply press the button and hold it. The opener will rotate automatically and stop when the cut is complete. It’s that easy!
Step 4: Remove the Lid
Once the cutting is done, the lid will still be attached by a small tab. Use the built-in lid lifter—located near the cutting wheel—to gently lift the lid off. This keeps your fingers away from any potential sharp spots and makes it easy to dispose of the lid safely.
Step 5: Clean and Store
After use, rinse the can opener under warm water or place it in the dishwasher. Dry it thoroughly before storing to prevent rust. Keep it in a drawer or utensil holder where it’s easy to reach next time.
Tips for Using Your OXO Can Opener Like a Pro

Visual guide about How to Work an OXO Can Opener Like a Pro
Image source: cdn.www.kitchenshop.eu
Even the best tools work better with a few insider tips. Here are some pro-level strategies to get the most out of your OXO can opener.
Use the Right Amount of Pressure
One common mistake is pressing too hard. The OXO can opener is designed to cut smoothly with light pressure. If you’re struggling, check that the cutting wheel is properly aligned with the rim. Forcing it can dull the blade or damage the can.
Start at a Consistent Spot
Begin cutting at the same point every time—like the 12 o’clock position. This helps you keep track of your progress and ensures a clean, even cut. It also makes it easier to stop just short of completing the circle if you want to leave a small hinge (useful for resealing).
Try the “Hinge Method” for Resealing
If you don’t plan to use the entire contents of the can right away, consider leaving a small uncut section—about a quarter-inch—so the lid stays attached. This creates a hinge that lets you fold the lid back to cover the can for short-term storage. Just remember to remove it completely before reheating.
Keep the Cutting Wheel Sharp
Over time, the cutting wheel may dull from use. While OXO blades are high quality, they’re not indestructible. Avoid using the opener on cans with thick or rusted rims, as this can wear it down faster. If you notice it’s struggling to cut, it might be time to replace the opener.
Use the Lid Lifter for Messy Foods
When opening cans of wet or sticky foods—like condensed milk or fruit in syrup—use the lid lifter to avoid getting your fingers messy. It’s a small feature, but it makes a big difference in kitchen hygiene.
Manual vs. Electric: Which OXO Can Opener Is Right for You?
OXO offers both manual and electric can openers, each with its own advantages. Choosing the right one depends on your kitchen habits, physical needs, and personal preferences.
The manual OXO Good Grips Can Opener is ideal for most home cooks. It’s lightweight, affordable, and doesn’t require batteries or electricity. It’s also great for camping or power outages. Plus, the smooth-edge cutting action leaves no sharp lid behind, making it safer for families.
The OXO Electric Can Opener, on the other hand, is perfect for those with arthritis, limited hand strength, or anyone who values convenience. It opens cans with the push of a button and automatically stops when done. It’s slightly larger and needs to be plugged in or charged, but it’s a game-changer for frequent can users.
If you’re unsure, consider your daily routine. Do you open cans often? Do you have hand mobility issues? Are you looking for something simple and reliable? Answering these questions will help you pick the best model.
Caring for Your OXO Can Opener: Maintenance Tips
Like any kitchen tool, your OXO can opener will last longer with proper care. Here’s how to keep it in top shape.
Clean After Every Use
Food residue can build up on the cutting wheel and gears, especially if you open cans with sticky contents. Rinse the opener under warm water and use a small brush (like a toothbrush) to clean hard-to-reach areas. For deeper cleaning, run it through the dishwasher.
Avoid Harsh Cleaners
Don’t use abrasive sponges or harsh chemicals, as they can damage the non-slip grips or dull the blade. Mild dish soap and water are all you need.
Store Properly
Keep your can opener in a dry place. Moisture can lead to rust, especially on the metal parts. If you live in a humid climate, consider storing it in a drawer with a silica gel packet to absorb excess moisture.
Inspect Regularly
Every few months, check the cutting wheel for signs of wear or damage. If it’s chipped or not cutting smoothly, it may be time for a replacement. OXO offers excellent customer service and often provides replacement parts or discounts on new models.
Common Mistakes to Avoid When Using an OXO Can Opener
Even with a great tool, mistakes can happen. Here are a few common pitfalls and how to avoid them.
Forcing the Opener
If the can isn’t opening smoothly, don’t force it. Check that the cutting wheel is properly seated on the rim. Sometimes a slight adjustment is all it takes.
Cutting Through the Lid
Remember: OXO openers cut along the side of the rim, not through the top. Cutting through the lid creates sharp edges and defeats the purpose of the smooth-edge design.
Ignoring the Lid Lifter
Many people forget to use the built-in lid lifter and end up touching the lid with their fingers. This increases the risk of cuts and makes cleanup messier.
Using on Non-Standard Cans
OXO can openers work best on standard-sized cans. Avoid using them on oversized, undersized, or heavily dented cans, as this can damage the tool or result in an uneven cut.
Conclusion: Master the OXO Can Opener for a Better Kitchen Experience
Learning how to work an OXO can opener like a pro isn’t just about opening cans—it’s about making your kitchen safer, cleaner, and more efficient. With its ergonomic design, smooth cutting action, and thoughtful features, the OXO can opener stands out as one of the best tools you can have on hand.
By following the steps in this guide, you’ll open cans with confidence, avoid common mistakes, and keep your opener in excellent condition for years to come. Whether you choose the manual or electric model, you’re investing in a tool that makes everyday tasks easier and more enjoyable.
So next time you reach for a can of beans or soup, take a moment to appreciate how simple and safe it is with your OXO can opener. With a little practice and care, you’ll wonder how you ever cooked without it.
Frequently Asked Questions
How do I clean the cutting wheel on my OXO can opener?
Rinse it under warm water and use a small brush to remove food particles. Avoid abrasive cleaners to protect the blade.
Why is my OXO can opener not gripping the can?
Make sure the arms are fully opened and positioned correctly on the rim. Dirt or residue can also affect grip—clean the jaws regularly.
Can the OXO can opener handle large cans?
It works best on standard-sized cans. Very large or oversized cans may not fit properly or could strain the mechanism.
Does the electric model need batteries?
No, the OXO electric can opener plugs into an outlet or recharges via USB, depending on the model.
What makes the OXO can opener “smooth edge”?
It cuts along the side of the can’s rim, not through the top, leaving the lid and can edge smooth and safe to touch.
How long does an OXO can opener typically last?
With proper care, it can last many years. Regular cleaning and avoiding misuse help extend its lifespan.