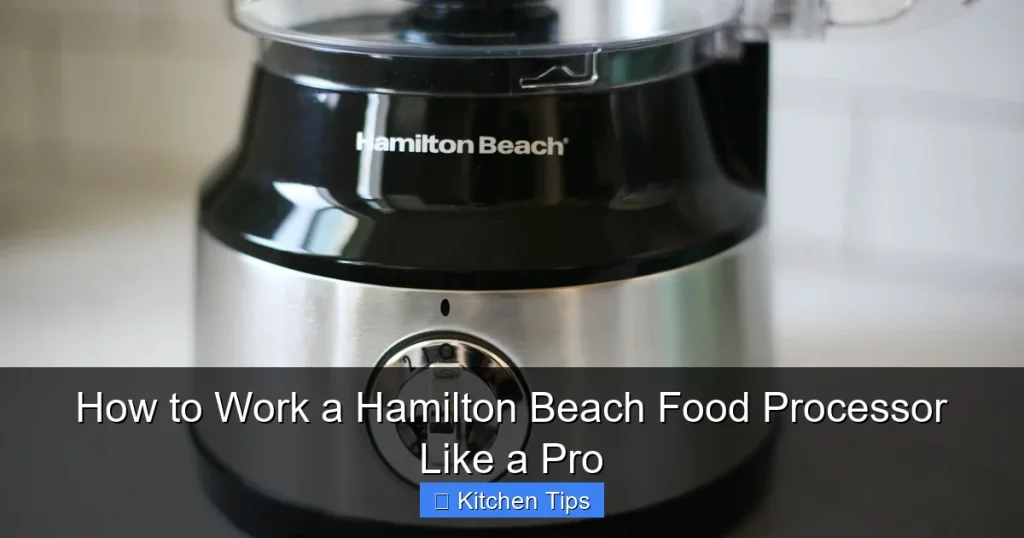
Learn how to work a Hamilton Beach food processor like a pro with this complete guide. From assembly to advanced techniques, we’ll show you how to chop, slice, shred, and knead with confidence—saving time and elevating your cooking game.
If you’ve ever stood in front of your Hamilton Beach food processor, wondering if you’re using it correctly—or worse, afraid to turn it on—you’re not alone. These powerful kitchen workhorses can chop, slice, shred, and even knead dough, but only if you know how to work a Hamilton Beach food processor the right way. Whether you’re a busy parent making homemade baby food, a meal prepper slicing veggies for the week, or a baker crafting pie crusts from scratch, mastering this tool can save you time, effort, and frustration.
The good news? Once you understand the basics—and a few pro tricks—you’ll wonder how you ever cooked without it. Hamilton Beach food processors are known for their reliability, affordability, and user-friendly design. But like any kitchen appliance, they perform best when used correctly. In this guide, we’ll walk you through everything from unboxing and setup to advanced techniques like making nut butter or dough. No jargon, no fluff—just clear, practical advice to help you use your food processor like a seasoned chef.
Key Takeaways
- Proper assembly is key: Always lock the bowl and lid securely before use to prevent leaks or accidents.
- Use the right blade for the job: Match the blade (S-blade, slicing disc, shredding disc) to your task for best results.
- Pulse for control: Use short pulses when chopping to avoid over-processing and achieve even textures.
- Don’t overfill the bowl: Fill no more than two-thirds full to ensure even processing and prevent motor strain.
- Clean immediately after use: Rinse parts right away—dried food is harder to remove and can damage components.
- Master dough and nut butter: Use the dough blade for bread and the S-blade for creamy nut butters with patience and oil.
- Safety first: Always unplug the unit before cleaning or changing blades to avoid injury.
Quick Answers to Common Questions
Can I put the food processor parts in the dishwasher?
Yes, most Hamilton Beach food processor parts—including the bowl, lid, pusher, and blades—are dishwasher-safe. However, check your user manual to confirm, and place blades in the utensil basket to prevent damage.
How do I prevent my food processor from overheating?
Don’t run the motor continuously for more than 1–2 minutes at a time. Allow it to rest for 30–60 seconds between long tasks. Also, avoid overloading the bowl, which can strain the motor.
Can I use the food processor to grind meat?
Yes, the S-blade is great for grinding raw meat for burgers, meatballs, or sausage. Cut meat into 1-inch cubes and chill it first for cleaner results. Pulse until desired texture is reached.
Why is my food processor leaking?
Leaks usually occur due to improper assembly—check that the bowl and lid are locked. Also, ensure the rubber gasket is in place and not damaged. Overfilling can also cause leaks.
How often should I replace the blades?
Blades should be replaced if they become dull, bent, or damaged. With regular use and proper care, they can last for years. Always inspect blades before each use.
📑 Table of Contents
Getting Started: Unboxing and Setup
Before you even think about chopping an onion, take a few minutes to get familiar with your Hamilton Beach food processor. Most models come with a motor base, work bowl, lid, pusher, and a set of blades and discs. Start by removing all packaging materials—especially the plastic wrap around the motor base and any foam inserts.
Inspecting the Parts
Check that all components are present and undamaged. You should have:
- A sturdy motor base with a power cord
- A clear or translucent work bowl (usually 8–12 cups)
- A lid with a feed tube and pusher
- An S-shaped chopping blade (also called the multipurpose blade)
- A slicing disc (typically reversible for thick or thin slices)
- A shredding disc
- Sometimes a dough blade (flat and blunt, designed for kneading)
Refer to your user manual if anything is missing—Hamilton Beach includes a detailed guide with every model.
Assembling the Processor
Proper assembly is critical for safety and performance. Here’s how to do it step by step:
- Place the motor base on a flat, dry surface near an outlet.
- Set the work bowl onto the base, aligning the handle with the front. Twist it slightly clockwise until it locks into place—you’ll feel it click.
- Insert the desired blade or disc into the bowl. For chopping, place the S-blade onto the center spindle. For slicing or shredding, slide the disc onto the spindle with the correct side facing up (usually marked).
- Place the lid on top of the bowl, aligning the feed tube with the opening. Twist the lid clockwise until it locks. The feed tube should be centered and secure.
- Insert the pusher into the feed tube. It should slide in smoothly but snugly.
Pro Tip: Never run the processor without the lid locked in place. Most Hamilton Beach models have a safety interlock that prevents operation if the lid isn’t secure—but it’s still smart to double-check.
Choosing the Right Blade for the Job
One of the most common mistakes new users make is using the wrong blade. Each attachment is designed for a specific task, and using the wrong one can lead to uneven results or even damage the machine.
The S-Blade: Your Go-To for Chopping
The S-shaped multipurpose blade is the heart of your food processor. It’s perfect for:

Visual guide about How to Work a Hamilton Beach Food Processor Like a Pro
Image source: i.pinimg.com
- Chopping onions, garlic, and herbs
- Making breadcrumbs or cracker crumbs
- Pureeing soups or sauces
- Grinding nuts or coffee beans
- Making pesto, hummus, or tapenade
To use it, simply insert the blade onto the spindle, add your ingredients, and pulse or run the motor. For finer results, pulse in short bursts. For smoother textures, run continuously—but watch closely to avoid over-processing.
Slicing and Shredding Discs: Precision Cutting
These flat discs attach to the top of the bowl and are used with the lid’s feed tube. They’re ideal for:
- Slicing cucumbers, potatoes, or apples for salads or chips
- Shredding cheese, carrots, or cabbage for coleslaw
- Julienning vegetables for stir-fries
Most slicing discs are reversible—one side for thin slices, the other for thick. Shredding discs usually have fine or coarse shred options. Always check the markings on the disc to ensure you’re using the right side.
The Dough Blade: For Kneading Like a Pro
If your model includes a dough blade (flat and blunt, unlike the sharp S-blade), use it for:
- Pizza dough
- Pie crusts
- Bread dough (for smaller batches)
- Cookie dough
The dough blade mimics hand kneading by gently folding and pressing the dough. It’s gentler than the S-blade, which can overwork dough and make it tough.
Mastering Basic Techniques
Now that you’ve got the right blade in place, it’s time to learn how to use it effectively. These techniques will help you get consistent, professional results every time.
Chopping Like a Chef
Whether you’re dicing onions for salsa or mincing garlic for pasta, chopping is where the food processor shines. Here’s how to do it right:

Visual guide about How to Work a Hamilton Beach Food Processor Like a Pro
Image source: i.ytimg.com
- Cut large ingredients into 1–2 inch pieces before adding them to the bowl. This prevents jamming and ensures even processing.
- Use the pulse function for better control. Short bursts let you check the texture and avoid turning your onions into paste.
- Don’t overfill. Fill the bowl no more than two-thirds full. Overloading can strain the motor and lead to uneven chopping.
- For herbs, add a pinch of salt or a teaspoon of oil to reduce bruising and help them chop evenly.
Example: To make salsa, pulse 1 chopped onion, 2 cloves garlic, 2 diced tomatoes, and a handful of cilantro until chunky but not pureed. Add lime juice and salt to taste.
Slicing and Shredding with Precision
For slicing and shredding, the key is preparation and steady feeding:
- Trim and wash your vegetables. Remove stems, cores, or seeds as needed.
- Cut ingredients to fit the feed tube. For example, slice a carrot lengthwise if it’s too thick.
- Use the pusher to guide food down steadily—don’t force it. Let the machine do the work.
- For even slices, apply gentle, consistent pressure. Jerky movements can cause uneven cuts.
Pro Tip: To shred cheese without it clumping, chill the cheese in the freezer for 10–15 minutes before processing. Cold cheese shreds cleaner and melts better in recipes.
Making Smooth Purees and Sauces
The food processor excels at turning solid ingredients into silky smooth mixtures. For best results:
- Add liquids gradually. Start with a small amount and increase as needed to achieve the desired consistency.
- Use the S-blade and run the motor continuously, scraping down the sides as needed.
- For hot soups, let them cool slightly before processing to avoid steam buildup and splattering.
Example: To make hummus, blend 1 can of drained chickpeas, 2 tbsp tahini, 2 cloves garlic, 2 tbsp lemon juice, and 2–3 tbsp olive oil until smooth. Add water if too thick.
Advanced Tips for Pro-Level Results
Once you’ve mastered the basics, it’s time to level up. These advanced techniques will help you get the most out of your Hamilton Beach food processor.
Making Nut Butter at Home
Store-bought nut butter can be expensive and full of additives. Making your own is easy—and delicious. Here’s how:

Visual guide about How to Work a Hamilton Beach Food Processor Like a Pro
Image source: kitchenseer.com
- Use raw or roasted nuts (peanuts, almonds, cashews). Roasted nuts yield creamier results.
- Add nuts to the bowl with the S-blade. Process on high.
- Be patient. It takes 5–10 minutes for nuts to go from chopped to creamy. Scrape down the sides often.
- Add a teaspoon of oil (peanut, coconut, or neutral) to help smooth the texture.
- Season with salt, honey, or cinnamon if desired.
Warning: Don’t walk away! Nut butter can go from perfect to burnt quickly. Stop the machine if it smells smoky or the motor strains.
Kneading Dough Like a Baker
Whether you’re making pizza dough or pie crust, the food processor can save you time and effort. Follow these steps:
- Use the dough blade. Add dry ingredients first, then slowly drizzle in liquid (water, milk, or oil) while the machine runs.
- Process until the dough forms a ball and pulls away from the sides. This usually takes 30–60 seconds.
- Don’t over-knead. Once the dough is smooth and elastic, stop the machine.
- Let the dough rest before rolling or shaping.
Example: For pie crust, pulse 1 cup flour, 1/2 tsp salt, and 1/3 cup cold butter until crumbly. Add 3–4 tbsp ice water, one at a time, until dough clumps.
Cleaning and Maintenance
To keep your food processor in top shape, clean it properly after every use:
- Unplug the unit before disassembling.
- Remove the bowl, lid, pusher, and blades. Most parts are dishwasher-safe (check your manual), but hand washing is gentler.
- Rinse immediately to prevent food from drying on.
- Use a soft brush to clean the blade spindle and feed tube.
- Wipe the motor base with a damp cloth—never submerge it in water.
- Store blades in a safe place, preferably in a protective case or blade guard.
Pro Tip: To remove stubborn odors, blend a mixture of water and lemon juice for 30 seconds, then rinse thoroughly.
Troubleshooting Common Issues
Even the best food processors can run into problems. Here’s how to solve the most common issues:
Motor Won’t Start
Check that:
- The bowl and lid are locked in place.
- The power cord is plugged in.
- The outlet is working (try another appliance).
- The motor isn’t overheated (let it cool for 30 minutes).
Leaking from the Bowl
This usually happens if:
- The bowl isn’t locked properly.
- The lid isn’t sealed.
- You’ve overfilled the bowl.
- The gasket (rubber seal) is worn or missing.
Check the seal around the bowl and replace it if necessary.
Uneven Chopping or Slicing
Causes include:
- Overloading the bowl.
- Using dull or damaged blades.
- Not using the pusher correctly.
Trim ingredients to size, use sharp blades, and feed food steadily.
Conclusion
Learning how to work a Hamilton Beach food processor like a pro doesn’t have to be complicated. With the right setup, the correct blades, and a few smart techniques, you can chop, slice, shred, and knead with confidence. Whether you’re making quick weeknight meals or experimenting with homemade nut butter and dough, this versatile appliance can transform your kitchen routine.
Remember: safety first, clean as you go, and don’t be afraid to experiment. The more you use your food processor, the more intuitive it becomes. Soon, you’ll be reaching for it as often as your knife and cutting board—and wondering how you ever cooked without it.
So go ahead—fire it up, pulse that onion, and slice those veggies. Your future self (and your taste buds) will thank you.
Frequently Asked Questions
What size food processor do I need?
For most home cooks, an 8–10 cup model is ideal. It’s large enough for family meals but compact enough for easy storage. Larger models (12+ cups) are better for big batches or frequent use.
Can I make smoothies in a Hamilton Beach food processor?
While possible, food processors aren’t ideal for smoothies. They lack the high-speed blending power of a blender and can leave chunks. Use a blender for smooth, creamy results.
Is it safe to process hot ingredients?
Yes, but let hot foods cool slightly first. Processing very hot liquids can create steam pressure, causing the lid to pop off. Always use caution and vent the lid if needed.
Can I use the food processor to crush ice?
Most Hamilton Beach models aren’t designed for crushing ice. Doing so can damage the blades or motor. Check your manual—some newer models may have ice-crushing capabilities.
How do I sharpen the blades?
Food processor blades aren’t meant to be sharpened at home. If they’re dull, contact Hamilton Beach for replacement parts. Avoid using damaged blades, as they can be unsafe.
What’s the difference between pulsing and continuous run?
Pulsing gives you short bursts of power for better control—ideal for chopping. Continuous run is for longer tasks like pureeing or kneading. Use pulse for texture, run for smoothness.