Are you ready to make perfect crepes every time? Using a crepe pan might seem tricky at first, but once you know the simple steps, it becomes easy and fun.
Imagine flipping thin, golden crepes with confidence and impressing your family or guests. In this guide, you’ll learn exactly how to use your crepe pan to create delicious, restaurant-quality crepes right at home. Keep reading, and you’ll discover tips that save you time and help you avoid common mistakes—making your cooking experience smooth and enjoyable.
Choosing The Right Crepe Pan
Choosing the right crepe pan sets the foundation for perfect crepes. The right pan makes cooking easier and results better. Knowing what to pick helps avoid common mistakes. Focus on three main things: material, size and shape, and coating. These factors affect how your crepes turn out.
Material Matters
The pan’s material controls heat and cooking speed. Cast iron holds heat well and cooks evenly. Aluminum heats up fast but can be uneven. Stainless steel is durable but may need oil to stop sticking. Pick a material that suits your stove and cooking style.
Size And Shape
Crepe pans come in different sizes and shapes. A 10-inch pan is good for most crepes. Larger pans make big crepes but need more batter. The shape should be flat with low sides. This helps spread batter thin and flip crepes easily.
Non-stick Coatings
Non-stick pans make crepe cooking simple. They need less oil and clean up fast. Check for safe, durable coatings like ceramic or Teflon. Avoid pans with worn or peeling coatings. A good non-stick surface helps keep crepes intact.
Preparing Your Crepe Pan
Preparing your crepe pan is the first step to making perfect crepes. A well-prepared pan ensures even cooking and easy crepe flipping. It also helps prevent sticking and tearing. Follow these simple steps to get your crepe pan ready for use.
Seasoning Tips
Seasoning your crepe pan builds a natural non-stick surface. Start by washing the pan with warm water and a soft sponge. Dry it completely with a clean cloth. Next, apply a thin layer of cooking oil or melted butter. Heat the pan on low for a few minutes. Let it cool, then wipe off any excess oil. Repeat this process a few times before your first use. Seasoning helps the pan last longer and makes cooking easier.
Proper Heating Techniques
Heat your crepe pan slowly to avoid warping. Place the pan on medium-low heat first. Let it warm evenly for 3 to 5 minutes. Test the temperature by sprinkling a few drops of water. If the water dances or sizzles, the pan is ready. Too hot and the crepes will burn. Too cool and they will stick. Adjust the heat as needed during cooking for best results.
Avoiding Common Mistakes
Do not use metal utensils on your crepe pan. They can scratch the surface and ruin the seasoning. Avoid overheating the pan, which damages the coating. Do not wash your pan with harsh detergents or scrubbers. Use gentle cleaning methods to keep the seasoning intact. Store the pan in a dry place to prevent rust. These simple steps keep your pan in top shape for every crepe batch.
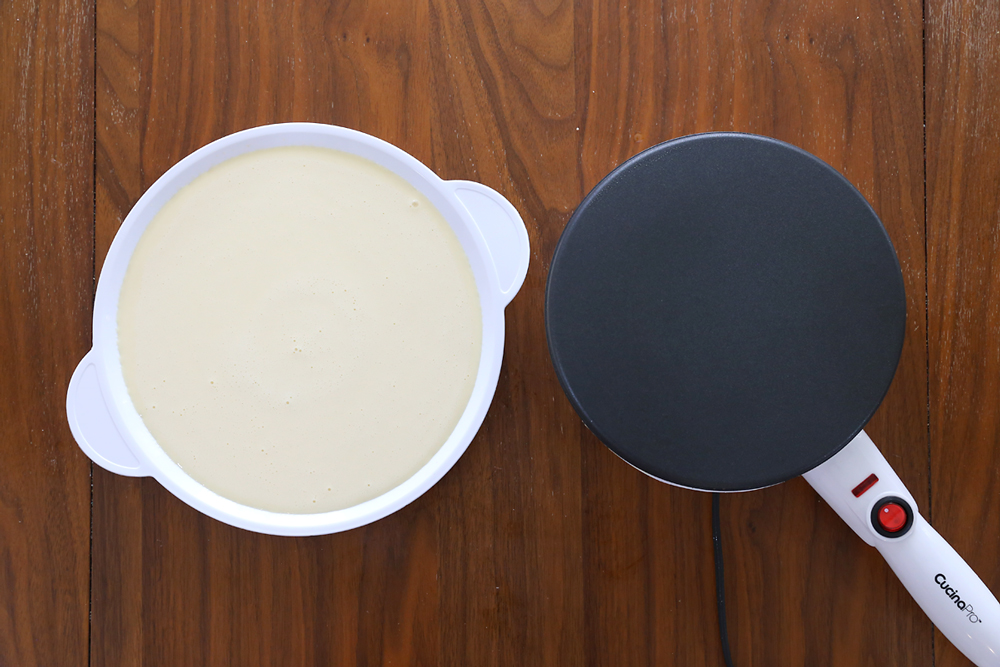
Mastering The Batter
Making great crepes starts with the batter. The batter needs the right mix of ingredients and proper care. This creates smooth, thin, and tasty crepes. Follow these steps for a batter that cooks evenly and feels light on the tongue.
Ingredients For Perfect Texture
Use fresh eggs for binding and richness. Add all-purpose flour for a smooth, soft batter. Milk keeps the batter thin and easy to spread. A pinch of salt enhances flavor. Sugar adds a slight sweetness but is optional. Butter or oil in the batter helps crepes not stick to the pan.
Mixing Tips
Start by whisking eggs and milk together. Slowly add flour while stirring to avoid lumps. Mix just enough to combine ingredients. Overmixing makes crepes tough and chewy. Use a hand whisk or blender for smoothness. The batter should be thin and runny.
Resting The Batter
Let the batter rest for 30 to 60 minutes. Resting lets the flour absorb liquid fully. This step improves texture and flavor. It also reduces bubbles during cooking. Cover the bowl with a clean cloth or plastic wrap. Stir gently before pouring the batter into the pan.
Credit: www.itsalwaysautumn.com
Cooking Crepes Like A Pro
Cooking crepes like a pro requires practice and the right technique. A good crepe pan helps you cook thin, even crepes with ease. Learn how to pour, spread, and flip batter perfectly. Control the heat to avoid burning or undercooking. These tips make your crepes smooth and tasty every time.
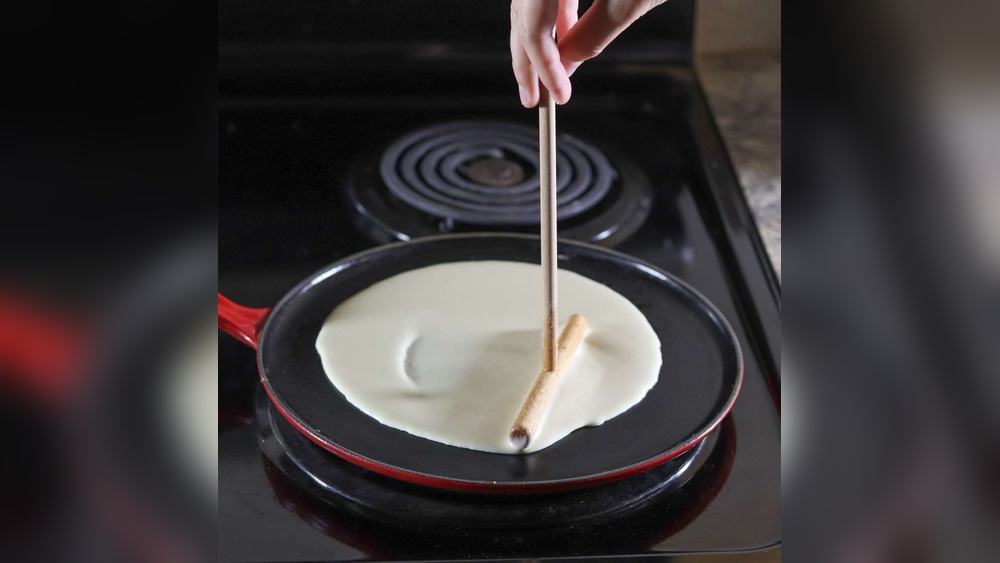
Pouring And Spreading Batter
Start by pouring a small amount of batter into the center of the pan. Tilt the pan quickly to spread the batter in a thin, even circle. Use a steady hand to avoid thick spots. Thin batter cooks faster and results in delicate crepes.
Timing And Flipping
Cook the crepe until the edges start to lift and look dry. This usually takes 30 to 60 seconds. Use a thin spatula to lift the crepe gently. Flip it carefully and cook the other side for 10 to 20 seconds. Quick flipping keeps the crepe soft and flexible.
Adjusting Heat Levels
Set the stove to medium heat at first. If crepes brown too fast, lower the heat slightly. If batter sticks or cooks slowly, increase the heat a little. Keep adjusting heat to get a light golden color. Proper heat control ensures perfect crepes every time.
Cleaning And Maintaining Your Crepe Pan
Cleaning and maintaining your crepe pan keeps it in good shape for a long time. A clean pan makes better crepes and cooks more evenly. Proper care prevents damage and helps keep the non-stick surface smooth.
Cleaning Techniques
Let the pan cool before washing. Use warm water and mild dish soap. Avoid harsh scrubbing pads that can scratch the surface. A soft sponge or cloth works best. For stuck-on food, soak the pan in warm soapy water. Gently remove residue with a non-abrasive brush. Dry the pan completely to stop rust or stains.
Storage Tips
Store your crepe pan in a dry place. Avoid stacking heavy pots on top. Use a soft cloth or paper towel between pans if stacking is needed. Keep the pan away from moisture to prevent rust. Hang it on a hook for easy access and air circulation.
Extending Pan Lifespan
Use wooden or silicone utensils to protect the coating. Avoid metal tools that can scratch the surface. Cook on low to medium heat to avoid warping. Clean the pan gently and regularly. Re-season the pan if it is cast iron. These steps keep your pan working well for years.
:max_bytes(150000):strip_icc()/sea-product-le-creuset-toughened-nonstick-pro-crepe-pan-taylor-murray-10-29cebf39ded7443da54349489175819c.jpeg)
Credit: www.seriouseats.com
Creative Crepe Serving Ideas
Creative crepe serving ideas make your crepe experience exciting and tasty. Crepes are very flexible. You can fill and top them with many ingredients. This variety lets you create dishes for breakfast, lunch, or dessert.
Try different flavors and textures. Play with colors and shapes. These ideas help you enjoy crepes in new ways every time.
Sweet Fillings And Toppings
Sweet crepes are a classic treat. Use fresh fruits like strawberries, bananas, or blueberries. Spread nut butter or chocolate spread for rich flavor. Add whipped cream or yogurt for creaminess. Sprinkle powdered sugar or drizzle honey for extra sweetness. Nuts or coconut flakes add a nice crunch.
Savory Options
Savory crepes suit any meal. Fill them with cheese, ham, or cooked vegetables. Try spinach and feta or mushrooms and onions. Add eggs or smoked salmon for protein. Use herbs and spices to boost taste. Serve with a side salad for a full meal.
Presentation Tips
Make crepes look as good as they taste. Fold crepes into triangles or roll them up. Stack crepes with layers of filling for a crepe cake. Use colorful plates and fresh garnishes. Cut crepes into bite-size pieces for parties. A clean plate and neat presentation invite people to eat.

Credit: www.reddit.com
Frequently Asked Questions
How Do I Properly Heat A Crepe Pan?
Preheat your crepe pan on medium heat for 2-3 minutes. It ensures even cooking and prevents sticking. Avoid overheating to maintain non-stick properties and achieve thin, golden crepes.
What Batter Consistency Works Best For Crepe Pans?
Use a thin, smooth batter for easy spreading. It should be pourable but not runny. This consistency helps create delicate, uniform crepes without tearing or clumping.
Can I Use Oil Or Butter In A Crepe Pan?
Lightly grease the pan with butter or oil before cooking. This prevents sticking and adds flavor. Use a paper towel to spread a thin, even layer for best results.
How Do I Clean A Crepe Pan After Use?
Let the pan cool, then wipe with a soft cloth or sponge. Avoid abrasive cleaners or metal scrubbers to protect the surface. For stubborn residue, use warm water and mild soap.
Conclusion
Using a crepe pan makes cooking thin pancakes easy and fun. Heat the pan well and use a little oil to stop sticking. Pour batter slowly and spread it evenly. Cook each side until golden brown. With practice, your crepes will look and taste great.
Try sweet or savory fillings to enjoy different flavors. Crepe pans suit beginners and cooks alike. Enjoy making tasty crepes at home anytime. Simple steps bring delicious results every time.