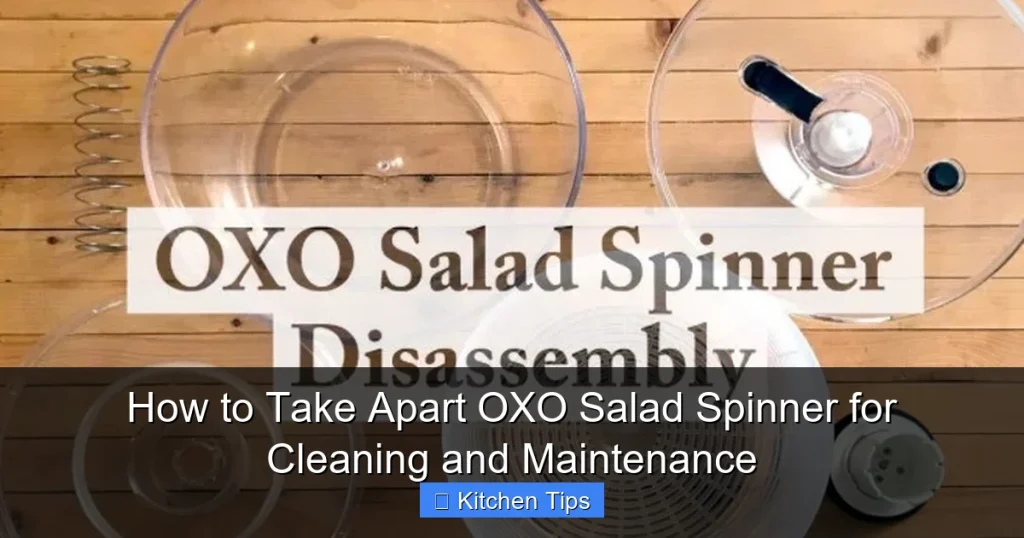
Taking apart your OXO salad spinner is simple and essential for thorough cleaning and long-term performance. This guide walks you through each step to disassemble, clean, and reassemble your spinner without damage—keeping it hygienic and efficient for years.
If you’ve ever reached for your OXO salad spinner only to find a musty smell or slimy residue, you’re not alone. Even the most reliable kitchen tools need a little TLC—especially something that handles wet, leafy greens day after day. The good news? Taking apart your OXO salad spinner is easier than you might think, and doing it regularly can extend its life, improve performance, and keep your salads tasting fresh.
OXO has built a reputation for user-friendly, durable kitchen gadgets, and their salad spinners are no exception. Designed with both functionality and cleanability in mind, these spinners feature snap-fit components that disassemble quickly—no screwdrivers or special tools required. Whether you own the classic OXO Good Grips Salad Spinner, the compact handheld version, or the larger garden spinner, the disassembly process is remarkably similar. In this guide, we’ll walk you through every step to safely take apart your OXO salad spinner, clean each component thoroughly, and put it back together like a pro.
Regular maintenance isn’t just about cleanliness—it’s about performance. Over time, tiny bits of lettuce, herbs, or dressing can get trapped in the pump mechanism, basket seams, or lid crevices. This buildup can slow down the spinning action, create unpleasant odors, or even harbor bacteria. By learning how to take apart your OXO salad spinner, you’re not just cleaning it—you’re preserving its efficiency and ensuring it stays a trusted part of your kitchen routine.
Key Takeaways
- Regular disassembly prevents mold and odors: Food particles can hide in hard-to-reach areas, so taking apart your spinner monthly helps maintain hygiene.
- OXO salad spinners are designed for easy cleaning: Most models feature snap-together parts that come apart without tools.
- Always dry components completely before reassembling: Trapped moisture can lead to bacterial growth or warping of plastic parts.
- Use mild soap and warm water: Avoid harsh chemicals or abrasive scrubbers that can damage the spinner’s finish or seals.
- Check the pump mechanism for debris: The spinning mechanism is the heart of the spinner—clean it gently to ensure smooth operation.
- Lubricate moving parts sparingly (if needed): A drop of food-safe oil on the pump shaft can restore smooth spinning if it feels stiff.
- Store the spinner fully assembled or loosely disassembled: This prevents parts from getting lost and ensures readiness for your next salad.
Quick Answers to Common Questions
Can I put my OXO salad spinner in the dishwasher?
The outer bowl and inner basket are usually dishwasher safe (top rack only), but the lid and pump mechanism should be hand-washed to avoid damage.
How often should I take apart my salad spinner?
For regular users, disassembling and deep cleaning every 4–6 weeks is ideal. If you notice odors or sluggish spinning, do it sooner.
What should I do if the pump won’t spin smoothly?
Check for debris in the mechanism, ensure all parts are dry, and apply a drop of food-safe mineral oil to the pump shaft if needed.
Can I use vinegar to clean my OXO spinner?
Yes, a diluted vinegar solution (1:1 with water) is safe and effective for removing odors and mineral buildup.
Are OXO salad spinner parts replaceable?
Yes, OXO offers replacement baskets, lids, and pumps for many models—check their website or customer service for availability.
📑 Table of Contents
Why You Should Take Apart Your OXO Salad Spinner
It’s easy to assume that a quick rinse under the tap is enough to clean your salad spinner. After all, it’s just holding greens, right? But the truth is, moisture and organic matter love to hide in the nooks and crannies of kitchen tools. The OXO salad spinner, while brilliantly designed, has several components that can trap water and food particles if not properly maintained.
One of the most common issues users face is a sluggish or sticky pump mechanism. This happens when tiny bits of vegetable matter get lodged in the central shaft or around the spinning basket. Over time, this debris can cause the spinner to feel stiff or uneven, making it harder to get that satisfying, fast spin. Even worse, trapped moisture in the pump housing can lead to mold or mildew—especially if the spinner is stored in a damp cabinet.
Another reason to disassemble your spinner is hygiene. Salad spinners often come into contact with raw produce, which may carry bacteria like E. coli or Salmonella. While washing the outer bowl and basket helps, the inner mechanisms—like the lid and pump—can harbor contaminants if not cleaned thoroughly. Taking the time to fully disassemble your spinner allows you to reach every surface, ensuring a truly deep clean.
Finally, regular disassembly helps you spot wear and tear early. Cracks in the plastic, warped baskets, or damaged seals can affect performance and safety. Catching these issues before they worsen means you can replace parts or the entire unit before it fails mid-spin—leaving you with a bowl of soggy lettuce and a mess to clean up.
Tools and Supplies You’ll Need

Visual guide about How to Take Apart OXO Salad Spinner for Cleaning and Maintenance
Image source: hunker.com
The beauty of the OXO salad spinner is that it’s designed for everyday users—no engineering degree required. You don’t need a toolkit or specialty cleaners to take it apart. In fact, you likely already have everything you need in your kitchen.
Start with a clean, dry workspace—like a countertop or table—where you can lay out the parts as you remove them. This helps prevent small components from getting lost. A soft sponge or brush (like an old toothbrush) is perfect for scrubbing tight spaces without scratching the plastic. Mild dish soap and warm water are all you need for cleaning; avoid bleach or abrasive cleaners, which can degrade the materials over time.
If your spinner has been used heavily or hasn’t been cleaned in a while, you might want to have a small bowl of vinegar-water solution (1:1 ratio) on hand. This natural cleaner helps break down mineral deposits and neutralize odors. For drying, use a clean towel or let the parts air-dry completely—this is crucial to prevent mold.
Optional but helpful: a microfiber cloth for polishing, and a drop of food-safe mineral oil if the pump feels stiff. Never use cooking oils like olive or vegetable oil, as they can go rancid and attract bacteria.
Step-by-Step Guide to Disassembling Your OXO Salad Spinner

Visual guide about How to Take Apart OXO Salad Spinner for Cleaning and Maintenance
Image source: hunker.com
Now that you’re prepared, let’s get into the nitty-gritty of taking apart your OXO salad spinner. The process is straightforward, but it helps to go slowly and pay attention to how the parts fit together—this makes reassembly much easier.
Step 1: Empty and Rinse the Spinner
Before you begin, make sure the spinner is completely empty. Shake out any leftover greens or water. Give the entire unit a quick rinse under warm water to remove loose debris. This prevents dirt from spreading as you take it apart.
Step 2: Remove the Lid
The lid is the top piece that houses the pump mechanism. On most OXO models, it simply snaps onto the outer bowl. To remove it, grip the lid firmly with both hands and lift straight up. Avoid twisting or prying, as this can damage the clips. If it feels stuck, gently wiggle it side to side while lifting—most lids will pop off with minimal effort.
Step 3: Take Out the Inner Basket
Once the lid is off, you’ll see the perforated inner basket sitting inside the outer bowl. This is where you place your greens before spinning. Simply lift the basket out by its handle. Some models have a slight lip or ridge that holds the basket in place, so you may need to tilt it slightly to remove it.
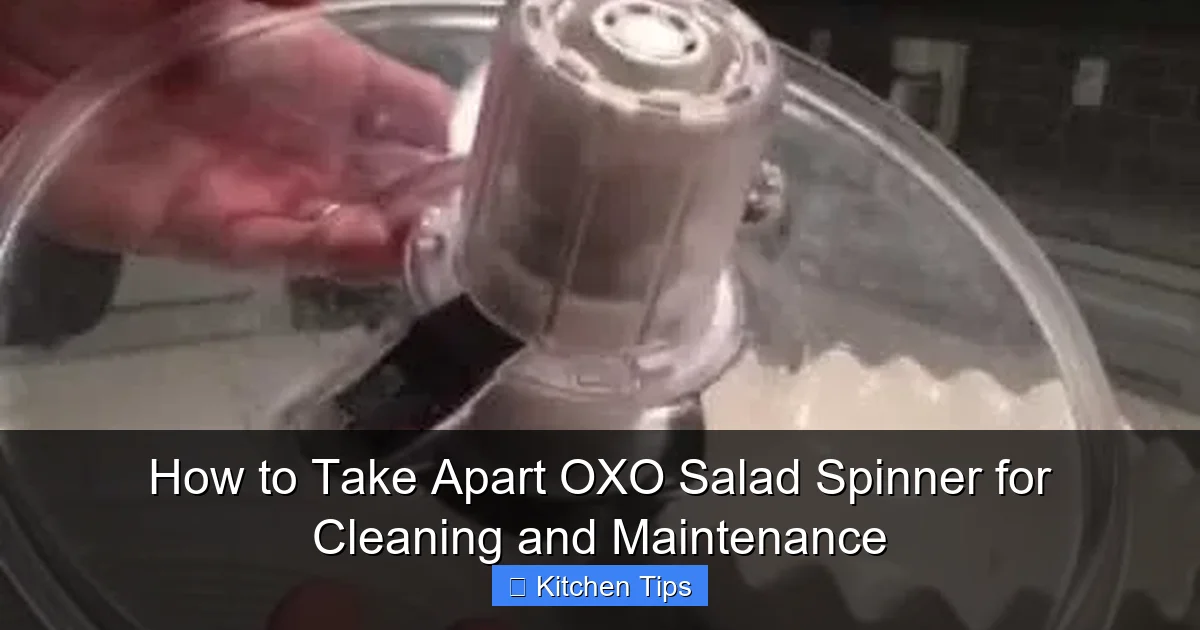
Step 4: Detach the Pump Mechanism (If Applicable)
This step varies slightly depending on your model. On the classic OXO Good Grips spinner, the pump is built into the lid. To access it, look for a small plastic cap or plug on the underside of the lid. Gently pry it off with your fingernail or a soft tool. Underneath, you’ll find the pump shaft and spring. Carefully pull the shaft out—note the order of parts so you can reassemble correctly.
On handheld or compact models, the pump may be a separate piece that slides out of the lid. Again, lift or pull it straight out without forcing it.
Step 5: Separate Any Remaining Components
Some OXO spinners have additional parts, like a splash guard or secondary lid. Check your model and remove any snap-on pieces. Most are designed to come apart with a gentle tug.
Step 6: Inspect for Hidden Debris
With everything disassembled, take a close look at each part. Check the basket holes, the inside of the outer bowl, and especially the pump housing. Use your toothbrush to scrub away any stuck-on residue. This is also a good time to check for cracks, warping, or worn seals.
Cleaning Each Component Thoroughly
Visual guide about How to Take Apart OXO Salad Spinner for Cleaning and Maintenance
Image source: cleanestor.com
Now that your spinner is in pieces, it’s time to give each part the attention it deserves. The goal is to remove all food particles, grease, and moisture without damaging the materials.
Cleaning the Outer Bowl
The outer bowl is the largest piece and usually the easiest to clean. Wash it with warm, soapy water and a soft sponge. Pay attention to the bottom and rim, where water can pool. Rinse thoroughly and dry with a towel or let it air-dry upside down.
Cleaning the Inner Basket
The perforated basket can trap tiny bits of lettuce or herbs in its holes. Use your toothbrush to gently scrub each hole, working from both sides. If there’s stubborn residue, soak the basket in warm soapy water for 10–15 minutes before scrubbing. Avoid using metal brushes, which can scratch the plastic and create hiding spots for bacteria.
Cleaning the Lid and Pump Mechanism
This is the most delicate part of the cleaning process. The pump mechanism contains small springs and moving parts that can be damaged if mishandled. Rinse the lid under warm water, then use the toothbrush to clean around the pump housing. If you removed the pump shaft, wash it separately and inspect the spring for rust or debris.
Never submerge the entire lid in water unless the manufacturer specifies it’s safe. Most OXO lids are not fully waterproof, and water inside the pump can cause corrosion or mold.
Drying and Sanitizing
After washing, shake off excess water from each part. Place them on a clean towel or drying rack, ensuring good airflow. Let them air-dry completely—this may take a few hours. Once dry, you can wipe them with a vinegar solution for extra sanitization, then rinse and dry again.
Reassembling Your OXO Salad Spinner
With everything clean and dry, it’s time to put your spinner back together. Reassembly is usually the reverse of disassembly, but a few tips can make it smoother.
Start by reinserting the pump shaft into the lid (if removed). Make sure the spring is in place and the shaft moves freely. Snap the plastic cap back on. Then, place the inner basket into the outer bowl, aligning the handle with the bowl’s grip. Finally, press the lid firmly onto the bowl until you hear or feel it click into place.
Test the spinner by adding a few leaves of lettuce and giving it a spin. If it feels stiff or uneven, double-check that all parts are properly seated. Sometimes a misaligned basket or loose lid can affect performance.
Tips for Long-Term Maintenance
To keep your OXO salad spinner in top condition, make disassembly and cleaning a regular habit. Aim to take it apart every 4–6 weeks, or more often if you use it daily. Store it in a dry, well-ventilated area—avoid sealing it in a plastic bag or airtight container while damp.
If the pump starts to feel stiff, a drop of food-safe mineral oil on the shaft can restore smooth operation. Never use WD-40 or other non-food lubricants.
Finally, consider replacing your spinner every few years, especially if you notice cracks, warping, or persistent odors. OXO offers replacement parts for many models, so you may not need to buy a whole new unit.
Conclusion
Taking apart your OXO salad spinner might seem like a chore, but it’s a small effort that pays big dividends. Not only does it keep your spinner clean and odor-free, but it also ensures it works efficiently every time you use it. With the right technique and a little routine care, your OXO spinner can last for years—keeping your salads crisp, fresh, and delicious.
Frequently Asked Questions
Is it safe to soak the entire OXO salad spinner in water?
No, you should not soak the entire spinner, especially the lid. The pump mechanism is not fully waterproof and can trap moisture, leading to mold or corrosion.
What’s the best way to dry the spinner after cleaning?
Air-dry all parts completely on a clean towel or drying rack. Ensure no moisture remains in the pump housing before reassembling.
Can I use bleach to disinfect my salad spinner?
It’s not recommended. Bleach can degrade plastic over time and leave harmful residues. Use vinegar or a food-safe sanitizer instead.
Why is my OXO spinner making a squeaking noise?
This is usually due to a dry or dirty pump mechanism. Clean and lightly lubricate the shaft with food-safe oil to restore smooth operation.
How do I know if my spinner needs to be replaced?
Look for cracks, warping, persistent odors, or parts that no longer fit securely. If performance doesn’t improve after cleaning, it may be time for a new one.
Can I take apart older OXO salad spinner models?
Yes, most OXO spinners—even older versions—are designed for disassembly. The process is similar across models, though some may have slight variations.