

Roasting a chicken doesn’t have to be intimidating—this guide breaks it down step by step for foolproof, juicy results. From prep to resting, discover the techniques pros use to make golden, tender, and flavorful roasted chicken every single time.
Key Takeaways
- Start with a dry bird: Patting the chicken dry before roasting ensures crispy skin and better browning.
- Season generously and in advance: Salt the chicken at least 30 minutes before cooking—or even overnight—for deeper flavor and juicier meat.
- Use a high oven temperature: Roast at 425°F (220°C) for the first 20–30 minutes to crisp the skin, then reduce to 375°F (190°C) to cook through gently.
- Truss the chicken (optional but helpful): Tying the legs together helps the chicken cook evenly and look more presentable.
- Check internal temperature: Use a meat thermometer—165°F (74°C) in the thickest part of the thigh (not touching bone) means it’s done.
- Let it rest before carving: Resting for 10–15 minutes allows juices to redistribute, keeping the meat moist.
- Add aromatics and vegetables: Stuff the cavity with herbs, lemon, and garlic, and roast veggies underneath for a complete meal.
Quick Answers to Common Questions
How long does it take to roast a 4-pound chicken?
A 4-pound chicken typically takes 75 to 90 minutes to roast properly, depending on your oven and whether you use a two-stage temperature method. Always check the internal temperature to be sure.
Should I cover the chicken while roasting?
No, never cover the chicken while roasting. Covering traps steam, which prevents the skin from crisping. Roasting is a dry-heat method, so leave the bird uncovered.
Can I roast a chicken from frozen?
It’s not recommended to roast a chicken directly from frozen, as it leads to uneven cooking. Always thaw it in the refrigerator first—allow 24 hours per 5 pounds.
What temperature should the oven be for roasting chicken?
Start at 425°F (220°C) for 20–30 minutes to crisp the skin, then reduce to 375°F (190°C) to finish cooking. This two-stage method ensures crispy skin and juicy meat.
How do I know when the chicken is done?
Use a meat thermometer. The internal temperature should reach 165°F (74°C) in the thickest part of the thigh, away from the bone. The breast should read around 160°F, as it will continue to cook while resting.
📑 Table of Contents
- Why Roasting Chicken Is a Kitchen Essential
- Choosing the Right Chicken
- Prepping the Chicken for Roasting
- Trussing and Positioning the Chicken
- Mastering Oven Temperature and Timing
- Basting, Basting Alternatives, and Crispy Skin Tips
- Resting and Carving the Chicken
- Making Pan Sauce (Optional but Delicious)
- Common Mistakes to Avoid
- Conclusion
Why Roasting Chicken Is a Kitchen Essential
Roasting a chicken might seem like a simple task, but doing it properly transforms it from a basic dinner into a centerpiece-worthy meal. Whether you’re feeding a family, hosting friends, or just treating yourself, a perfectly roasted chicken delivers crispy golden skin, tender juicy meat, and rich, savory flavor that’s hard to beat. It’s also one of the most versatile dishes—leftovers can become soups, salads, tacos, or sandwiches.
Yet, many home cooks end up with dry meat or unevenly cooked birds. The good news? With a few key techniques, anyone can roast chicken properly and consistently. This guide walks you through every step—from choosing the right bird to carving it like a pro—so you get juicy results every time. No guesswork, no dry meat, just golden, flavorful perfection.
Choosing the Right Chicken
Not all chickens are created equal when it comes to roasting. The type of bird you pick can make a big difference in texture, flavor, and cooking time. Most grocery stores carry broiler-fryer chickens, which are young, tender, and ideal for roasting. These typically weigh between 3.5 to 5 pounds (1.6 to 2.3 kg) and cook evenly without drying out.
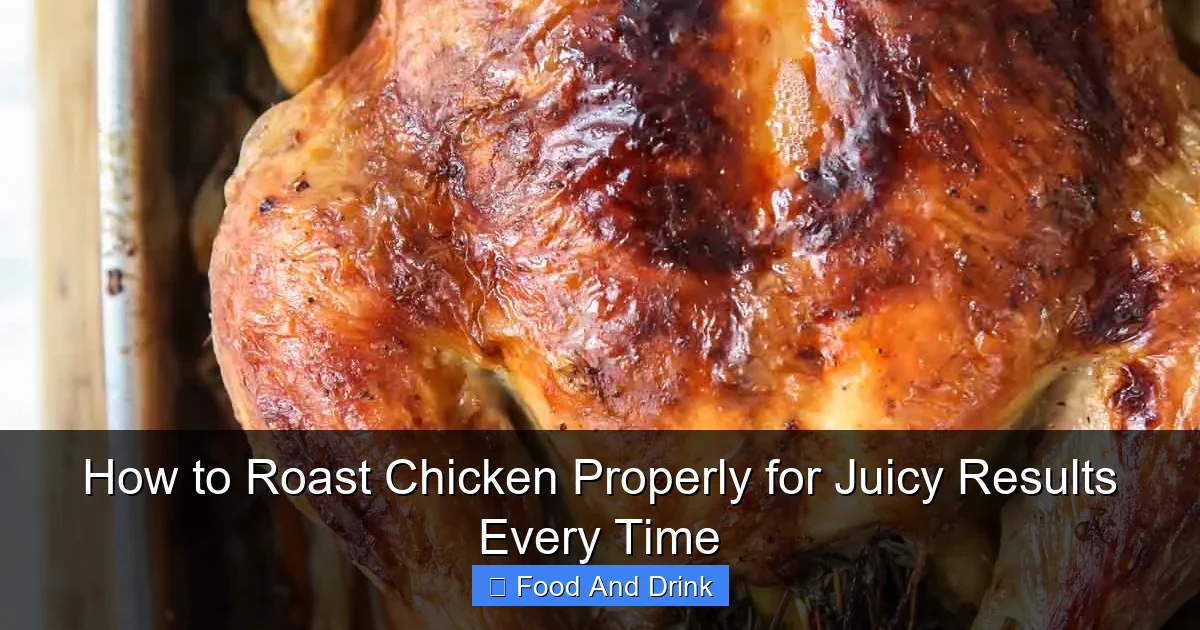
Visual guide about How to Roast Chicken Properly for Juicy Results Every Time
Image source: foodiecrush.com
Organic vs. Conventional
If budget allows, consider choosing an organic or free-range chicken. These birds are often raised with better living conditions and diets, which can result in more flavorful meat. Organic chickens are also raised without antibiotics or synthetic pesticides, which some people prefer for health and ethical reasons. While they may cost more, many find the improved taste and texture worth the investment.
Whole vs. Spatchcocked
You can roast a whole chicken traditionally, or try spatchcocking—removing the backbone and flattening the bird. Spatchcocking reduces cooking time and promotes even browning, making it a great option for weeknight meals. However, if you’re aiming for a classic presentation or want to stuff the cavity, a whole roasted bird is the way to go.
Fresh vs. Frozen
Fresh chickens are convenient, but frozen ones can be just as good if properly thawed. Always thaw frozen chicken in the refrigerator—never at room temperature—to prevent bacterial growth. Allow 24 hours of thawing time for every 5 pounds of chicken. Once thawed, pat it dry and proceed with your recipe.
Prepping the Chicken for Roasting
Proper preparation is the foundation of a great roast chicken. Skipping steps like drying or seasoning can lead to lackluster results. Take the time to prep your bird correctly, and you’ll be rewarded with crispy skin and moist meat.

Visual guide about How to Roast Chicken Properly for Juicy Results Every Time
Image source: amusingfoodie.com
Pat It Dry
One of the most important steps is drying the chicken thoroughly. Use paper towels to pat the skin and cavity completely dry. Moisture is the enemy of crispy skin—water turns to steam during roasting, which can make the skin soggy. A dry bird ensures maximum browning and crispiness.
Season Generously
Seasoning is where flavor begins. Don’t be shy with salt and pepper. Sprinkle kosher salt and freshly ground black pepper all over the skin, under the skin, and inside the cavity. For deeper flavor, season the chicken at least 30 minutes before roasting—or even better, do it the night before and let it rest uncovered in the fridge. This dry-brining method draws out moisture, which then gets reabsorbed with the salt, resulting in juicier, more flavorful meat.
Add Flavor Under the Skin
Gently loosen the skin over the breast and thighs with your fingers, being careful not to tear it. Slide small pats of butter, minced garlic, or fresh herbs like thyme and rosemary under the skin. This infuses the meat with flavor as it roasts and helps keep it moist. You can also rub the skin with olive oil or melted butter for extra browning and richness.
Stuff the Cavity (Optional)
Fill the cavity with aromatics like a halved lemon, garlic cloves, onion wedges, and fresh herbs. These won’t directly flavor the meat, but they release steam and fragrance during roasting, enhancing the overall aroma and taste. Avoid stuffing the cavity with bread-based stuffing if you’re roasting at high heat—it won’t cook safely and can dry out.
Trussing and Positioning the Chicken
Trussing—tying the legs together with kitchen twine—is a traditional technique that helps the chicken cook evenly and look neat. While not strictly necessary, it’s especially helpful for larger birds or if you want a more uniform shape. Trussing keeps the legs close to the body, preventing them from overcooking while the breast finishes.
How to Truss a Chicken
Place the chicken breast-side up. Tuck the wing tips behind the shoulders to prevent burning. Cut a piece of kitchen twine about 3 feet long. Slide the string under the chicken, cross it over the legs, pull tight, and tie a secure knot. Keep the legs close together but not overly tight—you want to maintain the bird’s natural shape.
Positioning in the Pan
Place the chicken breast-side up on a roasting rack inside a roasting pan. The rack elevates the bird, allowing heat to circulate evenly and preventing the bottom from steaming. If you don’t have a rack, you can place the chicken directly in the pan, but elevate it slightly with chopped vegetables like carrots, celery, and onions. These act as a natural trivet and add flavor to the pan drippings.
Roasting Pan Tips
Use a heavy-duty roasting pan that conducts heat well, such as stainless steel or enameled cast iron. Avoid thin, flimsy pans that can warp or create hot spots. A pan with a lid isn’t necessary—roasting is a dry-heat method, and covering the chicken will trap steam and soften the skin.
Mastering Oven Temperature and Timing
Temperature control is crucial for juicy, evenly cooked chicken. Too low, and the skin won’t crisp; too high, and the outside burns before the inside cooks through. The best method is a two-stage roasting process: start hot to crisp the skin, then reduce the heat to gently finish cooking.
High-Heat Start
Preheat your oven to 425°F (220°C). This high initial temperature quickly renders fat and crisps the skin. Roast the chicken at this temperature for the first 20 to 30 minutes. You’ll see the skin begin to brown and bubble—this is exactly what you want.
Reduce and Continue
After the initial high-heat phase, reduce the oven temperature to 375°F (190°C). Continue roasting until the internal temperature reaches 165°F (74°C) in the thickest part of the thigh, away from the bone. This usually takes another 30 to 45 minutes for a 4-pound chicken, but timing varies based on size and oven accuracy.
Use a Meat Thermometer
Never rely solely on time—use a reliable instant-read meat thermometer to check doneness. Insert the probe into the thigh, making sure it doesn’t touch the bone. The breast should read around 160°F (71°C), as it will continue to cook slightly while resting. The thigh is the slowest part to cook and the best indicator of overall doneness.
Estimated Roasting Times
- 3.5 to 4 lbs (1.6 to 1.8 kg): 60–75 minutes total
- 4 to 5 lbs (1.8 to 2.3 kg): 75–90 minutes total
- 5 to 6 lbs (2.3 to 2.7 kg): 90–105 minutes total
Remember, these are estimates. Always check the internal temperature to be sure.
Basting, Basting Alternatives, and Crispy Skin Tips
Basting—spooning pan juices over the chicken—is a common practice, but it’s not always necessary. In fact, opening the oven door frequently can cause temperature fluctuations and slow cooking. However, if you want extra moisture and flavor, basting can help.
To Baste or Not to Baste?
If you choose to baste, do it sparingly—once or twice during the second half of roasting. Use a spoon or bulb baster to drizzle pan juices over the breast and thighs. Avoid basting too early, as it can cool the skin and delay crisping.
Better Alternatives to Basting
Instead of basting, focus on building flavor in the pan. Add a splash of chicken broth, white wine, or water to the bottom of the pan before roasting. This creates steam and prevents the drippings from burning, while also forming the base for a delicious pan sauce. You can also rub the chicken with butter or olive oil before roasting to enhance browning.
Achieving Crispy Skin
Crispy skin starts with a dry bird and high heat. Here are a few extra tips:
- Dry-brine overnight: Salting the chicken and leaving it uncovered in the fridge dries out the skin, leading to better crispiness.
- Use a wire rack: Elevating the chicken allows air to circulate underneath.
- Avoid covering: Never cover the chicken while roasting—steam softens the skin.
- Finish under the broiler: If the skin isn’t brown enough, place the chicken under the broiler for 1–2 minutes, watching closely to prevent burning.
Resting and Carving the Chicken
Resting is one of the most overlooked—but most important—steps in roasting chicken. Cutting into the bird immediately after roasting causes juices to spill out, leaving the meat dry. Letting it rest allows the juices to redistribute, ensuring every bite is moist and flavorful.
How Long to Rest
Let the chicken rest for at least 10 to 15 minutes before carving. For larger birds, 20 minutes is even better. Tent the chicken loosely with aluminum foil to keep it warm, but don’t wrap it tightly—this can trap steam and soften the skin.
Carving Like a Pro
Use a sharp carving knife and a sturdy cutting board. Start by removing the legs: pull one leg away from the body, cut through the joint, and separate the thigh and drumstick. Repeat on the other side. Next, slice the breast meat against the grain into even slices. You can also remove the wings and separate the breast from the backbone if desired. Arrange the pieces on a platter and drizzle with pan juices for extra flavor.
Saving the Carcass
Don’t throw away the bones! Save the carcass to make homemade chicken stock. Simmer it with onions, carrots, celery, and herbs for 2–4 hours, then strain and use in soups, risottos, or sauces. It’s a delicious way to get more value from your roast chicken.
Making Pan Sauce (Optional but Delicious)
The browned bits and juices left in the roasting pan are liquid gold. With a few simple steps, you can turn them into a rich, flavorful pan sauce that elevates your meal.
Deglaze the Pan
After removing the chicken, place the roasting pan on the stovetop over medium heat. Add ½ cup of chicken broth, white wine, or water. Use a wooden spoon to scrape up the browned bits from the bottom of the pan—this is where the flavor is.
Reduce and Thicken
Let the liquid simmer and reduce by about half. For a thicker sauce, whisk in a tablespoon of butter or a slurry of cornstarch and water. Season with salt, pepper, and a splash of lemon juice or fresh herbs. Strain if desired and serve alongside the carved chicken.
Serving Suggestions
Pair your roasted chicken with roasted vegetables, mashed potatoes, or a fresh green salad. A simple pan sauce, a sprinkle of flaky sea salt, and a glass of white wine make for a restaurant-quality meal at home.
Common Mistakes to Avoid
Even experienced cooks can fall into traps that lead to dry or undercooked chicken. Here are the most common mistakes and how to avoid them.
Not Drying the Skin
Moisture prevents browning. Always pat the chicken dry inside and out before seasoning.
Underseasoning
Salt is essential for flavor and moisture. Season generously and, if possible, do it ahead of time.
Overcooking
Chicken dries out quickly once it passes 165°F. Use a thermometer and remove the chicken from the oven when the thigh reaches 160°F—it will rise to 165°F while resting.
Skipping the Rest
Carving too soon means losing precious juices. Always let the chicken rest before serving.
Using the Wrong Pan
A flimsy pan can cause uneven cooking. Invest in a sturdy roasting pan with a rack for best results.
Conclusion
Roasting a chicken properly doesn’t require fancy equipment or professional skills—just attention to detail and a few key techniques. By choosing the right bird, prepping it thoroughly, controlling oven temperature, and resting before carving, you can achieve juicy, flavorful results every time. Whether you’re cooking for a holiday dinner or a quiet weeknight meal, a perfectly roasted chicken is a rewarding and delicious centerpiece.
With practice, you’ll develop your own rhythm and preferences—maybe you’ll love herb butter under the skin, or always roast with potatoes and carrots. The beauty of roasting chicken is its versatility. Once you master the basics, the possibilities are endless. So preheat that oven, season that bird, and get ready to enjoy the golden, crispy, juicy results you’ve been craving.
Frequently Asked Questions
Can I use a roasting bag?
Yes, but it will result in softer skin. Roasting bags trap steam, which prevents crisping. If you use one, consider finishing the chicken under the broiler for a few minutes to crisp the skin.
What’s the best way to store leftover roast chicken?
Store carved chicken in an airtight container in the refrigerator for up to 4 days. You can also freeze it for up to 3 months. Reheat gently in the oven or microwave with a splash of broth to retain moisture.
Can I roast a chicken without a rack?
Yes, but elevate it slightly with chopped vegetables like onions, carrots, and celery. This prevents the bottom from steaming and adds flavor to the drippings.
Should I rinse the chicken before roasting?
No, rinsing raw chicken can spread bacteria around your kitchen. Instead, pat it dry with paper towels and proceed with seasoning.
Can I add stuffing inside the chicken?
It’s not safe to stuff the cavity with bread stuffing when roasting at high heat, as it won’t reach a safe temperature. Instead, bake stuffing separately or use a casserole dish.
What if my chicken skin isn’t crispy?
This usually happens if the skin wasn’t dry enough or the oven temperature was too low. Try dry-brining overnight, using a rack, and finishing under the broiler for 1–2 minutes to crisp it up.


