Roasting chicken drumsticks in the oven is one of the easiest and most satisfying ways to enjoy tender, flavorful meat with a golden, crispy skin. With the right temperature, seasoning, and technique, you can achieve restaurant-quality results at home—no fancy equipment needed.
If you’ve ever stood over a sizzling pan of chicken drumsticks, wondering why they’re either dry inside or soggy outside, you’re not alone. Roasting chicken drumsticks in the oven seems simple—just toss them in a pan and pop them in—but achieving that perfect balance of crispy skin and juicy meat takes a little know-how. The good news? Once you master the basics, you’ll never look back. This method is foolproof, requires minimal hands-on time, and delivers mouthwatering results every single time.
Chicken drumsticks are a favorite for good reason. They’re affordable, forgiving, and packed with flavor thanks to their higher fat content and dark meat. Unlike chicken breasts, which can dry out quickly, drumsticks stay tender and moist even with longer cooking times. Plus, their bone-in, skin-on nature means they caramelize beautifully in the oven, developing a rich, golden crust that’s hard to resist. Whether you’re cooking for a weeknight family dinner or impressing guests at a casual gathering, roasted drumsticks are a reliable crowd-pleaser.
In this guide, we’ll walk you through every step of how to roast chicken drumsticks in the oven—from prep to plating—so you can serve up crispy, juicy, flavorful drumsticks with confidence. We’ll cover everything from choosing the right drumsticks to seasoning tricks, oven settings, and pro tips for maximizing texture and taste. No guesswork, no stress—just delicious, homemade comfort food.
Key Takeaways
- Use high heat (425°F/220°C) for crispy skin: Starting with a hot oven helps render fat and crisp the skin without drying out the meat.
- Dry the drumsticks thoroughly before seasoning: Moisture is the enemy of crispiness—pat them dry with paper towels for best results.
- Season generously and let rest before roasting: Salt and spices work better when given time to penetrate the meat—30 minutes is ideal.
- Use a wire rack on a baking sheet: Elevating the drumsticks allows hot air to circulate, ensuring even browning and crispiness on all sides.
- Roast until internal temperature reaches 165°F (74°C): Use a meat thermometer to avoid overcooking—this ensures juicy, safe-to-eat drumsticks.
- Rest for 5–10 minutes after roasting: Letting the meat rest helps redistribute juices, keeping every bite moist.
- Experiment with marinades and spice blends: From garlic-herb to smoky paprika, customizing flavors makes each roast unique and delicious.
Quick Answers to Common Questions
How long do you roast chicken drumsticks at 425°F?
Roast chicken drumsticks at 425°F (220°C) for 35–45 minutes, flipping halfway through, until the internal temperature reaches 165°F (74°C).
Should I cover chicken drumsticks when roasting?
No, do not cover the drumsticks. Covering traps steam and prevents the skin from crisping. Roast them uncovered for best results.
Can I marinate drumsticks before roasting?
Yes! Marinate for at least 30 minutes or up to 24 hours in the fridge. Pat dry before roasting to ensure crispy skin.
What temperature should chicken drumsticks be cooked to?
Chicken drumsticks are safe to eat when the internal temperature reaches 165°F (74°C), measured with a meat thermometer.
How do I prevent soggy skin when roasting drumsticks?
Pat the drumsticks dry thoroughly, use a wire rack, and roast at high heat. Avoid covering or overcrowding the pan.
📑 Table of Contents
Why Chicken Drumsticks Are Perfect for Roasting
Chicken drumsticks are nature’s gift to home cooks. They’re the lower part of the chicken leg, connected to the thigh at the joint, and they come with skin, bone, and a generous amount of dark meat. This combination makes them incredibly forgiving and ideal for roasting. Unlike lean cuts like chicken breast, drumsticks contain more fat and connective tissue, which break down during cooking to keep the meat moist and tender. Even if you slightly overcook them, they’ll still be juicy—something that can’t be said for many other cuts.
Another advantage? Drumsticks are budget-friendly. You can often find them on sale or in bulk, making them a great option for feeding a family or meal prepping. They also cook relatively quickly compared to whole chickens or large roasts, usually ready in under an hour. And because they’re individual pieces, everyone can grab their own—no carving required.
But perhaps the best part is the skin. When roasted properly, chicken skin transforms into a crackling, golden-brown crust that’s both crispy and flavorful. That’s the magic of roasting: dry heat coaxes out moisture, renders fat, and creates that irresistible texture we all crave. With drumsticks, you get that satisfying crunch on the outside and succulent meat on the inside—every single time.
The Science Behind Crispy Skin
So, what makes chicken skin crispy? It all comes down to moisture and heat. Chicken skin contains fat and proteins, but it’s also covered in a thin layer of moisture from the meat beneath. When you roast drumsticks, the goal is to evaporate that surface moisture and render the fat underneath. High heat is essential for this process. At around 425°F (220°C), the water in the skin quickly turns to steam, escaping and leaving behind a dry, crisp texture.
But it’s not just about temperature. Preparation matters too. If the skin is wet—whether from washing or residual moisture—it will steam instead of crisp. That’s why drying the drumsticks thoroughly with paper towels before seasoning is a non-negotiable step. Some chefs even recommend air-drying the drumsticks uncovered in the fridge for a few hours or overnight. This extra step removes even more moisture, resulting in ultra-crispy skin.
Fat also plays a role. Drumsticks have a good amount of subcutaneous fat, which melts during roasting and bastes the meat from the outside. This not only adds flavor but helps keep the meat juicy. The rendered fat also contributes to browning through the Maillard reaction—a chemical process that creates complex, savory flavors when proteins and sugars are exposed to high heat.
Why Oven Roasting Beats Other Methods
While you can grill, fry, or air-fry chicken drumsticks, oven roasting offers unique advantages. First, it’s hands-off. Once the drumsticks go in the oven, you can focus on side dishes or relax—no constant flipping or monitoring required. Second, the oven provides consistent, even heat from all sides, especially if you use a wire rack. This ensures uniform browning and crispiness.
Grilling can dry out drumsticks if not carefully managed, and frying requires more oil and cleanup. Air fryers are great for small batches, but they can’t match the capacity of a standard oven. Roasting in the oven also allows you to cook larger quantities at once, making it ideal for family meals or meal prep.
Plus, oven roasting gives you control. You can adjust the temperature, timing, and positioning of the drumsticks to achieve your desired level of crispiness. Want extra-golden skin? Broil for the last few minutes. Prefer a more tender, fall-off-the-bone texture? Roast at a lower temperature for longer. The oven is versatile, reliable, and perfect for mastering how to roast chicken drumsticks.
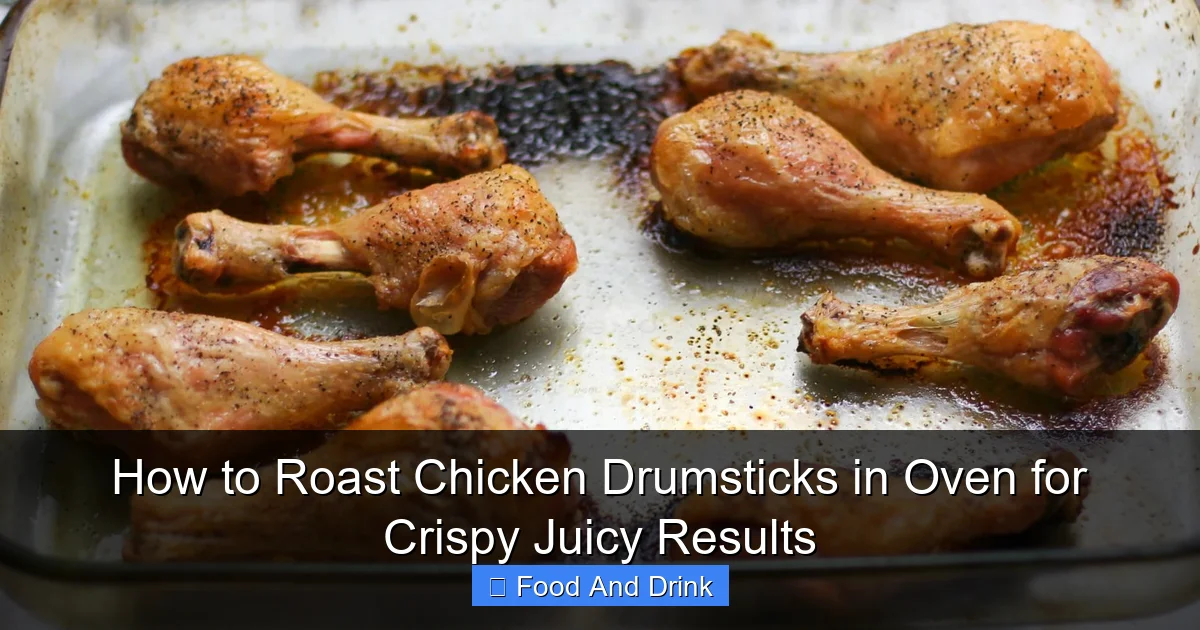
Choosing the Right Drumsticks

Visual guide about How to Roast Chicken Drumsticks in Oven for Crispy Juicy Results
Image source: carmyy.com
Not all chicken drumsticks are created equal. The quality and freshness of your ingredients will directly impact the final result. When shopping, look for drumsticks that are plump, with smooth, unbroken skin and a pinkish-white color. Avoid any that appear gray, slimy, or have a strong odor—these are signs of spoilage.
Fresh vs. Frozen
Fresh drumsticks are ideal, but frozen can work too—just make sure they’re fully thawed before cooking. Thaw them in the refrigerator overnight, never at room temperature, to prevent bacterial growth. Once thawed, pat them dry thoroughly. Frozen drumsticks may release more moisture during roasting, so extra drying time is essential.
Organic, Free-Range, or Conventional?
This comes down to personal preference and budget. Organic and free-range chickens are often raised with more space and natural diets, which some believe leads to better flavor and texture. Conventional drumsticks are more affordable and widely available. While there’s no definitive proof that one tastes significantly better than the other, many home cooks notice a difference in richness and juiciness with higher-quality meat.
Size Matters
Drumsticks come in various sizes, from small (around 4–5 ounces) to jumbo (up to 8 ounces). For even cooking, try to choose pieces that are similar in size. If you’re mixing sizes, place the larger ones toward the center of the pan and smaller ones on the edges, where the heat is more intense. This helps prevent overcooking the smaller pieces while ensuring the larger ones are done.
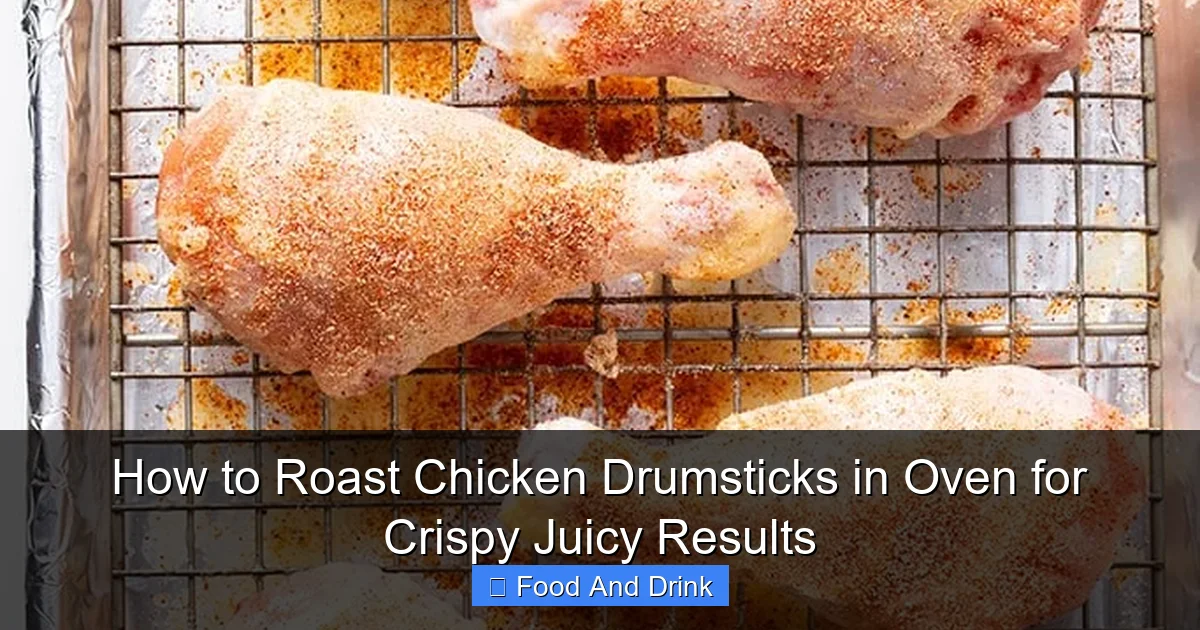
Essential Tools and Equipment
Visual guide about How to Roast Chicken Drumsticks in Oven for Crispy Juicy Results
Image source: ericajulson.com
You don’t need fancy gadgets to roast perfect drumsticks, but having the right tools makes a big difference. Here’s what you’ll need:
Baking Sheet or Roasting Pan
A sturdy rimmed baking sheet is ideal. It catches drippings and prevents spills. Avoid using glass or ceramic dishes, as they can cause uneven heating and may crack under high heat.
Wire Rack
This is a game-changer. Placing the drumsticks on a wire rack set inside the baking sheet allows hot air to circulate underneath, crisping the skin on all sides. Without a rack, the bottom of the drumsticks will steam in their own juices, leading to soggy skin.
Meat Thermometer
A digital instant-read thermometer is essential for checking doneness. Insert it into the thickest part of the drumstick, avoiding the bone. The internal temperature should reach 165°F (74°C) for safe consumption. Overcooking leads to dry meat, so this tool helps you hit the sweet spot every time.
Tongs or Forks
Use tongs to flip the drumsticks halfway through cooking, or a fork if you prefer. Avoid piercing the skin too much, as this can release juices and reduce crispiness.
Paper Towels
Keep a stack handy for drying the drumsticks thoroughly before seasoning. This simple step is often overlooked but is crucial for crispy skin.
Step-by-Step Guide to Roasting Chicken Drumsticks
Visual guide about How to Roast Chicken Drumsticks in Oven for Crispy Juicy Results
Image source: wholesomeyum.com
Now that you’ve got your tools and ingredients ready, let’s walk through the process of how to roast chicken drumsticks in the oven for crispy, juicy results.
Step 1: Preheat the Oven
Set your oven to 425°F (220°C). This high temperature is key for crisping the skin quickly while keeping the meat moist. Allow the oven to fully preheat—this usually takes about 10–15 minutes. A properly heated oven ensures even cooking from the start.
Step 2: Prepare the Drumsticks
Remove the drumsticks from packaging and pat them dry with paper towels. Press firmly to remove as much surface moisture as possible. If time allows, let them air-dry uncovered in the fridge for 30 minutes to an hour. This extra step enhances crispiness.
Step 3: Season Generously
Season the drumsticks on all sides with salt, pepper, and your favorite spices. A simple blend of garlic powder, onion powder, paprika, and a pinch of cayenne works well. For extra flavor, rub the seasoning into the skin and under the skin if possible. Let the seasoned drumsticks rest at room temperature for 20–30 minutes. This allows the salt to penetrate the meat, enhancing flavor and moisture retention.
Step 4: Arrange on a Rack
Place a wire rack inside a baking sheet. Arrange the drumsticks on the rack, skin side up, leaving space between each piece for air circulation. This prevents steaming and promotes even browning.
Step 5: Roast in the Oven
Place the baking sheet in the center of the preheated oven. Roast for 35–45 minutes, depending on size. Flip the drumsticks halfway through to ensure even cooking. The skin should be golden brown and crispy, and the internal temperature should reach 165°F (74°C).
Step 6: Rest Before Serving
Once done, remove the drumsticks from the oven and let them rest for 5–10 minutes. This allows the juices to redistribute, ensuring every bite is moist and flavorful. Serve hot with your favorite sides.
Seasoning Ideas and Flavor Variations
One of the best things about roasting drumsticks is how customizable they are. You can tailor the flavors to match any cuisine or mood. Here are some delicious seasoning ideas:
Classic Garlic-Herb
Combine 1 tsp salt, 1 tsp black pepper, 1 tsp garlic powder, 1 tsp dried thyme, 1 tsp dried rosemary, and 1/2 tsp onion powder. Rub over drumsticks and let rest before roasting.
Smoky BBQ
Use 1 tbsp smoked paprika, 1 tsp brown sugar, 1 tsp garlic powder, 1/2 tsp chili powder, 1/2 tsp cumin, and salt and pepper to taste. For extra flavor, brush with BBQ sauce during the last 10 minutes of roasting.
Lemon-Pepper
Mix 1 tbsp lemon zest, 1 tsp black pepper, 1 tsp garlic powder, 1/2 tsp dried oregano, and salt. The bright, zesty flavor pairs well with roasted vegetables.
Spicy Buffalo
Combine 1 tsp cayenne pepper, 1 tsp garlic powder, 1 tsp paprika, 1/2 tsp black pepper, and salt. After roasting, toss the drumsticks in a mixture of melted butter and hot sauce.
Mediterranean
Use 1 tsp dried oregano, 1 tsp dried basil, 1 tsp garlic powder, 1/2 tsp red pepper flakes, and a squeeze of lemon juice. Serve with olives and feta for a complete meal.
Troubleshooting Common Issues
Even with the best technique, things can go wrong. Here’s how to fix common problems:
Soggy Skin
This is usually caused by excess moisture. Make sure to dry the drumsticks thoroughly and use a wire rack. If the skin is still soft, broil for 2–3 minutes at the end to crisp it up.
Dry Meat
Overcooking is the main culprit. Always use a meat thermometer and remove the drumsticks when they reach 165°F (74°C). Letting them rest also helps retain moisture.
Uneven Browning
This happens when drumsticks are too close together or the oven heat is uneven. Space them out on the rack and rotate the pan halfway through cooking if needed.
Burnt Skin
If the skin is browning too quickly, reduce the oven temperature to 400°F (200°C) and extend the cooking time slightly. You can also cover the drumsticks loosely with foil for the first half of cooking.
Serving Suggestions and Pairings
Roasted chicken drumsticks are incredibly versatile. Serve them with roasted potatoes, steamed green beans, or a fresh garden salad. They also pair well with rice, quinoa, or crusty bread for soaking up the juices.
For a complete meal, add a side of roasted carrots, garlic mashed potatoes, or a tangy coleslaw. A simple green salad with a lemon vinaigrette complements the richness of the drumsticks perfectly.
Leftovers? Shred the meat and use it in tacos, sandwiches, or soups. The flavors deepen overnight, making them even more delicious the next day.
Conclusion
Mastering how to roast chicken drumsticks in the oven is a skill every home cook should have. It’s simple, reliable, and delivers consistently delicious results. With the right temperature, proper preparation, and a few pro tips, you can achieve crispy, golden skin and juicy, flavorful meat every time.
Remember: dry the drumsticks well, season generously, use a wire rack, and don’t skip the meat thermometer. Letting the meat rest is the final touch that makes all the difference. Whether you’re cooking for one or feeding a crowd, roasted drumsticks are a satisfying, no-fuss meal that never disappoints.
So preheat that oven, grab your favorite spices, and get roasting. Your taste buds—and your family—will thank you.
Frequently Asked Questions
Can I roast frozen chicken drumsticks?
It’s not recommended to roast frozen drumsticks directly. Always thaw them first in the refrigerator to ensure even cooking and food safety.
Do I need to flip drumsticks while roasting?
Yes, flipping halfway through helps ensure even browning and crispiness on all sides. Use tongs to gently turn them.
Can I use a roasting pan instead of a baking sheet?
Yes, but make sure to use a wire rack inside the pan. Without a rack, the drumsticks will sit in their juices and become soggy.
How do I know when drumsticks are done without a thermometer?
Cut into the thickest part—the juices should run clear, and the meat should no longer be pink. However, a thermometer is more accurate and recommended.
Can I add vegetables to the pan?
Yes! Add potatoes, carrots, or onions to the baking sheet around the drumsticks. They’ll absorb the flavorful drippings and roast alongside the chicken.
How long do roasted drumsticks last in the fridge?
Store leftovers in an airtight container for up to 3–4 days. Reheat in the oven or air fryer to restore crispiness.