Roasting chicken breast in the oven doesn’t have to be dry or boring. With the right techniques—like brining, proper seasoning, and precise temperature control—you can achieve tender, flavorful, and juicy results every single time. This guide walks you through every step, from prep to plating, so your chicken turns out restaurant-quality at home.
Key Takeaways
- Brining is a game-changer: Soaking chicken breast in a saltwater solution (wet brine) or using a dry brine (salt rub) helps retain moisture during roasting.
- Patience with prep pays off: Always pat chicken dry before seasoning to ensure a crispy, golden skin and even browning.
- Room temperature is key: Let chicken sit out for 20–30 minutes before roasting to promote even cooking and prevent overcooking the edges.
- Use a meat thermometer: The safest way to know when your chicken is done is by checking the internal temperature—165°F (74°C) at the thickest part.
- Rest before slicing: Letting the chicken rest for 5–10 minutes after roasting allows juices to redistribute, keeping it moist.
- Season generously and creatively: Don’t just use salt and pepper—herbs, garlic, lemon zest, and spices can transform plain chicken into a flavor-packed meal.
- Roasting rack improves results: Elevating the chicken on a rack allows hot air to circulate, cooking it evenly and crisping the skin.
Quick Answers to Common Questions
How long does it take to roast chicken breast in the oven?
Bone-in chicken breasts take 35–45 minutes at 375°F, while boneless breasts cook in 20–25 minutes. Always check the internal temperature—165°F is safe, but remove at 160°F for juicier results.
Should I cover chicken breast when roasting?
No, covering traps steam and prevents browning. Roast uncovered for crispy skin and even cooking.
Can I roast frozen chicken breast?
It’s not recommended. Frozen chicken cooks unevenly and may remain undercooked in the center. Always thaw in the fridge before roasting.
What temperature should the oven be for roasting chicken breast?
375°F (190°C) is ideal for even cooking and crispy skin. You can go up to 400°F for boneless breasts to speed things up.
How do I keep chicken breast from drying out?
Brining, using a meat thermometer, and letting the chicken rest after cooking are the best ways to retain moisture and prevent dryness.
📑 Table of Contents
- Why Roasting Chicken Breast in the Oven Is a Must-Know Skill
- Choosing the Right Chicken Breast
- Prepping Your Chicken Breast for Roasting
- Setting Up Your Oven and Roasting Pan
- Roasting Techniques for Perfect Results
- Resting and Serving Your Roasted Chicken Breast
- Troubleshooting Common Mistakes
- Conclusion
Why Roasting Chicken Breast in the Oven Is a Must-Know Skill
Chicken breast is one of the most popular proteins in home cooking—and for good reason. It’s lean, versatile, and cooks relatively quickly. But there’s a catch: it’s also notorious for turning dry and rubbery if not handled properly. That’s why mastering how to roast chicken breast in the oven is essential for anyone who wants to serve delicious, juicy meals without the guesswork.
Unlike frying or grilling, roasting in the oven gives you consistent, even heat that can produce beautifully golden skin and tender meat—if you do it right. The oven’s dry heat caramelizes the surface, sealing in flavor while gently cooking the interior. Plus, roasting is hands-off once the chicken goes in, freeing you up to prep sides or relax. Whether you’re cooking for one or feeding a family, this method is reliable, repeatable, and perfect for meal prep.
Choosing the Right Chicken Breast
Bone-In vs. Boneless
When it comes to roasting chicken breast in the oven, you’ve got two main options: bone-in (with the skin) or boneless (skinless). Each has its pros and cons, and your choice depends on your priorities—flavor, texture, and cooking time.

Visual guide about How to Roast Chicken Breast in Oven Perfectly Juicy Every Time
Image source: newbieinthekitchen.com
Bone-in chicken breasts, often called “bone-in, skin-on” breasts, are the gold standard for juiciness. The bone acts as an insulator, slowing down the cooking process and helping the meat stay moist. The skin crisps up beautifully in the oven, adding rich flavor and a satisfying texture. These take a bit longer to cook—usually 35 to 45 minutes at 375°F (190°C)—but the results are worth it.
Boneless, skinless chicken breasts are leaner and cook faster, typically in 20 to 25 minutes at the same temperature. They’re great for lower-fat meals or when you want a quicker cook time. However, they’re more prone to drying out because there’s no skin or bone to protect the meat. If you go this route, brining and careful temperature monitoring are even more critical.
Organic, Free-Range, or Conventional?
You might be wondering if the type of chicken matters. The short answer: yes, it can. Organic and free-range chickens are often raised with more space and better diets, which can result in better flavor and texture. They tend to have a more natural fat distribution and less water retention, which means they roast more evenly and taste richer.
That said, conventional chicken can still be delicious—especially if you use proper techniques like brining and seasoning. If budget is a concern, don’t stress. Focus on freshness: look for chicken that’s pink, not gray, and avoid any with a strong odor. Whether you choose organic or conventional, the key is handling it well from prep to plate.
Prepping Your Chicken Breast for Roasting
Brining: The Secret to Juicy Meat
If you’ve ever eaten dry, chalky chicken breast, you know the pain. The solution? Brining. This simple step can transform even the leanest cut into something tender and flavorful. Brining works by allowing salt and water to penetrate the meat, increasing its moisture content and helping it retain that moisture during cooking.

Visual guide about How to Roast Chicken Breast in Oven Perfectly Juicy Every Time
Image source: thetoastykitchen.com
There are two types of brining: wet and dry. A wet brine involves soaking the chicken in a saltwater solution (usually 1/4 cup salt per 4 cups water) for 30 minutes to 2 hours. You can add sugar, herbs, garlic, or citrus to the brine for extra flavor. After brining, rinse the chicken and pat it dry.
Dry brining is even easier: just generously salt both sides of the chicken and let it sit uncovered in the fridge for at least 1 hour (or up to 24 hours). The salt draws out moisture, which then reabsorbs into the meat along with the salt, seasoning it from the inside out. This method also helps dry out the skin, leading to better browning.
Patting Dry and Seasoning
After brining (or if you’re skipping it), the next step is crucial: pat the chicken completely dry with paper towels. Moisture on the surface prevents browning and can lead to steaming instead of roasting. You want that skin—or surface—crisp and golden, not soggy.
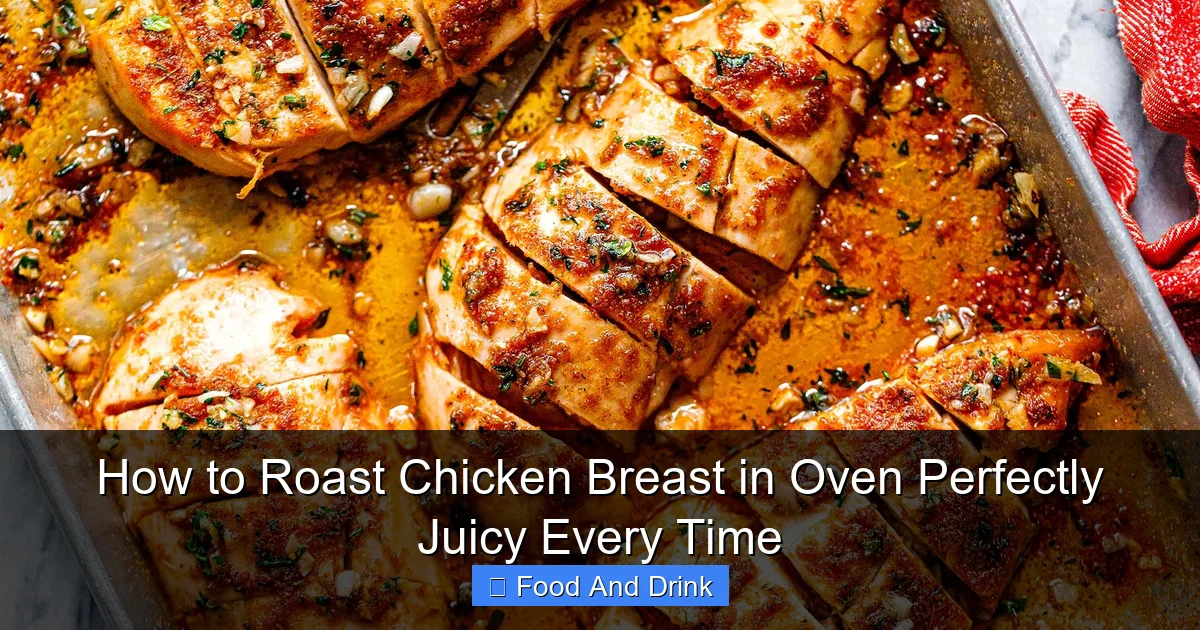
Once dry, season generously. Salt and pepper are the basics, but don’t stop there. Rub the chicken with olive oil or melted butter to help the seasoning stick and promote browning. Then add your favorite flavors: garlic powder, onion powder, smoked paprika, dried thyme, rosemary, or a squeeze of lemon juice. For a Mediterranean twist, try oregano, lemon zest, and a drizzle of olive oil. For a smoky kick, use cumin, chili powder, and a touch of brown sugar.
Pro tip: Let the seasoned chicken sit at room temperature for 20–30 minutes before roasting. Cold chicken straight from the fridge will cook unevenly—the outside may dry out before the inside reaches the right temperature. Warming it up slightly ensures more consistent results.
Setting Up Your Oven and Roasting Pan
Oven Temperature: The Sweet Spot
One of the most common mistakes when roasting chicken breast in the oven is using the wrong temperature. Too high, and the outside burns before the inside cooks. Too low, and the meat dries out from prolonged exposure to heat.
Visual guide about How to Roast Chicken Breast in Oven Perfectly Juicy Every Time
Image source: eatwell101.com
The ideal temperature for roasting chicken breast is 375°F (190°C). This moderate heat allows the chicken to cook through evenly without drying out. It also gives the skin time to crisp up without burning. If you’re using boneless breasts, you can go a bit higher—up to 400°F (200°C)—for faster cooking and better browning, but keep a close eye on them.
Preheating your oven is non-negotiable. Always allow the oven to fully preheat before placing the chicken inside. This ensures immediate, even heat distribution. A cold oven will cause the chicken to cook unevenly and may lead to undercooked spots.
Using a Roasting Rack
For the best results, place your chicken breast on a roasting rack set inside a baking dish or sheet pan. The rack elevates the chicken, allowing hot air to circulate all around it. This promotes even cooking and helps the skin crisp up on all sides.
If you don’t have a rack, you can improvise by placing the chicken on a bed of vegetables—like carrots, onions, or potatoes. The veggies act as a natural rack and absorb drippings, creating a flavorful base for a sauce or side dish. Just make sure the vegetables aren’t too watery, or they’ll steam the chicken instead of roasting it.
Choose a pan that’s just large enough to hold the chicken with a little space around it. Crowding can trap steam and prevent browning. A light-colored metal pan works best—it reflects heat and helps with even cooking. Avoid dark nonstick pans, which can cause excessive browning or burning.
Roasting Techniques for Perfect Results
Timing and Temperature Monitoring
Now for the most important part: knowing when your chicken is done. The best way to ensure perfectly cooked chicken breast is by using a meat thermometer. Insert it into the thickest part of the breast, avoiding the bone if you’re using bone-in cuts. The internal temperature should reach 165°F (74°C).
But here’s a pro tip: remove the chicken from the oven when it hits 160°F (71°C). The temperature will continue to rise by 5 degrees as the chicken rests—this is called carryover cooking. Taking it out at 160°F prevents overcooking and keeps the meat juicy.
Cooking times vary based on size and type. Bone-in breasts typically take 35–45 minutes at 375°F. Boneless breasts cook faster—20 to 25 minutes. But don’t rely solely on time. Always check the temperature. A thick breast may need longer; a thin one could be done in 15 minutes.
Basting and Flipping (Optional)
Basting—spooning pan juices over the chicken during roasting—can add moisture and flavor. However, it’s not necessary if you’ve brined and seasoned well. Opening the oven door to baste also lets heat escape, which can affect cooking time. If you do baste, do it quickly and only once or twice.
Flipping the chicken halfway through cooking is another option, especially for boneless breasts. It helps ensure even browning on both sides. Use tongs to gently flip the chicken, being careful not to tear the skin. For bone-in breasts, flipping isn’t usually needed—the skin side up is fine.
Adding Flavor During Roasting
Want to take your roasted chicken breast to the next level? Add aromatics to the pan. Toss in halved garlic cloves, sprigs of rosemary or thyme, lemon slices, or onion wedges. These infuse the chicken with subtle flavor as they roast.
You can also add a splash of liquid to the pan—like chicken broth, white wine, or apple cider—to create steam and prevent the drippings from burning. Just don’t add too much, or you’ll end up poaching instead of roasting. A quarter to half cup is plenty.
Resting and Serving Your Roasted Chicken Breast
The Importance of Resting
Once your chicken reaches the right temperature, take it out of the oven—but don’t slice it right away. Let it rest for 5 to 10 minutes, tented loosely with foil. This resting period allows the juices to redistribute throughout the meat. If you cut into it too soon, those precious juices will spill out, leaving the chicken dry.
During resting, the internal temperature stabilizes, and the fibers relax, making the meat more tender and easier to slice. It’s a small step that makes a big difference in texture and flavor.
Slicing and Serving Suggestions
After resting, transfer the chicken to a cutting board and slice it against the grain. This means cutting perpendicular to the muscle fibers, which shortens them and makes each bite more tender. Use a sharp knife for clean, even slices.
Serve your roasted chicken breast with a variety of sides. Classic pairings include roasted vegetables, mashed potatoes, or a fresh green salad. You can also shred it for tacos, chop it into a grain bowl, or use it in sandwiches and wraps. The pan drippings make a fantastic base for a quick pan sauce—just deglaze the pan with broth or wine, add a knob of butter, and simmer until slightly thickened.
Troubleshooting Common Mistakes
Dry or Rubbery Chicken
If your chicken breast turns out dry, the most likely culprit is overcooking. Even a few extra minutes can make a big difference. Always use a thermometer and pull the chicken out at 160°F. Also, consider brining next time—it’s the best defense against dryness.
Pale or Soggy Skin
For crispy skin, make sure the chicken is patted completely dry before seasoning. Use a roasting rack to allow air circulation. If the skin is still pale, try increasing the oven temperature to 400°F for the last 5–10 minutes to crisp it up.
Undercooked or Uneven Cooking
If parts of the chicken are undercooked, it may be due to inconsistent thickness. Use a meat mallet to pound the thicker end of the breast to match the thinner end. This ensures even cooking. Also, always let the chicken come to room temperature before roasting.
Conclusion
Roasting chicken breast in the oven doesn’t have to be a gamble. With the right prep, temperature, and technique, you can achieve juicy, flavorful results every time. Start with quality chicken, brine if possible, season generously, and use a thermometer to guide your cooking. Don’t forget to let it rest—your patience will be rewarded with tender, succulent meat.
This method is perfect for weeknight dinners, meal prep, or impressing guests. Once you master the basics, you can experiment with different herbs, spices, and pan additions to keep things exciting. So preheat that oven, grab your chicken, and get ready to roast your way to perfection.
Frequently Asked Questions
Can I use a convection oven to roast chicken breast?
Yes, convection ovens circulate hot air for even cooking. Reduce the temperature by 25°F and check the chicken 5–10 minutes early, as it may cook faster.
Is it safe to eat chicken breast at 160°F?
Yes, chicken is safe to eat at 160°F when removed from the heat. The temperature will rise to 165°F during resting, which is the USDA-recommended safe temperature.
Can I marinate chicken breast before roasting?
Absolutely. Marinating for 30 minutes to 2 hours adds flavor. Just pat the chicken dry before roasting to ensure proper browning.
What’s the best way to store leftover roasted chicken breast?
Store in an airtight container in the fridge for up to 3–4 days. Reheat gently in the oven or microwave to avoid drying out.
Can I roast chicken breast with vegetables?
Yes! Place chopped carrots, potatoes, onions, or broccoli around the chicken. They’ll absorb the drippings and make a complete meal.
Why is my chicken breast still pink after cooking?
Pink color can be due to the chicken’s diet or packaging process. As long as the internal temperature reaches 165°F, it’s safe to eat.