
Nobody likes dry, rubbery chicken—but it’s easier than you think to keep it moist and flavorful. With the right techniques like brining, proper temperature control, and resting, you can serve tender, juicy chicken every single time.
Key Takeaways
- Brining adds moisture: Soaking chicken in saltwater (wet brine) or salt rub (dry brine) helps it retain water during cooking.
- Cook to the right temperature: Use a meat thermometer to stop cooking at 160–165°F (71–74°C); carryover heat finishes it safely without drying.
- Rest your chicken: Letting it rest for 5–10 minutes allows juices to redistribute, preventing them from spilling out when sliced.
- Choose the right cut: Dark meat (thighs, drumsticks) stays juicier than white meat (breasts) due to higher fat content.
- Use low-and-slow or high-heat methods wisely: Poaching, braising, or sous vide retain moisture; grilling and roasting need careful monitoring.
- Avoid overcooking: Even 5 extra minutes can turn tender chicken into a dry, chalky mess—timing is everything.
- Add moisture during cooking: Basting, steaming, or cooking with liquid (like broth or wine) keeps chicken from drying out.
Quick Answers to Common Questions
Can I brine frozen chicken?
No, always thaw chicken completely before brining. Brining works by allowing salt to penetrate the meat, which won’t happen if it’s frozen. Thaw in the fridge overnight for best results.
Is it safe to eat chicken at 160°F?
Yes, as long as it reaches 165°F during resting. The USDA recommends 165°F for safety, but carryover cooking ensures it hits that temp even if you pull it at 160°F.
Can I brine chicken for too long?
Yes, especially boneless breasts. Wet brining for more than 4 hours can make them mushy. Dry brining is safer for longer periods—up to 24 hours.
Does marinating prevent dryness?
Marinating adds flavor and can slightly tenderize, but it doesn’t retain moisture like brining. For juiciness, combine marinating with brining or proper cooking techniques.
Why does my grilled chicken dry out?
Grilling uses high, direct heat, which can quickly overcook lean chicken. Use two-zone heat, monitor temperature, and consider brining or basting to keep it moist.
📑 Table of Contents
Why Does Chicken Dry Out So Easily?
Chicken is one of the most popular proteins in home kitchens around the world—and for good reason. It’s versatile, affordable, and quick to cook. But despite its popularity, chicken has a reputation for turning dry, tough, and unappetizing when not handled correctly. If you’ve ever taken a bite of chicken breast only to feel like you’re chewing on cardboard, you’re not alone. The culprit? Overcooking.
Chicken breast, in particular, is lean—meaning it has very little fat. Fat acts as a natural moisture barrier and flavor carrier, so when you remove it (as in skinless, boneless breasts), you’re left with muscle fibers that tighten and squeeze out moisture as they heat up. Once those fibers contract too much, the juices escape, and the meat becomes dry. Even dark meat, which has more fat and collagen, can dry out if cooked too long or at too high a temperature.
But here’s the good news: drying out isn’t inevitable. With a few smart techniques, you can cook chicken that’s consistently juicy, tender, and full of flavor. Whether you’re grilling, roasting, pan-searing, or baking, the principles of moisture retention remain the same. It all comes down to understanding how heat affects the meat and using methods that protect those precious juices.
In this guide, we’ll walk you through the most effective ways to prevent chicken from drying out—from pre-cooking prep to post-cooking care. You’ll learn how to brine, monitor temperature, choose the right cooking method, and even rescue slightly overcooked chicken. By the end, you’ll never have to serve dry chicken again.
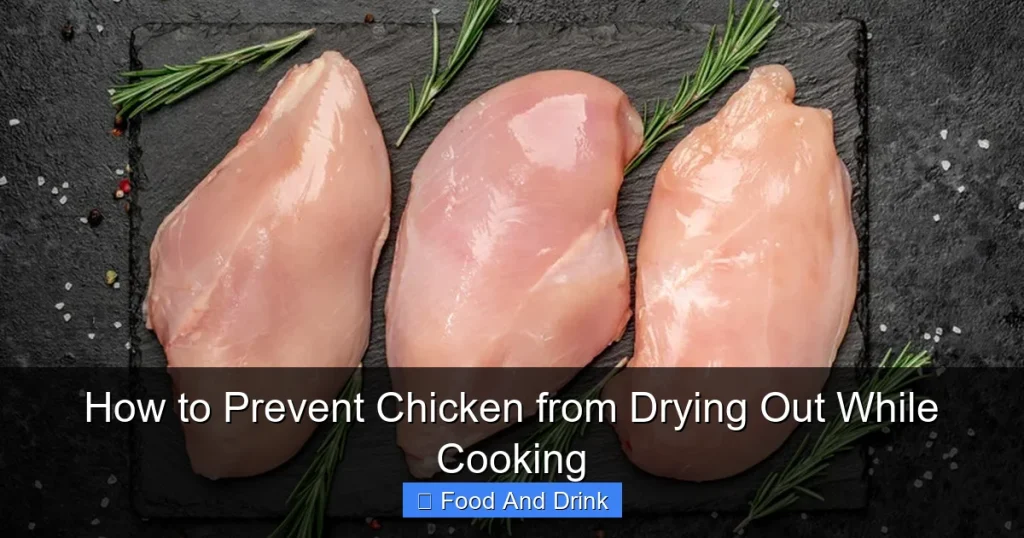
Master the Art of Brining
Visual guide about How to Prevent Chicken from Drying Out While Cooking
Image source: thedailymeal.com
One of the most powerful tools in the fight against dry chicken is brining. Simply put, brining is the process of soaking chicken in a saltwater solution (or applying salt directly) before cooking. It might sound like an extra step, but the payoff is huge: juicier, more flavorful meat that stays moist even if you slightly overcook it.
Wet Brining: The Classic Method
Wet brining involves submerging chicken in a solution of water, salt, and often sugar and aromatics like herbs, garlic, or citrus. The salt does two important things: it dissolves some of the muscle proteins, allowing the meat to absorb and retain more water, and it seasons the chicken from the inside out.
To make a basic wet brine, dissolve 1/2 cup of kosher salt and 1/4 cup of sugar in 4 cups of water. You can add bay leaves, peppercorns, garlic cloves, or lemon slices for extra flavor. Submerge your chicken—breasts, thighs, or whole pieces—in the brine and refrigerate. For boneless breasts, 30 minutes to 1 hour is plenty. For bone-in pieces or a whole chicken, 1–2 hours is ideal. Don’t go longer than 4 hours for breasts, as they can become too salty or mushy.
After brining, rinse the chicken lightly and pat it dry before cooking. The drying step is crucial—it helps the skin crisp up if you’re roasting or frying.
Dry Brining: Simpler and Just as Effective
If you’re short on time or fridge space, dry brining is a great alternative. This method involves rubbing salt (and optionally other seasonings) directly onto the chicken and letting it sit uncovered in the fridge for several hours or overnight.
The salt draws out moisture initially, but then the liquid reabsorbs back into the meat along with the salt, seasoning it deeply and improving texture. Dry brining also dries out the skin, which is perfect for achieving crispy skin when roasting or grilling.
For dry brining, use about 1/2 teaspoon of kosher salt per pound of chicken. Sprinkle it evenly over all surfaces, place the chicken on a wire rack set over a baking sheet (to allow air circulation), and refrigerate. Boneless breasts can dry brine for 1–4 hours; bone-in pieces or whole chickens benefit from 12–24 hours.
Both wet and dry brining work wonders, but dry brining is often preferred for its convenience and superior browning. Either way, you’ll notice a dramatic difference in juiciness.
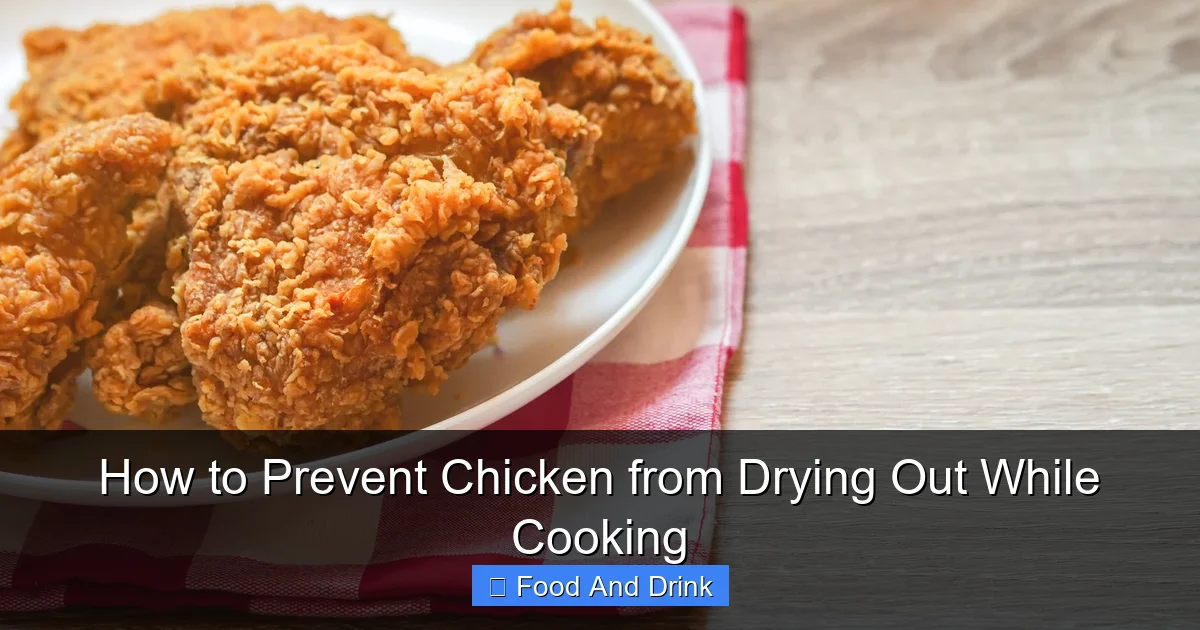
Cook to the Right Temperature—Not Time
Visual guide about How to Prevent Chicken from Drying Out While Cooking
Image source: thedailymeal.com
One of the biggest mistakes home cooks make is relying on cooking time instead of temperature. Recipes often say “cook for 20 minutes,” but that’s a rough estimate at best. The real key to preventing dry chicken is using a meat thermometer to monitor internal temperature.
Chicken is safe to eat once it reaches 165°F (74°C), but pulling it off the heat at 160°F (71°C) is smarter. Why? Because of carryover cooking. As chicken rests, the internal temperature continues to rise by 5–10°F. So if you pull it at 160°F, it will reach 165°F during resting—perfectly safe and still juicy.
Overcooking by even a few degrees can turn chicken dry. At 170°F (77°C), the proteins tighten so much that they squeeze out most of the moisture. That’s why precision matters.
Use a Reliable Meat Thermometer
Invest in a good instant-read thermometer—it’s one of the best kitchen tools you can own. Insert the probe into the thickest part of the chicken, avoiding bone or fat. For breasts, check near the center; for thighs, go into the middle of the meat.
If you’re cooking a whole chicken, check the temperature in the breast and thigh. The breast is done at 160°F, and the thigh at 175°F (the higher temp helps break down collagen for tenderness).
Adjust Cooking Methods Based on Temperature
Different cooking methods require different temperature strategies:
– **Grilling:** Preheat the grill and use two-zone heat (hot and cool sides). Sear over high heat, then move to the cooler side to finish cooking gently.
– **Roasting:** Start at a high temperature (425°F/220°C) to brown the skin, then reduce to 350°F (175°C) to cook through without drying.
– **Pan-searing:** Cook over medium-high heat for a good crust, then finish in a 375°F (190°C) oven if needed.
– **Poaching:** Simmer chicken in liquid (broth, water, or wine) at 160–180°F (71–82°C)—never boil, as it toughens the meat.
No matter the method, always use a thermometer. Time is just a suggestion; temperature is the truth.
Choose the Right Cut for the Job
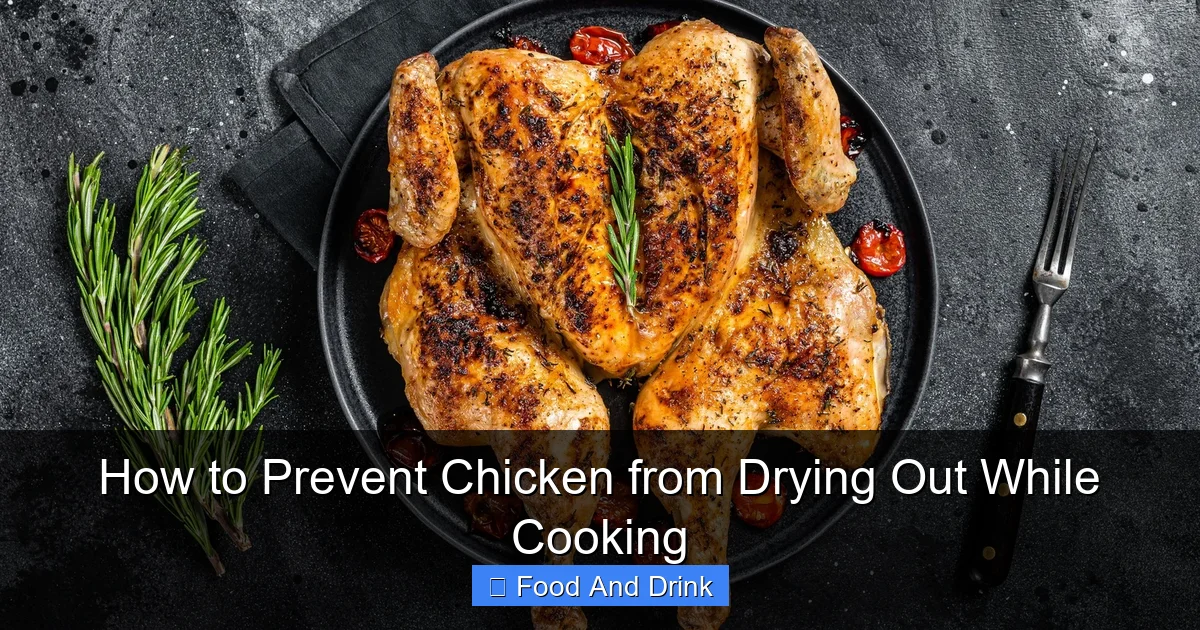
Visual guide about How to Prevent Chicken from Drying Out While Cooking
Image source: mashed.com
Not all chicken is created equal when it comes to moisture. Understanding the differences between cuts can help you pick the best one for your recipe—and avoid dry results.
Dark Meat vs. White Meat
Dark meat—thighs and drumsticks—comes from the legs, which are used more by the bird. This means they have more connective tissue, fat, and myoglobin (a protein that holds moisture). As a result, dark meat is naturally more forgiving. It stays juicy even if cooked a bit longer and benefits from slower, moist-heat methods like braising or stewing.
White meat—breasts and wings—comes from the breast, which is used less. It’s leaner and cooks faster, but it’s also more prone to drying out. Boneless, skinless breasts are the most challenging because they lack both fat and skin protection.
If you’re new to cooking chicken or want a foolproof option, start with thighs. They’re harder to overcook and deliver rich, satisfying flavor.
Bone-In and Skin-On: Your Moisture Allies
Bone and skin act as natural insulators. The bone conducts heat slowly, helping the meat cook evenly. The skin protects the surface from drying out and adds fat, which bastes the meat as it renders.
Whenever possible, cook chicken bone-in and skin-on. You can always remove the skin after cooking if you’re watching calories—but leaving it on during cooking makes a big difference in moisture.
For example, a skinless breast roasted at 375°F might dry out in 20 minutes. But a skin-on, bone-in breast from the same bird will stay juicy for 30–35 minutes. The skin crisps up beautifully, and the meat underneath stays tender.
Use Moist-Heat Cooking Methods
While dry-heat methods like grilling and roasting are popular, moist-heat techniques are your best friends when it comes to preventing dry chicken. These methods use liquid or steam to keep the meat hydrated during cooking.
Poaching: Gentle and Juicy
Poaching involves simmering chicken in liquid—usually broth, water, or a flavorful mixture with herbs, onions, and spices. The liquid keeps the chicken moist and infuses it with flavor.
To poach chicken breasts, bring a pot of seasoned liquid to a gentle simmer (not a boil). Add the chicken and cook for 10–15 minutes, depending on size. Use a thermometer to check for 160°F. Remove and let rest.
Poached chicken is perfect for salads, sandwiches, or shredding for tacos. It’s never dry—and it’s one of the healthiest ways to cook chicken.
Braising: Tender and Flavorful
Braising combines searing and slow cooking in liquid. It’s ideal for tougher cuts like thighs or drumsticks, but it works beautifully for breasts too.
Sear the chicken in a hot pan to develop flavor, then add liquid (broth, wine, or tomatoes) and simmer covered for 20–30 minutes. The low, slow heat breaks down connective tissue and keeps the meat incredibly moist.
Braised chicken is fall-off-the-bone tender and packed with flavor. It’s a great option for weeknight dinners or meal prep.
Sous Vide: The Ultimate Precision
Sous vide cooking involves sealing chicken in a vacuum bag and cooking it in a water bath at a precise, low temperature. It’s the most reliable way to prevent dryness because the meat never exceeds the target temperature.
For chicken breasts, cook at 145°F (63°C) for 1–2 hours. The result is silky, juicy meat that’s evenly cooked from edge to edge. Finish with a quick sear in a hot pan for color and texture.
While sous vide requires special equipment, it’s worth it for consistently perfect chicken.
Don’t Skip the Resting Period
After cooking, many people slice into chicken right away—only to watch all the juices run out onto the cutting board. That’s a missed opportunity. Resting is a crucial step that allows the juices to redistribute throughout the meat.
When chicken cooks, the proteins contract and push moisture toward the center. If you cut it immediately, those juices escape. But if you let it rest for 5–10 minutes, the fibers relax and reabsorb the liquid.
How Long to Rest?
– Boneless breasts: 5–7 minutes
– Bone-in pieces: 7–10 minutes
– Whole chicken: 10–15 minutes
Place the chicken on a cutting board or plate, loosely tent with foil (don’t wrap tightly, or it’ll steam and soften the skin). The temperature will rise slightly, finishing the cooking process safely.
Resting might feel like an extra step, but it’s the difference between dry and juicy. Think of it as the final act in the cooking process—one that pays off big time.
Bonus Tips to Keep Chicken Moist
Beyond the main techniques, here are a few extra tricks to ensure your chicken stays juicy:
Baste While Cooking
Basting—brushing or spooning liquid over the chicken—adds moisture and flavor. Use melted butter, olive oil, broth, or pan juices. For roasting, baste every 10–15 minutes. For grilling, use a spray bottle with broth to keep the surface from drying.
Add a Liquid Base
When roasting or baking, place chicken on a bed of vegetables (onions, carrots, celery) and add a splash of liquid to the pan. The steam helps keep the chicken moist, and the veggies absorb delicious flavor.
Marinate for Moisture and Flavor
Marinades with acidic ingredients (like lemon juice or vinegar) can tenderize chicken, but don’t overdo it—too much acid can make the meat mushy. Use oil-based marinades with herbs and spices for flavor without breaking down the texture.
Slice Against the Grain
When serving, always slice chicken against the grain. This shortens the muscle fibers, making each bite more tender and easier to chew.
Rescue Overcooked Chicken
If your chicken is slightly dry, don’t despair. Shred it and toss with a sauce—gravy, barbecue, or a creamy dressing. The moisture from the sauce will revive it. Or serve it in a soup or stew, where the broth will rehydrate it.
Conclusion
Preventing chicken from drying out isn’t about complicated techniques or expensive tools—it’s about understanding the basics of heat, moisture, and timing. By brining, cooking to the right temperature, choosing the right cut, using moist-heat methods, and letting your chicken rest, you can serve juicy, flavorful chicken every time.
Start with one or two of these tips—like using a thermometer or trying dry brining—and build from there. Soon, dry chicken will be a thing of the past. Whether you’re cooking for family dinner or impressing guests, these strategies will keep your chicken tender, moist, and delicious. Happy cooking!
Frequently Asked Questions
What’s the best way to cook chicken breast without drying it out?
The best way is to brine it first, cook it to 160°F using a thermometer, and let it rest. Poaching, sous vide, or pan-searing with a finish in the oven also work well.
Can I use chicken broth instead of water for brining?
Yes, using chicken broth adds extra flavor. Just reduce the added salt slightly, as broth often contains sodium.
How do I know if my chicken is overcooked?
Overcooked chicken is dry, stringy, and pale. It may also have a chalky texture. Use a thermometer to avoid guessing—pull it at 160°F for best results.
Is skinless chicken more likely to dry out?
Yes, because it lacks the protective fat and moisture barrier of the skin. Brining and careful temperature control are especially important for skinless cuts.
Can I freeze brined chicken?
Yes, but it’s best to cook it first. Freezing raw brined chicken can affect texture. Cook, cool, and freeze for up to 3 months.
Does cooking chicken longer make it more tender?
Not necessarily. While slow cooking can tenderize tough cuts, overcooking lean meat like breasts makes it dry and tough. Use low heat and monitor temperature.


