

Master the art of making roast chicken gravy with this foolproof guide. From using pan drippings to perfecting the roux, you’ll learn every technique to create a rich, velvety gravy that elevates any roast chicken dinner.
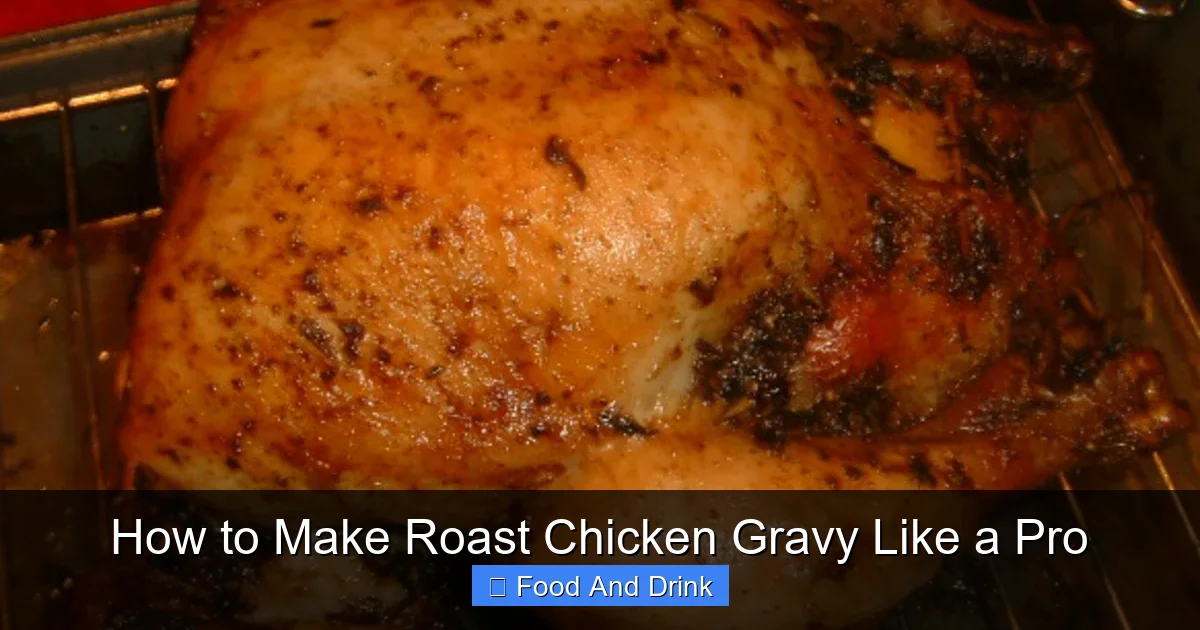
There’s something deeply comforting about a perfectly roasted chicken—crispy skin, juicy meat, and that irresistible aroma filling the kitchen. But what truly transforms a good roast chicken into a show-stopping meal? The answer is simple: a rich, velvety roast chicken gravy. It’s the crowning glory that ties everything together, soaking into mashed potatoes, drizzling over stuffing, and making every bite taste like home.
If you’ve ever been intimidated by making gravy from scratch, you’re not alone. Many home cooks assume it’s complicated or requires fancy techniques. But the truth is, making roast chicken gravy like a pro is easier than you think—especially when you understand the science and steps behind it. With a few key ingredients and a little patience, you can turn the drippings from your roasted chicken into a luxurious sauce that tastes like it came from a five-star restaurant.
In this guide, we’ll walk you through every step of the process, from collecting pan drippings to mastering the roux and achieving that perfect glossy finish. Whether you’re cooking for a holiday feast or a cozy weeknight dinner, this method will give you consistent, delicious results every time. So grab your roasting pan, sharpen your knife, and let’s dive into the world of homemade roast chicken gravy.
Key Takeaways
- Use pan drippings: The golden liquid left after roasting chicken is packed with flavor and forms the base of great gravy.
- Make a roux: Cooking equal parts fat and flour creates a smooth, lump-free thickening agent essential for rich gravy.
- Deglaze the pan: Pouring liquid into the hot roasting pan lifts all the caramelized bits, adding depth and complexity.
- Simmer gently: Let the gravy simmer to blend flavors and achieve the perfect consistency without scorching.
- Season thoughtfully: Taste and adjust salt, pepper, and herbs at the end for balanced, restaurant-quality flavor.
- Strain for smoothness: For an elegant finish, strain the gravy to remove any bits and ensure a silky texture.
- Store and reheat properly: Leftover gravy can be refrigerated or frozen and reheated gently to maintain quality.
Quick Answers to Common Questions
Can I make roast chicken gravy without pan drippings?
Yes, but it won’t have the same depth of flavor. Use butter and chicken broth instead, and consider adding a splash of soy sauce or Worcestershire for umami.
How do I thicken gravy if it’s too thin?
Simmer it longer to reduce, or mix 1 teaspoon of cornstarch with 1 tablespoon of cold water and stir it in while whisking.
Can I make gravy ahead of time?
Absolutely. Make it a day in advance, store it in the fridge, and reheat gently on the stove, adding broth if needed.
What’s the best way to store leftover gravy?
Let it cool, then transfer to an airtight container. It keeps in the fridge for up to 5 days or in the freezer for 3 months.
Why is my gravy lumpy?
Lumps form when flour isn’t fully incorporated. Whisk constantly when adding liquid, and strain the gravy if needed.
📑 Table of Contents
Why Homemade Roast Chicken Gravy Is Worth the Effort
Store-bought gravy might be convenient, but it often falls short in flavor, texture, and authenticity. It’s usually loaded with preservatives, thickeners, and artificial flavors that can’t compete with the rich, savory depth of a gravy made from real pan drippings. When you make roast chicken gravy at home, you’re not just adding moisture to your meal—you’re creating a sauce that tells the story of your chicken: the herbs it was roasted with, the caramelized bits stuck to the pan, and the natural juices that seeped out during cooking.
Homemade gravy also gives you complete control over the ingredients. You decide how salty, herby, or rich it will be. You can tailor it to your dietary needs—gluten-free, low-sodium, or dairy-free—without sacrificing taste. Plus, there’s a certain pride that comes from making something from scratch. It’s a small act of love that makes your meal feel more personal and special.
Another reason to go homemade? Leftovers. A good roast chicken often leaves behind plenty of drippings, and instead of wasting that liquid gold, you can turn it into gravy that lasts for days. Store it in the fridge for up to a week or freeze it for up to three months. Reheat it gently on the stove, and it’ll taste just as good as the day you made it.
The Science Behind Perfect Roast Chicken Gravy
Visual guide about How to Make Roast Chicken Gravy Like a Pro
Image source: img.sndimg.com
Before we get into the step-by-step process, it helps to understand what makes gravy work. At its core, gravy is a sauce made by thickening liquid with a starch—usually flour—and flavoring it with meat drippings. The magic happens when fat, flour, and liquid come together in the right balance.
The key ingredient in roast chicken gravy is the pan drippings. These are the juices and melted fat that collect at the bottom of your roasting pan as the chicken cooks. They’re loaded with flavor because they contain rendered chicken fat, caramelized bits of skin and herbs, and natural gelatin from the bird. This combination gives your gravy its rich, meaty taste and helps it coat the back of a spoon.
To thicken the gravy, we use a roux—a mixture of equal parts fat and flour cooked together. The fat can come from the pan drippings or added butter. When you cook the flour in fat, it loses its raw taste and becomes a smooth thickening agent. The longer you cook the roux, the darker and more nutty it becomes, which can add depth to your gravy. For classic roast chicken gravy, a light or medium roux is ideal.
Once the roux is ready, you slowly add liquid—usually broth or stock—while whisking constantly to prevent lumps. The liquid hydrates the flour and creates a smooth, velvety sauce. As the gravy simmers, the starch molecules swell and thicken the mixture. This is why it’s important not to rush the process. A gentle simmer allows the flavors to meld and the texture to develop properly.
Finally, seasoning is crucial. Salt, pepper, and herbs like thyme or rosemary enhance the natural flavors of the chicken and drippings. But remember: the drippings and broth may already be salty, so taste as you go and adjust accordingly.
Ingredients You’ll Need

Visual guide about How to Make Roast Chicken Gravy Like a Pro
Image source: images.yummy.ph
The beauty of roast chicken gravy is that it requires only a handful of simple ingredients—most of which you already have in your kitchen. Here’s what you’ll need:
- Pan drippings: About ¼ to ½ cup, collected from your roasted chicken. This is the flavor base of your gravy.
- All-purpose flour: ¼ cup. This will be used to make the roux. For a gluten-free version, substitute with cornstarch or a gluten-free flour blend.
- Chicken broth or stock: 2 to 3 cups, preferably low-sodium so you can control the salt level. Homemade stock works best, but store-bought is fine in a pinch.
- Butter (optional): 1 to 2 tablespoons, if your drippings aren’t fatty enough. This adds richness and helps make the roux.
- Salt and black pepper: To taste. Start with a pinch and adjust as needed.
- Fresh herbs (optional): A few sprigs of thyme, rosemary, or sage from your roasted chicken. These add aromatic depth.
- White wine or apple cider (optional): ¼ cup, for deglazing the pan and adding complexity. Use only if you enjoy a slightly tangy note.
You’ll also need a few basic tools: a roasting pan with a rack, a wooden spoon or whisk, a small saucepan or the roasting pan itself (if deglazing), and a fine-mesh strainer (optional, for a smoother finish).
Step-by-Step Guide to Making Roast Chicken Gravy
Visual guide about How to Make Roast Chicken Gravy Like a Pro
Image source: cookingclassy.com
Now that you know the basics, let’s walk through the process of making roast chicken gravy like a pro. Follow these steps carefully, and you’ll end up with a rich, flavorful sauce that’s perfect for any meal.
Step 1: Collect the Pan Drippings
After removing your roasted chicken from the pan, let it rest for 10–15 minutes. This allows the juices to redistribute, but it also gives you time to collect the drippings. Place the roasting pan on the stovetop (if it’s stovetop-safe) or transfer the drippings to a saucepan.
Use a spoon or fat separator to skim off excess fat if there’s too much—about ¼ cup of fat is ideal for the roux. If there’s not enough fat, add a tablespoon or two of butter to make up the difference. The remaining liquid (the broth-like part of the drippings) will be used later.
Step 2: Make the Roux
Over medium heat, add the fat (drippings and/or butter) to your saucepan. Once melted, sprinkle in the flour and whisk constantly. Cook for 2–3 minutes, until the mixture is smooth and bubbly but not browned. This is a white roux, perfect for a light-colored, delicate gravy.
If you prefer a deeper flavor, cook the roux a bit longer—5–7 minutes—until it turns a light golden brown. This is called a blond roux and adds a nutty, toasted note to the gravy. Just be careful not to burn it, as that will give it a bitter taste.
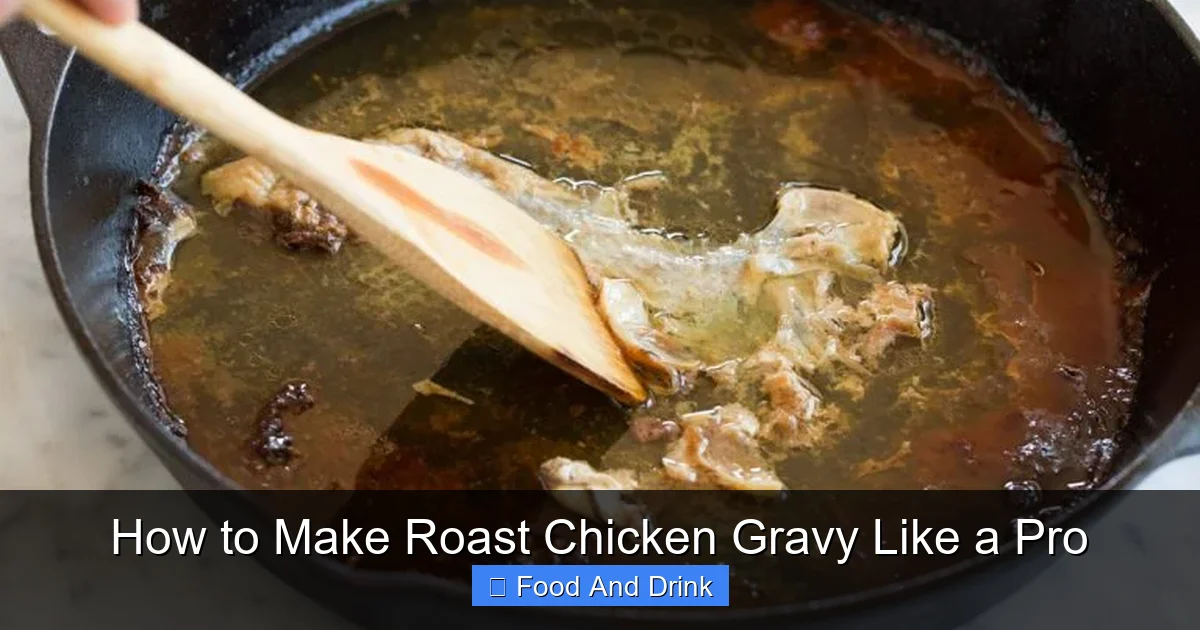
Step 3: Deglaze the Pan (Optional but Recommended)
If you’re using the roasting pan directly, this step adds incredible flavor. With the pan still warm, pour in ¼ cup of broth, wine, or water. Use a wooden spoon to scrape up all the browned bits stuck to the bottom—these are packed with flavor and will dissolve into your gravy.
Let the liquid simmer for a minute or two, then pour it into your saucepan with the roux. This step ensures you don’t waste any of that delicious roasted goodness.
Step 4: Add Liquid and Whisk
Slowly pour in the chicken broth while whisking constantly. Start with 2 cups and add more as needed to reach your desired consistency. Whisking prevents lumps from forming and ensures a smooth texture.
Bring the mixture to a gentle simmer, stirring frequently. Let it cook for 5–10 minutes, until it thickens enough to coat the back of a spoon. If it’s too thick, add more broth. If it’s too thin, let it simmer a bit longer or mix a teaspoon of cornstarch with cold water and stir it in.
Step 5: Season and Strain
Taste the gravy and season with salt and pepper. Add a few fresh herbs if desired—thyme and rosemary work especially well with chicken. Let it simmer for another minute to infuse the flavors.
For a restaurant-quality finish, strain the gravy through a fine-mesh sieve into a clean bowl or gravy boat. This removes any bits of herbs, peppercorns, or lumps, leaving you with a silky, elegant sauce.
Step 6: Serve and Store
Serve the gravy warm, drizzled over your roast chicken, mashed potatoes, or stuffing. If you have leftovers, let the gravy cool completely, then transfer it to an airtight container. It will keep in the fridge for up to 5 days or in the freezer for up to 3 months.
To reheat, place it in a saucepan over low heat, stirring frequently. Add a splash of broth or water if it’s too thick.
Pro Tips for Flawless Roast Chicken Gravy
Even with the best recipe, small mistakes can happen. Here are some expert tips to ensure your gravy turns out perfect every time:
- Don’t rush the roux: Cooking the flour properly removes the raw taste and ensures smooth thickening. Take your time.
- Whisk constantly: When adding liquid to the roux, whisk nonstop to prevent lumps. A silicone whisk works great for this.
- Use low-sodium broth: This lets you control the salt level. You can always add more, but you can’t take it away.
- Deglaze with wine for depth: A splash of dry white wine or apple cider adds a subtle tang that complements the chicken beautifully.
- Strain for elegance: Even if you don’t mind small bits, straining gives your gravy a polished, professional look.
- Adjust consistency on the fly: If your gravy is too thick, thin it with broth. If too thin, simmer longer or use a cornstarch slurry.
- Make it ahead: Gravy can be made a day in advance and reheated. Just store it properly and warm it gently.
Variations and Flavor Enhancements
Once you’ve mastered the basic recipe, feel free to get creative. Here are a few ways to customize your roast chicken gravy:
- Herb-infused gravy: Add a bouquet garni (thyme, parsley, bay leaf) while simmering, then remove before straining.
- Garlic gravy: Sauté a minced garlic clove in the fat before adding the flour for a punch of flavor.
- Mushroom gravy: Sauté sliced mushrooms in the pan before deglazing, then include them in the gravy.
- Spicy gravy: Add a pinch of cayenne or red pepper flakes for a subtle kick.
- Creamy gravy: Stir in a splash of heavy cream or crème fraîche at the end for a richer, silkier texture.
These variations let you match the gravy to your meal—whether it’s a classic Sunday roast or a festive holiday dinner.
Troubleshooting Common Gravy Problems
Even pros run into issues sometimes. Here’s how to fix the most common gravy problems:
- Lumpy gravy: Strain it through a fine-mesh sieve, then whisk vigorously. To prevent lumps, always whisk while adding liquid.
- Too thin: Simmer longer to reduce, or mix 1 tsp cornstarch with 1 tbsp cold water and stir in.
- Too thick: Add warm broth or water, a little at a time, until you reach the right consistency.
- Bland flavor: Add a splash of soy sauce, Worcestershire sauce, or a pinch of sugar to boost umami.
- Burnt taste: If the roux or pan bits burned, start over. Use a clean pan and lower heat next time.
With these fixes, you’ll never have to serve a less-than-perfect gravy again.
Conclusion
Making roast chicken gravy like a pro isn’t about fancy techniques or hard-to-find ingredients—it’s about understanding the basics and paying attention to the details. From collecting those precious pan drippings to mastering the roux and seasoning with care, each step builds toward a sauce that’s rich, flavorful, and deeply satisfying.
This gravy isn’t just a side—it’s the heart of your meal. It transforms simple ingredients into something extraordinary, turning a humble roast chicken into a feast. And the best part? Once you’ve made it once, you’ll wonder why you ever settled for store-bought.
So the next time you roast a chicken, don’t skip the gravy. Embrace the process, enjoy the aromas, and savor the results. With this guide in hand, you’re ready to make roast chicken gravy like a true pro—every single time.
Frequently Asked Questions
What can I use instead of flour for a gluten-free gravy?
Cornstarch, arrowroot, or a gluten-free flour blend work well. Use half the amount of cornstarch compared to flour and mix it with cold liquid before adding.
How do I deglaze a non-stick roasting pan?
Transfer the drippings to a saucepan instead. Add liquid and scrape the roasting pan separately, then combine everything in the saucepan.
Can I use vegetable broth instead of chicken broth?
Yes, but chicken broth adds more authentic flavor. If using vegetable broth, consider adding a bit of soy sauce or miso for depth.
Why does my gravy taste bitter?
This usually happens if the roux or pan bits burned. Use lower heat next time and stir frequently to prevent scorching.
How much gravy does this recipe make?
This recipe yields about 2 to 2.5 cups, enough to serve 4 to 6 people generously.
Can I freeze roast chicken gravy?
Yes! Cool it completely, then store in a freezer-safe container or ice cube trays for easy portioning. Reheat gently on the stove.


