

Grilled chicken doesn’t need a grill or oven—your microwave can do the job fast and easy! With simple seasoning, a few tricks, and the right technique, you can enjoy tender, juicy chicken in under 15 minutes. This method is perfect for quick meals, salads, wraps, or meal prep.
Key Takeaways
- Microwave grilling is safe and effective: When done correctly, microwaving chicken with the right method mimics grilled flavor and texture without drying it out.
- Use bone-in, skin-on cuts for juiciness: Thighs and drumsticks retain moisture better than boneless breasts during quick cooking.
- Marinate for maximum flavor: Even a 10-minute soak in herbs, oil, and acid (like lemon or vinegar) boosts taste and tenderness.
- Cover and rotate for even cooking: Use a microwave-safe lid or vented cover and flip the chicken halfway to prevent hot spots.
- Finish with a quick sear (optional): A 1–2 minute zap in a hot skillet or air fryer adds that authentic grilled char.
- Perfect for meal prep: Cook a batch on Sunday and use throughout the week in salads, tacos, or grain bowls.
- Safe internal temperature is key: Always check that chicken reaches 165°F (74°C) with a food thermometer.
Quick Answers to Common Questions
Can you really grill chicken in a microwave?
Yes! While it won’t have the exact char of a real grill, you can make juicy, flavorful grilled chicken with microwave using the right technique—marinating, covering, and cooking on medium power.
Is microwaved chicken safe to eat?
Absolutely, as long as it reaches an internal temperature of 165°F (74°C). Use a food thermometer to ensure safety.
How long does it take to cook chicken in the microwave?
About 6 minutes per pound on medium power, plus flipping halfway. For 1 pound of thighs, expect 6–8 minutes total.
Can I use boneless chicken breasts?
Yes, but they dry out faster. Use bone-in if possible, or marinate well and monitor cooking time closely.
Do I need a special microwave to do this?
No—any standard microwave works. Just avoid high power and always cover the dish to retain moisture.
📑 Table of Contents
Why You Should Try Making Grilled Chicken with Microwave
Let’s be honest—grilling is great, but not everyone has a backyard, a grill, or the time to fire it up on a busy Tuesday. And while ovens work, they take forever to preheat and leave your kitchen sweltering. That’s where the microwave comes in—yes, the humble microwave!
You might be skeptical. “Can you really make grilled chicken with microwave?” The answer is a resounding yes. With the right technique, your microwave can produce juicy, flavorful chicken that tastes like it spent hours on the grill. It’s fast, easy, and perfect for anyone short on time, space, or patience. Whether you’re a student, a busy parent, or just craving a quick protein boost, this method delivers.
The secret lies in how you prepare and cook the chicken. It’s not about blasting it on high until it’s rubbery. Instead, it’s about using moisture, heat control, and a few smart tricks to lock in flavor and texture. Think of it as “microwave grilling”—a hybrid method that combines the speed of microwaving with the principles of grilling. And the best part? You can have dinner ready in under 20 minutes, start to finish.
What You’ll Need: Ingredients and Tools

Visual guide about How to Make Grilled Chicken with Microwave Fast and Easy
Image source: i.pinimg.com
Before we dive into the steps, let’s make sure you have everything you need. The beauty of this method is that it requires minimal equipment and ingredients you probably already have in your kitchen.
Essential Ingredients
- Chicken: Bone-in, skin-on chicken thighs or drumsticks work best. They’re more forgiving and stay juicier than boneless breasts. If you prefer breast, go for bone-in to retain moisture.
- Olive oil or avocado oil: A light coating helps conduct heat and prevents sticking.
- Salt and pepper: The foundation of flavor. Use kosher salt and freshly ground black pepper.
- Garlic powder and onion powder: These add depth without needing fresh garlic, which can burn in the microwave.
- Dried herbs: Thyme, oregano, or rosemary complement chicken beautifully.
- Acid: Lemon juice, lime juice, or apple cider vinegar tenderize and brighten the flavor.
- Optional extras: Smoked paprika for a “grilled” smokiness, a dash of soy sauce for umami, or a pinch of cayenne for heat.
Kitchen Tools
- Microwave-safe dish: A glass or ceramic baking dish with a lid or microwave-safe cover. Avoid metal!
- Microwave-safe plate or lid: If your dish doesn’t have a cover, use a plate or vented microwave lid.
- Food thermometer: Non-negotiable for safety. You need to check that the internal temperature reaches 165°F (74°C).
- Tongs or fork: For flipping the chicken halfway through cooking.
- Small bowl: For mixing the marinade or seasoning.
- Paper towels: To pat the chicken dry before seasoning—this helps the spices stick.
Optional but Helpful
- Skillet or air fryer: For a quick sear at the end to add grill-like char.
- Aluminum foil: To loosely cover the dish if you don’t have a lid (poke a few holes for steam).
- Meat mallet or rolling pin: To gently pound thicker pieces for even cooking.
With these basics, you’re ready to make delicious grilled chicken with microwave in no time.
Step-by-Step Guide: How to Make Grilled Chicken with Microwave
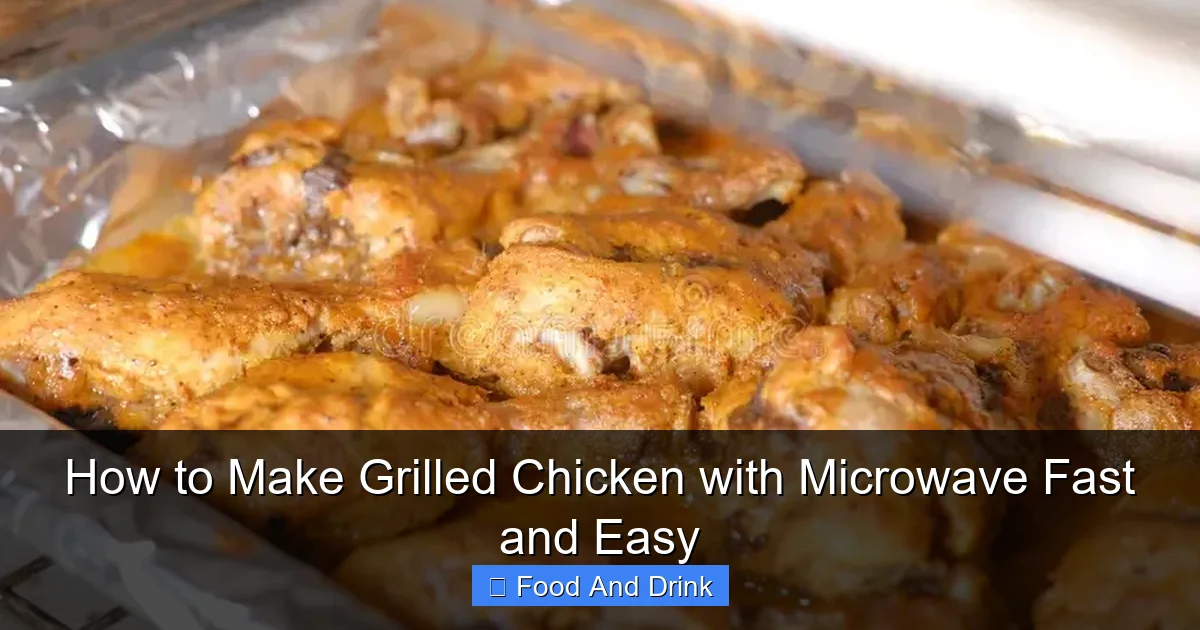
Visual guide about How to Make Grilled Chicken with Microwave Fast and Easy
Image source: thumbs.dreamstime.com
Now for the fun part—actually cooking the chicken! This method is designed to be foolproof, even if you’ve never cooked chicken in the microwave before. Follow these steps carefully, and you’ll end up with tender, flavorful chicken every time.
Step 1: Prep the Chicken
Start by taking your chicken out of the fridge and letting it sit for 10–15 minutes. This brings it closer to room temperature, which helps it cook more evenly. While it’s resting, pat it dry with paper towels. Moisture on the surface can create steam and make the chicken soggy, so drying is key.
If you’re using chicken breasts and they’re uneven in thickness, gently pound the thicker end with a meat mallet or rolling pin. This ensures the whole piece cooks at the same rate. For thighs or drumsticks, you can skip this step—they’re naturally more uniform.
Step 2: Season or Marinate
Now it’s time to add flavor. You have two options: a quick dry rub or a short marinade.
For a dry rub, mix 1 teaspoon salt, ½ teaspoon black pepper, 1 teaspoon garlic powder, 1 teaspoon onion powder, ½ teaspoon dried thyme, and ½ teaspoon smoked paprika (for that grilled taste). Rub this mixture all over the chicken, making sure to get under the skin if possible. This helps the seasoning penetrate deeper.
For a quick marinade, whisk together 2 tablespoons olive oil, 1 tablespoon lemon juice, 1 teaspoon garlic powder, 1 teaspoon onion powder, ½ teaspoon salt, and ½ teaspoon black pepper. Place the chicken in a bowl, pour the marinade over it, and toss to coat. Let it sit for at least 10 minutes—or up to 30 minutes if you have time. The acid in the lemon juice helps tenderize the meat, while the oil keeps it moist during cooking.
Step 3: Arrange in the Microwave
Place the seasoned chicken in a microwave-safe dish. Arrange the pieces in a single layer, skin-side up if applicable. Don’t overcrowd the dish—leave a little space between each piece so steam can circulate. Overcrowding leads to uneven cooking and steaming instead of “grilling.”
If you’re cooking multiple pieces, place the thicker parts (like drumsticks) around the edge of the dish, where the microwave heats more intensely. The center is cooler, so thinner pieces like breast tenders can go there.
Step 4: Cover and Cook
Cover the dish with a microwave-safe lid or a plate. If you don’t have either, use a sheet of microwave-safe plastic wrap, but leave one corner slightly open to vent steam. This prevents pressure buildup and keeps the chicken from exploding (yes, that can happen!).
Set your microwave to medium power (50–70%). Cooking on high can cause the outside to overcook while the inside stays raw. Medium power allows heat to penetrate evenly.
Cook for 6 minutes per pound as a general rule. For example, if you have 1 pound of chicken thighs, cook for 6 minutes. But this is just a starting point—microwaves vary in strength.
After the first 3 minutes, pause the microwave, carefully remove the dish (it will be hot!), and flip each piece of chicken over. This ensures both sides cook evenly. Return the dish to the microwave and continue cooking for the remaining time.
Step 5: Check the Temperature
Once the cooking time is up, use a food thermometer to check the internal temperature. Insert it into the thickest part of the chicken, avoiding bone. The chicken is safe to eat when it reaches 165°F (74°C).
If it’s not quite there, return it to the microwave in 1-minute intervals, checking after each. Overcooking is the enemy of juicy chicken, so go slow at the end.
Step 6: Rest and Serve
Let the chicken rest for 3–5 minutes before serving. This allows the juices to redistribute, keeping the meat moist. During this time, you can prepare a side salad, rice, or whatever you’re serving with it.
If you want that authentic grilled look and char, here’s a pro tip: heat a skillet over high heat for 1–2 minutes. Add a little oil, then sear the chicken for 30–60 seconds per side. The microwave has already cooked it through, so this is just for texture and color. You can also use an air fryer on high for 2–3 minutes.
Tips for Perfect Microwave Grilled Chicken

Visual guide about How to Make Grilled Chicken with Microwave Fast and Easy
Image source: platetopalateblog.com
Even with the right steps, a few extra tips can take your chicken from good to great. These are the secrets I’ve learned from trial and error—and they make a big difference.
Use a Turntable (or Rotate Manually)
Most microwaves have a rotating turntable, which helps distribute heat evenly. If yours doesn’t, or if it’s not working, rotate the dish 180 degrees halfway through cooking. This prevents hot spots and ensures all sides cook uniformly.
Add Moisture to Prevent Drying
Microwaves can dry out food quickly. To combat this, add a splash of liquid to the dish—1–2 tablespoons of water, broth, or lemon juice. This creates steam, which helps keep the chicken moist. Just don’t overdo it, or you’ll end up with poached chicken instead of grilled.
Don’t Skip the Flip
Flipping the chicken halfway through is crucial. The top and bottom cook at different rates, and flipping ensures both sides get equal exposure to heat. Use tongs or a fork to avoid burning your fingers.
Adjust for Your Microwave
Microwaves vary in power. A 1200-watt model will cook faster than a 700-watt one. Start with the recommended time, but be ready to adjust. If your chicken is done early, great! If it needs more time, add it in small increments.
Experiment with Flavors
Once you’ve mastered the basics, get creative! Try a teriyaki marinade, a Cajun spice blend, or a Mediterranean mix with olive oil, oregano, and lemon. The microwave won’t burn delicate herbs like fresh basil or cilantro, so you can add them at the end for a fresh burst of flavor.
Use Leftovers Wisely
Grilled chicken with microwave tastes great cold, too! Store leftovers in an airtight container in the fridge for up to 4 days. Use them in salads, sandwiches, wraps, or grain bowls. You can also reheat gently in the microwave for 30–60 seconds.
Serving Suggestions and Meal Ideas
Now that you’ve made delicious grilled chicken with microwave, what do you do with it? The possibilities are endless! Here are some quick, tasty ideas to turn your chicken into a full meal.
Classic Grilled Chicken Plate
Serve the chicken with a side of steamed vegetables (also microwave-friendly!) and a baked potato or quinoa. Drizzle with a simple lemon-herb sauce made from olive oil, lemon juice, garlic, and parsley.
Chicken Caesar Salad
Slice the chicken and toss it with romaine lettuce, croutons, Parmesan cheese, and Caesar dressing. The warm chicken adds a nice contrast to the crisp greens.
Chicken Tacos or Wraps
Shred or slice the chicken and load it into soft tortillas with lettuce, tomato, avocado, and salsa. Add a dollop of sour cream or Greek yogurt for creaminess.
Grain Bowls
Start with a base of brown rice, quinoa, or farro. Top with chopped chicken, roasted veggies, chickpeas, and a tahini or peanut sauce. Perfect for meal prep!
Chicken Pasta
Toss sliced chicken with cooked pasta, olive oil, garlic, spinach, and a sprinkle of Parmesan. Add sun-dried tomatoes or artichokes for extra flavor.
Chicken Sandwich
Place a piece of chicken on a toasted bun with lettuce, tomato, and a smear of mayo or pesto. Add a slice of cheese if you like—it’ll melt from the warmth of the chicken.
Common Mistakes to Avoid
Even with the best intentions, things can go wrong. Here are the most common pitfalls and how to avoid them.
Cooking on High Power
High power cooks too fast, leading to rubbery, dry chicken. Always use medium power (50–70%) for even, gentle cooking.
Skipping the Thermometer
Guessing the doneness of chicken is risky. Undercooked chicken can make you sick, and overcooked chicken is tough. Always use a food thermometer.
Overcrowding the Dish
Piling chicken on top of each other steams instead of grills. Use a larger dish if needed, and leave space between pieces.
Not Letting It Rest
Cutting into chicken right after cooking lets all the juices escape. Resting for a few minutes keeps it moist and tender.
Using Boneless, Skinless Breasts Without Care
These cuts dry out easily. If you must use them, pound them evenly, marinate well, and monitor cooking time closely.
Conclusion
Making grilled chicken with microwave might sound unconventional, but it’s a game-changer for quick, healthy meals. It’s fast, easy, and delivers juicy, flavorful results—no grill required. Whether you’re cooking for one or feeding a family, this method saves time without sacrificing taste.
With the right ingredients, tools, and techniques, you can enjoy restaurant-quality chicken in under 20 minutes. Marinate for flavor, cook on medium power, flip halfway, and always check the temperature. Add a quick sear if you want that grilled finish, or enjoy it as-is for a simple, satisfying meal.
So the next time you’re short on time but craving something delicious, skip the drive-thru and fire up the microwave. Your taste buds—and your schedule—will thank you.
Frequently Asked Questions
Can I make grilled chicken with microwave if I don’t have a lid?
Yes! Use a microwave-safe plate or loosely cover with plastic wrap, leaving a small vent for steam to escape.
Why is my microwaved chicken rubbery?
This usually happens from cooking on high power or overcooking. Use medium power and check the temperature frequently to avoid this.
Can I freeze microwaved grilled chicken?
Yes, but it’s best to freeze it after cooking and cooling. Reheat gently in the microwave or oven to maintain texture.
Is it okay to eat the skin after microwaving?
Yes, the skin is safe to eat and adds flavor and moisture. It won’t get crispy like on a grill, but it’s still tasty.
Can I use frozen chicken?
It’s not recommended. Frozen chicken cooks unevenly in the microwave. Thaw it in the fridge overnight first for best results.
How do I add a grilled flavor without a grill?
Use smoked paprika in your seasoning, or finish the chicken in a hot skillet or air fryer for 1–2 minutes to add char.


