

Grilled chicken is the ultimate protein boost for salads—tender, flavorful, and incredibly versatile. With the right marinade, heat control, and slicing technique, you can make grilled chicken for salad that’s restaurant-quality at home.
Key Takeaways
- Marinate for at least 30 minutes: A good marinade infuses flavor and keeps chicken moist during grilling.
- Use a meat thermometer: Cook chicken to 165°F (74°C) for safety without overcooking.
- Preheat your grill properly: High, even heat ensures a nice sear and prevents sticking.
- Let it rest before slicing: Resting allows juices to redistribute, keeping the meat tender.
- Slice against the grain: This makes each bite more tender and easier to eat in a salad.
- Choose the right cut: Boneless, skinless breasts or thighs work best for salads—thighs are juicier, breasts are leaner.
- Season simply but effectively: Salt, pepper, garlic, and herbs go a long way in enhancing natural chicken flavor.
Key Takeaways
- Understanding how to make grilled chicken for salad: Provides essential knowledge
Quick Answers to Common Questions
How long should I marinate chicken for grilling?
Marinate chicken for at least 30 minutes, but no more than 4 hours for breasts or 8 hours for thighs. Over-marinating can make the meat mushy.
What temperature should grilled chicken reach?
Grilled chicken should reach an internal temperature of 165°F (74°C) to be safe to eat. Use a meat thermometer to check.
Can I use frozen chicken for grilling?
It’s best to thaw chicken completely before grilling. Frozen chicken cooks unevenly and can lead to dry spots or undercooked areas.
Should I oil the chicken or the grill?
Oil the grill grates to prevent sticking. The marinade already contains oil, so you don’t need to oil the chicken itself.
Can I grill chicken in advance for salads?
Yes! Grilled chicken can be made ahead, cooled, and stored in the fridge for up to 4 days. Slice and add to salads as needed.
📑 Table of Contents
- Why Grilled Chicken Belongs in Every Salad
- Choosing the Right Chicken Cut for Grilling
- Essential Tools and Equipment
- Mastering the Marinade: Flavor That Lasts
- Grilling Techniques for Perfect Results
- Slicing and Serving: The Final Touch
- Salad Pairing Ideas and Flavor Combinations
- Common Mistakes to Avoid
- Make-Ahead and Storage Tips
- Conclusion
Why Grilled Chicken Belongs in Every Salad
There’s something magical about a fresh, crisp salad topped with a warm slice of perfectly grilled chicken. It’s not just about adding protein—it’s about transforming a simple bowl of greens into a satisfying, restaurant-worthy meal. Whether you’re meal prepping for the week or whipping up a quick dinner, grilled chicken for salad brings texture, flavor, and balance to the plate.
But here’s the thing: not all grilled chicken is created equal. Overcooked, dry, or bland chicken can ruin an otherwise delicious salad. The secret to success lies in preparation, timing, and technique. When done right, grilled chicken becomes the star of your salad—juicy on the inside, slightly charred on the outside, and packed with savory flavor. It’s the kind of ingredient that makes you look forward to eating your veggies.
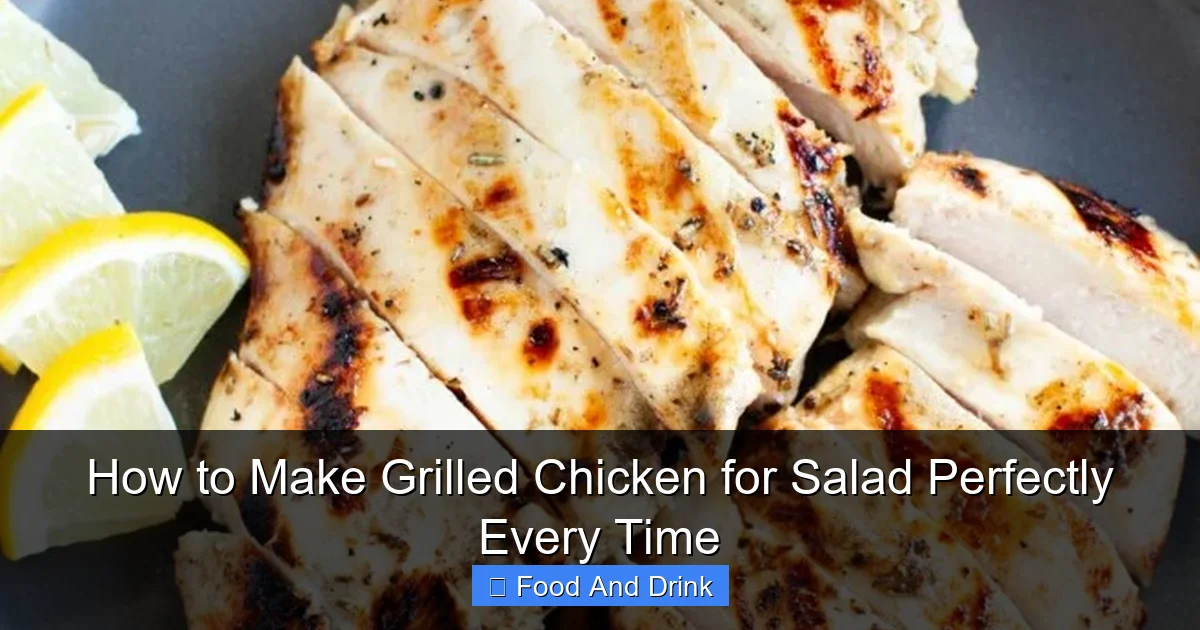
Choosing the Right Chicken Cut for Grilling
Before you even think about lighting the grill, you need to pick the right cut of chicken. The two most popular options for grilled chicken salads are boneless, skinless chicken breasts and boneless, skinless chicken thighs. Each has its pros and cons, and your choice depends on your taste preferences and dietary goals.
Visual guide about How to Make Grilled Chicken for Salad Perfectly Every Time
Image source: joyfullymad.com
Boneless, Skinless Chicken Breasts
Chicken breasts are lean, low in fat, and high in protein—making them a favorite for health-conscious eaters. They grill quickly and absorb marinades well. However, because they’re so lean, they can dry out easily if overcooked. To avoid this, it’s crucial to monitor cooking time and use a meat thermometer.
Tip: Pound the breasts to an even thickness (about ½ inch) using a meat mallet or rolling pin. This ensures even cooking and prevents the thinner parts from drying out while the thicker parts finish cooking.
Boneless, Skinless Chicken Thighs
Chicken thighs are darker meat, which means they’re higher in fat and naturally more tender and juicy. They’re more forgiving on the grill—even if you slightly overcook them, they’ll still be moist. This makes thighs a great choice for beginners or anyone who wants a foolproof grilled chicken experience.
Thighs also have a richer, more robust flavor that stands up well to bold marinades and spice rubs. If you’re making a salad with strong flavors like feta, olives, or balsamic vinaigrette, thighs can hold their own.
Which Should You Choose?
If you’re aiming for a light, low-calorie salad, go with chicken breasts. If you want maximum flavor and juiciness with less risk of drying out, choose thighs. You can even mix both—grill a few breasts for lean protein and a few thighs for richness. Just be sure to adjust cooking times accordingly, as thighs take a bit longer to cook through.
Essential Tools and Equipment
You don’t need a professional kitchen or fancy gear to make great grilled chicken for salad. But having the right tools makes the process easier, safer, and more consistent. Here’s what you’ll need:
Visual guide about How to Make Grilled Chicken for Salad Perfectly Every Time
Image source: sundaysuppermovement.com
Grill (Gas, Charcoal, or Indoor)
Any grill will work—gas, charcoal, or even an indoor grill pan. Gas grills offer quick heat and easy temperature control. Charcoal grills give that classic smoky flavor. Indoor grill pans are perfect for apartment dwellers or rainy days. The key is to get your cooking surface hot before adding the chicken.
Meat Thermometer
This is non-negotiable. Relying on time alone is risky—chicken thickness varies, and grill temperatures fluctuate. A digital instant-read thermometer ensures your chicken reaches the safe internal temperature of 165°F (74°C) without overcooking. Insert it into the thickest part of the meat, avoiding bone or fat.
Tongs and Spatula
Use long-handled tongs to flip the chicken—this keeps your hands away from the heat and prevents tearing the meat. A sturdy spatula can help with thicker cuts or if you’re grilling chicken cutlets.
Meat Mallet or Rolling Pin
As mentioned earlier, pounding chicken breasts to even thickness ensures uniform cooking. A meat mallet with a flat side works best, but a rolling pin or even the bottom of a heavy pan can do in a pinch.
Marinade Container or Resealable Bag
You’ll need something to hold your marinade and chicken while it soaks. A resealable plastic bag is ideal—it takes up less space, allows you to massage the marinade into the meat, and makes cleanup a breeze. Glass or ceramic containers work too, especially if you’re marinating for several hours.
Cutting Board and Sharp Knife
After grilling, you’ll need to slice the chicken. A sharp chef’s knife and a clean cutting board are essential. A dull knife can tear the meat, making it look messy in your salad.
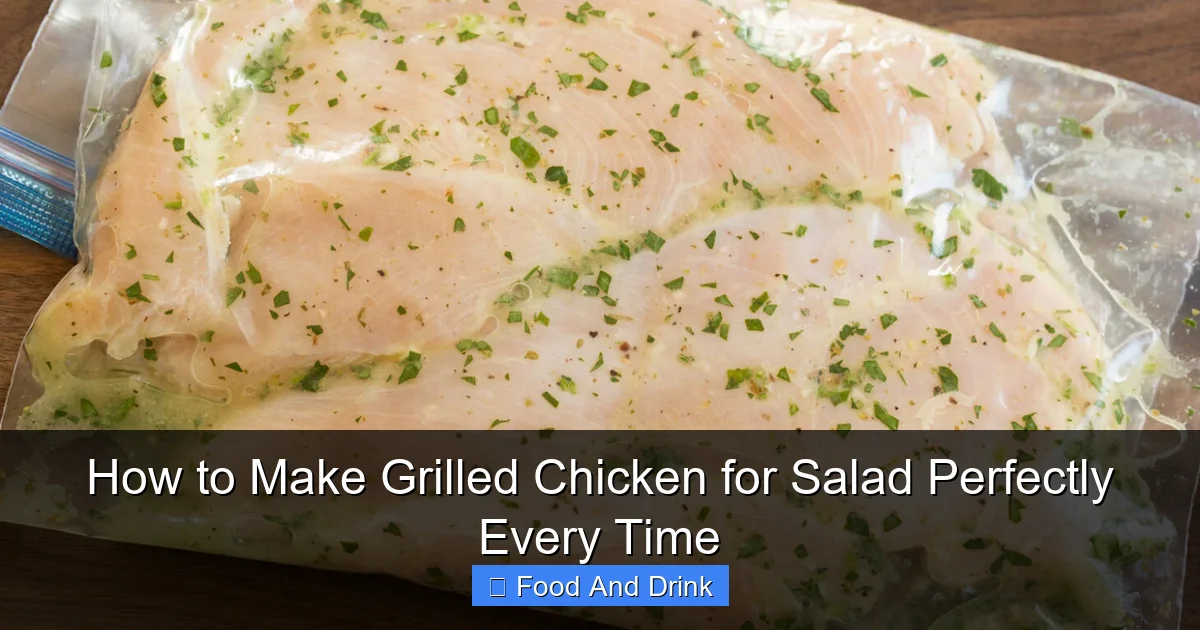
Mastering the Marinade: Flavor That Lasts
A great marinade does more than just add flavor—it tenderizes the meat and helps retain moisture during grilling. The best marinades have three key components: acid, oil, and seasoning.
Visual guide about How to Make Grilled Chicken for Salad Perfectly Every Time
Image source: cookingclassy.com
The Role of Acid
Acidic ingredients like lemon juice, vinegar, yogurt, or buttermilk break down muscle fibers, making the chicken more tender. They also infuse flavor deep into the meat. Common acids include:
- Lemon or lime juice
- Apple cider vinegar
- Balsamic vinegar
- White wine vinegar
- Greek yogurt (also adds creaminess)
Use about ¼ to ⅓ cup of acid per pound of chicken. Don’t overdo it—too much acid can make the chicken mushy.
The Role of Oil
Oil helps carry fat-soluble flavors and prevents the chicken from sticking to the grill. It also keeps the meat moist. Olive oil is a popular choice, but avocado oil, canola oil, or even melted butter work well. Use about 2–3 tablespoons per pound of chicken.
The Role of Seasoning
This is where you get creative. Salt and pepper are essential, but don’t stop there. Add garlic, onion powder, smoked paprika, dried herbs (like oregano, thyme, or rosemary), or even a splash of soy sauce or Worcestershire for umami depth.
Sample Marinade Recipes
Lemon-Herb Marinade: ¼ cup olive oil, 3 tbsp lemon juice, 2 cloves minced garlic, 1 tsp dried oregano, 1 tsp salt, ½ tsp black pepper.
Spicy Southwest Marinade: ⅓ cup olive oil, ¼ cup lime juice, 1 tbsp chili powder, 1 tsp cumin, 1 tsp smoked paprika, 1 clove garlic, 1 tsp salt.
Asian-Inspired Marinade: ¼ cup soy sauce, 2 tbsp rice vinegar, 1 tbsp honey, 1 tbsp sesame oil, 1 clove garlic, 1 tsp grated ginger.
How Long to Marinate
For best results, marinate chicken for at least 30 minutes. This gives the flavors time to penetrate. You can go up to 4 hours for breasts and 6–8 hours for thighs. Avoid marinating too long—especially with strong acids—as it can degrade the texture.
Tip: Always marinate in the refrigerator, never at room temperature. And don’t reuse marinade that’s touched raw chicken unless you boil it first.
Grilling Techniques for Perfect Results
Now that your chicken is marinated and your tools are ready, it’s time to grill. The goal is to get a nice sear on the outside while keeping the inside juicy. Here’s how to do it right.
Preheat the Grill
Turn on your grill and let it heat up for at least 10–15 minutes. You want the grates to be hot—around 400–450°F (204–232°C). This high heat creates a caramelized crust and prevents sticking.
Pro tip: Clean the grates with a wire brush before heating. Then lightly oil them with a paper towel dipped in oil and tongs to prevent sticking.
Grill Setup: Direct vs. Indirect Heat
For chicken breasts and thighs, use direct heat—place the meat directly over the flame or coals. This gives you that classic grilled char. If your chicken is thicker than 1 inch, you can start with direct heat to sear, then move to indirect heat to finish cooking without burning.
Indirect heat is useful for larger cuts or if you’re worried about flare-ups. On a gas grill, turn off one burner and place the chicken over it. On charcoal, push the coals to one side.
Cooking Time and Temperature
Chicken breasts (½ to ¾ inch thick) usually take 6–8 minutes per side over medium-high heat. Thighs take 7–9 minutes per side. But again, time varies—always use a thermometer.
Insert the thermometer into the thickest part of the meat. When it reads 165°F (74°C), the chicken is safe to eat. Remove it from the grill immediately—carryover cooking will raise the temperature a few more degrees.
Flipping and Monitoring
Flip the chicken only once during cooking. Use tongs—don’t pierce it with a fork, as that lets juices escape. Watch for flare-ups caused by dripping fat. If flames appear, move the chicken to a cooler part of the grill temporarily.
Don’t press down on the chicken with a spatula. This squeezes out juices and dries it out.
Resting the Chicken
This step is often skipped, but it’s crucial. Let the grilled chicken rest for 5–10 minutes before slicing. During this time, the juices redistribute throughout the meat, keeping it moist and tender.
Cover loosely with foil to keep it warm, but don’t wrap tightly—this can steam the chicken and make it soggy.
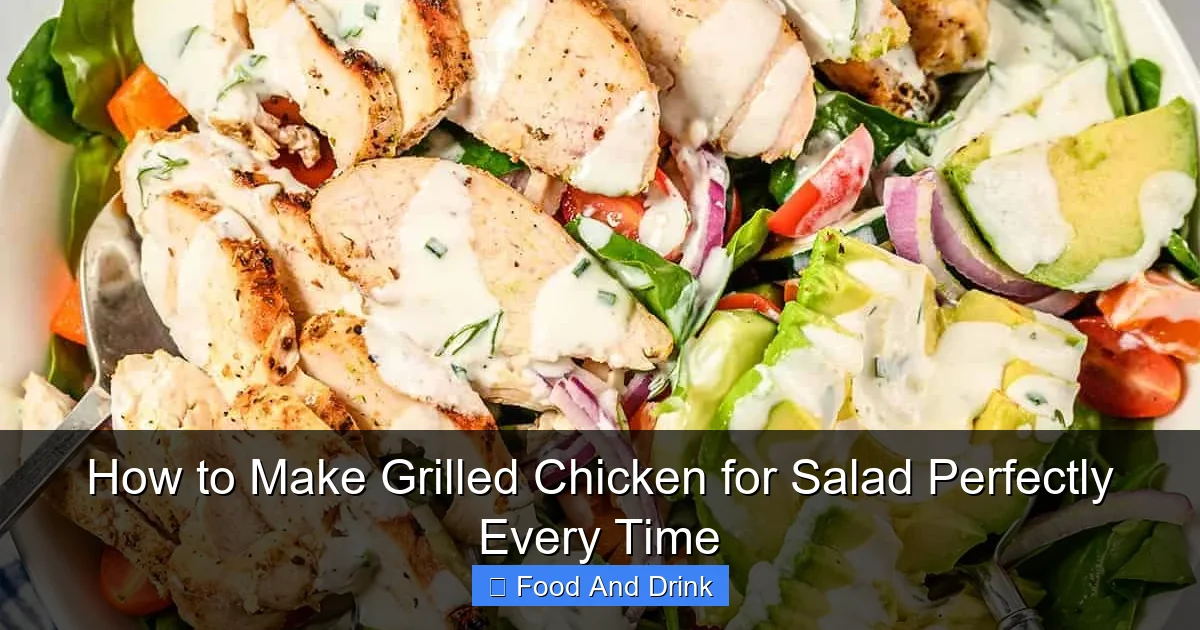
Slicing and Serving: The Final Touch
How you slice your grilled chicken can make or break your salad. The goal is tender, easy-to-eat pieces that blend well with the other ingredients.
Slice Against the Grain
Always slice chicken against the grain—this means cutting perpendicular to the muscle fibers. This shortens the fibers, making each bite more tender. Look for the direction of the lines in the meat and slice across them.
For chicken breasts, the grain usually runs lengthwise, so slice widthwise into ¼- to ½-inch strips. For thighs, the grain is less obvious, but slicing thinly still helps.
Warm or Cold?
Grilled chicken can be served warm or cold, depending on your salad. Warm chicken adds a comforting contrast to crisp greens. Cold chicken is great for make-ahead meals or picnic salads.
If serving cold, let the chicken cool completely before slicing and storing. Refrigerate in an airtight container for up to 4 days.
Portioning Tips
A typical salad serving uses about 4–6 ounces of cooked chicken (roughly the size of a deck of cards). Slice it just before serving to keep it fresh and juicy.
For meal prep, slice all the chicken at once and store it separately from the salad ingredients. Add it just before eating to prevent sogginess.
Salad Pairing Ideas and Flavor Combinations
Grilled chicken is incredibly versatile—it pairs well with almost any salad. Here are some delicious combinations to inspire your next meal:
Mediterranean Salad
Grilled chicken, mixed greens, cherry tomatoes, cucumber, red onion, Kalamata olives, feta cheese, and a lemon-olive oil vinaigrette. Add fresh herbs like parsley or dill for extra brightness.
Asian Chicken Salad
Grilled chicken, napa cabbage, shredded carrots, edamame, mandarin oranges, sliced almonds, and a ginger-soy dressing. Top with crispy wonton strips for crunch.
Southwest Salad
Grilled chicken, romaine, black beans, corn, avocado, cherry tomatoes, red bell pepper, and a lime-cilantro dressing. Sprinkle with cotija cheese and tortilla strips.
Caprese Salad with a Twist
Grilled chicken, arugula, fresh mozzarella, ripe tomatoes, basil, and a balsamic glaze. Drizzle with extra virgin olive oil and season with flaky sea salt.
Classic Cobb Salad
Grilled chicken, chopped romaine, hard-boiled eggs, bacon, avocado, blue cheese, and cherry tomatoes. Serve with a creamy ranch or blue cheese dressing.
Simple Green Salad
Sometimes less is more. Toss grilled chicken with mixed greens, a light vinaigrette, and a sprinkle of Parmesan. Perfect for a quick lunch.
Common Mistakes to Avoid
Even experienced cooks can make mistakes when grilling chicken. Here are the most common pitfalls and how to avoid them:
Overcooking the Chicken
This is the #1 mistake. Overcooked chicken is dry, tough, and unappetizing. Always use a meat thermometer and remove the chicken at 165°F (74°C). Remember, it will continue to cook slightly after removal.
Not Preheating the Grill
Adding chicken to a cold grill leads to uneven cooking and sticking. Always preheat for at least 10 minutes.
Skipping the Marinade
While you can grill chicken with just salt and pepper, a marinade adds flavor and moisture. Even a quick 15-minute soak makes a difference.
Flipping Too Often
Constant flipping prevents a good sear and can tear the meat. Flip only once, halfway through cooking.
Slicing Too Soon
Cutting into hot chicken releases all the juices. Always let it rest for 5–10 minutes before slicing.
Using the Wrong Cut
Don’t use bone-in, skin-on chicken for salads—it’s harder to slice and eat. Stick to boneless, skinless cuts for best results.
Make-Ahead and Storage Tips
Grilled chicken is a meal prep hero. Here’s how to store it for maximum freshness and flavor.
Refrigeration
Store cooked, cooled chicken in an airtight container in the fridge for up to 4 days. Slice it before storing if you plan to use it in salads throughout the week.
Freezing
You can freeze grilled chicken for up to 3 months. Wrap individual portions in plastic wrap, then place in a freezer bag. Thaw in the fridge overnight before using.
Reheating
To reheat, place chicken in a skillet over low heat with a splash of broth or water to restore moisture. You can also microwave it, but cover it to prevent drying out.
Meal Prep Strategy
Grill a batch of chicken on Sunday and use it in salads all week. Store the chicken separately from greens, dressing, and toppings. Assemble salads daily to keep ingredients crisp.
Conclusion
Making grilled chicken for salad doesn’t have to be complicated. With the right cut, a flavorful marinade, proper grilling technique, and smart slicing, you can create a protein-packed salad topping that’s juicy, delicious, and satisfying every time. Whether you’re cooking for one or feeding a family, this method delivers consistent results.
Remember: great grilled chicken starts with preparation. Marinate, preheat, monitor temperature, rest, and slice with care. Once you master these steps, you’ll never settle for dry, bland chicken again. So fire up that grill, toss together your favorite greens, and enjoy a salad that’s anything but ordinary.
Frequently Asked Questions
Can I use a grill pan instead of an outdoor grill?
Absolutely. A grill pan on the stovetop works great for making grilled chicken for salad, especially when outdoor grilling isn’t an option. Just preheat it well and use the same cooking principles.
What’s the best way to prevent chicken from sticking to the grill?
Preheat the grill, clean the grates, and lightly oil them before adding the chicken. A hot, oiled surface prevents sticking and promotes a nice sear.
Is it safe to reuse marinade?
Only if you boil it first to kill bacteria from the raw chicken. Otherwise, discard used marinade or set aside a portion before adding raw meat.
Can I grill chicken thighs and breasts at the same time?
Yes, but thighs take longer to cook. Start the thighs first, then add the breasts partway through so both finish around the same time.
How do I know when chicken is done without a thermometer?
While a thermometer is best, you can check by cutting into the thickest part—juices should run clear, and the meat should no longer be pink. But this method risks overcooking.
What’s the best way to slice grilled chicken for salad?
Let the chicken rest for 5–10 minutes, then slice it thinly against the grain. This ensures tender, easy-to-eat pieces that blend well with salad ingredients.


