
Grilled chicken on the stove is a fast, flavorful, and healthy way to enjoy juicy, tender meat without a grill. With the right tools, marinade, and cooking technique, you can achieve restaurant-quality results right in your kitchen.
Key Takeaways
- Choose the right cut: Boneless, skinless chicken breasts or thighs work best for stovetop grilling.
- Marinate for flavor and tenderness: A 30-minute to 2-hour marinade with acid, oil, and seasonings enhances taste and moisture.
- Use a grill pan or cast iron skillet: These provide even heat and beautiful grill marks.
- Preheat your pan properly: A hot pan ensures a good sear and prevents sticking.
- Cook to the right temperature: Use a meat thermometer to reach 165°F (74°C) for safe, juicy chicken.
- Rest before slicing: Letting the chicken rest for 5 minutes helps retain juices.
- Customize with seasonings: Experiment with herbs, spices, and sauces to match your taste.
Quick Answers to Common Questions
Can I use a regular frying pan instead of a grill pan?
Yes, a heavy-duty skillet—especially cast iron—works well. It won’t give grill marks, but it can still sear the chicken beautifully.
How do I prevent chicken from sticking to the pan?
Preheat the pan thoroughly, use the right oil, and don’t move the chicken too soon. Let it develop a crust before flipping.
Can I grill frozen chicken on the stove?
It’s not recommended. Frozen chicken cooks unevenly and can be unsafe. Always thaw it in the fridge before cooking.
How long does grilled chicken last in the fridge?
Properly stored, it lasts 3 to 4 days in an airtight container. Reheat gently to avoid drying out.
Can I use the same marinade for chicken and vegetables?
Yes, but reserve a portion before adding raw chicken. Use the reserved marinade for veggies to avoid cross-contamination.
📑 Table of Contents
- Why Grilled Chicken on the Stove Is a Game-Changer
- Choosing the Right Chicken Cut
- Essential Tools for Stovetop Grilling
- Marinating for Maximum Flavor and Tenderness
- Step-by-Step Guide to Cooking Grilled Chicken on the Stove
- Tips for Perfect Results Every Time
- Serving Suggestions and Meal Ideas
- Common Mistakes to Avoid
- Conclusion
Why Grilled Chicken on the Stove Is a Game-Changer
Grilled chicken is a staple in kitchens around the world. It’s lean, high in protein, and incredibly versatile. But what if you don’t have a backyard grill or it’s raining outside? That’s where learning how to cook grilled chicken on the stove comes in. It’s not only possible—it’s actually one of the fastest and most effective ways to get that smoky, charred flavor with tender, juicy meat.
The beauty of stovetop grilling lies in its simplicity and speed. With just a few tools and a little know-how, you can recreate the grilled taste indoors. Whether you’re cooking for one or feeding a family, this method delivers consistent results every time. Plus, it’s perfect for meal prep—cook a batch of grilled chicken and use it in salads, wraps, sandwiches, or grain bowls throughout the week.
But here’s the secret: it’s not just about throwing chicken on a pan. To truly master how to cook grilled chicken on the stove quickly and tenderly, you need the right technique. From choosing the best cut to mastering heat control, every step matters. In this guide, we’ll walk you through everything you need to know to make perfect stovetop grilled chicken—every single time.
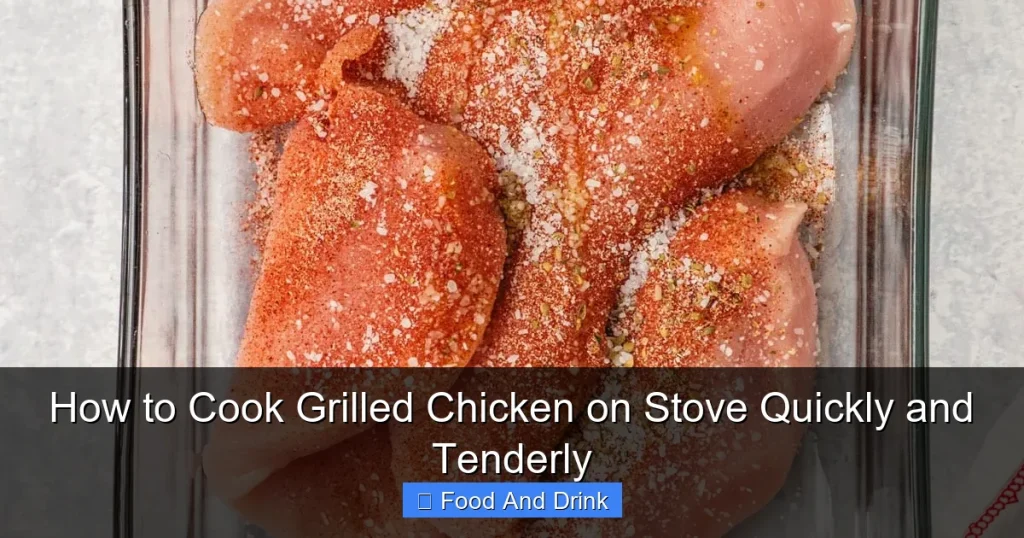
Choosing the Right Chicken Cut
Visual guide about How to Cook Grilled Chicken on Stove Quickly and Tenderly
Image source: jessicagavin.com
Not all chicken cuts are created equal when it comes to stovetop grilling. The cut you choose will affect cooking time, texture, and overall flavor. Let’s break down your options so you can pick the best one for your meal.
Boneless, Skinless Chicken Breasts
This is the most popular choice for grilled chicken—and for good reason. Chicken breasts are lean, cook quickly, and absorb marinades well. They’re ideal for those watching their fat intake or looking for a high-protein, low-calorie option.
However, chicken breasts can dry out easily if overcooked. That’s why it’s crucial to monitor the internal temperature and avoid high heat for too long. To prevent dryness, look for breasts that are uniform in thickness. If they’re uneven, you can pound them gently with a meat mallet or rolling pin to create an even surface. This ensures even cooking and helps the chicken stay tender.
Boneless, Skinless Chicken Thighs
If you prefer more flavor and juiciness, chicken thighs are your best bet. They have a higher fat content, which makes them more forgiving and less likely to dry out. Thighs also have a richer, more satisfying taste that stands up well to bold marinades and spices.
Because they’re slightly thicker than breasts, thighs take a bit longer to cook—usually 6 to 8 minutes per side over medium-high heat. But the extra time is worth it. The result is meat that’s moist, tender, and packed with flavor. Thighs are especially great if you’re new to stovetop grilling and want a cut that’s harder to overcook.
Bone-In, Skin-On Chicken Pieces
While less common for stovetop grilling, bone-in chicken pieces like drumsticks or thighs can work if you have a heavy-duty pan and patience. The bone helps retain moisture, and the skin crisps up beautifully when seared properly.
The downside? These cuts take longer to cook—often 20 to 25 minutes—and require flipping or rotating to ensure even doneness. They’re better suited for lower, slower cooking methods like braising or roasting. But if you’re determined to grill them on the stove, use a lid to trap heat and help the chicken cook through without burning the skin.
Ground Chicken or Chicken Patties
For a twist on grilled chicken, try forming ground chicken into patties. These cook quickly—about 4 to 5 minutes per side—and are perfect for burgers or tacos. Just make sure to season the meat well and avoid pressing down on the patties while cooking, as this squeezes out the juices.
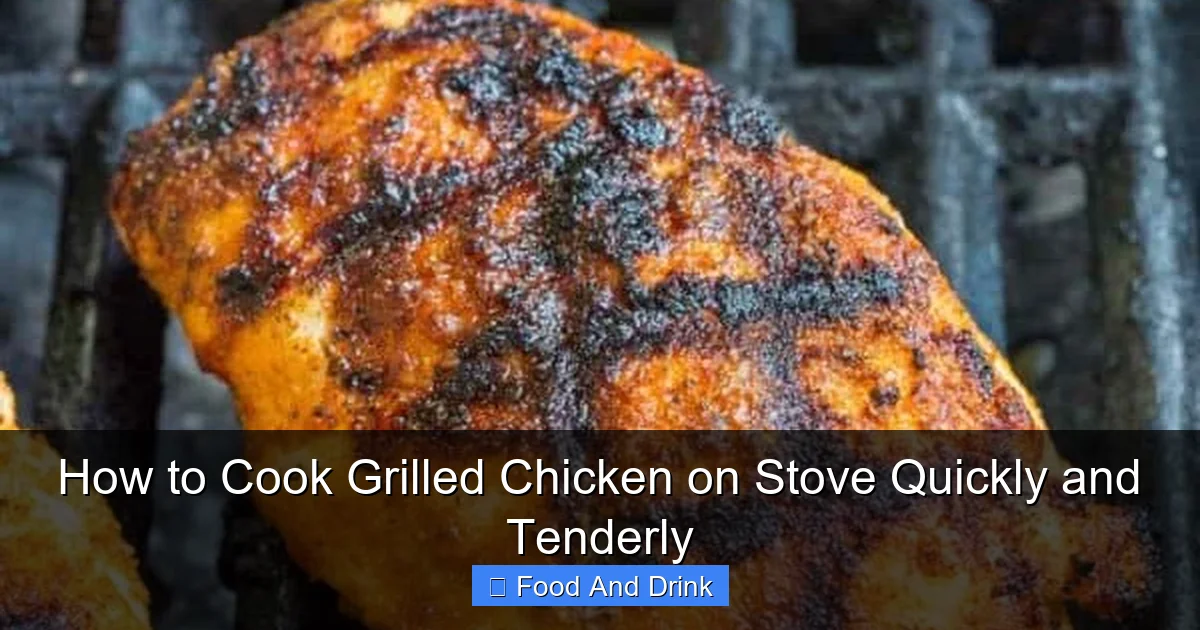
Essential Tools for Stovetop Grilling
Visual guide about How to Cook Grilled Chicken on Stove Quickly and Tenderly
Image source: thegunnysack.com
You don’t need a fancy grill to get that authentic grilled flavor. With the right tools, your stovetop can deliver impressive results. Here’s what you’ll need to get started.
Grill Pan
A grill pan is the star of the show when it comes to stovetop grilling. Its ridged surface creates those classic grill marks and allows fat to drip away from the meat, giving you that charred, smoky taste.
Look for a heavy-duty, non-stick or cast iron grill pan. Cast iron is especially great because it retains heat well and develops a natural non-stick surface over time. Avoid flimsy aluminum pans—they don’t distribute heat evenly and can warp under high heat.
When using a grill pan, preheat it over medium-high heat for 5 to 7 minutes before adding the chicken. This ensures a good sear and prevents sticking. Lightly oil the ridges with a high-smoke-point oil like canola, avocado, or grapeseed oil to keep the chicken from sticking.
Cast Iron Skillet
If you don’t have a grill pan, a cast iron skillet is the next best thing. It heats evenly, holds temperature well, and can achieve a beautiful crust on your chicken. While it won’t give you those signature grill marks, it still delivers a delicious char and caramelization.
The key is to preheat the skillet thoroughly and avoid moving the chicken too soon. Let it sear for 2 to 3 minutes before flipping to develop a golden-brown crust.
Tongs and Spatula
Use long-handled tongs to flip and move the chicken. They give you better control and keep your hands safe from the heat. A thin, flexible spatula can also help lift the chicken without tearing it, especially if it’s sticking slightly.
Meat Thermometer
This is non-negotiable. Relying on time alone is risky—chicken can look done on the outside but still be undercooked inside. A digital meat thermometer takes the guesswork out of cooking.
Insert the probe into the thickest part of the chicken, avoiding bone or fat. The chicken is safe to eat when it reaches an internal temperature of 165°F (74°C). For best results, aim to remove it at 160°F (71°C), as the temperature will rise a few degrees while resting.
Cutting Board and Knife
After cooking, transfer the chicken to a clean cutting board and let it rest. Use a sharp knife to slice it against the grain for maximum tenderness.
Marinating for Maximum Flavor and Tenderness
Marinating is one of the most important steps in how to cook grilled chicken on the stove quickly and tenderly. It’s not just about flavor—it also helps keep the meat moist during cooking.
Why Marinate?
Chicken, especially breasts, can dry out quickly when grilled. A good marinade does two things: it infuses the meat with flavor and helps retain moisture. The acid in the marinade (like lemon juice, vinegar, or yogurt) breaks down proteins, making the meat more tender. The oil coats the surface, preventing it from drying out.
Basic Marinade Formula
A great marinade has three key components:
– **Acid:** Lemon juice, lime juice, vinegar, or yogurt. This tenderizes the meat.
– **Oil:** Olive oil, avocado oil, or sesame oil. This adds moisture and helps carry flavor.
– **Seasonings:** Salt, pepper, garlic, herbs, spices, or soy sauce. This is where you get creative.
Here’s a simple, all-purpose marinade recipe:
– 1/4 cup olive oil
– 2 tablespoons lemon juice
– 2 cloves garlic, minced
– 1 teaspoon salt
– 1/2 teaspoon black pepper
– 1 teaspoon dried oregano or thyme
Mix everything in a bowl or zip-top bag, add the chicken, and refrigerate.
How Long to Marinate
The ideal marinating time depends on the cut and your schedule:
– **30 minutes to 1 hour:** Great for a quick flavor boost. Works well for thin cuts or when you’re short on time.
– **1 to 2 hours:** The sweet spot for most chicken. Allows flavors to penetrate without over-tenderizing.
– **Overnight (up to 12 hours):** Best for maximum flavor, especially with thighs or bone-in cuts.
Avoid marinating chicken breasts for more than 12 hours—the acid can make the texture mushy.
Marinade Ideas to Try
– **Mediterranean:** Olive oil, lemon juice, garlic, oregano, salt, and pepper.
– **Asian-Inspired:** Soy sauce, rice vinegar, ginger, garlic, sesame oil, and a touch of honey.
– **Spicy:** Lime juice, olive oil, chili powder, cumin, garlic, and cayenne.
– **Herb-Forward:** Yogurt, olive oil, rosemary, thyme, garlic, and lemon zest.
Always reserve a small portion of the marinade before adding raw chicken if you plan to use it as a sauce. Never reuse marinade that’s touched raw meat unless you boil it first.
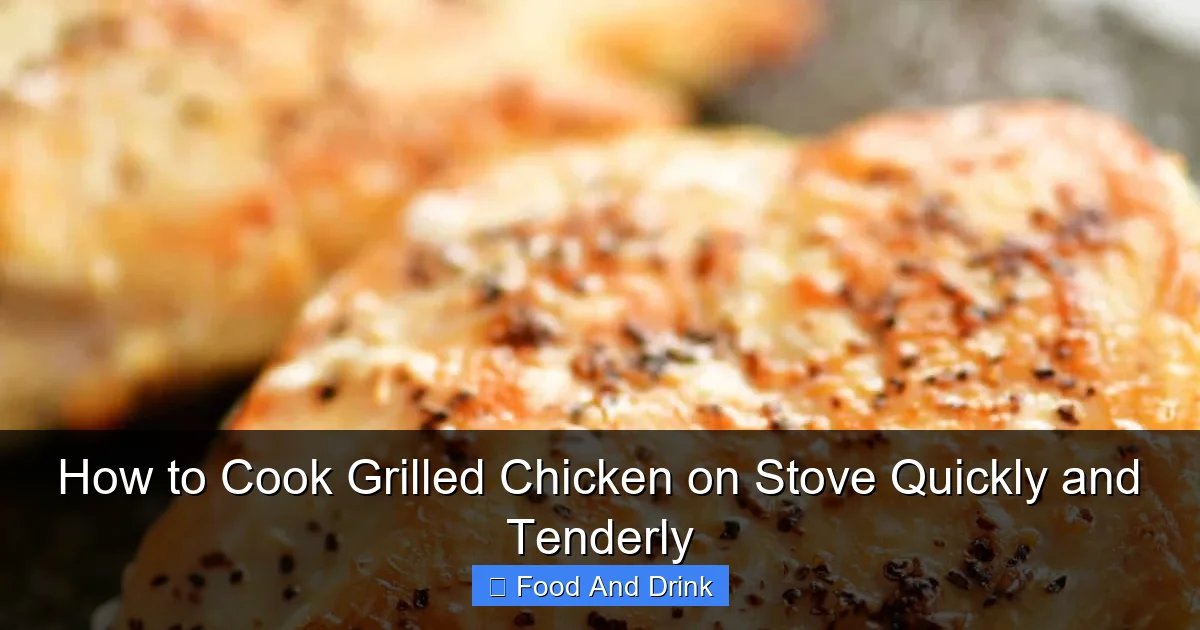
Step-by-Step Guide to Cooking Grilled Chicken on the Stove
Now that you’ve got your chicken, tools, and marinade ready, it’s time to cook. Follow these steps for perfectly grilled chicken every time.
Step 1: Prep the Chicken
Remove the chicken from the marinade and pat it dry with paper towels. This is crucial—wet chicken won’t sear properly and will steam instead of grill. Let it sit at room temperature for 10 to 15 minutes. This helps it cook more evenly.
Step 2: Preheat the Pan
Place your grill pan or cast iron skillet on the stove over medium-high heat. Let it heat for 5 to 7 minutes. You’ll know it’s ready when a few drops of water sizzle and evaporate instantly.
Step 3: Oil the Pan
Lightly brush or spray the pan with oil. Use a high-smoke-point oil like canola, avocado, or grapeseed. Don’t overdo it—too much oil can cause flare-ups and make the chicken greasy.
Step 4: Cook the Chicken
Place the chicken in the pan in a single layer, leaving space between each piece. Don’t overcrowd—this lowers the pan’s temperature and leads to steaming instead of searing.
For boneless, skinless chicken breasts:
– Cook for 5 to 7 minutes on the first side, until golden brown and grill marks form.
– Flip and cook for another 5 to 7 minutes, or until the internal temperature reaches 160°F (71°C).
For chicken thighs:
– Cook for 6 to 8 minutes per side, depending on thickness.
Avoid moving the chicken too soon. Let it develop a crust before flipping.
Step 5: Check the Temperature
Use a meat thermometer to check the thickest part of the chicken. It’s done when it reaches 165°F (74°C). If it’s not quite there, reduce the heat to medium and cover the pan for a few minutes to finish cooking gently.
Step 6: Rest the Chicken
Transfer the chicken to a cutting board and let it rest for 5 minutes. This allows the juices to redistribute, ensuring every bite is moist and flavorful.
Step 7: Slice and Serve
Slice the chicken against the grain for maximum tenderness. Serve immediately with your favorite sides—grilled vegetables, rice, salad, or a fresh herb sauce.
Tips for Perfect Results Every Time
Even with the right technique, small adjustments can make a big difference. Here are some pro tips to elevate your stovetop grilled chicken.
Use a Meat Thermometer
This can’t be stressed enough. Visual cues like color and texture are unreliable. A thermometer ensures your chicken is safe and juicy.
Don’t Overcook
Chicken continues to cook after it’s removed from the heat. Remove it at 160°F (71°C) and let it rest—it will reach 165°F (74°C) during that time.
Let It Rest
Skipping the rest period is a common mistake. Resting allows the muscle fibers to relax and the juices to settle. Slicing too soon means those delicious juices end up on the cutting board instead of in your mouth.
Season Generously
Don’t be shy with salt and pepper. Season both sides well before cooking. You can also add a sprinkle of finishing salt after grilling for extra flavor.
Experiment with Finishing Touches
After grilling, brush the chicken with a little melted butter, olive oil, or a quick pan sauce. Try a squeeze of fresh lemon, a drizzle of balsamic glaze, or a sprinkle of chopped herbs like parsley or cilantro.
Clean Your Pan Right Away
Grill pans can get gunky with charred bits. Soak it in warm, soapy water right after cooking to make cleanup easier. For cast iron, avoid soap—just scrub with hot water and a brush, then dry thoroughly and lightly oil to prevent rust.
Serving Suggestions and Meal Ideas
Grilled chicken is incredibly versatile. Once you’ve mastered how to cook grilled chicken on the stove quickly and tenderly, the possibilities are endless.
Classic Pairings
– Serve with roasted vegetables like zucchini, bell peppers, and onions.
– Pair with a fresh garden salad and a tangy vinaigrette.
– Add to a grain bowl with quinoa, black beans, avocado, and salsa.
Global Flavors
– Make a Mediterranean platter with hummus, tzatziki, olives, and pita bread.
– Turn it into a taco night with corn tortillas, cabbage slaw, and lime crema.
– Use in a stir-fry with soy sauce, ginger, and bok choy.
Meal Prep Friendly
Cook a large batch at the beginning of the week. Store in an airtight container in the fridge for up to 4 days. Use in salads, wraps, soups, or sandwiches. You can also freeze cooked chicken for up to 3 months—just thaw in the fridge before reheating.
Kid-Friendly Options
– Cut into strips and serve with honey mustard or barbecue sauce for dipping.
– Make chicken quesadillas with cheese and peppers.
– Add to a simple pasta with marinara and Parmesan.
Common Mistakes to Avoid
Even experienced cooks can make errors. Here are some pitfalls to watch out for when grilling chicken on the stove.
Using a Cold Pan
A cold pan won’t sear the chicken. It will stick, steam, and lose moisture. Always preheat your pan before adding the chicken.
Overcrowding the Pan
Crowding lowers the temperature and causes uneven cooking. Cook in batches if needed.
Flipping Too Early
Let the chicken develop a crust before flipping. If it sticks, it’s not ready. Use tongs to gently lift and check.
Skipping the Thermometer
Guessing leads to overcooked or undercooked chicken. Always use a thermometer.
Not Resting the Meat
Resting is essential for juicy chicken. Don’t skip this step.
Using the Wrong Oil
Oils with low smoke points (like extra virgin olive oil) can burn and taste bitter. Stick to high-smoke-point oils for grilling.
Conclusion
Learning how to cook grilled chicken on the stove quickly and tenderly opens up a world of delicious, healthy meals. With the right cut, tools, marinade, and technique, you can achieve juicy, flavorful chicken that rivals any outdoor grill.
The key is attention to detail—preheating your pan, using a thermometer, and letting the meat rest. Once you master these steps, you’ll be able to whip up perfect grilled chicken in under 30 minutes.
Whether you’re cooking for one or feeding a crowd, stovetop grilling is a reliable, convenient method that delivers consistent results. So grab your grill pan, fire up the stove, and enjoy restaurant-quality chicken right at home.
Frequently Asked Questions
What’s the best oil for stovetop grilling?
Use oils with high smoke points like canola, avocado, or grapeseed oil. These won’t burn at high heat and help prevent sticking.
How do I know when the chicken is done?
The safest way is to use a meat thermometer. Insert it into the thickest part—chicken is done at 165°F (74°C).
Can I cook chicken breasts and thighs together?
It’s best to cook them separately. Thighs take longer, and cooking them together can lead to uneven doneness.
Why is my chicken dry?
Dry chicken is usually overcooked. Use a thermometer, avoid high heat, and let it rest after cooking to retain moisture.
Can I add sauce while grilling?
Yes, but add it in the last 1 to 2 minutes to prevent burning. Brush on barbecue or teriyaki sauce for extra flavor.
Is stovetop grilled chicken healthy?
Yes, especially when using lean cuts and minimal oil. It’s high in protein and low in carbs, making it great for balanced meals.

