Changing the power level on your Hamilton Beach microwave is simple and essential for better cooking results. Whether you’re defrosting, reheating, or cooking delicate foods, adjusting the power ensures even heating and prevents overcooking. This guide walks you through the process with clear steps and practical tips.
Key Takeaways
- Power level controls cooking intensity: Lower settings prevent overcooking and allow even heating for delicate foods.
- Use the Power Level button: Most Hamilton Beach models have a dedicated button to adjust power from 1 to 10.
- Default is usually 100%: If you don’t change it, your microwave runs at full power, which may be too strong for some tasks.
- Defrosting works best at low power: Use 30% to 50% power to safely thaw food without cooking the edges.
- Reheating leftovers? Try 70-80%: This balances speed and even heating to avoid cold spots.
- Check your model’s manual: Button layout and features vary slightly between Hamilton Beach microwaves.
- Practice makes perfect: Experiment with different power levels to find what works best for your favorite meals.
Quick Answers to Common Questions
How do I change the power level on a Hamilton Beach microwave?
Press the Power Level button after setting the cooking time. Keep pressing until you reach your desired setting, then press Start.
What power level should I use for defrosting?
Use 30–50% power or the Defrost setting to safely thaw food without cooking the edges.
Can I reheat food at full power?
You can, but lower power (70–80%) gives more even results and prevents drying out.
Why isn’t my power level changing?
Make sure you’ve entered the cooking time first. Some models require time input before adjusting power.
Is it safe to melt butter in the microwave?
Yes, but use 50% power and heat in short intervals, stirring between each, to prevent burning.
📑 Table of Contents
- Why Power Level Matters in Your Hamilton Beach Microwave
- How to Change Power Level on Hamilton Beach Microwave: Step-by-Step Guide
- Understanding Power Levels: What Each Setting Does
- Common Cooking Tasks and Recommended Power Levels
- Tips and Tricks for Better Microwave Cooking
- Troubleshooting Common Issues
- Conclusion: Master Your Microwave with Confidence
Why Power Level Matters in Your Hamilton Beach Microwave
You might think microwaves just heat food fast—and you’re not wrong. But not all heating is created equal. The secret to perfectly cooked meals in your Hamilton Beach microwave? It’s all about the power level. Think of it like driving a car: full power is like flooring the gas, while lower settings are like cruising at a steady speed. Both get you there, but one does it smoother and safer.
Most people use their microwave on full power by default. That’s fine for boiling water or popping popcorn, but it can ruin delicate foods like fish, sauces, or reheated pasta. High power can cause hot spots, overcook edges, and leave the center cold. By adjusting the power level, you give your food time to heat evenly. It’s especially helpful when defrosting meat or melting butter—tasks that require gentle, controlled heat.
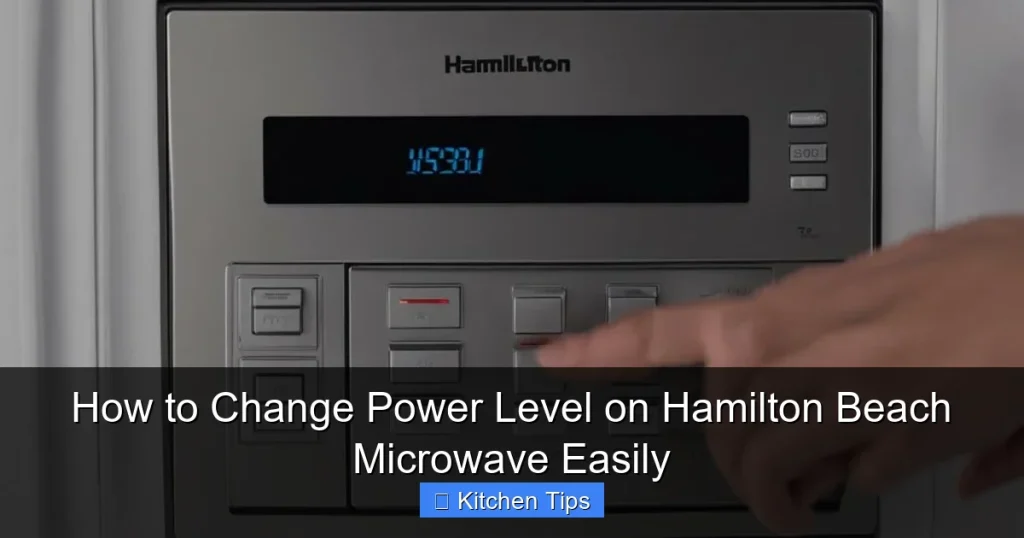
How to Change Power Level on Hamilton Beach Microwave: Step-by-Step Guide
Changing the power level on your Hamilton Beach microwave is easier than you might think. Most models use a simple button system, and once you get the hang of it, you’ll wonder how you ever cooked without it. Here’s how to do it, no matter which Hamilton Beach model you own.

Visual guide about How to Change Power Level on Hamilton Beach Microwave Easily
Image source: machineanswered.com
Step 1: Locate the Power Level Button
The first thing you need to do is find the Power Level button. On most Hamilton Beach microwaves, it’s clearly labeled and located on the control panel, usually near the number pad or timer buttons. It might say “Power,” “Power Level,” or have a symbol like a wave or percentage sign. If you can’t find it, check your user manual—some compact models combine it with other functions.
Step 2: Enter Your Cooking Time
Before adjusting the power, set how long you want to cook. Press the number buttons to enter the time—say, 2 minutes for reheating soup. The display will show your selected time. This step is important because the microwave needs to know both how long and how intensely to cook.
Step 3: Press the Power Level Button
Once the time is set, press the Power Level button. The display will usually show the current power setting—often “P10” for 100% power. Each time you press the button, the level changes. Keep pressing until you reach your desired setting. For example, press it once to go to P9 (90%), twice for P8 (80%), and so on.
Step 4: Confirm and Start
After selecting your power level, press Start. The microwave will begin cooking at the new setting. You’ll notice it runs quieter and heats more gently than at full power. Some models beep when the power level changes, so listen for that cue.
Alternative Method: Using the Defrost or Sensor Cook Settings
Some Hamilton Beach microwaves have preset programs like Defrost or Sensor Reheat. These automatically adjust the power level for optimal results. For example, the defrost setting typically uses 30–50% power to thaw food safely. If you’re not sure about manual settings, these presets are a great shortcut.
Understanding Power Levels: What Each Setting Does
Not all power levels are created equal. Knowing what each one does helps you choose the right setting for every task. Here’s a quick breakdown of common power levels and when to use them.

Visual guide about How to Change Power Level on Hamilton Beach Microwave Easily
Image source: machineanswered.com
100% Power (P10)
This is full power—great for boiling water, cooking popcorn, or heating drinks quickly. Use it when speed is your top priority and even heating isn’t critical. Just be careful with foods that can splatter or overcook fast.
80–90% Power (P8–P9)
Ideal for reheating leftovers like pizza, rice, or casseroles. This range heats food thoroughly without drying it out. It’s also good for cooking vegetables or frozen meals that need a bit more intensity.
60–70% Power (P6–P7)
Perfect for cooking meats, pasta, or dense foods. This setting gives the heat time to penetrate without overcooking the outside. Try it when making scrambled eggs in the microwave or cooking a frozen dinner.
30–50% Power (P3–P5)
Use this for defrosting meat, melting butter, or softening ice cream. Low power prevents the edges from cooking while the center is still frozen. It’s also great for reheating delicate sauces like hollandaise or cheese dip.
10–20% Power (P1–P2)
Rarely used, but helpful for very gentle tasks like proofing dough or keeping food warm. Some models don’t go this low, so check your manual.
Common Cooking Tasks and Recommended Power Levels
Now that you know how to change the power level, let’s talk about when to use it. Here are some everyday cooking tasks and the best power settings for each.

Visual guide about How to Change Power Level on Hamilton Beach Microwave Easily
Image source: machineanswered.com
Reheating Leftovers
Got yesterday’s pasta or stir-fry? Use 70–80% power for 1–2 minutes. This prevents the edges from getting rubbery while ensuring the center heats up. Cover your food with a microwave-safe lid or damp paper towel to retain moisture.
Defrosting Meat
Never defrost meat on high power—it can start cooking the outside while the inside stays frozen. Use the Defrost button or set the power to 30–50%. For best results, flip the meat halfway through and check frequently.
Cooking Vegetables
Fresh or frozen veggies cook well at 80–90% power. Add a splash of water, cover, and cook for 3–5 minutes. Stir halfway through for even results. Avoid overcooking—vegetables should be tender-crisp, not mushy.
Melting Butter or Chocolate
High heat can burn these ingredients. Use 50% power and heat in 15–20 second intervals, stirring between each. This gives you control and prevents scorching.
Making Popcorn
Stick to 100% power for popcorn—most bags are designed for full power. But if you’re making homemade popcorn, try 80% power to reduce the chance of burning.
Tips and Tricks for Better Microwave Cooking
Adjusting the power level is just one part of great microwave cooking. Here are some extra tips to get the most out of your Hamilton Beach microwave.
Use Microwave-Safe Containers
Not all dishes are created equal. Use glass, ceramic, or microwave-safe plastic. Avoid metal, foil, or containers with metallic trim—they can cause sparks or fires.
Stir and Rotate
Even with lower power, microwaves can create hot spots. Stir liquids halfway through and rotate dense foods like casseroles. This ensures even heating.
Cover Your Food
A lid or microwave-safe wrap traps steam, which helps food cook evenly and stay moist. Just leave a small vent to prevent pressure buildup.
Let Food Rest
After cooking, let food sit for 1–2 minutes. This allows heat to distribute evenly, especially in dense items like potatoes or meatloaf.
Clean Regularly
Food splatters can affect performance. Wipe the interior with a damp cloth after each use. A clean microwave heats more efficiently and smells better.
Troubleshooting Common Issues
Sometimes, changing the power level doesn’t work as expected. Here’s how to fix common problems.
Power Level Button Not Responding
If the button doesn’t change the setting, make sure you’ve entered the cooking time first. Some models require time input before adjusting power. Also, check if the microwave is in a preset mode like “Sensor Cook,” which may override manual settings.
Food Still Overcooking
Even at lower power, some foods cook fast. Try reducing the time or using a lower setting. For example, if 2 minutes at 70% is too much, try 1 minute at 60%.
Display Shows Wrong Power Level
If the display doesn’t match your selection, press the Power Level button again. Some models cycle through settings slowly. Wait a few seconds between presses.
Microwave Beeps But Doesn’t Heat
This could mean the door isn’t fully closed or the control panel is locked. Check the door seal and look for a “Child Lock” feature. Press and hold the “Stop/Clear” button for 3 seconds to unlock.
Conclusion: Master Your Microwave with Confidence
Changing the power level on your Hamilton Beach microwave is a simple trick that makes a big difference. It gives you control over how your food cooks, helping you avoid overcooked edges, cold centers, and burnt sauces. Whether you’re defrosting a steak, reheating soup, or melting chocolate, the right power level ensures better results every time.
Don’t be afraid to experiment. Start with the recommended settings, then adjust based on your preferences. Over time, you’ll develop a feel for what works best. And remember—your microwave is more than just a reheating tool. With the right techniques, it can be a versatile kitchen ally for quick, healthy meals. So go ahead, press that Power Level button, and cook with confidence.
Frequently Asked Questions
What does P10 mean on my Hamilton Beach microwave?
P10 stands for 100% power, which is full power. It’s the highest setting and best for quick tasks like boiling water or cooking popcorn.
Can I use the Power Level button with preset programs?
Most preset programs like Sensor Reheat or Defrost automatically set the power level. You usually can’t adjust it manually while using these modes.
How long should I defrost meat in the microwave?
It depends on the weight, but generally 5–7 minutes per pound at 30–50% power. Flip the meat halfway through for even thawing.
Why does my food cook unevenly even at low power?
Microwaves can create hot spots. Stir or rotate your food halfway through cooking, and use a microwave-safe cover to trap steam.
Can I cook raw meat in the microwave?
Yes, but use 60–70% power and cook in short intervals, checking frequently. Make sure the meat reaches a safe internal temperature.
What if my Hamilton Beach microwave doesn’t have a Power Level button?
Some compact models combine power adjustment with other buttons. Check your user manual or look for a “Power” or “Cook” button that cycles through settings.