
Roasting the perfect chicken isn’t just about throwing it in the oven—it’s about timing, temperature, and technique. Whether you’re cooking a whole bird or just parts, knowing how long to roast chicken ensures tender meat, crispy skin, and food safety. This guide breaks down everything you need for flawless results every time.
Key Takeaways
- Roasting time depends on weight: A general rule is 20 minutes per pound at 375°F (190°C), but always use a meat thermometer to confirm doneness.
- Use a meat thermometer: Insert it into the thickest part of the thigh without touching bone; 165°F (74°C) is the safe internal temperature.
- Higher heat = faster cooking: Roasting at 425°F (220°C) reduces time and crisps skin, ideal for smaller chickens under 4 pounds.
- Rest your chicken: Let it rest 15–20 minutes after roasting to lock in juices and improve texture.
- Trussing matters: Tying the legs together helps the chicken cook evenly and retain moisture.
- Season generously and early: Salt the chicken at least 30 minutes before roasting for deeper flavor and better browning.
- Use a roasting pan with a rack: Elevating the chicken allows hot air to circulate, promoting even cooking and crispy skin.
Quick Answers to Common Questions
How long should you roast a 4-pound chicken at 375°F?
About 80–95 minutes. Always check the internal temperature—165°F in the thigh—to confirm doneness.
Can you roast chicken at 400°F?
Yes! Roasting at 400°F reduces cooking time by about 10%. A 4-pound chicken will take roughly 70–80 minutes.
Should I cover my chicken while roasting?
No. Covering traps steam and prevents the skin from crisping. Roast uncovered for golden, crispy skin.
How do I keep chicken from drying out?
Use a meat thermometer, don’t overcook, and let the chicken rest after roasting. Salting ahead of time also helps retain moisture.
Can I roast a frozen chicken?
It’s not recommended. Frozen chickens cook unevenly and take much longer. Always thaw in the refrigerator before roasting.
📑 Table of Contents
- How Long Should You Roast Chicken for Perfect Results
- Understanding Roasting Basics: Time, Temperature, and Weight
- How to Calculate Roasting Time by Weight
- Using a Meat Thermometer: The Secret to Perfect Chicken
- Tips for Juicy, Flavorful Roasted Chicken
- The Importance of Resting Your Chicken
- Common Mistakes to Avoid
- Conclusion
How Long Should You Roast Chicken for Perfect Results
There’s something deeply satisfying about pulling a golden, aromatic roasted chicken out of the oven—its skin glistening, the meat tender enough to fall off the bone. But achieving that perfect roast isn’t magic. It’s science, patience, and a little know-how. One of the most common questions home cooks ask is: “How long should you roast chicken?” The answer isn’t one-size-fits-all. It depends on the size of the bird, your oven temperature, and whether you’re cooking a whole chicken or just parts.
Roasting chicken seems simple—season, place in the oven, wait. But too many people end up with dry meat or undercooked centers because they rely on guesswork instead of precision. The good news? With the right timing and a few smart techniques, you can roast chicken that’s juicy, flavorful, and safe to eat every single time. Whether you’re feeding a family of four or hosting a holiday dinner, mastering the roast chicken is a skill worth perfecting.
In this guide, we’ll walk you through everything you need to know about roasting chicken—from calculating cooking times based on weight to choosing the best temperature for your oven. You’ll learn how to use a meat thermometer like a pro, why resting your chicken is non-negotiable, and how small tweaks like trussing or salting ahead of time can make a big difference. By the end, you’ll have the confidence to roast chicken that’s not just good—it’s restaurant-quality.
Understanding Roasting Basics: Time, Temperature, and Weight

Visual guide about How Long Should You Roast Chicken for Perfect Results
Image source: newengland.com
When it comes to roasting chicken, three factors rule the roost: time, temperature, and weight. These elements work together to determine how long your chicken will take to cook and how it will turn out. Ignoring any one of them can lead to overcooked, dry meat or worse—undercooked poultry that’s unsafe to eat.
Let’s start with weight. A standard whole chicken typically weighs between 3 and 6 pounds. The larger the bird, the longer it needs to roast. But here’s the catch: cooking time isn’t linear. A 4-pound chicken doesn’t take twice as long as a 2-pound one. Instead, a good rule of thumb is to allow about 20 minutes per pound when roasting at 375°F (190°C). So, a 4-pound chicken would need roughly 80 minutes in the oven. But this is just a starting point—always verify doneness with a thermometer.
Temperature plays an equally important role. Most recipes call for roasting between 350°F and 425°F (175°C to 220°C). Lower temperatures (350°F–375°F) result in slower, more even cooking, which is great for larger birds or when you want ultra-tender meat. Higher temperatures (400°F–425°F) cook the chicken faster and help crisp the skin, which is ideal for smaller chickens or when you’re short on time.
For example, if you’re roasting a 3.5-pound chicken at 425°F, you might only need about 60–70 minutes. But at 375°F, that same bird could take 75–85 minutes. The key is to adjust based on your oven and the results you want. Convection ovens, which circulate hot air, can reduce cooking time by 10–15%, so keep that in mind if you’re using one.
Another factor to consider is whether your chicken is stuffed. Stuffed chickens take longer to cook because the stuffing acts as an insulator, slowing heat transfer to the center of the bird. If you’re stuffing your chicken, add about 15–20 minutes to your estimated cooking time and ensure the stuffing reaches 165°F as well.
Why Weight Matters More Than You Think
You might think all chickens cook the same way, but weight dramatically affects roasting time. A 3-pound chicken and a 6-pound chicken are worlds apart in terms of heat penetration. The thicker the bird, the longer it takes for the center to reach the safe internal temperature of 165°F.
This is why guessing based on time alone is risky. A 5-pound chicken roasted at 375°F might need 1 hour and 40 minutes, but if your oven runs hot or cold, that time could be off by 15 minutes or more. That’s why using a meat thermometer is essential—it removes the guesswork and ensures your chicken is perfectly cooked.
Choosing the Right Oven Temperature
So, should you roast at 375°F or 425°F? It depends on your goals. If you want crispy, golden skin and don’t mind a slightly shorter cook time, go for 425°F. This higher heat helps render fat and crisp the skin quickly, which is especially helpful if you’re short on time or roasting a smaller bird.
On the other hand, if you’re cooking a large chicken (5 pounds or more) or want extra-tender meat, 375°F is your friend. The lower temperature allows heat to penetrate evenly without drying out the breast meat. Many chefs recommend starting at a high temperature (425°F) for the first 15–20 minutes to crisp the skin, then reducing to 375°F for the remainder of the cook time. This hybrid approach gives you the best of both worlds.
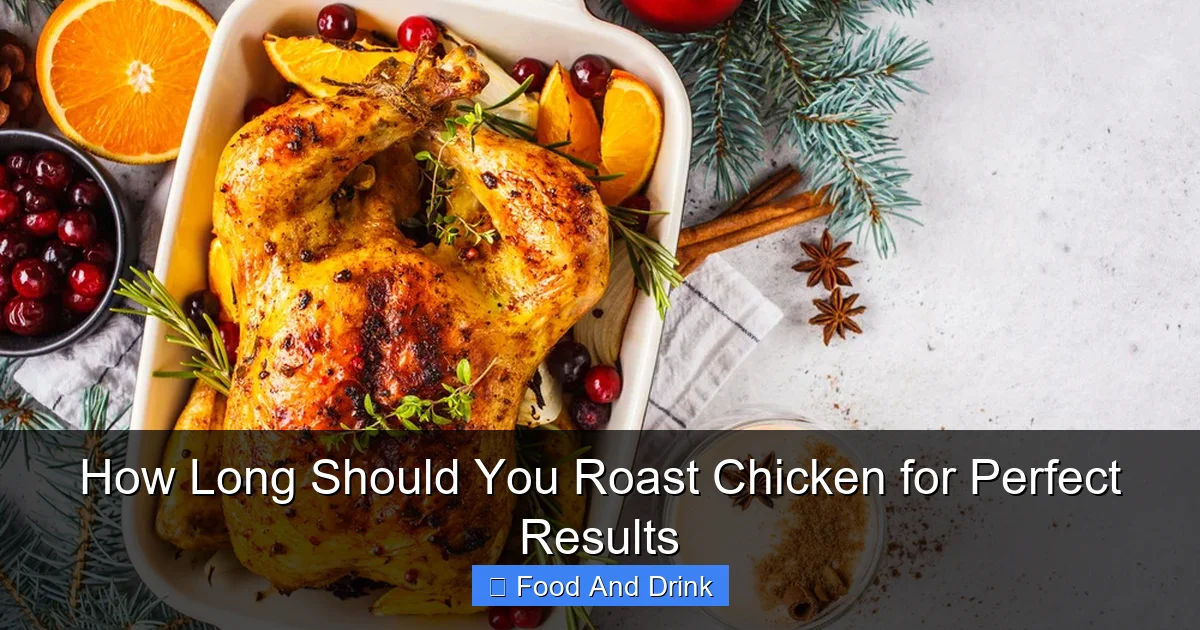
How to Calculate Roasting Time by Weight

Visual guide about How Long Should You Roast Chicken for Perfect Results
Image source: newengland.com
Now that you understand the basics, let’s get practical. How do you calculate exactly how long to roast your chicken? The most reliable method is to use weight as your guide and adjust based on temperature.
Here’s a simple formula:
**Roasting Time = Weight (in pounds) × 20 minutes per pound at 375°F**
For example:
– A 3-pound chicken: 3 × 20 = 60 minutes
– A 4.5-pound chicken: 4.5 × 20 = 90 minutes
– A 6-pound chicken: 6 × 20 = 120 minutes
But remember, this is an estimate. Always check the internal temperature with a meat thermometer. Insert it into the thickest part of the thigh, avoiding the bone. The chicken is done when it reaches 165°F (74°C).
If you’re roasting at a different temperature, adjust accordingly:
– At 400°F: Reduce time by about 10% (e.g., 4.5-pound chicken = ~80 minutes)
– At 425°F: Reduce time by 15–20% (e.g., 4.5-pound chicken = ~70–75 minutes)
– At 350°F: Increase time by 10–15% (e.g., 4.5-pound chicken = ~100–105 minutes)
Roasting Times for Common Chicken Sizes
To make it even easier, here’s a quick reference for roasting whole chickens at 375°F:
– 3 to 3.5 pounds: 60–75 minutes
– 4 to 4.5 pounds: 80–95 minutes
– 5 to 5.5 pounds: 100–115 minutes
– 6 pounds and up: 120–140 minutes
These times assume the chicken is unstuffed and placed on a rack in a roasting pan. If your chicken is stuffed, add 15–20 minutes and check the stuffing temperature.
Adjusting for High-Altitude Cooking
If you live at high altitude (above 3,000 feet), you may need to adjust your roasting time. At higher elevations, water boils at a lower temperature, which can affect how heat transfers to food. While roasting isn’t as sensitive as baking, you might find that your chicken takes 5–10% longer to cook. Keep an eye on the thermometer and add time as needed.
Using a Meat Thermometer: The Secret to Perfect Chicken
Visual guide about How Long Should You Roast Chicken for Perfect Results
Image source: mashed.com
We can’t stress this enough: **always use a meat thermometer**. Timing alone is unreliable because ovens vary, chickens differ in shape and fat content, and even the type of roasting pan can affect cooking. A thermometer takes the guesswork out of roasting and ensures your chicken is safe and delicious.
The USDA recommends cooking poultry to an internal temperature of 165°F (74°C). This temperature kills harmful bacteria like salmonella, making the chicken safe to eat. But that doesn’t mean you should stop the moment it hits 165°F. In fact, many chefs prefer to pull the chicken out at 160°F and let it rest, as the temperature will continue to rise 5°F during resting—a phenomenon called “carryover cooking.”
Where to Insert the Thermometer
Insert the thermometer into the thickest part of the thigh, near the breast but not touching the bone. The thigh takes longer to cook than the breast, so if the thigh is done, the rest of the bird is safe. Avoid inserting it into the breast, as that area can dry out quickly and give a false reading.
For stuffed chickens, also check the center of the stuffing. It should reach 165°F as well. If the stuffing isn’t hot enough, return the chicken to the oven and check every 5 minutes.
Types of Thermometers to Use
There are two main types of thermometers for roasting:
1. **Instant-read thermometers**: These give a quick reading in 5–10 seconds. Use them to check the temperature at the end of cooking.
2. **Oven-safe probe thermometers**: These stay in the chicken while it roasts and alert you when it reaches the target temperature. Great for hands-free monitoring.
Investing in a good thermometer is one of the best things you can do for your cooking. It’s a small tool that makes a huge difference in consistency and safety.
Tips for Juicy, Flavorful Roasted Chicken
Knowing how long to roast chicken is only half the battle. The other half is making sure it’s juicy, flavorful, and has that irresistible crispy skin. Here are some proven tips to elevate your roast chicken game.
Season Generously and Ahead of Time
Salt is your best friend when roasting chicken. But don’t just sprinkle it on right before cooking. For maximum flavor and moisture, salt the chicken at least 30 minutes before roasting—or even better, up to 24 hours in advance. This process, called dry brining, draws out moisture, which then gets reabsorbed along with the salt, seasoning the meat from the inside out.
Use about 1 teaspoon of kosher salt per pound of chicken. Rub it all over the skin and under the breast skin if possible. Add pepper, herbs (like thyme, rosemary, or sage), and garlic for extra flavor.
Truss the Chicken
Trussing—tying the legs together with kitchen twine—helps the chicken cook evenly. Without trussing, the legs can overcook while the breast is still underdone. It also gives the chicken a neat, compact shape that roasts more uniformly.
To truss, tie the legs together with a piece of twine, then loop the string around the tail and pull tight. Tuck the wings under the body to prevent burning.
Use a Roasting Rack
Place your chicken on a roasting rack inside a pan. This elevates the bird and allows hot air to circulate underneath, promoting even cooking and crispy skin on all sides. If you don’t have a rack, you can create a makeshift one with chopped vegetables (like carrots, onions, and celery) at the bottom of the pan. They’ll add flavor to the drippings and prevent the chicken from sitting in its own juices.
Add Aromatics
Stuff the cavity with aromatics like lemon halves, garlic cloves, onion wedges, and fresh herbs. These infuse the meat with flavor as the chicken roasts and create a beautiful aroma in your kitchen. Just remember: the stuffing inside the cavity doesn’t count as “stuffing” for food safety—only the internal temperature of the meat matters.
Baste for Extra Moisture (Optional)
Basting—brushing the chicken with its own juices or melted butter—can help keep the skin moist and add flavor. However, it’s not necessary if you’re using a thermometer and roasting at the right temperature. Opening the oven door to baste can cause temperature fluctuations, so do it sparingly.
The Importance of Resting Your Chicken
One of the most overlooked steps in roasting chicken is resting. After the chicken comes out of the oven, resist the urge to carve it immediately. Let it rest, uncovered, for 15–20 minutes. This allows the juices to redistribute throughout the meat, resulting in a moister, more tender bite.
During resting, the internal temperature will continue to rise slightly (carryover cooking), so pulling the chicken out at 160°F ensures it reaches 165°F safely without overcooking. Resting also makes carving easier—the meat firms up just enough to hold its shape.
Place the chicken on a cutting board or platter and loosely tent with foil if needed. Don’t wrap it tightly, as this can steam the skin and make it soggy.
Common Mistakes to Avoid
Even experienced cooks make mistakes when roasting chicken. Here are a few to watch out for:
– **Not using a thermometer**: Relying on time alone is risky. Always check the internal temperature.
– **Overcrowding the pan**: If you’re roasting vegetables with your chicken, don’t pile them too high. They should surround the chicken, not smother it.
– **Skipping the rest**: Cutting into the chicken too soon lets all the juices run out.
– **Using cold chicken**: Let the chicken sit at room temperature for 20–30 minutes before roasting. Cold meat cooks unevenly.
– **Ignoring oven calibration**: If your oven runs hot or cold, your timing will be off. Use an oven thermometer to check accuracy.
Conclusion
Roasting the perfect chicken is within reach for every home cook. It starts with understanding how long to roast chicken based on weight and temperature, but it doesn’t end there. Using a meat thermometer, seasoning ahead of time, trussing, and resting are all essential steps that turn a good roast into a great one.
Whether you’re cooking a 3-pound bird for a weeknight dinner or a 6-pound beauty for a holiday feast, these tips will help you achieve juicy meat, crispy skin, and deep flavor every time. Remember: precision beats guesswork, and patience pays off. So next time you’re wondering how long to roast chicken, grab your thermometer, trust the process, and enjoy the delicious results.
Frequently Asked Questions
How long should you roast chicken per pound?
Allow about 20 minutes per pound when roasting at 375°F. Adjust slightly for higher or lower temperatures.
What temperature should chicken be when fully cooked?
Chicken is safe to eat when the internal temperature reaches 165°F (74°C) in the thickest part of the thigh.
Should I roast chicken breast-side up or down?
Always roast breast-side up. This allows the skin to crisp and the juices to baste the breast meat naturally.
How do I know if my chicken is done without a thermometer?
While not recommended, you can check by piercing the thigh—the juices should run clear, not pink. But a thermometer is far more reliable.
Can I roast chicken parts instead of a whole bird?
Yes! Chicken parts cook faster—about 35–45 minutes at 425°F. Use a thermometer to ensure they reach 165°F.
Why is my roasted chicken skin soggy?
Soggy skin often results from not using a rack, overcrowding the pan, or wrapping the chicken too tightly while resting. Roast on a rack and rest uncovered.


