Grilling chicken perfectly means balancing time, temperature, and technique to ensure it’s safe, juicy, and full of flavor. Knowing exactly how long are you supposed to grill chicken for different cuts—like breasts, thighs, wings, or whole birds—can make or break your meal. With the right approach, you’ll avoid dry, overcooked meat or undercooked, risky bites.
Grilling chicken is one of the most beloved summer traditions—and for good reason. There’s something magical about that smoky aroma, the sizzle as juices hit the hot grates, and the satisfying char that forms on the outside while the inside stays tender and juicy. But here’s the catch: getting it right isn’t just about throwing chicken on the grill and hoping for the best. If you’ve ever ended up with dry, rubbery breasts or worse—undercooked, pink-centered meat—you know how tricky it can be.
So, how long are you supposed to grill chicken for perfect results? The answer isn’t one-size-fits-all. It depends on the cut, the thickness, the heat of your grill, and even the weather. But with a few key guidelines and a little practice, you can master the art of grilled chicken every single time. Whether you’re cooking boneless breasts for a quick weeknight dinner or slow-grilling a whole bird for a backyard feast, understanding timing and technique is essential.
In this guide, we’ll break down everything you need to know—from ideal cooking times for different cuts to pro tips for juicy, flavorful results. We’ll cover how to prep your chicken, what temperature to cook it at, how to avoid common mistakes, and how to tell when it’s truly done. By the end, you’ll feel confident firing up the grill and serving up restaurant-quality chicken that’s safe, delicious, and perfectly cooked.
Key Takeaways
- Chicken must reach 165°F internally: This is the safe minimum temperature set by the USDA to kill harmful bacteria like salmonella.
- Boneless chicken breasts take 6–8 minutes per side: Cook over medium-high heat for even browning and juiciness.
- Bone-in pieces need 12–15 minutes per side: Thighs, drumsticks, and wings require longer cooking due to bone and fat content.
- Use a meat thermometer: Visual cues aren’t reliable—always check internal temperature for safety and doneness.
- Rest chicken after grilling: Let it sit for 5–10 minutes to lock in juices and improve texture.
- Preheat your grill: A hot grill (375–450°F) ensures proper searing and reduces sticking.
- Marinate for flavor and moisture: At least 30 minutes (or up to 24 hours) helps keep chicken tender and tasty.
Quick Answers to Common Questions
How long are you supposed to grill chicken breasts?
Boneless chicken breasts should be grilled for 6–8 minutes per side over medium-high heat, reaching an internal temperature of 160–165°F.
Can you grill chicken from frozen?
It’s not recommended. Frozen chicken cooks unevenly and can lead to undercooked centers. Always thaw chicken in the fridge before grilling.
Should I marinate chicken before grilling?
Yes! Marinating for at least 30 minutes adds flavor and helps keep chicken moist, especially for lean cuts like breasts.
What’s the safest way to check if grilled chicken is done?
Use a meat thermometer. Insert it into the thickest part of the meat, avoiding bone. Chicken is safe at 165°F.
How do I prevent grilled chicken from drying out?
Don’t overcook, use a marinade or brine, and let the chicken rest for 5–10 minutes after grilling to retain juices.
📑 Table of Contents
Why Timing Matters When Grilling Chicken
Grilling chicken isn’t just about flavor—it’s about safety and texture too. Undercooked chicken can harbor dangerous bacteria like salmonella and campylobacter, which can cause serious foodborne illness. On the flip side, overcooked chicken becomes dry, tough, and unappetizing. That’s why knowing how long are you supposed to grill chicken for is so important.
The ideal internal temperature for chicken is 165°F (74°C), as recommended by the USDA. This temperature ensures that harmful pathogens are destroyed, making the meat safe to eat. But reaching that temperature doesn’t mean you should stop cooking the moment you hit 165°F. In fact, many chefs recommend pulling chicken off the grill at 160°F and letting it rest, as the temperature will continue to rise slightly due to carryover cooking.
Timing also affects texture. Chicken breast, for example, has very little fat and connective tissue. It cooks quickly but dries out fast if left on too long. Dark meat like thighs and drumsticks, on the other hand, have more fat and collagen, which break down during cooking to keep them moist and tender—even if they take a bit longer.
Another factor is carryover cooking. When you remove chicken from the grill, the internal temperature can rise by 5–10°F as heat redistributes. This means if you wait until the thermometer hits 165°F, the chicken might actually end up overcooked by the time it’s served. That’s why many experts suggest pulling chicken at 160°F and letting it rest for 5–10 minutes.
Finally, timing varies based on the cut. A thin chicken breast will cook much faster than a thick, bone-in thigh. Even two breasts from the same package can vary in thickness, leading to uneven cooking if you’re not careful. That’s why it’s crucial to adjust your timing based on the specific piece you’re grilling.
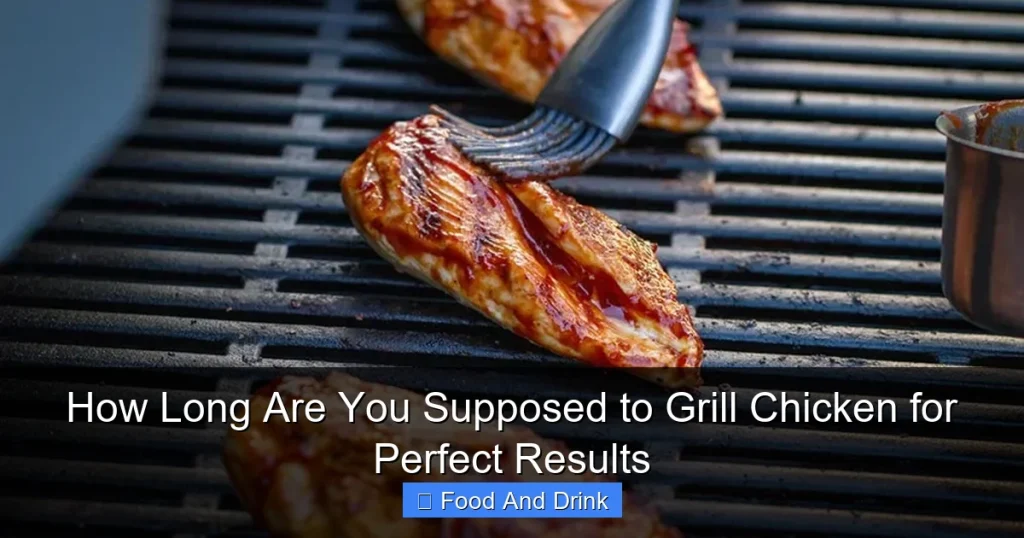
How Long to Grill Different Cuts of Chicken

Visual guide about How Long Are You Supposed to Grill Chicken for Perfect Results
Image source: noorsrecipe.com
Not all chicken is created equal—especially when it comes to grilling. Each cut has its own ideal cooking time and method. Let’s break down the most common types of chicken you’ll grill and how long are you supposed to grill chicken for each.
Boneless, Skinless Chicken Breasts
These are the most popular cut for grilling because they’re lean, quick-cooking, and versatile. But they’re also the most prone to drying out. A typical boneless breast is about 1 to 1.5 inches thick and should be grilled over medium-high heat (around 400°F).
Cooking time: 6–8 minutes per side.
Start by preheating your grill and oiling the grates to prevent sticking. Place the chicken on the grill and cook for 6–8 minutes on the first side, until you see nice grill marks and the meat starts to release easily. Flip and cook another 6–8 minutes on the second side. Use a meat thermometer to check the thickest part—it should read 160°F before resting.
Tip: If your breasts are uneven in thickness, pound them gently with a meat mallet to create a uniform shape. This ensures even cooking.
Bone-In Chicken Breasts
Bone-in breasts take longer because the bone acts as an insulator, slowing down heat transfer. They also have more flavor and moisture due to the bone and often retain skin.
Cooking time: 12–15 minutes per side over medium heat (375–400°F).
These benefit from indirect heat, especially if you’re using a gas grill. Start by searing over direct heat for 2–3 minutes per side to develop a crust, then move to the cooler side of the grill to finish cooking. This prevents the outside from burning while the inside cooks through.
Chicken Thighs (Boneless and Bone-In)
Thighs are forgiving and flavorful, making them a favorite among grillers. Boneless thighs cook faster, while bone-in thighs need more time.
– Boneless thighs: 5–7 minutes per side.
– Bone-in thighs: 10–12 minutes per side.
Because thighs have more fat, they can handle higher heat without drying out. Cook over medium-high heat and flip once. Bone-in thighs are especially good with indirect grilling—sear first, then finish over lower heat.
Chicken Drumsticks
Drumsticks are similar to thighs in texture and cooking time. They’re bone-in and have a good balance of meat and fat.
Cooking time: 12–15 minutes total, turning every 4–5 minutes.
They don’t need to be flipped just once. Rotating them helps ensure even cooking and prevents flare-ups from dripping fat. Use a thermometer to check—165°F in the thickest part, avoiding the bone.
Chicken Wings
Wings are small and cook quickly, but they can dry out or burn if not watched closely.
Cooking time: 10–12 minutes total, turning every 3–4 minutes.
For extra crispy skin, start them over indirect heat to cook through, then finish over direct heat for 2–3 minutes to crisp up. Alternatively, par-cook them in the oven or sous vide before grilling for guaranteed juiciness.
Whole Chicken (Spatchcocked or Rotisserie)
Grilling a whole chicken is impressive and delicious, but it requires patience and technique.
– Spatchcocked (butterflied): 45–60 minutes over indirect heat.
– Rotisserie: 1.5–2 hours at 325–350°F.
Spatchcocking involves removing the backbone and flattening the bird, which allows it to cook evenly and quickly. Rotisserie cooking is slower but yields incredibly juicy, evenly cooked meat. Use a meat thermometer to check multiple spots—breast should hit 165°F, thighs 175°F.
How to Tell When Grilled Chicken Is Done

Visual guide about How Long Are You Supposed to Grill Chicken for Perfect Results
Image source: shungrill.com
You’ve grilled your chicken for the recommended time, but is it really done? Relying on time alone isn’t enough—chicken can vary in thickness, starting temperature, and grill heat. That’s why the best way to know if your chicken is ready is by using a meat thermometer.
Use a Meat Thermometer
Insert the thermometer into the thickest part of the meat, avoiding bone, fat, or gristle. For breasts, aim for the center. For thighs or drumsticks, insert it near the joint but not touching the bone.
The safe internal temperature is 165°F, but as mentioned earlier, many chefs pull chicken at 160°F and let it rest. The temperature will rise to 165°F during resting, and the chicken will be juicier.
Check for Visual and Textural Cues
While not as reliable as a thermometer, there are some visual signs to look for:
– Juices run clear: Pierce the meat with a knife or fork. If the juices are clear (not pink), it’s likely done.
– Meat pulls away from the bone: In bone-in pieces, the meat should easily separate from the bone.
– Firm to the touch: Cooked chicken feels firm, not soft or spongy.
– No pink: There should be no visible pink or red in the meat, especially near the bone.
However, these cues can be misleading. Some chicken may look done but still be undercooked, or appear pink due to myoglobin (a protein) even when fully safe. That’s why a thermometer is essential.
The Resting Period
After grilling, let your chicken rest for 5–10 minutes before slicing or serving. This allows the juices to redistribute throughout the meat, resulting in a moister, more flavorful bite. Cover loosely with foil to keep it warm, but don’t wrap tightly—this can steam the skin and make it soggy.
Tips for Juicy, Flavorful Grilled Chicken

Visual guide about How Long Are You Supposed to Grill Chicken for Perfect Results
Image source: grillmasterhq.com
Now that you know how long are you supposed to grill chicken for, let’s talk about how to make it taste amazing. Juicy, flavorful grilled chicken starts long before it hits the grill.
Brine or Marinate
Brining (soaking in saltwater) or marinating adds moisture and flavor. A simple brine of 1/4 cup salt and 1/4 cup sugar per quart of water, soaked for 1–2 hours, can dramatically improve texture. For marinades, use a mix of acid (like lemon juice or vinegar), oil, and seasonings. Marinate for at least 30 minutes, or up to 24 hours in the fridge.
Season Generously
Don’t be shy with salt, pepper, garlic, herbs, or spice rubs. Season at least 15 minutes before grilling to allow flavors to penetrate. A dry rub works great for a crispy exterior, while a wet marinade adds moisture.
Preheat the Grill
A hot grill (375–450°F) is essential for good searing and preventing sticking. Preheat for at least 10–15 minutes with the lid closed. For gas grills, turn all burners to high. For charcoal, let the coals burn until they’re covered with white ash.
Use Two-Zone Heat
Set up your grill with direct and indirect heat zones. Sear chicken over direct heat to develop a crust, then move to indirect heat to finish cooking without burning. This is especially useful for thicker cuts like bone-in breasts or whole chickens.
Oil the Grates
Use tongs and a folded paper towel dipped in oil to grease the grates before cooking. This prevents sticking and helps create those beautiful grill marks.
Avoid Flare-Ups
Fat dripping onto hot coals or burners can cause flare-ups, which burn the chicken and add a bitter taste. Trim excess fat, use a drip pan, or keep a spray bottle of water handy to tame flames.
Don’t Overcook
It’s better to slightly undercook and let carryover cooking finish the job than to overcook. Use a thermometer and trust the numbers, not the clock.
Common Mistakes to Avoid
Even experienced grillers make mistakes. Here are some common pitfalls and how to avoid them.
Not Preheating the Grill
Starting with a cold grill leads to uneven cooking and sticking. Always preheat thoroughly.
Flipping Too Often
Let chicken develop a good sear before flipping. Constant flipping prevents browning and can tear the meat.
Using High Heat for Thin Cuts
Boneless breasts can dry out quickly over high heat. Use medium-high and monitor closely.
Ignoring Carryover Cooking
Pulling chicken at 165°F instead of 160°F can lead to overcooking. Let it rest and trust the rise.
Not Using a Thermometer
Guessing doneness is risky. A $10 instant-read thermometer is one of the best investments you can make.
Skipping the Rest
Cutting into chicken immediately after grilling lets all the juices escape. Always rest for 5–10 minutes.
Grilling Chicken on Different Grill Types
The type of grill you use can affect cooking time and technique.
Gas Grill
Gas grills offer precise temperature control and even heat. Preheat on high, then adjust to medium or medium-high. Use the lid to trap heat and cook more evenly. Two-zone setup is easy—turn one burner off for indirect heat.
Charcoal Grill
Charcoal provides that classic smoky flavor. Light the coals and let them burn until ashed over. Arrange for direct and indirect zones. Cooking times may be slightly longer due to lower average heat, but the flavor is unmatched.
Electric Grill
Great for indoor use or apartments. Preheat fully and use medium-high heat. Cooking times are similar to gas, but you may miss the smokiness. Add wood chips in a smoker box for extra flavor.
Kamado or Ceramic Grill
These retain heat exceptionally well and are great for low-and-slow cooking. Ideal for whole chickens or spatchcocked birds. Use indirect heat and maintain steady temperatures.
Conclusion
Grilling chicken doesn’t have to be intimidating. Once you understand how long are you supposed to grill chicken for different cuts and how to use tools like a meat thermometer, you’ll be serving up juicy, safe, and delicious meals with confidence. Remember: timing is important, but technique matters just as much. Preheat your grill, use two-zone heat, marinate for flavor, and always check the internal temperature.
Whether you’re grilling boneless breasts for a quick dinner or slow-cooking a whole bird for a weekend gathering, the key is balance—enough heat to sear and flavor, enough time to cook through, and enough patience to let the meat rest. With these tips, you’ll turn every grilled chicken dish into a crowd-pleaser.
So fire up the grill, grab your thermometer, and get cooking. Perfect grilled chicken is just a few minutes away.
🎥 Related Video: This is how to grill juicy chicken breast on charcoal grill
📺 Schueys BBQ
How to grill juicy chicken breast on charcoal grill #shorts It’s all in the preparation. Keeping chicken breast moist is super easy …
Frequently Asked Questions
How long are you supposed to grill chicken thighs?
Boneless chicken thighs take 5–7 minutes per side, while bone-in thighs need 10–12 minutes per side over medium-high heat. Always check for 165°F internally.
Can I grill chicken on a gas grill?
Yes, gas grills are excellent for grilling chicken. Preheat to 375–450°F and use two-zone heat for best results.
Is it safe to eat slightly pink chicken?
Not if it’s under 165°F. Some chicken may appear pink due to myoglobin even when safe, but always verify with a thermometer.
Should I cover chicken while grilling?
Yes, covering helps retain heat and cook more evenly, especially for thicker cuts. Just monitor to prevent burning.
How do I get grill marks on chicken?
Preheat the grill, oil the grates, and place chicken at a 45-degree angle. Don’t move it for 2–3 minutes, then rotate and repeat.
Can I grill chicken in the winter?
Absolutely! Just allow extra preheating time and consider using a windbreak. The same timing and techniques apply.