

Grilled chicken doesn’t have to be dry or bland. With the right techniques—like proper marinating, temperature control, and resting—you can achieve tender, flavorful, and juicy grilled chicken every single time. This step-by-step guide walks you through everything you need to know, from prep to plate.
Grilled chicken is one of the most popular dishes around the world—and for good reason. It’s healthy, versatile, and packed with protein. But let’s be honest: too often, grilled chicken turns out dry, rubbery, or under-seasoned. That’s not the fault of the chicken—it’s usually the method.
The good news? You can master grilled chicken step by step with just a few simple techniques. Whether you’re using a gas grill, charcoal, or even an indoor grill pan, the principles remain the same. With the right prep, timing, and attention to detail, you’ll serve up juicy, flavorful chicken that everyone will ask for again.
In this guide, we’ll walk you through every stage—from selecting your chicken to slicing it perfectly. You’ll learn how to marinate like a pro, manage heat, avoid common mistakes, and even add creative flavors. By the end, you’ll have the confidence to grill chicken that’s not just safe to eat, but truly delicious.
Key Takeaways
- Marinate for at least 30 minutes: A good marinade adds flavor and helps keep chicken moist during grilling.
- Use a meat thermometer: Cook chicken to an internal temperature of 165°F (74°C) for safety without overcooking.
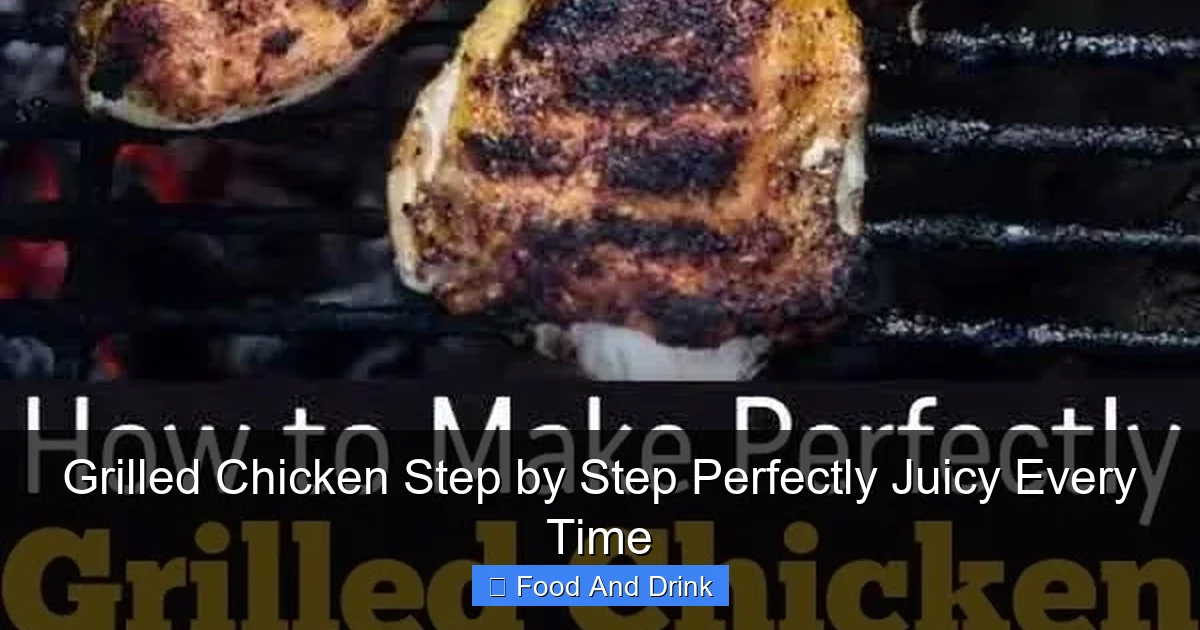
- Preheat your grill: A hot grill seals in juices and creates beautiful grill marks.
- Don’t flip too often: Let chicken cook undisturbed for 5–7 minutes per side for even browning.
- Rest before slicing: Letting chicken rest for 5–10 minutes redistributes juices for maximum tenderness.
- Choose the right cut: Boneless thighs stay juicier than breasts, but both can work with proper technique.
- Clean and oil the grates: Prevents sticking and ensures even cooking.
Quick Answers to Common Questions
How long should I marinate chicken before grilling?
Marinate chicken for at least 30 minutes, but up to 24 hours for maximum flavor. Avoid marinating too long with acidic ingredients like lemon juice, as it can make the meat mushy.
What’s the best way to prevent chicken from sticking to the grill?
Preheat the grill, clean the grates, and oil them before adding chicken. Also, let the chicken cook undisturbed for 5–7 minutes before flipping to allow a crust to form.
Can I grill frozen chicken?
It’s not recommended. Frozen chicken cooks unevenly and can lead to food safety issues. Always thaw chicken in the fridge before grilling.
How do I know when grilled chicken is done?
Use a meat thermometer. Chicken is safe to eat when the internal temperature reaches 165°F (74°C) in the thickest part.
Should I rinse chicken before grilling?
No. Rinsing chicken can spread bacteria in your kitchen. Cooking it to the right temperature kills any harmful bacteria.
📑 Table of Contents
Why Grilled Chicken Often Fails (And How to Fix It)
One of the biggest myths about grilled chicken is that it’s supposed to be dry. It’s not. Dry chicken is a sign of overcooking or poor preparation. The truth is, chicken—especially lean cuts like breasts—can lose moisture quickly when exposed to high heat. But that doesn’t mean you have to avoid grilling altogether.
The most common mistake people make is cooking chicken straight from the fridge. Cold meat doesn’t cook evenly. When you toss a cold chicken breast on a hot grill, the outside sears quickly while the inside stays undercooked. Then, to compensate, you leave it on longer—and boom, dry chicken.
Another issue is lack of seasoning. Grilled chicken isn’t just about heat—it’s about flavor. Without a good marinade or dry rub, even perfectly cooked chicken can taste bland. And let’s not forget flipping too early or too often. Constant flipping prevents a good crust from forming and can tear the meat.
So how do you fix these problems? Start with room-temperature chicken. Take it out of the fridge 20–30 minutes before grilling. This allows for even cooking. Next, season generously—don’t be shy with salt, pepper, herbs, or marinades. And finally, resist the urge to flip constantly. Let the chicken sit and develop that golden-brown crust.
The Science of Juicy Chicken
Juiciness in chicken comes from moisture retention. When meat is heated, muscle fibers contract and push out water. The longer and hotter you cook it, the more moisture is lost. That’s why overcooked chicken feels dry and stringy.
But there’s a sweet spot. If you cook chicken just enough to reach a safe internal temperature—165°F (74°C)—you preserve most of its natural juices. The key is precision. That’s where a meat thermometer becomes your best friend. Instead of guessing, you can monitor the temperature and pull the chicken off the grill at the perfect moment.
Another factor is fat content. Chicken thighs have more fat than breasts, which helps keep them moist during grilling. That’s why many chefs prefer thighs for grilling. But even chicken breasts can be juicy if handled correctly—especially with a marinade or brine.
Common Grilling Mistakes to Avoid
Let’s talk about the top five grilling mistakes that ruin chicken:
1. **Skipping the marinade or seasoning.** Grilled chicken needs flavor. A quick 30-minute marinade can make a huge difference. Even a simple mix of olive oil, lemon juice, garlic, and herbs works wonders.
2. **Not preheating the grill.** A cold grill won’t sear the chicken properly. You need high heat to lock in juices and create those beautiful grill marks. Preheat for at least 10–15 minutes.
3. **Overcrowding the grill.** When you pack too much chicken onto the grill, the temperature drops. This leads to steaming instead of grilling. Cook in batches if needed.
4. **Flipping too soon.** Let the chicken cook for 5–7 minutes on the first side before flipping. This allows a crust to form and prevents sticking.
5. **Cutting into the chicken too early.** Slicing or poking chicken while it’s cooking releases juices. Use a thermometer instead of cutting to check doneness.
Choosing the Right Chicken for Grilling

Visual guide about Grilled Chicken Step by Step Perfectly Juicy Every Time
Image source: mashed.com
Not all chicken is created equal when it comes to grilling. The cut you choose will affect flavor, texture, and cooking time. Let’s break down your options.
Boneless, Skinless Chicken Breasts
These are the most popular choice for grilled chicken—and for good reason. They’re lean, cook quickly, and absorb marinades well. But they’re also the most prone to drying out. That’s because they have very little fat.
To keep chicken breasts juicy, consider pounding them to an even thickness. This ensures they cook evenly. You can also brine them before grilling. A simple saltwater brine (1/4 cup salt per 4 cups water) for 30 minutes to 2 hours helps the meat retain moisture.
Another trick? Butterfly the breasts. Cut them horizontally almost all the way through, then open them like a book. This reduces thickness and cuts cooking time in half.
Bone-In, Skin-On Chicken Pieces
Thighs, drumsticks, and wings with the skin on are fantastic for grilling. The bone conducts heat slowly, helping the meat cook evenly. The skin crisps up beautifully and adds flavor and moisture.
These cuts are more forgiving than breasts. They can handle higher heat and longer cooking times without drying out. Plus, the skin acts as a natural barrier, protecting the meat from direct flame.
For best results, start skin-side down over medium heat. This allows the fat to render slowly, creating a crispy exterior while keeping the inside tender.
Boneless Chicken Thighs
If you want the juiciness of dark meat without the skin, boneless thighs are your best bet. They’re more flavorful than breasts and stay moist even if slightly overcooked.
Thighs are perfect for kebabs, salads, or tacos. They also absorb marinades deeply, making them ideal for bold flavors like teriyaki, jerk, or chimichurri.
Whole Chicken (Spatchcocked)
Grilling a whole chicken can be intimidating, but spatchcocking makes it easy. By removing the backbone and flattening the bird, you create even thickness for consistent cooking.
Spatchcocked chicken grills in about 45–60 minutes and gets crispy skin all over. It’s a showstopper for dinner parties and feeds a crowd.
Prepping Your Chicken: The Foundation of Great Grilling
Visual guide about Grilled Chicken Step by Step Perfectly Juicy Every Time
Image source: i.pinimg.com
Great grilled chicken starts long before you light the grill. Proper prep is what separates good chicken from great chicken. Here’s how to do it right.
Step 1: Bring Chicken to Room Temperature
Take your chicken out of the fridge 20–30 minutes before grilling. Cold meat doesn’t sear well and cooks unevenly. Room-temperature chicken ensures a golden crust and juicy interior.
Step 2: Trim and Pat Dry
Remove any excess fat or skin. Then, pat the chicken dry with paper towels. Moisture on the surface creates steam, which prevents browning. A dry surface = better grill marks.
Step 3: Pound for Even Thickness (Optional)
If using chicken breasts, place them between two sheets of plastic wrap and gently pound with a meat mallet or rolling pin. Aim for 1/2-inch thickness. This helps them cook evenly and prevents the ends from drying out.
Step 4: Season or Marinate
Now it’s time to add flavor. You can use a dry rub, a wet marinade, or just salt and pepper. Here are a few options:
– **Simple Dry Rub:** 1 tsp salt, 1 tsp black pepper, 1 tsp garlic powder, 1 tsp paprika, 1/2 tsp onion powder.
– **Classic Marinade:** 1/4 cup olive oil, 2 tbsp lemon juice, 2 cloves minced garlic, 1 tsp oregano, 1/2 tsp salt.
– **Yogurt Marinade (for extra tenderness):** 1 cup plain yogurt, 1 tbsp lemon zest, 1 tsp cumin, 1 tsp coriander, 1/2 tsp cayenne.
Marinate for at least 30 minutes, or up to 24 hours in the fridge. The longer it marinates, the more flavor it absorbs.
Step 5: Oil the Chicken (Not the Grill)
Lightly brush both sides of the chicken with oil. This helps prevent sticking and promotes even browning. Use a neutral oil like canola or vegetable oil.
Setting Up Your Grill for Success

Visual guide about Grilled Chicken Step by Step Perfectly Juicy Every Time
Image source: creatingmyhappiness.com
Your grill setup makes a huge difference in the final result. Whether you’re using gas, charcoal, or a grill pan, follow these steps for optimal performance.
Gas Grill Setup
1. **Clean the grates.** Use a grill brush to remove any residue from previous cooks.
2. **Preheat on high for 10–15 minutes.** This burns off leftover food and heats the grates.
3. **Oil the grates.** Turn off the heat, dip a folded paper towel in oil, and use tongs to rub it over the grates.
4. **Create two zones:** Turn one side to high (direct heat) and leave the other side off (indirect heat). This lets you sear first, then finish cooking without burning.
Charcoal Grill Setup
1. **Light the charcoal.** Use a chimney starter for even lighting. Avoid lighter fluid—it can leave a chemical taste.
2. **Wait for gray ash.** Once the coals are covered in gray ash (about 15–20 minutes), they’re ready.
3. **Arrange the coals.** Pile them on one side for a two-zone setup. This gives you direct and indirect heat.
4. **Oil the grates.** Same as with gas—clean, heat, then oil.
Indoor Grill Pan Tips
If you’re grilling indoors, a cast-iron grill pan works great. Preheat it over medium-high heat for 5 minutes. Add a little oil, then place the chicken on. The ridges create grill marks, and the pan retains heat well.
The Step-by-Step Grilling Process
Now for the main event: grilling your chicken to perfection. Follow these steps every time for juicy, flavorful results.
Step 1: Preheat the Grill
Make sure your grill is hot—around 400–450°F (204–232°C). You should be able to hold your hand 5 inches above the grates for only 3–4 seconds.
Step 2: Place Chicken on the Grill
Place the chicken on the hot side of the grill, skin-side down if applicable. Don’t move it for 5–7 minutes. This allows a crust to form and prevents sticking.
Step 3: Flip Once
After 5–7 minutes, flip the chicken using tongs—not a fork, which pierces the meat and releases juices. Cook for another 5–7 minutes on the second side.
Step 4: Move to Indirect Heat (If Needed)
If the chicken is browning too quickly but isn’t done, move it to the cooler side of the grill. Finish cooking there until it reaches 165°F (74°C).
Step 5: Check the Temperature
Insert a meat thermometer into the thickest part of the chicken, avoiding bone. When it reads 165°F (74°C), it’s safe to eat. Remove from the grill.
Step 6: Let It Rest
Place the chicken on a plate or cutting board and let it rest for 5–10 minutes. This allows the juices to redistribute, making every bite moist and tender.
Creative Marinades and Rubs to Try
Want to take your grilled chicken to the next level? Try these flavor-packed marinades and rubs.
Mediterranean Marinade
– 1/4 cup olive oil
– 3 tbsp lemon juice
– 2 cloves garlic, minced
– 1 tsp oregano
– 1 tsp thyme
– 1/2 tsp salt
– 1/4 tsp black pepper
Perfect with chicken skewers or grilled breasts. Serve with tzatziki and pita.
Asian-Inspired Soy-Ginger Glaze
– 1/4 cup soy sauce
– 2 tbsp honey
– 1 tbsp rice vinegar
– 1 tbsp grated ginger
– 1 clove garlic, minced
– 1 tsp sesame oil
Brush on during the last 5 minutes of grilling for a sticky, glossy finish.
Spicy Chipotle Rub
– 1 tbsp smoked paprika
– 1 tsp chipotle powder
– 1 tsp garlic powder
– 1 tsp onion powder
– 1/2 tsp cumin
– 1/2 tsp salt
– 1/4 tsp black pepper
Great for tacos or grilled chicken sandwiches.
Herb Butter Baste
Melt 2 tbsp butter with 1 tbsp chopped fresh herbs (rosemary, thyme, parsley). Baste the chicken during the last 2 minutes of grilling for extra richness.
Serving and Storing Grilled Chicken
Grilled chicken is incredibly versatile. Here are some delicious ways to serve it.
Classic Sides
– Grilled vegetables (zucchini, bell peppers, onions)
– Corn on the cob
– Garlic bread
– Greek salad
– Quinoa or rice pilaf
Creative Ideas
– **Chicken Caesar Salad:** Slice grilled chicken over romaine with croutons, Parmesan, and Caesar dressing.
– **Tacos:** Shred or slice chicken and serve in tortillas with salsa, avocado, and lime.
– **Wraps:** Roll in a tortilla with hummus, spinach, and cucumber.
– **Pasta:** Toss with penne, marinara, and fresh basil.
– **Buddha Bowl:** Add to a bowl with quinoa, roasted veggies, and tahini dressing.
Storing Leftovers
Store grilled chicken in an airtight container in the fridge for up to 4 days. Reheat gently in a skillet with a splash of broth or water to restore moisture. You can also freeze it for up to 3 months—just thaw in the fridge before reheating.
Conclusion
Grilled chicken doesn’t have to be a gamble. With the right techniques—marinating, preheating, proper heat management, and resting—you can achieve perfectly juicy results every time. Whether you’re grilling for a weeknight dinner or a summer barbecue, this step-by-step guide gives you the tools to succeed.
Remember: great grilled chicken starts with good prep. Season well, cook to the right temperature, and let it rest. Don’t be afraid to experiment with flavors and cuts. Thighs, breasts, wings, or even a whole spatchcocked bird—each has its place on the grill.
So fire up that grill, grab your tongs, and get cooking. Your taste buds (and your family) will thank you.
Frequently Asked Questions
Can I use a dry rub instead of a marinade?
Yes! Dry rubs work great for grilled chicken. They form a flavorful crust and don’t require soaking time. Just pat the chicken dry and rub the seasoning on before grilling.
What’s the difference between direct and indirect grilling?
Direct grilling uses high heat directly under the food, ideal for searing. Indirect grilling uses heat from the sides, better for finishing thicker cuts without burning.
How do I keep chicken breasts from drying out?
Pound them to even thickness, brine them, or marinate in yogurt. Also, avoid overcooking by using a thermometer and resting the meat after grilling.
Can I grill chicken on a George Foreman grill?
Yes! Preheat the grill, lightly oil the plates, and cook chicken for 6–8 minutes. The contact heat helps keep it moist, but watch closely to avoid overcooking.
Is it safe to reuse marinade?
Only if you boil it first. Raw chicken can contaminate the marinade. If you want to use it as a sauce, set some aside before adding raw chicken.
What’s the best wood for smoking grilled chicken?
Fruitwoods like apple or cherry add a mild, sweet smoke flavor. Hickory is stronger—great for bold profiles. Soak wood chips for 30 minutes before adding to charcoal.


