Roasting chicken in the oven is one of the most satisfying and delicious ways to cook poultry, but achieving that golden, crispy skin and juicy meat every time takes more than just tossing it in the oven. With the right techniques—like proper seasoning, temperature control, and resting—you can turn a simple whole chicken into a restaurant-quality centerpiece for any meal.
Key Takeaways
- Start with a dry bird: Patting the chicken dry before seasoning ensures crispy skin and better browning.
- Season generously and in advance: Salt the chicken at least 1 hour (or overnight) before roasting for deeper flavor and moisture retention.
- Use the right temperature: Roast at 425°F (220°C) for the first 30 minutes, then reduce to 375°F (190°C) to cook evenly without drying out.
- Truss for even cooking: Tying the legs together helps the chicken cook uniformly and maintains its shape.
- Check internal temperature: Use a meat thermometer to ensure the thickest part of the thigh reaches 165°F (74°C) for safe, juicy meat.
- Let it rest: Allowing the chicken to rest for 15–20 minutes after roasting keeps the juices inside instead of spilling out when carved.
- Add aromatics for extra flavor: Stuff the cavity with lemon, garlic, herbs, or onions to infuse the meat with rich, aromatic notes.
Quick Answers to Common Questions
How long do you roast a 4-pound chicken?
Roast a 4-pound chicken at 425°F for 30 minutes, then reduce to 375°F and cook for another 50–60 minutes, or until the internal temperature reaches 165°F in the thigh.
Should I cover chicken when roasting?
No, do not cover the chicken while roasting. Covering traps steam and prevents the skin from crisping. Only tent loosely with foil during resting.
Can I roast a chicken from frozen?
No, always thaw the chicken completely before roasting. Roasting from frozen leads to uneven cooking and food safety risks.
What temperature should the oven be for roasting chicken?
Start at 425°F (220°C) for 30 minutes to brown the skin, then reduce to 375°F (190°C) for even cooking.
How do I keep chicken moist when roasting?
Season with salt in advance, avoid overcooking, and let the chicken rest after roasting. These steps help retain natural juices.
📑 Table of Contents
- Why Roasting Chicken in the Oven Is a Kitchen Staple
- Choosing the Right Chicken for Roasting
- Preparing the Chicken: The Secret to Flavor and Crispiness
- Roasting Techniques for Perfect Results
- How to Know When Your Chicken Is Done
- Resting the Chicken: The Final Step for Juicy Meat
- Serving and Storing Your Roasted Chicken
- Common Mistakes to Avoid When Roasting Chicken
- Conclusion: Master the Art of Roasting Chicken
Why Roasting Chicken in the Oven Is a Kitchen Staple
There’s something deeply comforting about the smell of a chicken roasting in the oven. The golden skin crackling, the aroma of herbs and garlic filling the kitchen, and the promise of tender, juicy meat—it’s a timeless tradition in homes around the world. Whether you’re cooking for a holiday feast or a simple weeknight dinner, roasting a whole chicken is both practical and impressive. It’s one of those dishes that feels fancy but is surprisingly easy once you know the basics.
But here’s the truth: not all roasted chickens are created equal. Some come out dry and bland, while others are undercooked or unevenly browned. The difference between a mediocre roast and a show-stopping one often comes down to technique. Do you roast chicken in the oven perfectly every time? If not, you’re not alone—many home cooks struggle with consistency. The good news? With a few key tips and a little practice, you can master the art of roasting chicken and turn it into a reliable go-to meal.
Choosing the Right Chicken for Roasting
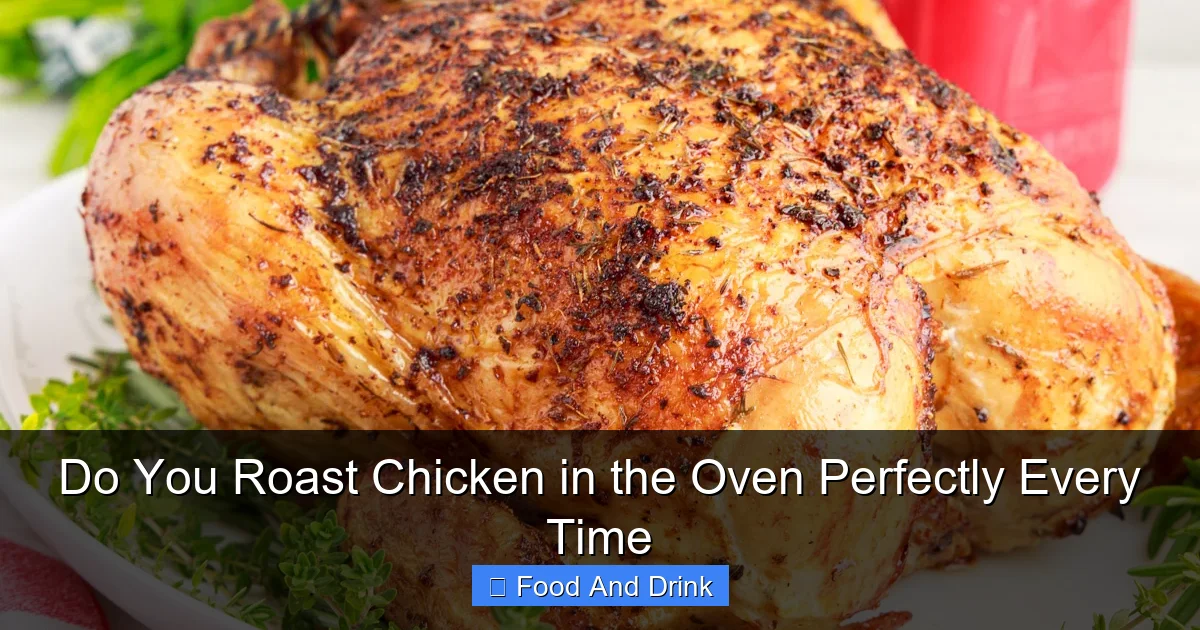
Visual guide about Do You Roast Chicken in the Oven Perfectly Every Time
Image source: familydinners.com
Not all chickens are created equal when it comes to roasting. The quality and type of bird you choose can significantly impact the final result. For the best flavor and texture, look for a fresh or high-quality frozen whole chicken, ideally labeled as “free-range,” “organic,” or “air-chilled.” These birds tend to have better fat distribution and more natural flavor compared to conventionally raised chickens.
Size Matters
A typical whole chicken weighs between 3.5 to 5 pounds (1.6 to 2.3 kg), which is ideal for most home ovens and family meals. Smaller chickens (under 3.5 lbs) cook faster but can dry out more easily, while larger birds (over 5 lbs) may require longer cooking times and risk uneven doneness. A 4-pound chicken is often the sweet spot—it roasts evenly and serves 4–6 people comfortably.
Fresh vs. Frozen
If you’re using a frozen chicken, make sure it’s fully thawed before roasting. The safest way to thaw is in the refrigerator, allowing 24 hours for every 5 pounds of weight. Never thaw at room temperature, as this can promote bacterial growth. Once thawed, pat the chicken dry thoroughly with paper towels. Moisture on the skin is the enemy of crispy results, so this step is non-negotiable.
Air-Chilled vs. Water-Chilled
You might not think about how chickens are processed, but it matters. Most conventional chickens are water-chilled after slaughter, which can dilute flavor and make the skin harder to crisp. Air-chilled chickens, on the other hand, are cooled using cold air, preserving their natural juices and resulting in better texture. Look for this label when shopping—it’s a small detail that makes a big difference.
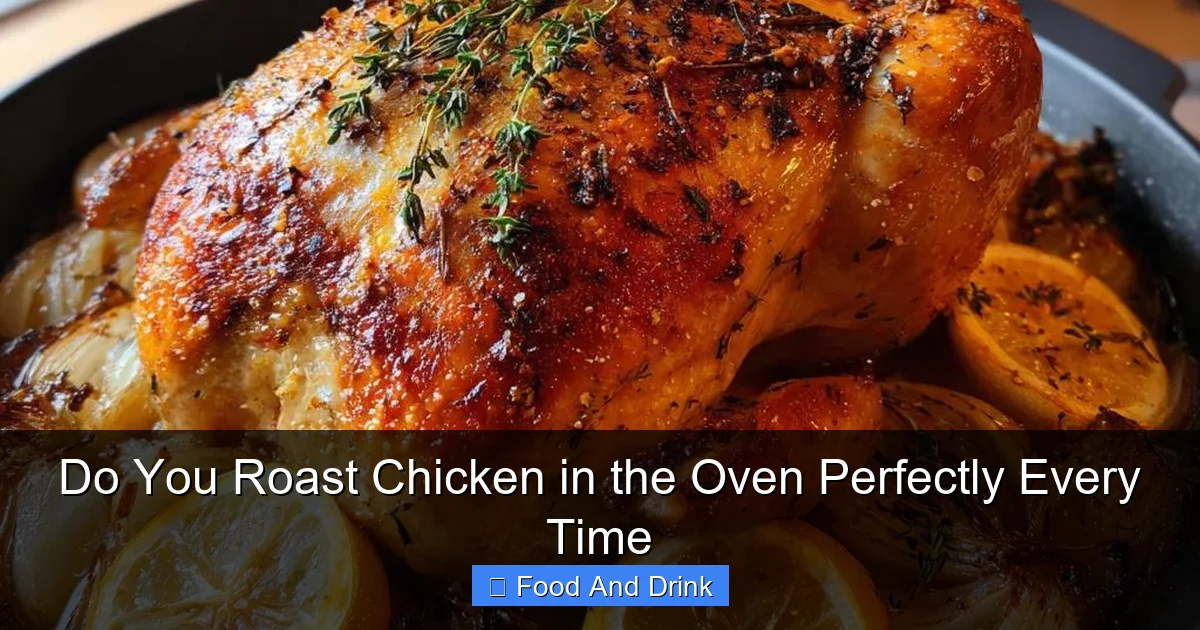
Preparing the Chicken: The Secret to Flavor and Crispiness

Visual guide about Do You Roast Chicken in the Oven Perfectly Every Time
Image source: panningtheglobe.com
The way you prepare the chicken before it hits the oven is just as important as the roasting process itself. Skipping these steps might save time, but it will cost you in flavor and texture.
Dry the Skin Thoroughly
Start by removing the chicken from its packaging and patting it completely dry—inside and out—with paper towels. This step is crucial. Wet skin steams instead of roasts, leading to rubbery, unappetizing results. For even better results, let the chicken air-dry in the fridge, uncovered, for at least 1 hour or up to 24 hours. This extra drying time helps the skin crisp up beautifully during roasting.
Season Generously and in Advance
Salt is your best friend when roasting chicken. Not only does it enhance flavor, but it also helps break down proteins, allowing the meat to retain more moisture. Season the chicken liberally with kosher salt and freshly ground black pepper, both inside the cavity and under the skin if possible. Gently loosen the skin over the breast and thighs with your fingers, then slide some salt and herbs underneath. This direct contact with the meat ensures deep, even seasoning.
For best results, season the chicken at least 1 hour before roasting—or even better, do it the night before and refrigerate. This dry-brining method draws out moisture, which then gets reabsorbed along with the salt, resulting in juicier, more flavorful meat.
Add Aromatics to the Cavity
Stuffing the cavity with aromatic ingredients infuses the chicken with incredible flavor from the inside out. Classic combinations include:
– Half a lemon, halved onion, and a few garlic cloves
– Fresh herbs like rosemary, thyme, and sage
– A few sprigs of parsley and a bay leaf
Avoid stuffing the cavity with bread-based stuffing unless you’re cooking it separately—otherwise, it may not reach a safe temperature. The aromatics will perfume the meat and create a beautiful steam bath inside the chicken as it roasts.
Truss the Chicken (Optional but Recommended)
Trussing—tying the legs together with kitchen twine—helps the chicken cook more evenly. It keeps the legs and wings close to the body, preventing them from drying out or burning. It also gives the chicken a neat, professional appearance. If you don’t have twine, you can tuck the wing tips behind the shoulders and cross the legs, securing them with a toothpick.
Roasting Techniques for Perfect Results
Visual guide about Do You Roast Chicken in the Oven Perfectly Every Time
Image source: it.vihaad.com
Now comes the fun part: actually roasting the chicken. The method you use can make or break your dish, so pay attention to temperature, timing, and placement.
Preheat the Oven
Always preheat your oven to the correct temperature before placing the chicken inside. A properly heated oven ensures immediate browning and even cooking. For most roast chickens, start at 425°F (220°C) for the first 30 minutes to kickstart the Maillard reaction—the chemical process that creates that gorgeous golden-brown crust.
Use a Roasting Pan or Baking Dish
Place the chicken breast-side up on a roasting rack set inside a roasting pan or a heavy-duty baking dish. The rack elevates the chicken, allowing hot air to circulate underneath and promoting even browning. If you don’t have a rack, you can place the chicken directly in the pan, but be sure to pour off excess fat halfway through cooking to prevent steaming.
Roasting Temperature and Time
After the initial high-heat blast, reduce the oven temperature to 375°F (190°C) for the remainder of the cooking time. This two-stage method gives you crispy skin without overcooking the breast meat.
As a general rule, plan for about 20 minutes per pound at 375°F. So a 4-pound chicken will take roughly 80 minutes total (30 minutes at 425°F + 50 minutes at 375°F). However, oven temperatures can vary, so always rely on a meat thermometer rather than time alone.
Baste or Not to Baste?
Basting—pouring pan juices over the chicken during roasting—was once considered essential. But modern ovens are so well-sealed that opening the door to baste can cause heat loss and uneven cooking. Instead, focus on proper seasoning and high heat for browning. If you want extra moisture, you can add a few tablespoons of butter or olive oil to the skin before roasting, or place a small dish of water in the oven to create steam.
Add Vegetables (Optional)
Roasting vegetables alongside your chicken is a fantastic way to create a complete meal with minimal cleanup. Cut potatoes, carrots, onions, and celery into large chunks and toss them with olive oil, salt, and herbs. Spread them around the chicken in the pan, making sure they’re not piled too high—this ensures even cooking. The vegetables will absorb the chicken’s juices and become rich and flavorful.
How to Know When Your Chicken Is Done
The biggest fear when roasting chicken is undercooking it—or worse, overcooking and drying it out. The only reliable way to know if your chicken is done is by checking its internal temperature.
Use a Meat Thermometer
Insert a digital meat thermometer into the thickest part of the thigh, making sure the probe doesn’t touch the bone. The chicken is safe to eat when the internal temperature reaches 165°F (74°C). However, for the juiciest results, aim for 160°F (71°C)—the temperature will continue to rise 5°F during resting, hitting the safe zone without overcooking.
Check Multiple Spots
Check both the thigh and the breast. The thigh should read 165°F, while the breast can be slightly lower (around 160°F). If one area is done before the other, you can tent the breast with foil to slow down cooking while the thigh finishes.
Visual and Tactile Cues
While a thermometer is best, you can also look for these signs:
– Juices run clear when you pierce the thigh with a knife
– The legs move easily in their joints
– The skin is golden brown and crispy
But don’t rely solely on these—color and texture can be misleading. Always use a thermometer for safety and consistency.
Resting the Chicken: The Final Step for Juicy Meat
Once your chicken is done, resist the urge to carve it immediately. Resting is a critical step that allows the juices to redistribute throughout the meat. If you cut into the chicken too soon, all those delicious juices will spill out, leaving the meat dry.
How Long to Rest
Let the chicken rest, loosely tented with foil, for 15–20 minutes. This gives the muscle fibers time to relax and reabsorb the juices. The larger the chicken, the longer it should rest—up to 30 minutes for a 5-pound bird.
Keep It Warm
To keep the chicken warm while resting, place it on a cutting board or platter and cover it loosely with aluminum foil. Don’t wrap it tightly—this can steam the skin and make it soggy. If you’re serving a crowd, you can keep the chicken in a low oven (170°F/77°C) while it rests.
Carve with Confidence
After resting, carving is a breeze. Start by removing the legs and wings, then slice the breast meat against the grain. Serve with the roasted vegetables and pan juices for a complete, satisfying meal.
Serving and Storing Your Roasted Chicken
A perfectly roasted chicken is delicious on its own, but it also pairs beautifully with a variety of sides and sauces.
Classic Pairings
Serve your roasted chicken with:
– Mashed potatoes or roasted root vegetables
– A fresh green salad with vinaigrette
– Crusty bread to soak up the pan juices
– Gravy made from the drippings (see below)
Make Pan Gravy
Don’t toss those golden drippings! They’re the foundation of a rich, flavorful gravy. After removing the chicken, pour the pan juices into a measuring cup and let the fat rise to the top. Skim off most of the fat, leaving about 2–3 tablespoons. Heat it in a saucepan, whisk in 2 tablespoons of flour, and cook for 1–2 minutes. Gradually add 1–2 cups of chicken broth, whisking constantly until smooth and thickened. Season with salt, pepper, and a splash of lemon juice if desired.
Storing Leftovers
Leftover roasted chicken keeps well in the refrigerator for up to 4 days. Store it in an airtight container, separating the meat from the bones if possible. You can also freeze it for up to 3 months—just wrap it tightly in plastic wrap and foil, or use a freezer-safe bag.
Repurposing Leftovers
Don’t let leftovers go to waste! Use them in:
– Chicken salad with mayo, celery, and herbs
– Tacos or enchiladas with salsa and cheese
– Soups or stews for added protein
– Sandwiches with avocado and sprouts
Common Mistakes to Avoid When Roasting Chicken
Even experienced cooks can fall into traps that lead to less-than-perfect results. Here are the most common mistakes and how to avoid them.
Not Drying the Skin
As mentioned earlier, moisture is the enemy of crispy skin. Always pat the chicken dry and consider air-drying in the fridge for best results.
Skipping the Salt
Underseasoned chicken is bland chicken. Salt not only adds flavor but also helps retain moisture. Don’t be shy—season generously.
Overcrowding the Pan
If you’re roasting vegetables, make sure they’re in a single layer around the chicken. Overcrowding leads to steaming instead of roasting, resulting in soggy vegetables and uneven browning.
Opening the Oven Too Often
Every time you open the oven door, heat escapes, which can延长 cooking time and cause uneven results. Use the oven light and window to check progress instead.
Not Using a Thermometer
Guessing when the chicken is done is a recipe for disaster. Invest in a good digital thermometer—it’s one of the best tools you can have in the kitchen.
Carving Too Soon
Resting is non-negotiable. Skipping this step means dry, disappointing meat. Be patient—it’s worth the wait.
Conclusion: Master the Art of Roasting Chicken
Roasting chicken in the oven doesn’t have to be intimidating. With the right preparation, technique, and attention to detail, you can achieve juicy, flavorful, and perfectly golden results every single time. From choosing the right bird to seasoning in advance, using the correct temperature, and resting before carving, each step plays a vital role in the final outcome.
The beauty of roasting a whole chicken is that it’s both simple and versatile. It’s a meal that feeds a family, impresses guests, and provides delicious leftovers for days. Once you master the basics, you can start experimenting—try different herb blends, spice rubs, or even brining methods to customize the flavor.
So the next time you’re wondering, “Do you roast chicken in the oven perfectly every time?”—the answer is yes, you can. With practice and these proven techniques, your oven-roasted chicken will become a kitchen staple you turn to again and again. Happy roasting!
Frequently Asked Questions
Can I use a roasting bag to roast chicken?
Yes, roasting bags can help keep the chicken moist and reduce mess. Follow the bag’s instructions and reduce cooking time slightly, as the sealed environment cooks faster.
Is it safe to eat chicken if the skin is pink?
Pink skin is usually due to the bird’s diet or breed and is not a sign of undercooking. Always check the internal temperature—165°F in the thigh means it’s safe to eat.
Can I roast a chicken without a rack?
Yes, you can roast chicken directly in a pan, but elevate it slightly with vegetables or crumpled foil to promote even browning and prevent steaming.
Should I brine my chicken before roasting?
Brining (soaking in saltwater) can add moisture and flavor, but dry-brining (salting in advance) is often easier and just as effective for home cooks.
How do I get crispy skin on roasted chicken?
Pat the chicken dry, season under the skin, and roast at a high initial temperature. Air-drying in the fridge for several hours also helps achieve crispiness.
Can I roast a chicken in a convection oven?
Yes, convection ovens circulate hot air for even cooking. Reduce the temperature by 25°F and check for doneness earlier, as convection roasting is faster.