

Deboning a whole chicken might sound intimidating, but with the right technique, it’s simpler than you think. This step-by-step guide walks you through the entire process—from choosing the right tools to carving out clean, boneless meat—so you can cook like a professional chef at home.
Key Takeaways
- Use a sharp, flexible boning knife: A good knife makes all the difference in precision and safety during deboning.
- Start with a cold chicken: Chilling the bird for 30 minutes firms up the meat, making it easier to separate from the bone.
- Follow the natural anatomy: Work along the bones, not against them, to avoid tearing the meat.
- Save the bones for stock: Don’t throw away the carcass—simmer it into rich, flavorful broth.
- Practice makes perfect: Your first attempt may not be flawless, but each try improves your speed and skill.
- Deboned chicken cooks faster: Without bones, the meat absorbs marinades better and cooks more evenly.
- Great for stuffing and rolling: A butterflied or fully deboned chicken is ideal for recipes like roulades or stuffed breasts.
Quick Answers to Common Questions
Can I debone a frozen chicken?
No, never debone a frozen chicken. It’s unsafe and nearly impossible to do properly. Always thaw the bird completely in the refrigerator before starting.
How long does it take to debone a whole chicken?
For beginners, it may take 20–30 minutes. With practice, experienced cooks can do it in under 10 minutes.
Do I need to remove all the bones?
Not necessarily. Some recipes call for bone-in legs or wings. You can debone only the parts you need.
Can I use a regular chef’s knife instead of a boning knife?
It’s possible, but not ideal. A boning knife’s flexibility allows for better control around curves and joints.
What do I do with the leftover bones?
Simmer them with vegetables and herbs to make homemade chicken stock. It’s flavorful and reduces waste.
📑 Table of Contents
Why Debone a Whole Chicken?
Deboning a whole chicken might seem like extra work, but the benefits are hard to ignore. Whether you’re prepping for a special dinner, trying to reduce food waste, or simply want more control over your ingredients, mastering this skill opens up a world of culinary possibilities. A deboned chicken cooks faster, absorbs marinades deeply, and allows for creative presentations like stuffed rolls or elegant roasts. Plus, it’s easier to carve and serve—no more wrestling with bones at the dinner table.
Many home cooks shy away from deboning because they think it’s too complicated or requires professional training. But the truth is, with a little patience and the right approach, anyone can do it. Once you get the hang of it, you’ll wonder why you ever bought pre-cut chicken. Not only is it more cost-effective, but you also get fresher meat and can use every part of the bird—including the bones for stock. Think of deboning as unlocking the full potential of your ingredients.
Tools You’ll Need for Deboning
Visual guide about Master deboning whole chicken step by step like a pro
Image source: theskinnypot.com
Before you begin, gather the right tools. Having the proper equipment makes the process smoother, safer, and more efficient. You don’t need a full professional kitchen setup—just a few key items will do.
Essential Tools
The most important tool is a sharp boning knife. Look for one with a thin, flexible blade about 5 to 6 inches long. Flexibility allows the knife to glide along the bones without tearing the meat. A dull knife is actually more dangerous—it can slip and cause injury. Keep your knife sharp with regular honing and occasional sharpening.
A cutting board with a non-slip surface is also essential. Wood or plastic boards work well, but avoid glass or marble, which can dull your knife quickly. Some chefs prefer a board with a groove around the edge to catch juices, especially when working with a whole bird.
Optional but Helpful Tools
While not mandatory, a few extras can make your life easier. Kitchen shears are great for snipping through smaller bones or cartilage, especially around the wing joints. A pair of kitchen tweezers or fish pliers helps remove tiny pin bones that sometimes remain after deboning.
If you’re planning to stuff the chicken, consider using a meat mallet to gently pound the meat to an even thickness. This ensures even cooking and makes rolling easier. And don’t forget a clean towel or paper towels—chicken can be slippery, and a dry grip helps maintain control.
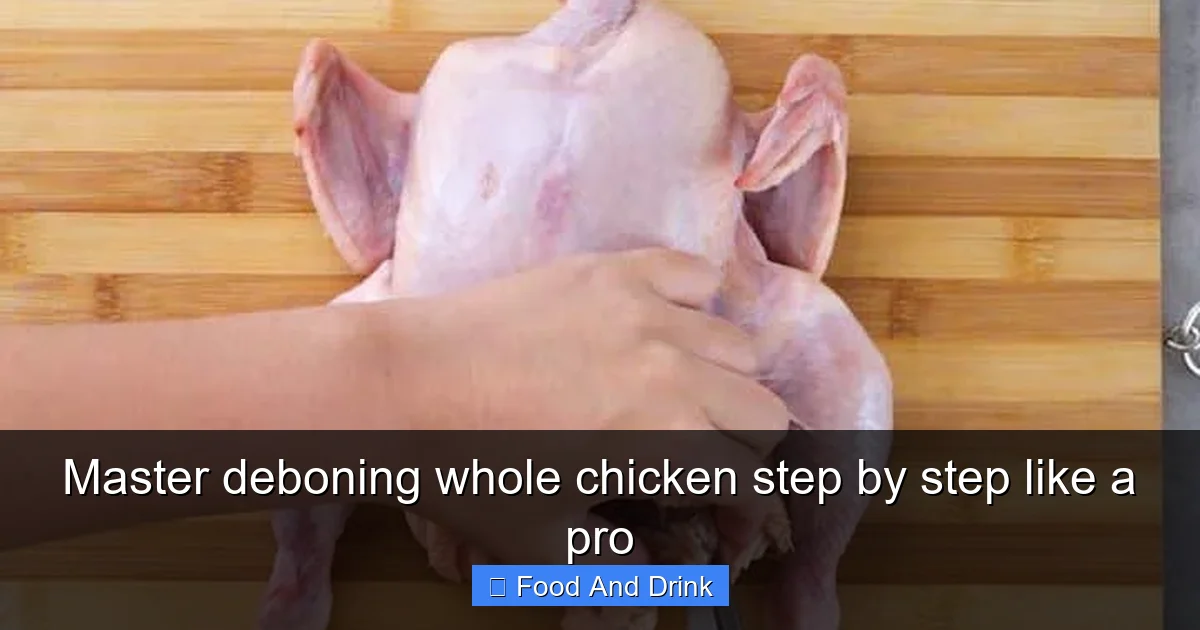
Preparing the Chicken for Deboning
Visual guide about Master deboning whole chicken step by step like a pro
Image source: theskinnypot.com
Proper preparation sets the stage for a successful deboning experience. Rushing this step can lead to frustration and wasted meat.
Choose the Right Chicken
Start with a fresh or properly thawed whole chicken. If frozen, thaw it in the refrigerator for 24 hours—never at room temperature, as this promotes bacterial growth. A 3- to 4-pound chicken is ideal for beginners; larger birds can be more challenging due to thicker bones and denser meat.
Inspect the chicken for any remaining feathers or pinfeathers. Use tweezers to remove them. Rinse the bird under cold water and pat it dry thoroughly with paper towels. Moisture makes the skin slippery and harder to grip.
Chill the Chicken
Here’s a pro tip: chill the chicken for 30 minutes in the refrigerator before deboning. Cold meat is firmer and holds its shape better, making it easier to separate from the bones. This small step can make a big difference in how clean your cuts are.
While the chicken chills, lay out your tools and set up your workspace. Make sure you have enough room to move around the bird comfortably. Good lighting is also important—you’ll need to see the joints and bones clearly.
Step-by-Step Guide to Deboning a Whole Chicken

Visual guide about Master deboning whole chicken step by step like a pro
Image source: i.pinimg.com
Now comes the main event. Follow these steps carefully, and don’t rush. Take your time to understand the anatomy of the bird as you go.
Step 1: Remove the Legs and Wings
Place the chicken breast-side down on the cutting board. Locate the thigh joint where the leg connects to the body. Use your fingers to feel the natural separation between the thigh and the backbone. Insert the tip of your boning knife into this joint and cut through the skin and connective tissue.
Once the joint is exposed, bend the leg backward to pop it out of the socket. Cut through the joint to remove the entire leg (thigh and drumstick still attached). Repeat on the other side. Set the legs aside—you can debone them separately later if needed.
Next, remove the wings. Feel for the joint where the wing meets the body. Cut through the skin around the joint, then bend the wing back to expose the socket. Slice through the joint to detach the wing. Repeat on the other side.
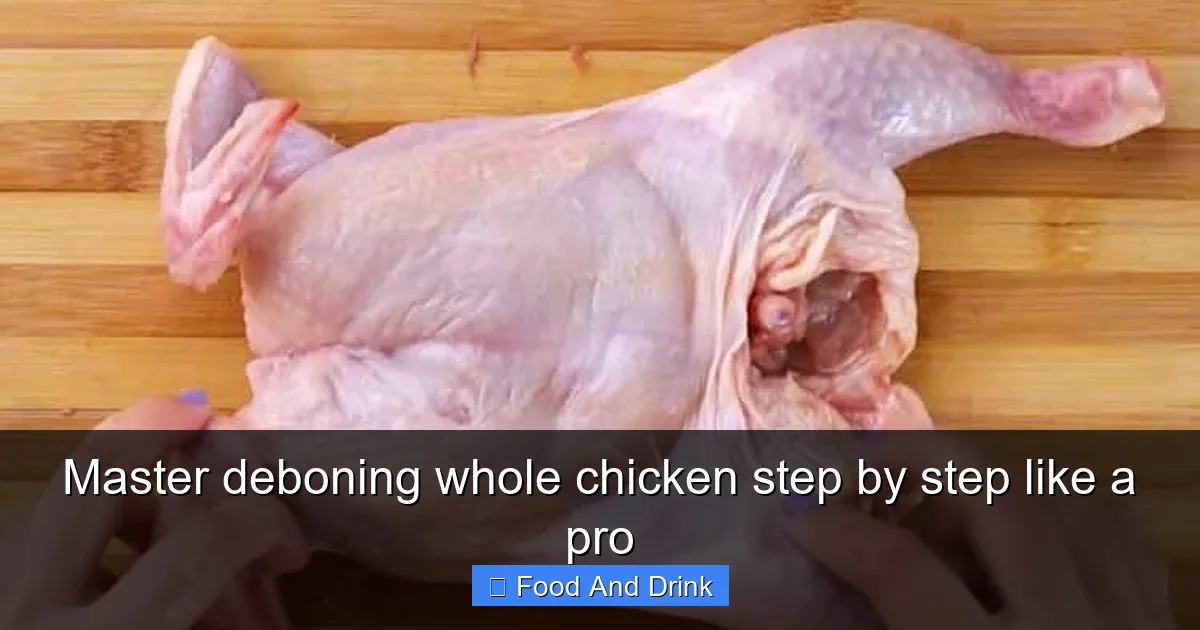
Step 2: Remove the Backbone
Flip the chicken breast-side up. You’ll now work on removing the backbone (also called the spine). This step opens up the bird and gives you access to the rib cage.
Starting at the tail end, insert your knife along one side of the backbone. Carefully slice downward, following the curve of the spine. Use smooth, controlled strokes, keeping the blade close to the bone to avoid wasting meat. Work your way up toward the neck.
Repeat on the other side of the backbone. Once both sides are cut, lift the backbone out in one piece. You can save it for stock—it’s full of flavor.
Step 3: Remove the Rib Cage and Sternum
With the backbone gone, the rib cage is now exposed. Your goal is to remove the ribs and the breastbone (sternum) while keeping the breast meat intact.
Start at the top near the neck. Insert your knife under the rib cage and gently scrape along the inside of the breast, separating the meat from the bones. Work slowly, using the tip of the knife to navigate tight spaces. Keep the blade angled slightly upward to avoid cutting through the skin.
As you work downward, you’ll reach the sternum—the flat bone in the center of the breast. Carefully cut along both sides of it, freeing the breast meat. Once the ribs and sternum are loosened, lift them out. You may need to use your fingers to gently pull away any remaining connective tissue.
Step 4: Remove the Wing and Leg Bones (Optional)
If you want a completely boneless chicken, you’ll need to remove the bones from the legs and wings. This step is optional—many recipes call for bone-in legs or wings—but it’s useful for stuffing or making chicken roulades.
For the legs: Make a lengthwise cut along the top of the thigh to expose the bone. Use your knife to scrape the meat away from the bone, working from top to bottom. Once the bone is free, pull it out. Repeat with the drumstick if desired.
For the wings: The wing has three bones, but only the two larger ones are usually removed. Make a small cut along the joint to expose the bones, then carefully scrape and pull them out. This takes practice, so don’t worry if it’s not perfect the first time.
Step 5: Final Cleanup
Once all the major bones are removed, inspect the chicken for any remaining bits of cartilage, bone fragments, or excess fat. Use tweezers to pull out tiny pin bones. Trim any loose pieces of skin or meat to create a neat, even surface.
Your deboned chicken is now ready to use! You can leave it butterflied (flattened), roll it with stuffing, or cut it into portions.
Tips for Success and Common Mistakes to Avoid
Even with a solid plan, deboning can be tricky. Here are some tips to help you succeed and avoid common pitfalls.
Work Slowly and Confidently
Rushing leads to mistakes. Take your time, especially when navigating around joints and delicate areas like the breast. Confidence comes with practice, so don’t be discouraged if your first attempt isn’t perfect.
Keep Your Knife Sharp
A dull knife requires more force, increasing the risk of slipping. Hone your knife before starting, and sharpen it regularly. A sharp blade makes cleaner cuts and reduces fatigue.
Don’t Force It
If you’re struggling to separate meat from bone, stop and reassess. You might be cutting in the wrong direction or hitting a tough ligament. Adjust your angle and try again. Forcing the knife can tear the meat or damage the bone.
Save Everything
Don’t throw away the bones, skin, or trimmings. Simmer the carcass, backbone, and wing tips in water with vegetables and herbs to make a rich, homemade chicken stock. The skin can be crisped up for snacks or used in recipes.
Practice on Different Cuts
Once you’ve mastered the whole chicken, try deboning just the breast or thigh. These smaller cuts are great for practicing precision and control.
Cooking with Your Deboned Chicken
Now that you’ve deboned your chicken, the fun begins! A boneless bird opens up so many cooking options.
Butterfly and Grill
Lay the deboned chicken flat, skin-side up, and lightly pound it to an even thickness. Season generously and grill over medium heat. The meat cooks quickly and evenly, with beautiful grill marks and crispy skin.
Stuff and Roll
Spread a layer of stuffing—like spinach and feta, or apple and sage—over the breast meat. Roll it up tightly and secure with kitchen twine or toothpicks. Roast in the oven until golden and cooked through. Slice into medallions for an impressive presentation.
Make Chicken Roulades
Cut the breast into thin slices and pound them flat. Add fillings like prosciutto and cheese, then roll and tie. Pan-sear and finish in the oven for a restaurant-quality dish.
Use in Stir-Fries or Curries
Cut the boneless meat into strips or cubes. It absorbs marinades and sauces beautifully, making it perfect for quick-cooking dishes. No more worrying about undercooked bones!
Conclusion
Mastering the art of deboning a whole chicken step by step is a skill that pays off in flavor, efficiency, and creativity. It might take a few tries to get it right, but each attempt brings you closer to pro-level precision. Not only will you save money by buying whole birds, but you’ll also gain a deeper appreciation for the ingredients you cook with.
Remember, the key is patience and practice. Use the right tools, follow the natural anatomy of the bird, and don’t be afraid to make mistakes—they’re part of the learning process. Once you’ve deboned your first chicken, you’ll be amazed at how versatile and delicious boneless meat can be.
So next time you’re at the market, grab a whole chicken and give it a try. With this guide, you’re well on your way to cooking like a pro. Happy deboning!
Frequently Asked Questions
Is deboning a whole chicken difficult for beginners?
It can be challenging at first, but with patience and practice, most people can learn it. Start with a cold chicken and use a sharp knife for better control.
Can I debone a chicken ahead of time?
Yes, you can debone a chicken and store it in the refrigerator for up to 24 hours. Wrap it tightly in plastic wrap or place it in an airtight container.
What’s the difference between deboning and butterflying?
Butterflying means cutting the chicken open and flattening it, usually leaving some bones in. Deboning removes all or most of the bones for a fully boneless bird.
Can I use deboned chicken for grilling?
Absolutely! Deboned chicken grills beautifully because it cooks evenly and absorbs marinades well. Just watch the cooking time—it’s faster than bone-in.
Do I need special training to debone a chicken?
No special training is required. This guide provides all the steps you need. Practice and confidence come with repetition.
What’s the best way to store deboned chicken?
Store it in the refrigerator for up to 2 days or freeze it for up to 3 months. Wrap it tightly to prevent freezer burn.


