
Roasting a chicken in the oven doesn’t have to be complicated—follow this proven method for tender, juicy meat and crispy skin every time. With the right preparation, temperature, and resting technique, you’ll serve a restaurant-quality roast chicken that wows your family and guests.
There’s something deeply satisfying about pulling a golden-brown, perfectly roasted chicken out of the oven. The aroma fills the kitchen, the skin crackles under your fork, and the meat falls off the bone—juicy, flavorful, and comforting. Whether it’s Sunday dinner, a holiday feast, or just a weeknight meal, mastering the best way to roast chicken in the oven is a skill every home cook should have in their back pocket.
But let’s be honest—roasting a whole chicken can feel intimidating. Will it dry out? Will the skin burn? Will the inside be undercooked? These are common fears, but they don’t have to be realities. The truth is, with a few simple techniques and a little patience, you can consistently roast a chicken that’s moist, tender, and bursting with flavor. It’s not about fancy equipment or secret ingredients—it’s about understanding the basics: heat, timing, moisture, and seasoning.
In this guide, we’ll walk you through every step of the process, from choosing the right bird to carving it like a pro. We’ll share pro tips, explain the science behind juicy meat, and help you avoid common mistakes. Whether you’re a beginner or a seasoned cook looking to refine your technique, this is the ultimate roadmap to roasting the perfect chicken in your oven.
Key Takeaways
- Start with a dry bird: Pat the chicken completely dry before seasoning to ensure crispy skin and even browning.
- Use high heat (425°F to 450°F): Begin roasting at a high temperature to crisp the skin, then reduce to 375°F to cook the meat evenly without drying out.
- Season generously and early: Salt the chicken at least 1 hour (or up to 24 hours) ahead of time for deeper flavor and better moisture retention.
- Truss the legs (optional but helpful): Tying the legs together helps the chicken cook evenly and keeps it compact for even browning.
- Use a meat thermometer: Insert it into the thickest part of the thigh (without touching bone); 165°F is the safe internal temperature.
- Let it rest for 15–20 minutes: Resting allows juices to redistribute, resulting in moister, more flavorful meat.
- Add aromatics for extra flavor: Stuff the cavity with lemon, garlic, herbs, or onions to infuse the meat with subtle aromatics during roasting.
Quick Answers to Common Questions
What temperature should I roast a chicken at?
Start at 425°F to 450°F for 20–30 minutes to crisp the skin, then reduce to 375°F until the internal temperature reaches 165°F in the thigh.
How long does it take to roast a 4-pound chicken?
A 4-pound chicken typically takes about 1 hour to 1 hour 15 minutes total, including the high-heat start and lower-temperature finish.
Should I cover the chicken while roasting?
No, covering the chicken traps steam and prevents the skin from crisping. Only tent with foil if the skin is browning too quickly.
Can I roast a chicken from frozen?
It’s not recommended. Always thaw the chicken in the refrigerator before roasting to ensure even cooking and food safety.
How do I know when the chicken is done?
Use a meat thermometer. Insert it into the thickest part of the thigh without touching the bone. It’s done when it reads 165°F.
📑 Table of Contents
- Why Roasting a Whole Chicken Is Worth It
- Choosing the Right Chicken
- Preparing the Chicken for Roasting
- The Best Roasting Method: High Heat Start, Then Lower
- Trussing: Should You Do It?
- Resting: The Final Step for Juicy Meat
- Carving and Serving
- Troubleshooting Common Problems
- Pro Tips for Next-Level Roast Chicken
- Conclusion
Why Roasting a Whole Chicken Is Worth It
Roasting a whole chicken might seem like extra work compared to cooking chicken breasts or thighs, but the rewards are well worth the effort. First, it’s incredibly economical—a whole chicken costs less per pound than individual cuts, and you get multiple meals out of one bird. You can serve the roasted chicken for dinner, then use the leftovers for sandwiches, soups, or salads.
But beyond cost and convenience, roasting a whole chicken delivers unmatched flavor and texture. The skin becomes irresistibly crispy, the dark meat stays succulent, and the breast meat—when cooked properly—remains tender and juicy. Plus, the process of roasting allows you to infuse the meat with herbs, spices, and aromatics in a way that’s hard to replicate with other cooking methods.
Another benefit? It’s a one-pan meal. You can roast vegetables like potatoes, carrots, and onions right alongside the chicken, absorbing all those delicious drippings. That means fewer dishes and a complete dinner with minimal cleanup. And let’s not forget the visual appeal—a golden, glistening roast chicken looks impressive on the dinner table, whether you’re hosting guests or just treating your family.
Choosing the Right Chicken

Visual guide about Best Way to Roast Chicken in Oven for Juicy Results
Image source: cafedelites.com
Not all chickens are created equal, and the quality of your bird can make a big difference in the final result. When shopping, look for a fresh or properly thawed whole chicken that’s plump and free of strong odors. Organic, free-range, or pasture-raised chickens often have better flavor and texture due to their diet and living conditions, though they may come at a higher price point.
A typical roasting chicken weighs between 3.5 to 5 pounds. This size is ideal because it cooks evenly and fits comfortably in most standard ovens and roasting pans. Smaller birds (under 3 pounds) can dry out quickly, while larger ones (over 6 pounds) may require longer cooking times and risk uneven doneness.
If you’re buying frozen, make sure to thaw it safely in the refrigerator—allow 24 hours for every 5 pounds of weight. Never thaw a chicken at room temperature, as this can promote bacterial growth. Once thawed, pat it dry and use it within 1–2 days.
Organic vs. Conventional: Does It Matter?
This is a common question, and the answer depends on your priorities. Organic chickens are raised without antibiotics or synthetic pesticides, and they’re often fed a more natural diet. Many people find that organic birds have a cleaner, more pronounced chicken flavor. However, conventional chickens can still produce excellent results when roasted properly.
If budget is a concern, don’t stress—focus on technique. A well-seasoned, properly cooked conventional chicken can be just as delicious as an organic one. The key is in the preparation and cooking method, not just the label.
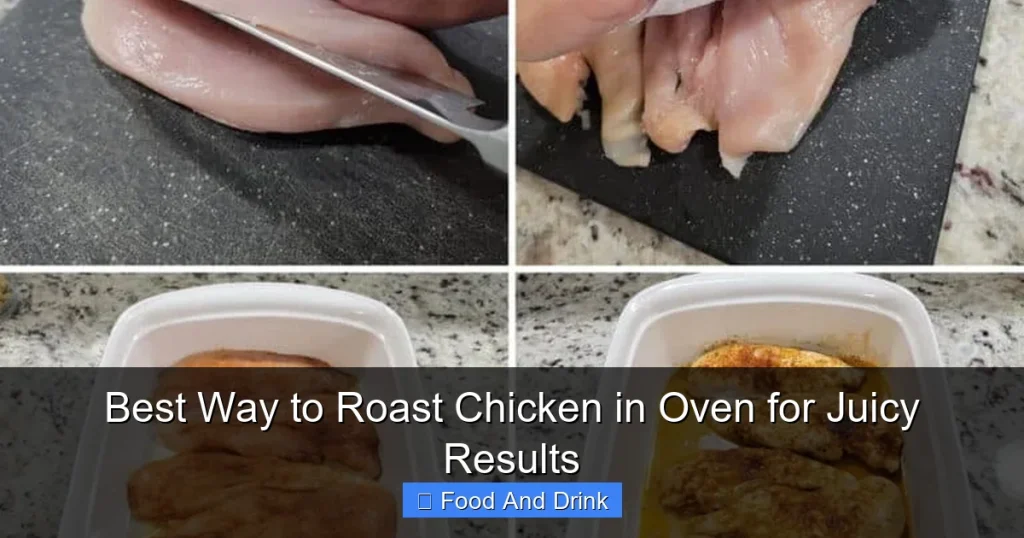
Preparing the Chicken for Roasting

Visual guide about Best Way to Roast Chicken in Oven for Juicy Results
Image source: i.pinimg.com
The secret to a juicy, flavorful roast chicken starts long before it hits the oven. Proper preparation is crucial, and it begins with drying and seasoning.
Pat It Dry—Thoroughly
One of the most important steps is drying the chicken inside and out. Moisture is the enemy of crispy skin. When water evaporates during roasting, it steams the skin instead of browning it. So take the time to pat the chicken dry with paper towels—don’t skip this step.
Pro tip: After drying, let the chicken sit uncovered in the refrigerator for at least 1 hour (or up to 24 hours). This extra drying time helps the skin crisp up even more during roasting. Some chefs call this “dry-brining,” and it’s a game-changer.
Season Generously—and Early
Salt is your best friend when it comes to roast chicken. It enhances flavor, helps retain moisture, and promotes browning. But don’t just sprinkle it on right before cooking—season the chicken at least 1 hour in advance, or even the night before.
Apply salt evenly over the entire surface, including under the skin if possible. Gently loosen the skin over the breast and thighs with your fingers, then slide some salt (and optional herbs or spices) directly onto the meat. This ensures the seasoning penetrates deeply.
For extra flavor, use a dry rub with garlic powder, onion powder, paprika, black pepper, and dried herbs like thyme or rosemary. You can also add a bit of sugar or brown sugar to help with browning—just a teaspoon is enough.
Stuff the Cavity (Optional but Flavorful)
While you shouldn’t stuff the cavity with bread-based stuffing (that’s a food safety risk unless cooked separately), you can add aromatics to infuse the chicken with flavor. A classic combo includes:
– 1 lemon, halved
– 1 head of garlic, halved crosswise
– A few sprigs of fresh rosemary, thyme, or sage
– 1 small onion, quartered
These ingredients won’t cook through, but they’ll release their essential oils during roasting, perfuming the meat from the inside. Plus, they look beautiful when you carve the chicken.
The Best Roasting Method: High Heat Start, Then Lower
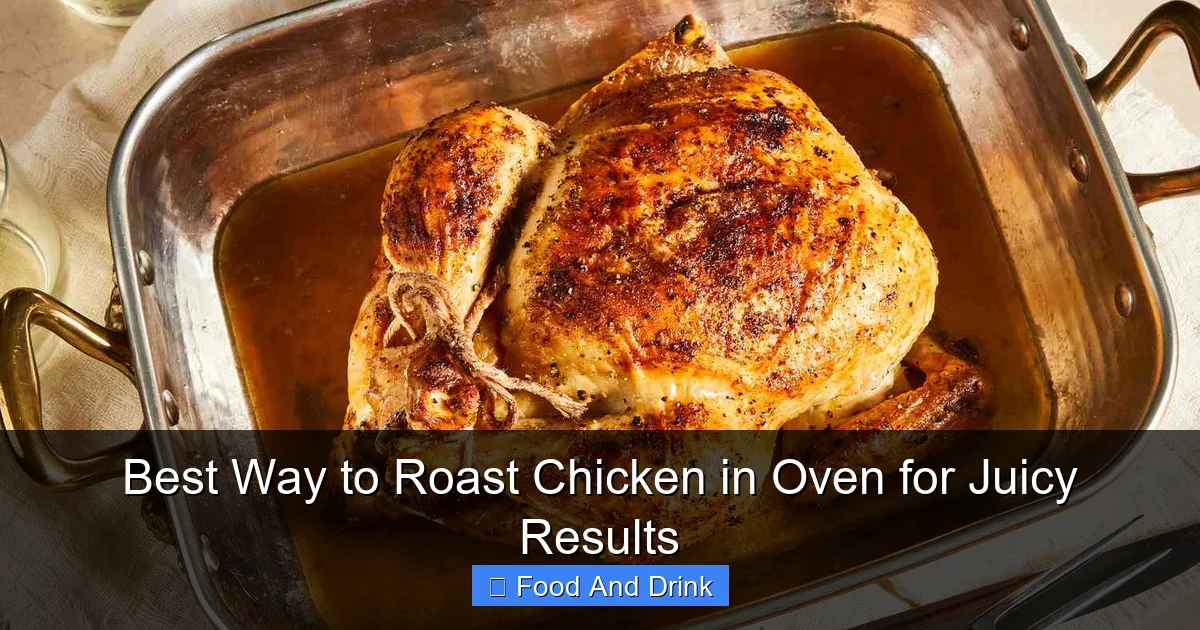
Visual guide about Best Way to Roast Chicken in Oven for Juicy Results
Image source: allrecipes.com
Now for the main event—roasting. The best way to roast chicken in the oven involves a two-stage temperature approach: start high, then reduce.
Step 1: Preheat to 425°F to 450°F
Begin by preheating your oven to 425°F (220°C) or even 450°F (230°C) if your oven runs hot. High heat is essential for crisping the skin quickly. Place the chicken breast-side up on a roasting pan or a wire rack set inside a baking sheet. This allows air to circulate underneath, promoting even browning.
If you’re roasting vegetables, toss them with olive oil, salt, and pepper, and arrange them around the chicken. Potatoes, carrots, and Brussels sprouts work especially well.
Step 2: Roast for 20–30 Minutes at High Heat
Roast the chicken at the high temperature for 20 to 30 minutes. This initial blast of heat will render fat, crisp the skin, and give the chicken a beautiful golden color. You’ll notice the skin starting to puff up and turn golden brown.
Step 3: Reduce to 375°F and Continue Roasting
After the first stage, reduce the oven temperature to 375°F (190°C). Continue roasting until the internal temperature reaches 165°F (74°C) in the thickest part of the thigh. This usually takes another 45 minutes to 1 hour, depending on the size of the chicken.
Use a meat thermometer to check doneness. Insert it into the thigh, making sure it doesn’t touch the bone. The breast should read around 160°F (71°C)—it will continue to rise to 165°F during resting.
Optional: Baste for Extra Moisture and Shine
Basting—spooning pan juices over the chicken—can add moisture and enhance flavor. However, it’s not strictly necessary if you’ve seasoned well and used a high-heat start. If you do baste, do it sparingly (every 20–30 minutes) to avoid lowering the oven temperature too much.
For a glossy finish, you can brush the chicken with melted butter or olive oil during the last 10 minutes of roasting. This adds richness and helps the skin shine.
Trussing: Should You Do It?
Trussing—tying the legs together with kitchen twine—is a traditional technique that many home cooks skip. But it’s worth considering.
Benefits of Trussing
Trussing helps the chicken cook more evenly by keeping the legs and wings close to the body. This prevents the thinner parts from drying out before the thicker breast is done. It also gives the chicken a neater, more compact shape, which some people prefer for presentation.
How to Truss a Chicken
If you decide to truss, here’s a simple method:
1. Place the chicken breast-side up.
2. Tuck the wing tips behind the shoulders.
3. Cross the legs and tie them together with kitchen twine.
4. Loop the string around the tail and pull tight to secure.
You don’t need to be perfect—just make sure the legs are held close to the body. If you don’t have twine, you can skip trussing. The chicken will still roast beautifully.
Resting: The Final Step for Juicy Meat
This is where many cooks go wrong—they carve the chicken immediately after pulling it from the oven. Big mistake. Resting is essential for juicy results.
Why Resting Matters
When meat cooks, the juices are pushed toward the center. If you cut into it right away, those juices spill out, leaving the meat dry. Resting allows the fibers to relax and the juices to redistribute evenly throughout the chicken.
How Long to Rest
Let the chicken rest for at least 15–20 minutes, tented loosely with foil. This keeps it warm while allowing the internal temperature to stabilize. During this time, the breast meat will rise slightly in temperature (carryover cooking), so pulling it at 160°F ensures it reaches 165°F safely.
Use this time to make a quick pan sauce with the drippings, or simply enjoy the anticipation of that first bite.
Carving and Serving
Now for the fun part—carving and serving your masterpiece.
How to Carve a Roast Chicken
1. Place the chicken breast-side up on a cutting board.
2. Remove the twine if you trussed it.
3. Pull one leg away from the body and cut through the joint to remove the thigh and drumstick.
4. Repeat on the other side.
5. Slice the breast meat horizontally, starting from the top and working down.
6. Remove the wings by cutting through the joint.
Serve the dark meat (thighs and drumsticks) and white meat (breast) separately, or mix them on the platter. Don’t forget to save the carcass for homemade chicken stock!
Serving Suggestions
Pair your roast chicken with:
– Roasted vegetables (potatoes, carrots, parsnips)
– A fresh green salad with vinaigrette
– Crusty bread to soak up the pan juices
– A simple gravy made from the drippings
Leftovers? Shred the meat for tacos, add it to a grain bowl, or make a creamy chicken salad.
Troubleshooting Common Problems
Even with the best method, things can go wrong. Here’s how to fix common issues:
Problem: Dry Breast Meat
This usually happens when the chicken is overcooked or roasted at too low a temperature. Stick to the high-heat start and use a thermometer. If your oven runs cool, increase the temperature slightly.
Problem: Pale or Soggy Skin
Blame moisture. Make sure the chicken is thoroughly dried before roasting. Letting it air-dry in the fridge helps. Also, avoid covering the chicken during roasting.
Problem: Uneven Cooking
This can happen if the chicken is too large or the oven temperature is inconsistent. Use a meat thermometer and rotate the pan halfway through cooking if needed.
Problem: Burnt Skin
If the skin is browning too quickly, tent the chicken loosely with foil for the remainder of the cooking time. This protects the skin while allowing the inside to cook through.
Pro Tips for Next-Level Roast Chicken
Want to take your roast chicken to the next level? Try these expert tips:
– Butter under the skin: Soften a few tablespoons of butter and mix with herbs, then slide it under the skin over the breast. This bastes the meat from within.
– Use a roasting rack: Elevating the chicken ensures even browning on all sides.
– Add wine or broth to the pan: A splash of white wine or chicken broth creates steam and adds flavor to the drippings.
– Roast upside down first: Some chefs recommend roasting breast-side down for the first 20 minutes to keep the breast moist, then flipping. This works well if you’re confident in your flipping skills.
Conclusion
Roasting a chicken in the oven doesn’t have to be a daunting task. With the right approach—starting with a dry, well-seasoned bird, using a high-heat start followed by moderate roasting, and letting it rest—you can consistently produce a juicy, flavorful, and golden-brown roast chicken that’s worthy of any special occasion.
The best way to roast chicken in the oven is simple, reliable, and deeply satisfying. It’s a skill that pays off with every bite. So next time you’re planning dinner, consider the whole bird. Your taste buds—and your dinner guests—will thank you.
Frequently Asked Questions
Can I use a roasting pan or a baking sheet?
Yes, both work. A roasting pan with a rack is ideal for even browning, but a baking sheet with a wire rack also does the job well.
Do I need to brine the chicken?
Brining is optional. Dry-brining (salting ahead of time) is often enough to keep the meat juicy and flavorful without the hassle of a wet brine.
Can I add vegetables to the pan?
Absolutely! Roast potatoes, carrots, onions, or Brussels sprouts around the chicken. They’ll absorb the delicious drippings and make a complete meal.
What if my chicken is undercooked in the middle?
Return it to the oven and continue roasting, checking the temperature every 5–10 minutes. Make sure to use a thermometer to avoid overcooking.
Can I make a gravy from the pan drippings?
Yes! Pour off excess fat, then deglaze the pan with broth or wine. Add a slurry of flour and water to thicken into a rich, flavorful gravy.
How should I store leftover roast chicken?
Store in an airtight container in the refrigerator for up to 3–4 days. Reheat gently in the oven or use cold in salads and sandwiches.

