
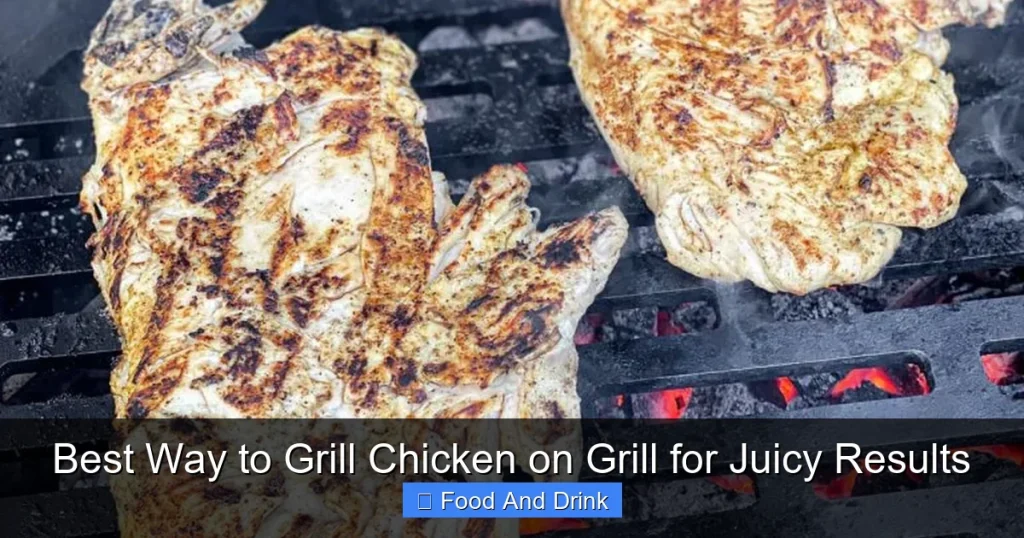
Grilling chicken doesn’t have to be dry or boring—master the best way to grill chicken on a grill for tender, juicy, and perfectly charred results. With the right prep, heat control, and timing, you’ll serve restaurant-quality chicken that’s bursting with flavor and never overcooked.
Grilling chicken should be one of life’s simple joys—crispy skin, smoky flavor, and tender, juicy meat that practically melts in your mouth. But too often, grilled chicken ends up dry, rubbery, or unevenly cooked. Sound familiar? You’re not alone. Many home cooks struggle with timing, heat, or prep, leading to disappointing results. The good news? With a few smart techniques, you can master the best way to grill chicken on a grill and turn every meal into a backyard feast.
Whether you’re using a gas grill, charcoal, or even a pellet smoker, the fundamentals remain the same: control the heat, respect the meat, and don’t rush the process. Grilling isn’t just about throwing chicken on the fire and hoping for the best. It’s about understanding how heat transfers, how moisture behaves, and how flavors develop. When done right, grilled chicken is more than just protein—it’s a centerpiece dish that brings people together.
Key Takeaways
- Brining or marinating is essential: Soaking chicken in brine or marinade for at least 2 hours (or overnight) locks in moisture and enhances flavor.
- Use a two-zone fire: Set up your grill with direct and indirect heat zones to sear safely and cook evenly without burning.
- Pat chicken dry before grilling: Removing surface moisture ensures better browning and prevents steaming.
- Cook to the right internal temperature: Use a meat thermometer—165°F (74°C) is safe, but pull chicken off at 160°F (71°C) for juicier results.
- Rest the chicken after grilling: Letting it rest for 5–10 minutes redistributes juices, keeping every bite moist.
- Choose the right cut: Boneless thighs stay juicier than breasts; bone-in pieces retain more flavor and moisture.
- Oil the grates, not the chicken: Prevent sticking by brushing oil directly on clean, preheated grates.
Quick Answers to Common Questions
What’s the best internal temperature for grilled chicken?
Chicken is safe to eat at 165°F (74°C), but for juicier results, remove it from the grill at 160°F (71°C) and let it rest. The temperature will rise to 165°F as it sits.
Should I brine chicken before grilling?
Yes! Brining (wet or dry) helps chicken retain moisture and improves flavor. Even a 1-hour brine makes a noticeable difference.
Can I grill frozen chicken?
It’s not recommended. Frozen chicken cooks unevenly and can lead to food safety risks. Always thaw chicken in the fridge before grilling.
How do I prevent chicken from sticking to the grill?
Preheat the grill, clean the grates, and oil them with a paper towel dipped in oil. Pat chicken dry before placing it on the grill.
What’s the best cut of chicken for grilling?
Boneless thighs and bone-in thighs are the most forgiving and stay juiciest. Breasts can work well if brined and cooked carefully.
📑 Table of Contents
Why Grilling Chicken Right Matters
Chicken is a lean protein, which means it has less fat than beef or pork. While that makes it a healthy choice, it also makes it prone to drying out when exposed to high heat. Overcooking, even by a few minutes, can turn juicy meat into a chewy disappointment. That’s why mastering the best way to grill chicken on a grill isn’t just about flavor—it’s about texture, safety, and satisfaction.
When chicken is grilled properly, the exterior develops a beautiful golden-brown crust with subtle char marks, while the inside stays moist and tender. The Maillard reaction—the chemical process that creates complex flavors when proteins and sugars brown—kicks in, giving your chicken a depth of taste that’s hard to beat. Plus, grilling imparts that unmistakable smoky aroma that no oven or stovetop can replicate.
But here’s the catch: chicken must reach a safe internal temperature of 165°F (74°C) to kill harmful bacteria like salmonella. However, many people overshoot this mark, thinking “more heat, more safety.” In reality, chicken continues to cook even after it’s removed from the grill due to residual heat. That’s why pulling it off at 160°F (71°C) and letting it rest allows it to coast to 165°F while staying juicy.
Choosing the Right Chicken Cuts for Grilling

Visual guide about Best Way to Grill Chicken on Grill for Juicy Results
Image source: grillseeker.com
Not all chicken is created equal when it comes to grilling. Some cuts handle high heat better than others, and your choice can make or break your meal.
Boneless, Skinless Chicken Breasts
These are the most popular cut for grilling—low in fat, high in protein, and quick to cook. But they’re also the most likely to dry out. Because they lack skin and fat, they have little natural moisture protection. If you’re using boneless breasts, brining is almost mandatory. A simple saltwater brine (1/4 cup salt per quart of water) for 1–2 hours can dramatically improve juiciness.
Pro tip: Pound the thicker end of the breast to an even thickness. This ensures even cooking—no more burnt edges and raw centers.
Bone-In, Skin-On Chicken Pieces
Thighs, drumsticks, and whole legs are grilling superstars. The bone conducts heat slowly, helping the meat cook evenly, while the skin crisps up beautifully and locks in moisture. These cuts are more forgiving and stay juicy even if slightly overcooked.
For best results, leave the skin on and grill skin-side down over indirect heat first, then finish over direct heat to crisp the skin. This method prevents flare-ups and ensures thorough cooking.
Chicken Thighs (Boneless or Bone-In)
Thighs are the unsung heroes of grilled chicken. They’re richer in fat than breasts, which means they stay moist and flavorful. Boneless thighs cook quickly and are great for skewers or flat grilling. Bone-in thighs take a bit longer but offer deeper flavor and better texture.
If you’re new to grilling chicken, start with thighs. They’re harder to overcook and deliver consistent results.
Whole Chicken (Spatchcocked)
Grilling a whole chicken can be intimidating, but spatchcocking (removing the backbone and flattening the bird) makes it easy. This technique exposes more surface area to heat, allowing the chicken to cook evenly and quickly. It’s perfect for indirect grilling and delivers crispy skin and juicy meat all around.
Use kitchen shears to cut out the backbone, then press the chicken flat. Rub with oil and season generously before placing it skin-side up over indirect heat.
Prepping Chicken for the Grill: The Secret to Juiciness
Visual guide about Best Way to Grill Chicken on Grill for Juicy Results
Image source: grillseeker.com
Great grilled chicken starts long before it hits the grates. Proper prep is the foundation of success.
Brining: The Moisture Magnet
Brining is one of the most effective ways to ensure juicy grilled chicken. Whether you use a wet brine (saltwater solution) or a dry brine (salt rubbed directly on the meat), the process helps the chicken retain moisture during cooking.
For a basic wet brine, dissolve 1/4 cup of kosher salt and 1/4 cup of sugar in 4 cups of water. Add herbs, garlic, or citrus for extra flavor. Submerge chicken pieces and refrigerate for 1–4 hours (don’t go over 12 hours for breasts, or they’ll get too salty).
Dry brining is simpler: just sprinkle salt (and optional seasonings) on the chicken, place it on a rack over a tray, and refrigerate uncovered for 1–24 hours. The salt draws out moisture, then reabsorbs it, seasoning the meat deeply and improving texture.
Marinating for Flavor and Tenderness
Marinades do more than add flavor—they can also tenderize meat. Acidic ingredients like lemon juice, vinegar, or yogurt break down proteins, making the chicken more tender. Oil in the marinade helps carry fat-soluble flavors and prevents sticking.
A great basic marinade includes:
– 1/4 cup olive oil
– 2 tbsp lemon juice or vinegar
– 2 cloves minced garlic
– 1 tsp salt
– 1 tsp black pepper
– 1 tsp smoked paprika or herbs (like thyme or oregano)
Marinate for at least 2 hours, or up to 24 hours in the fridge. Avoid over-marinating acidic marinades (like lemon-heavy ones) for more than 4 hours, or the meat can become mushy.
Pat Dry Before Grilling
This step is often overlooked but critical. After brining or marinating, pat the chicken dry with paper towels. Moisture on the surface turns to steam when it hits the grill, preventing proper browning and creating a soggy exterior. Dry chicken = better sear = better flavor.
Bring to Room Temperature
Cold chicken straight from the fridge cooks unevenly. Let it sit out for 20–30 minutes before grilling. This ensures the center and exterior cook at the same rate, reducing the risk of dry edges and undercooked centers.
Setting Up Your Grill: The Two-Fire Method
Visual guide about Best Way to Grill Chicken on Grill for Juicy Results
Image source: grillseeker.com
One of the biggest mistakes in grilling chicken is using only direct heat. While searing is important, chicken needs time to cook through without burning. That’s where the two-zone fire comes in.
What Is a Two-Zone Fire?
A two-zone fire means dividing your grill into two sections:
– **Direct heat zone:** Where the flames or burners are directly under the grates. Used for searing and browning.
– **Indirect heat zone:** Where there’s no direct flame—heat circulates around the food. Used for slow, even cooking.
This setup gives you control. You can sear the chicken to develop flavor, then move it away from the flame to finish cooking gently.
How to Set Up a Two-Zone Fire
**On a Gas Grill:**
Turn on one or two burners (usually the outer ones) to medium-high. Leave the center burner(s) off. This creates a hot zone and a cooler zone.
**On a Charcoal Grill:**
Pile the coals on one side of the grill. Leave the other side empty. For longer cooks, use the “snake method” or add wood chunks for smoke.
Place a drip pan under the indirect side to catch fat and prevent flare-ups.
Why It Works for Chicken
Chicken skin and exterior can burn quickly over high heat, while the inside remains undercooked. By starting over direct heat to sear, then moving to indirect heat to finish, you get the best of both worlds: crispy skin and juicy meat.
For bone-in pieces or whole chickens, start skin-side up over indirect heat to cook through, then finish skin-side down over direct heat to crisp the skin.
Grilling Techniques for Perfect Chicken
Now that your grill is ready and your chicken is prepped, it’s time to cook. Here’s how to do it right.
Step-by-Step Grilling Method
1. **Preheat the grill:** Aim for 375°F to 450°F (190°C to 230°C). A hot grill ensures good searing and prevents sticking.
2. **Oil the grates:** Use tongs and a folded paper towel dipped in oil to brush the grates. Never oil the chicken directly—this causes flare-ups.
3. **Sear over direct heat:** Place chicken skin-side down (if applicable) over the hot zone. Sear for 2–3 minutes per side to develop color and flavor.
4. **Move to indirect heat:** Transfer chicken to the cooler side of the grill. Cover and cook until nearly done.
5. **Check temperature:** Use a meat thermometer. Insert it into the thickest part, avoiding bone. Remove at 160°F (71°C).
6. **Rest the chicken:** Let it rest for 5–10 minutes. Juices redistribute, and the temperature rises to 165°F (74°C).
Grilling Times by Cut
– **Boneless breasts (6–8 oz):** 6–8 minutes total (3–4 minutes per side over direct heat, then indirect if needed).
– **Bone-in thighs/drumsticks:** 25–35 minutes over indirect heat, then 2–3 minutes over direct to crisp skin.
– **Whole spatchcocked chicken:** 45–60 minutes over indirect heat, skin-side up, then 5 minutes skin-side down over direct heat.
Avoiding Common Mistakes
– **Flipping too often:** Let the chicken sear. Flip only once or twice to prevent tearing and ensure good browning.
– **Lifting the lid too much:** Every time you open the grill, heat escapes. Use a thermometer instead of guessing.
– **Overcrowding:** Leave space between pieces for proper airflow and even cooking.
– **Ignoring flare-ups:** Keep a spray bottle of water handy to tame sudden flames from dripping fat.
Seasoning and Flavoring Ideas
Grilled chicken doesn’t have to be plain. With the right seasonings, you can create bold, delicious flavors that complement the smokiness of the grill.
Simple Dry Rubs
Dry rubs are easy and add great texture. Mix and match:
– Smoked paprika, garlic powder, onion powder, salt, pepper, and brown sugar (for a sweet-smoky rub)
– Cumin, coriander, chili powder, and lime zest (for a Mexican-inspired rub)
– Herbs de Provence, thyme, rosemary, and lemon pepper (for a Mediterranean twist)
Apply rubs 30 minutes before grilling, or up to 24 hours ahead for deeper flavor.
Sauces and Glazes
Brush on sauces during the last 5–10 minutes of grilling to prevent burning. Great options:
– **BBQ sauce:** Sweet, tangy, and smoky.
– **Honey mustard:** A balance of sweet and sharp.
– **Teriyaki:** Salty-sweet with ginger and garlic.
– **Chimichurri:** Fresh herbs, garlic, vinegar, and olive oil—perfect for chicken thighs.
Wood Chips for Smoke Flavor
Add wood chips to your charcoal or gas grill for extra aroma. Soak chips in water for 30 minutes, then place them over the heat source.
– **Hickory:** Strong, bacon-like smoke—great for bold flavors.
– **Apple or cherry:** Mild, fruity smoke—ideal for chicken.
– **Mesquite:** Intense and earthy—use sparingly.
Serving and Storing Grilled Chicken
Once your chicken is perfectly grilled, it’s time to enjoy it.
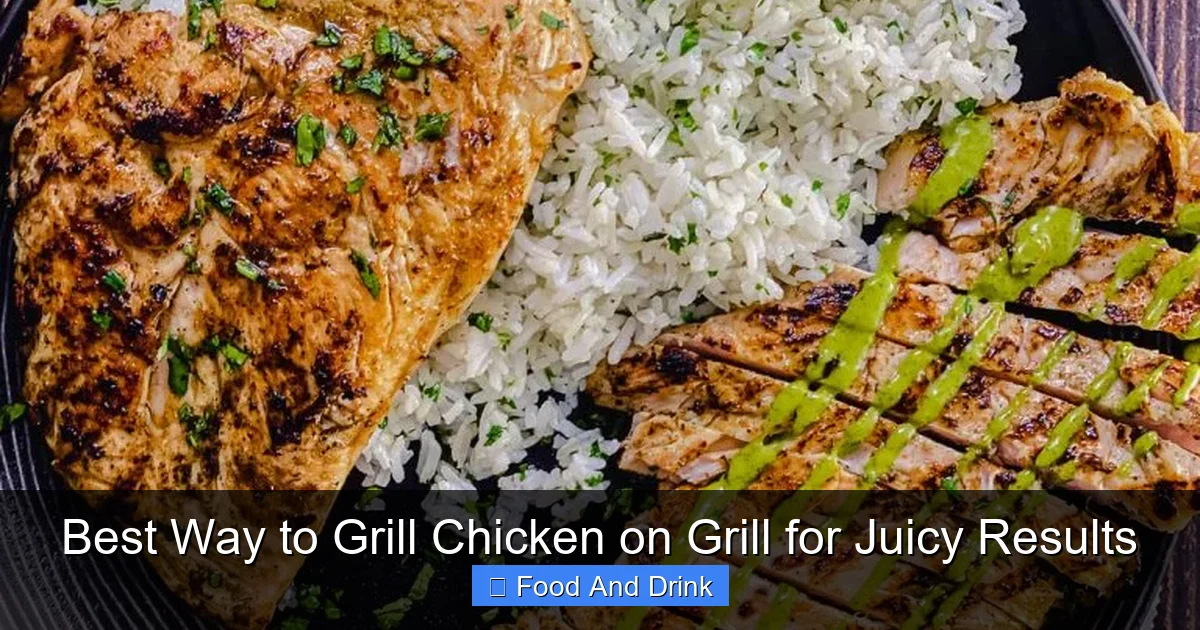
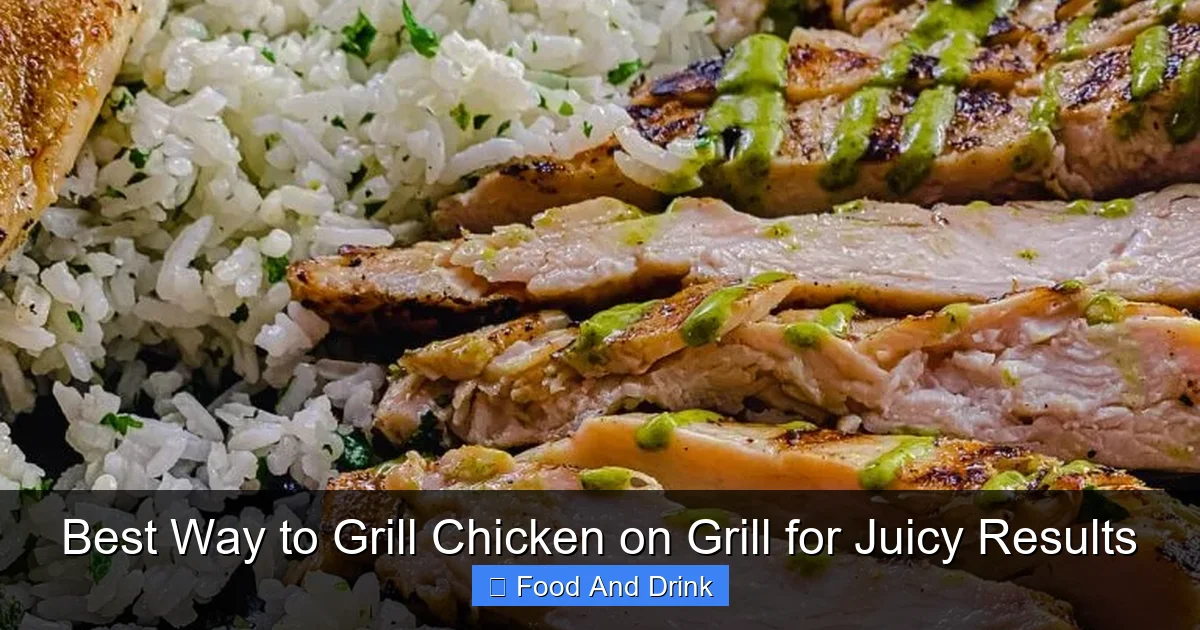
How to Serve
– Slice grilled breasts and serve over salads, in tacos, or with rice and veggies.
– Serve bone-in pieces with grilled corn, coleslaw, or a fresh herb salad.
– Shred leftover chicken for sandwiches, soups, or casseroles.
Storing Leftovers
Let chicken cool completely, then store in an airtight container in the fridge for up to 4 days. Reheat gently in a skillet with a splash of broth or water to restore moisture.
For longer storage, freeze in portions for up to 3 months. Thaw in the fridge overnight before reheating.
Conclusion
Grilling chicken doesn’t have to be a gamble. By following the best way to grill chicken on a grill—brining or marinating, using a two-zone fire, monitoring temperature, and resting the meat—you’ll consistently deliver juicy, flavorful results. Whether you’re cooking for a weeknight dinner or a summer cookout, these techniques will elevate your chicken from ordinary to extraordinary.
Remember, great grilling is about patience, practice, and paying attention to the details. Don’t rush the process. Let the chicken come to room temperature, respect the heat zones, and always use a thermometer. With these tips, you’ll never serve dry chicken again.
So fire up the grill, grab your tongs, and get ready to impress. Your taste buds—and your guests—will thank you.
Frequently Asked Questions
How long should I marinate chicken before grilling?
Marinate chicken for at least 2 hours, or up to 24 hours in the refrigerator. Avoid over-marinating acidic marinades for more than 4 hours to prevent mushy texture.
Can I use a gas grill instead of charcoal?
Absolutely. Gas grills offer precise temperature control and are great for beginners. Use the two-zone method and add wood chips for smoke flavor if desired.
Why is my grilled chicken dry?
Dry chicken is usually caused by overcooking, lack of brining, or high heat. Use a thermometer, brine the meat, and cook over indirect heat to keep it juicy.
Do I need to flip chicken while grilling?
Yes, but only once or twice. Let it sear over direct heat first, then move to indirect heat and flip once to finish cooking evenly.
Can I grill chicken on skewers?
Yes! Use boneless, skinless thighs or breasts cut into chunks. Soak wooden skewers in water for 30 minutes to prevent burning. Thread evenly and grill over medium heat, turning occasionally.
How do I know when chicken is done without a thermometer?
While possible (clear juices, firm texture), it’s risky. A meat thermometer is the safest and most reliable way to ensure chicken is cooked properly and stays juicy.


